• The site migration is complete! Hopefully everything transferred properly from the multiple decades old software we were using before. If you notice any issues please let me know, thanks! Also, I'm still working on things like chatbox, etc so hopefully those will be working in the next week or two.

'00 Impala LS - 5 Speed and Supercharged

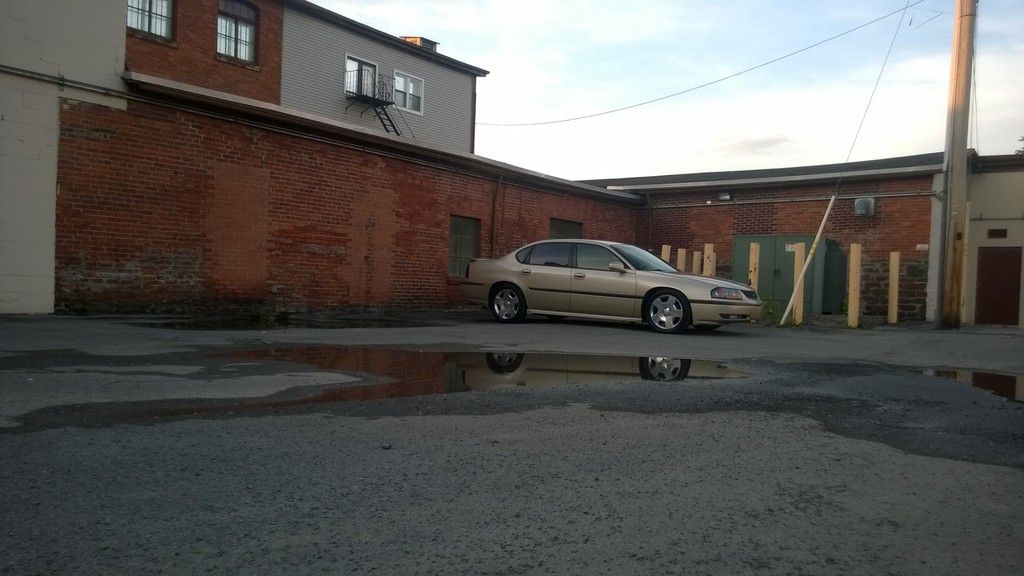
I was finally able to say I have a car worth looking at and then....
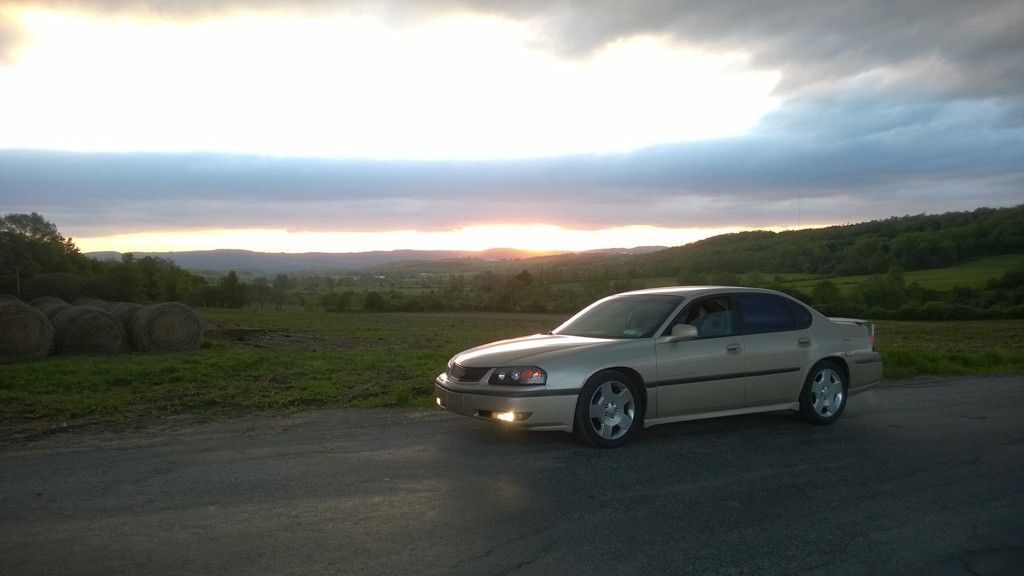
WP_20150519_19_53_48_Pro.jpg


I blew it up.
WP_20150520_14_56_45_Pro.jpg


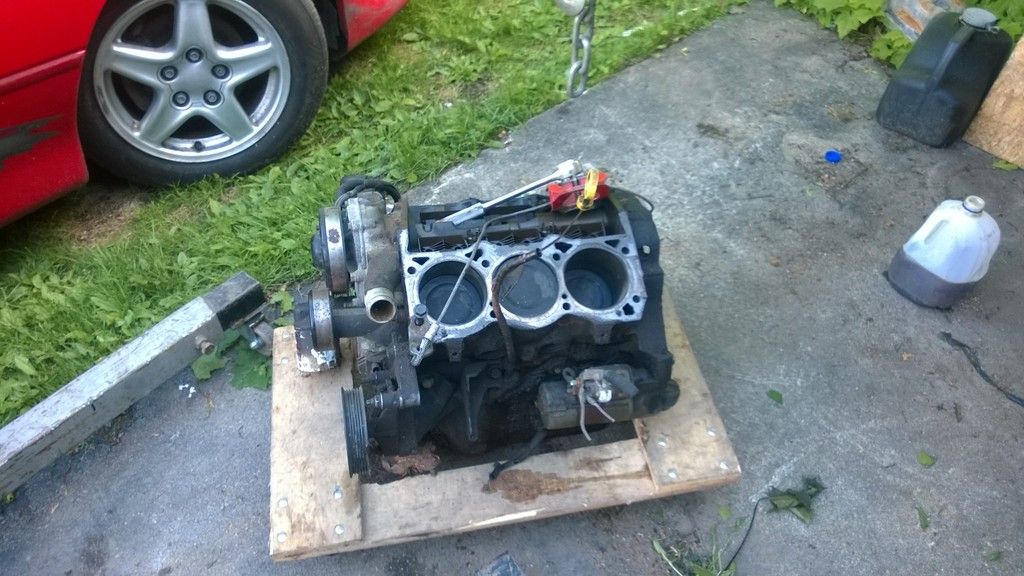
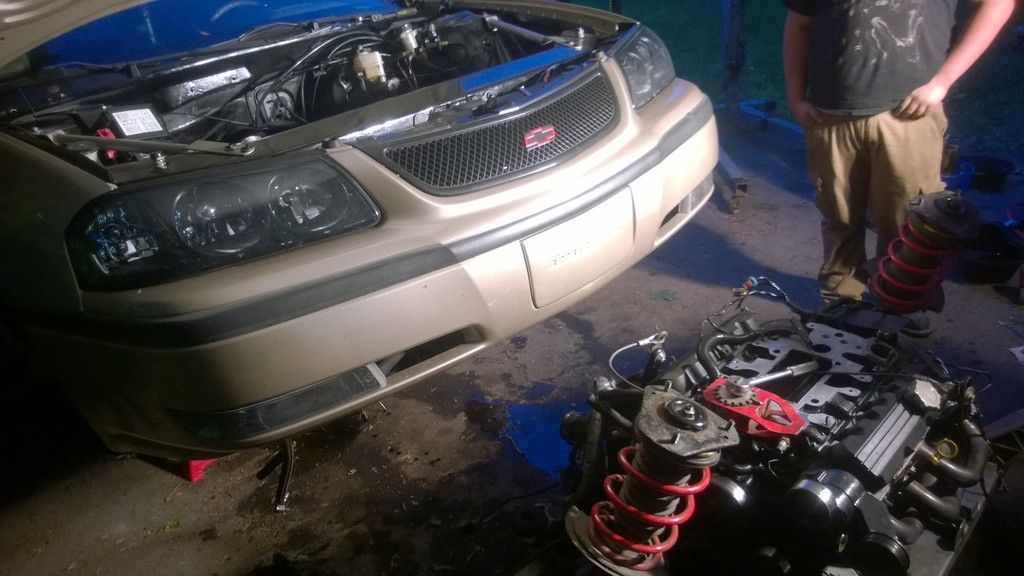
The RallyBuick's short block will live on:
WP_20150520_17_00_04_Pro.jpg


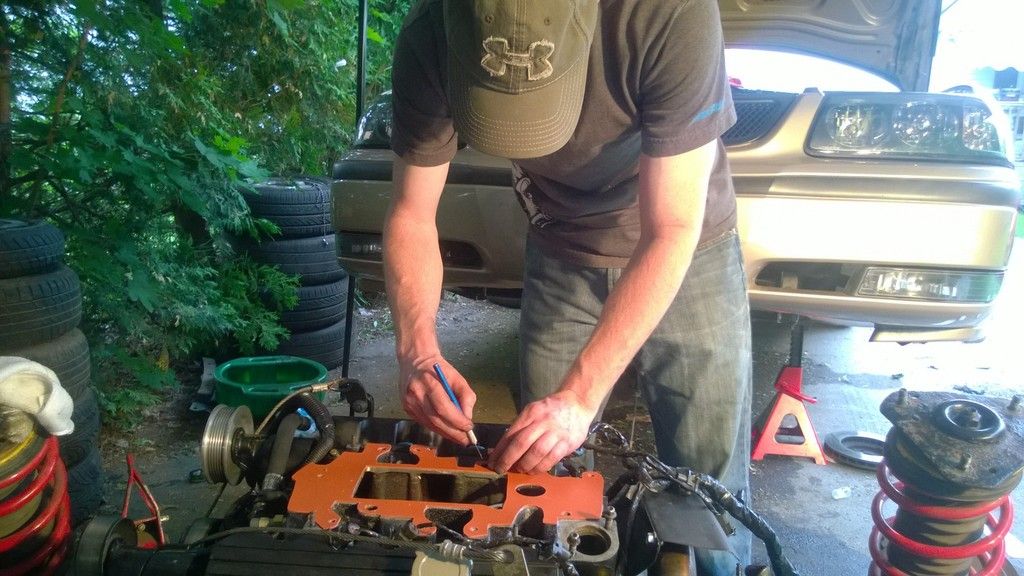
The unpaid interns (these guys are awesome for helping):
WP_20150520_17_16_12_Pro.jpg


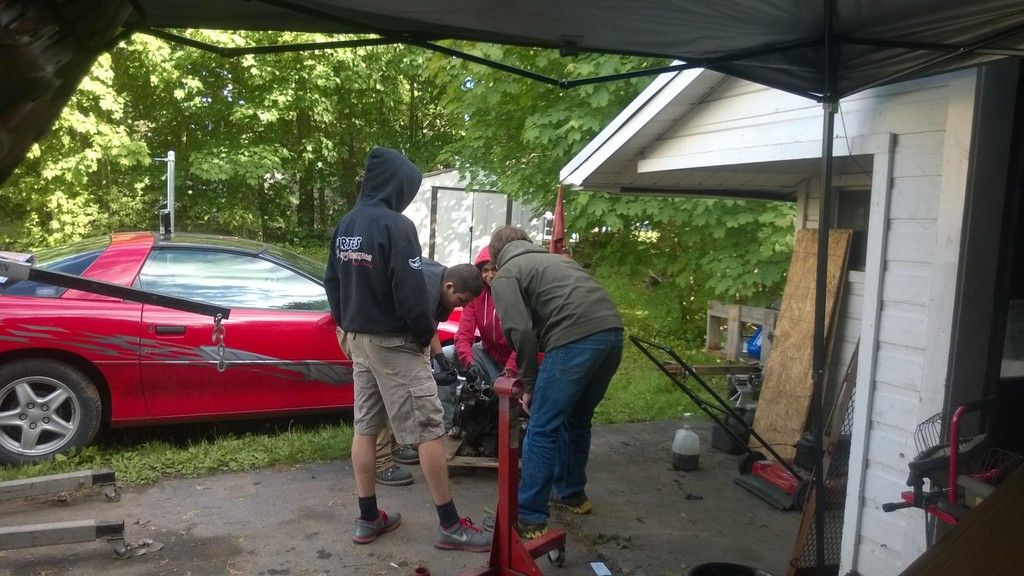
Getting right to work, no time to waste.
WP_20150520_17_47_32_Pro.jpg

WP_20150520_18_59_13_Pro.jpg

WP_20150520_20_33_55_Pro.jpg

WP_20150520_20_34_27_Pro.jpg


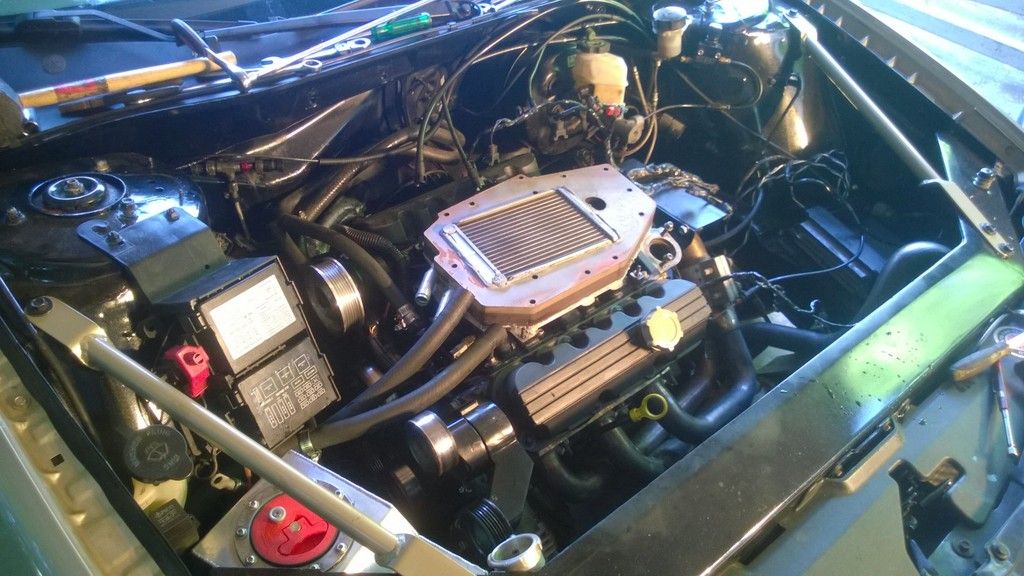
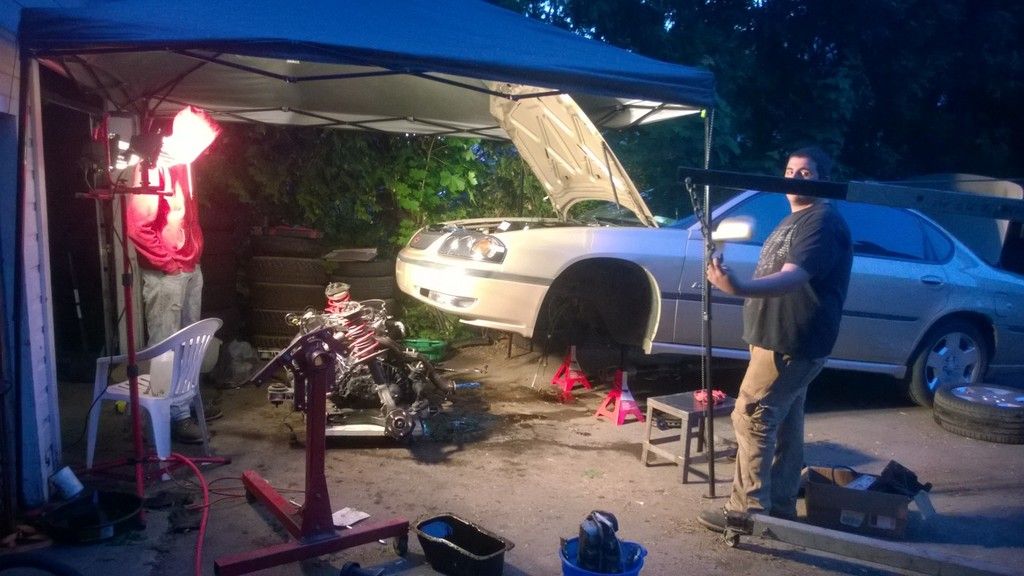
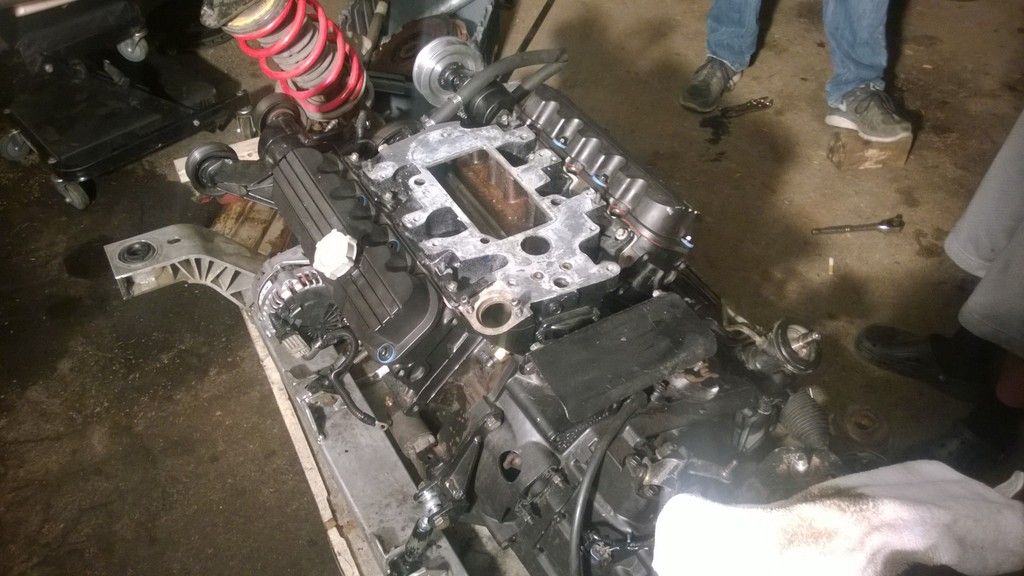
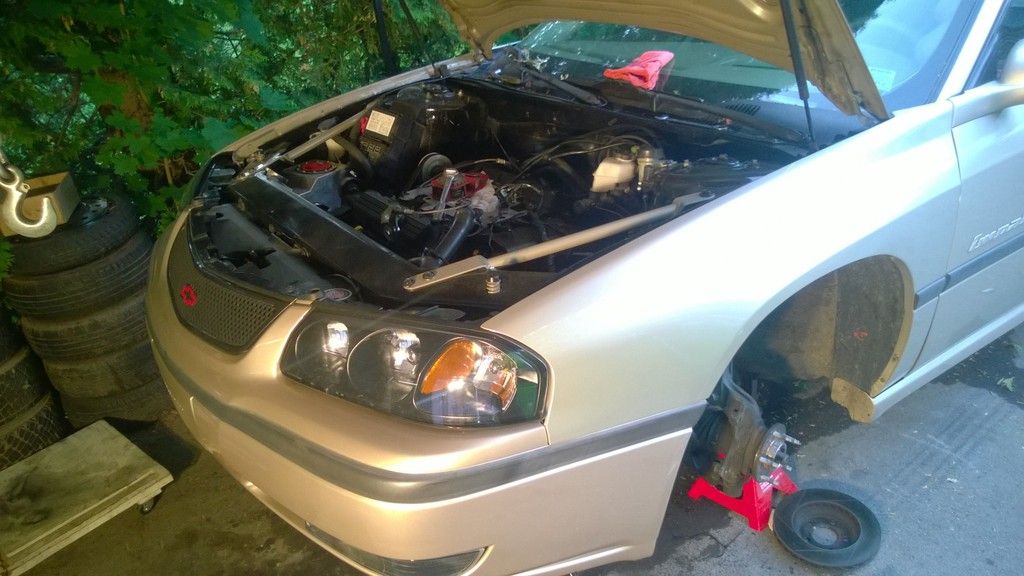
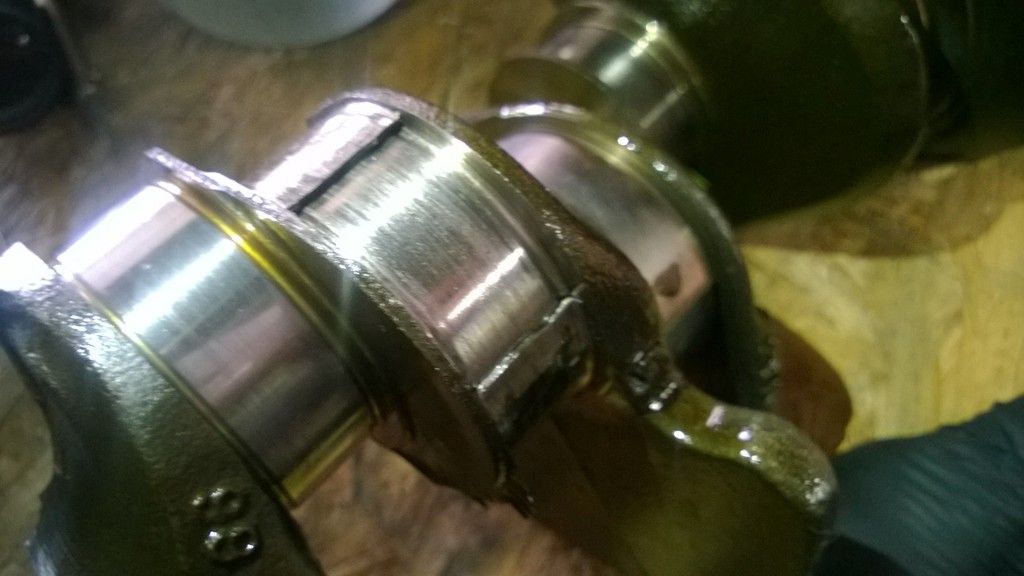
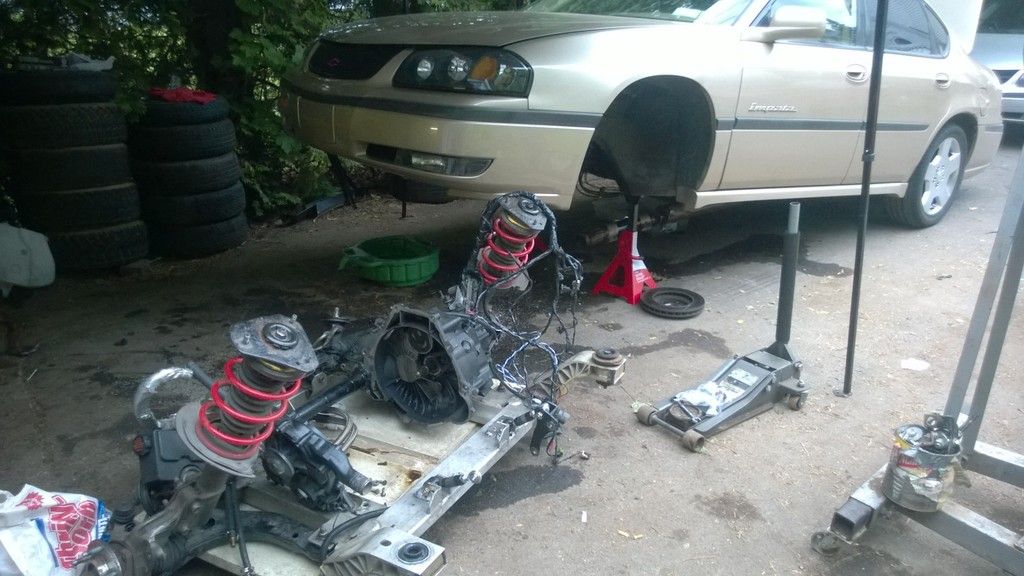
Where we left off on Wednesday, about 6hrs after I spun the bearing:
WP_20150520_22_23_13_Pro.jpg


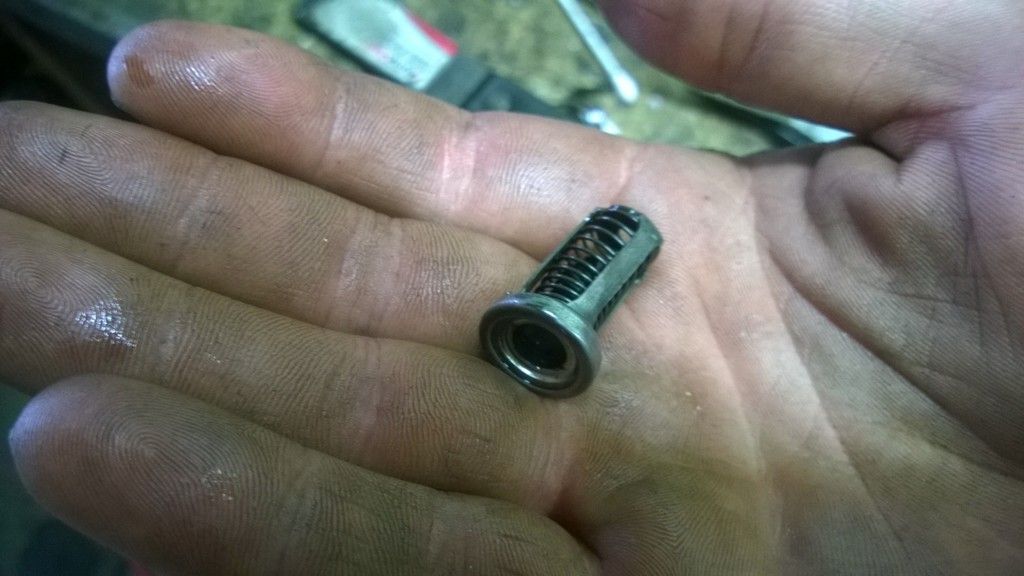
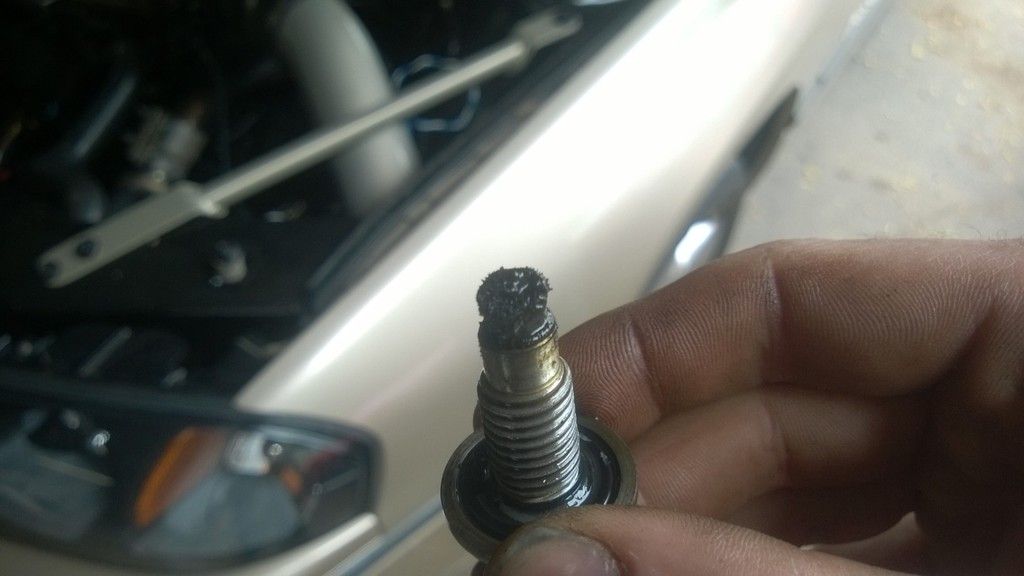
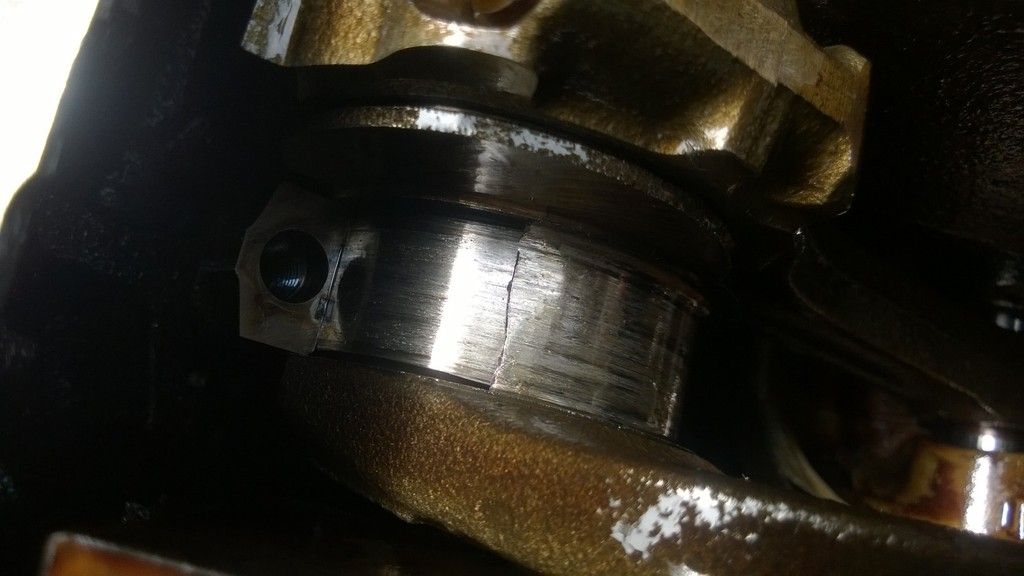
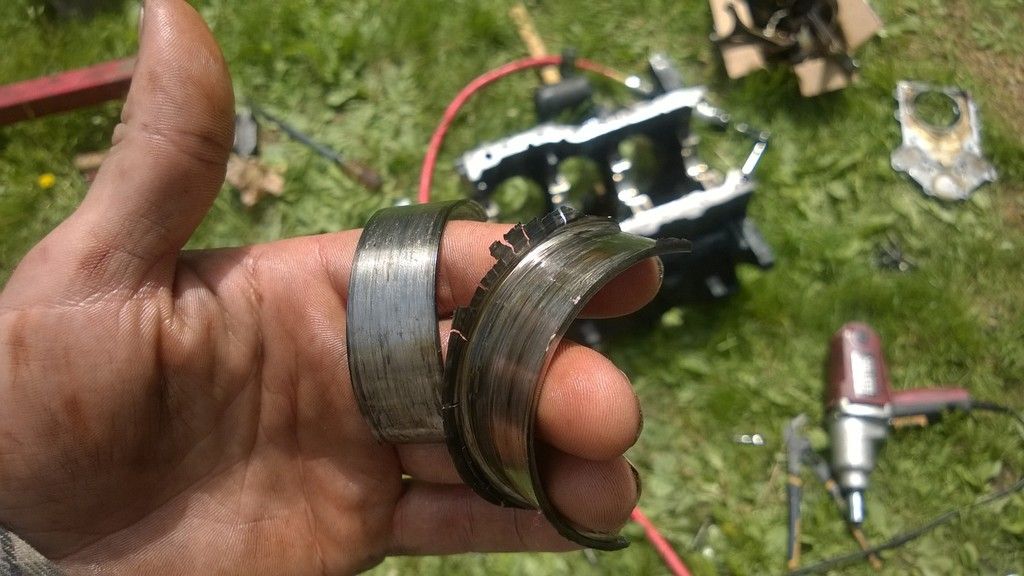
Love it when you take things apart and your diagnosis is on the money. Cyl #5 rod bearing has seen better days:
WP_20150521_11_02_22_Pro.jpg

WP_20150521_11_19_20_Pro.jpg

WP_20150521_11_20_38_Pro.jpg


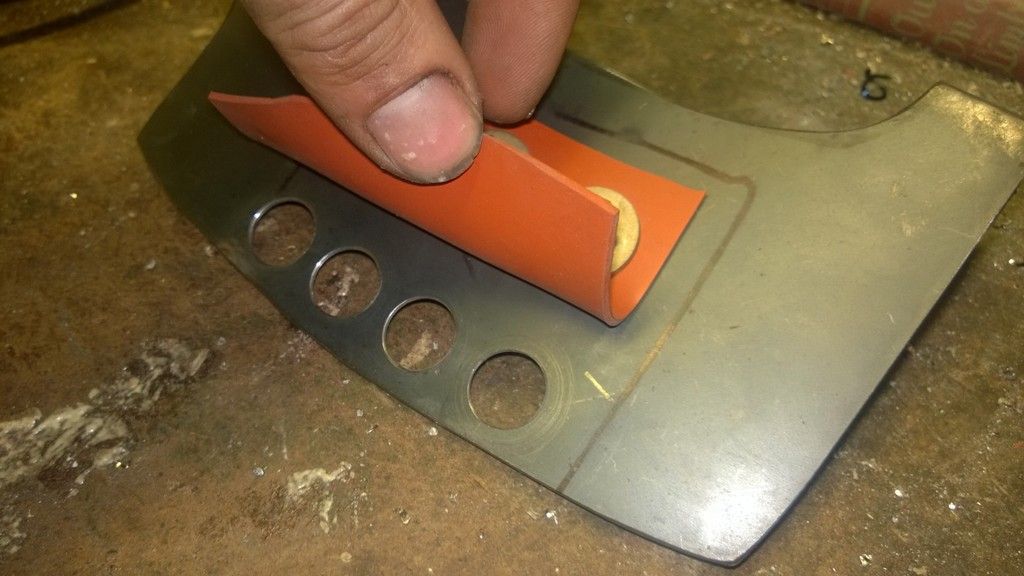
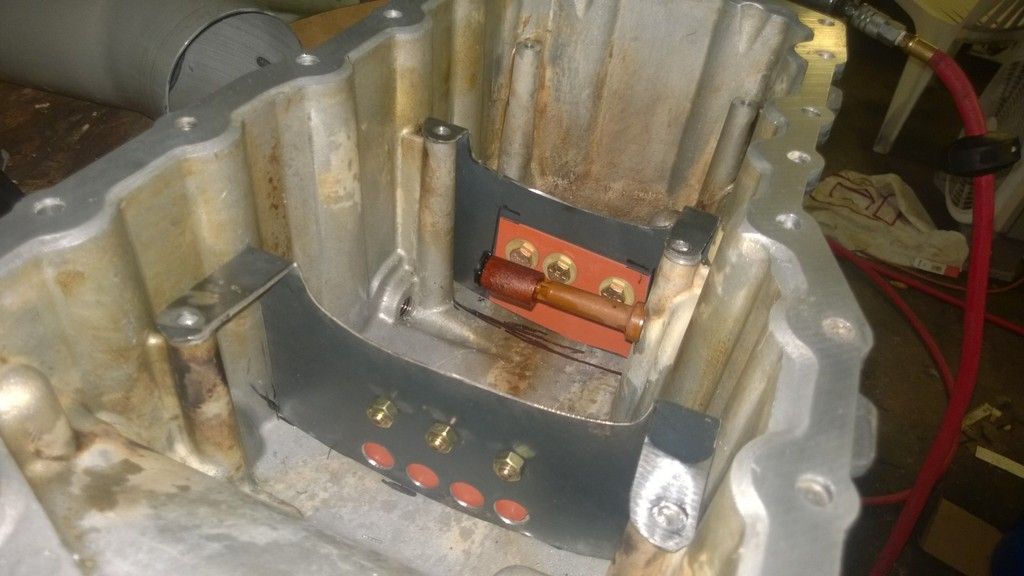
Designing some baffles for the oil pan because I don't want to have to do this again if I don't have to.
WP_20150521_18_25_36_Pro.jpg

WP_20150521_18_38_42_Pro.jpg


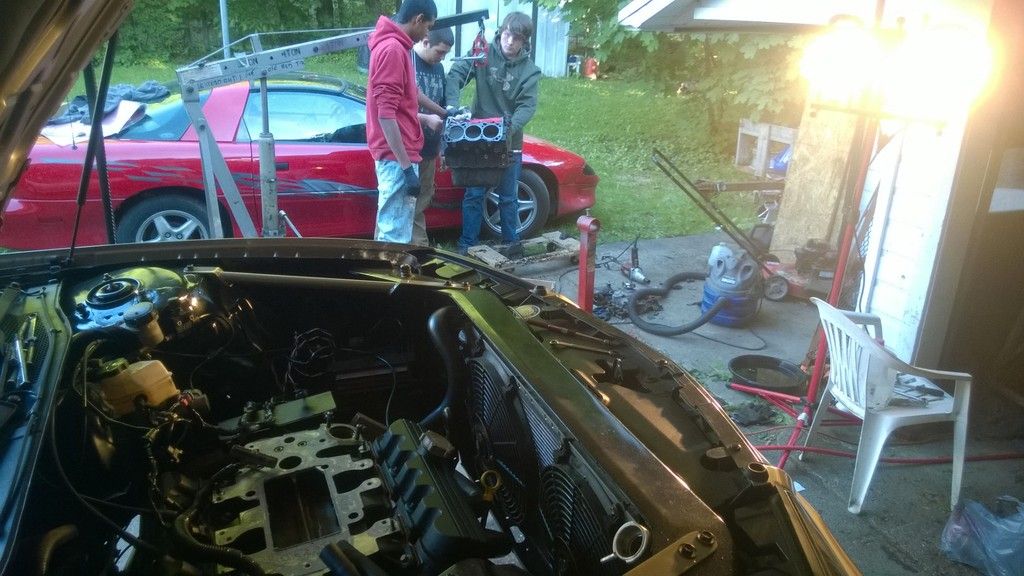
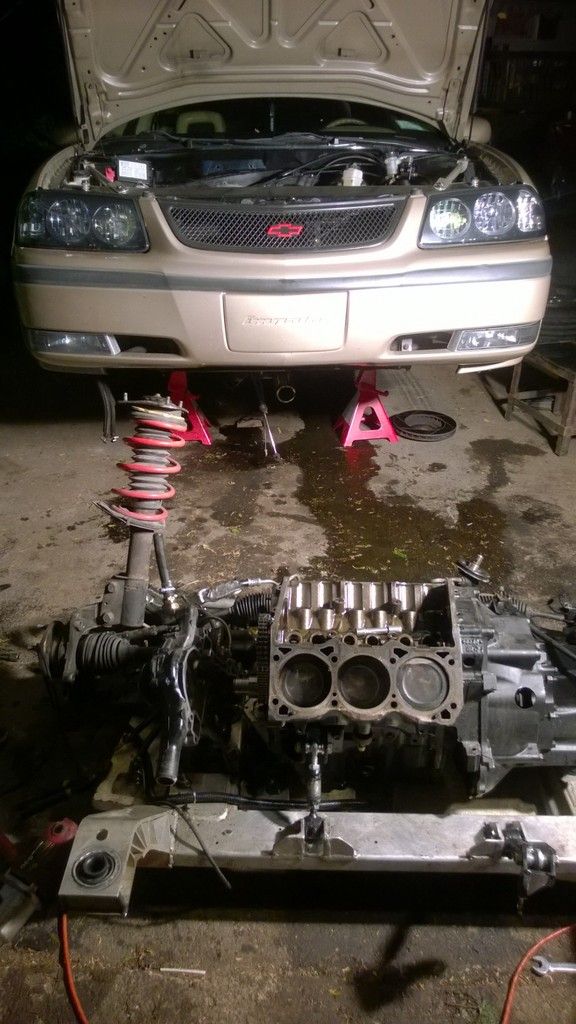
Back to normal (apart):
WP_20150521_19_53_34_Pro.jpg


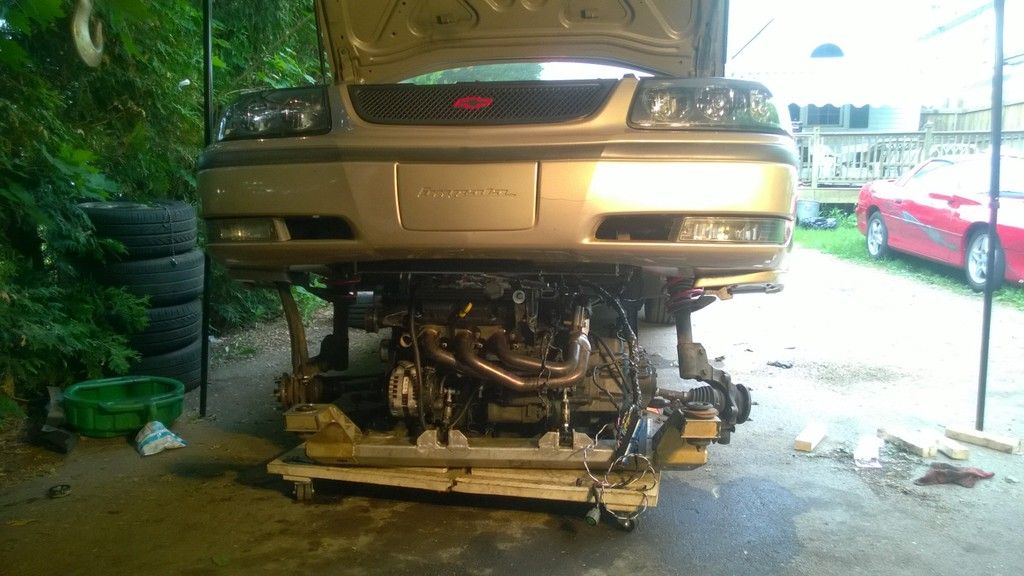
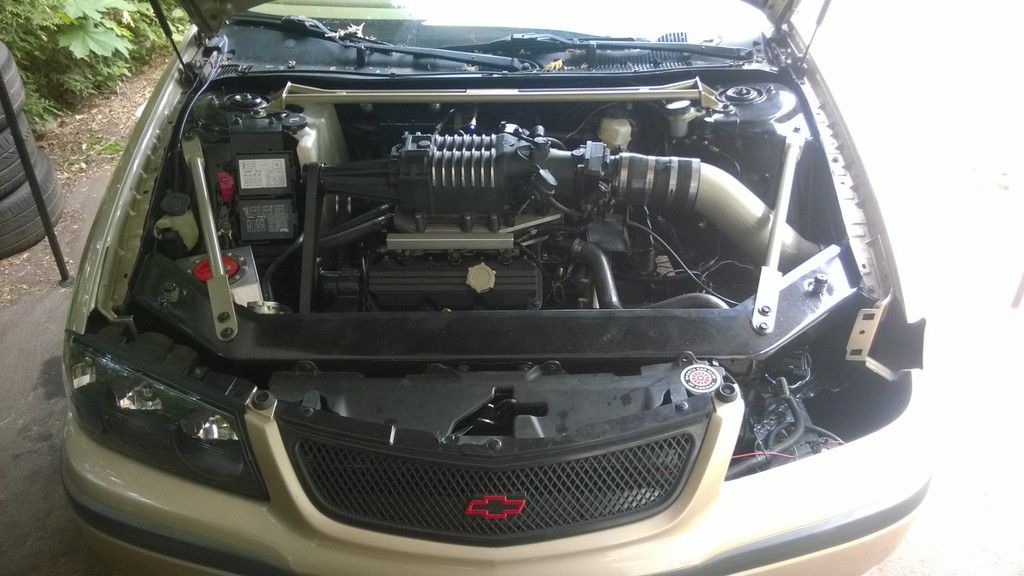
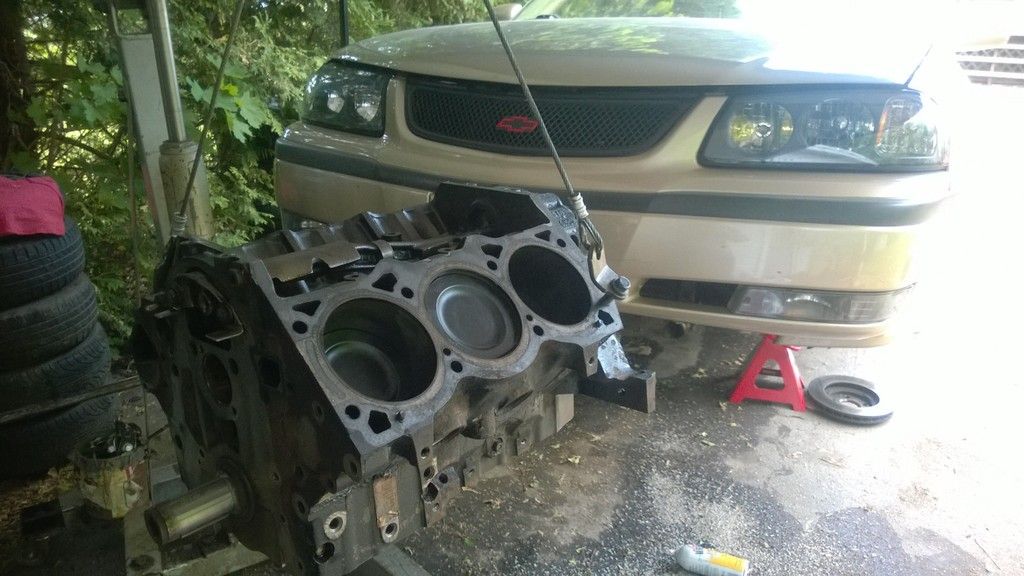
Ready for your new heart?
WP_20150522_17_17_35_Pro.jpg


This was inevitable. Most people with these motors would never have this problem because most are strictly drag racers and have no need for side-side baffles in the oil pan. This car can go around corners way better than it was intended to and I think that's why I ran into a problem. I'm not mad, its just bad timing right before the meet. On the bright side, its going to have the stronger l67 bottom end now.

Today I'm going to assemble the engine and hopefully get it mounted on the subframe and if all goes well, I'll have it back in the car tomorrow.


if you were sucking air then its always cyl1 and the front main bearing that get beat to hell. air finds the easiest path of escape...and the main oil galley is closest to the crank and the cam bearing at the cyl1 bulkhead.

cyl 2,3 and 4,5 are far more prone to spinning from lack of oil pressure past the cam bearing shell, they almost assuredly get the least amount of oil and pressure at cold starts as well. each of the middle main passages have to feed the main and two rod bearings. id say if i had the inclination id tap into the main passage below the cam bearing and find lower pressure than above it....doubtlessly getting worse as the bearings wear ove rthe years at each cold start till the oil pressure drops since volume cant increase...
this tiny area around the cam bearing can be easily restricted or even plugged by old gasket scrapings or chunks of rtv from sealant insanity.

the other side of that coin is the OEM filter bypass in the oil filter neck/adapter. it opens quite easily at pressure surges/spikes and at cold starts....sending unfiltered clitter-glitter directly to the bearings. a large filter changed regularly would minimize pressure drop to help keep spikes from popping it open.

nice work on the baffles, but your using the ****tiest pan and windage tray? please tell me your using the alum pan with the steel pan mounting horseshoe and the craploads better plastic windage tray/gasket?

some reading fer ya when yer bored
http://www.thechicagogarage.com/for...-remember-twin-engine-olds-7.html#post2788385
http://www.thechicagogarage.com/for...-remember-twin-engine-olds-9.html#post2863096
 
Last edited:
if you were sucking air then its always cyl1 and the front main bearing that get beat to hell. air finds the easiest path of escape...and the main oil galley is closest to the crank and the cam bearing at the cyl1 bulkhead.

cyl 2,3 and 4,5 are far more prone to spinning from lack of oil pressure past the cam bearing shell, they almost assuredly get the least amount of oil and pressure at cold starts as well. each of the middle main passages have to feed the main and two rod bearings. id say if i had the inclination id tap into the main passage below the cam bearing and find lower pressure than above it....doubtlessly getting worse as the bearings wear ove rthe years at each cold start till the oil pressure drops since volume cant increase...
this tiny area around the cam bearing can be easily restricted or even plugged by old gasket scrapings or chunks of rtv from sealant insanity.

the other side of that coin is the OEM filter bypass in the oil filter neck/adapter. it opens quite easily at pressure surges/spikes and at cold starts....sending unfiltered clitter-glitter directly to the bearings. a large filter changed regularly would minimize pressure drop to help keep spikes from popping it open.

nice work on the baffles, but your using the ****tiest pan and windage tray? please tell me your using the alum pan with the steel pan mounting horseshoe and the craploads better plastic windage tray/gasket?

some reading fer ya when yer bored
http://www.thechicagogarage.com/for...-remember-twin-engine-olds-7.html#post2788385
http://www.thechicagogarage.com/for...-remember-twin-engine-olds-9.html#post2863096


You sir, are a wealth of knowledge, and I appreciate you continuing to drop by and share it.

So you're thinking this was not caused by the oil pickup sucking up air, rather it was my continued abuse and possibly some debris in the oil?


I have been using the aluminum pan with the steel windage tray since the 5 speed swap. The position of the passenger side axle no longer allows me to run the factory OFA. I'm using a modified Reatta OFA which will not fit with the steel oil pan/u-bracket. I'm kind of stuck with that pan and mounting setup for now, but you are saying it is possible to use the plastic windage tray with the aluminum pan, and that would be the way to go?


I'll get a chance to look over those links tomorrow.


Once things are a little less hectic, I'm going to look for another short block to start modifying for improved oiling, so the more info I'm armed with the better.
 
its a glaring oem defect that is a direct carryover from the issues the original buick 3.8 had...we at least have a more efficient oil pump design. the bad part is that just like the original 3.8 we have issues with the aluminum timing cover wearing and killing pump efficiency.
the cover and the crank are the main reasons i suggest good used shorty's and i still look for good timing covers

any factory filter neck has the filter bypass...its the round piece next to the filter threads.

the plastic tray isnt very good with the pan used as a structural piece. thats why i suggest keeping the early engine mount horseshoe. you might be sorta ****ed there...
 
as an fyi i run the early 1030 or the later 5w30 spring with 1-3 #10 washers tucked inside the regulator piston for my oil pressure mods. turbo car runs 5w40 diesel, all others 5w30 with moly/zddp additive since the SJ oils suck ass thanks to the lack of zinc since they decided it was smart to sacrifice the engine for a longer cat life.


How did you go about mounting the trans on the aluminum subframe? Im just gonna use my aluminum for weight reduction. Was thinking im gonna pull the motor trans and subframe, mount it in place then raise the engine slightly, pull the auto, mount the 284 and drop it getting it as close as possible to where it was factory. I already am fabricating a completely custom mount because I have no original to go off.

Also how many miles have you put on the the new input shaft seal and how does it seem to hold up?
 
Last edited:
Its been a long day. Engine/trans/subframe is ready to be put back in the car. I ended buying a plastic windage tray on my way home from work, but then read Turbocharged400sbc's post on the plastic not being able to support the weight. Torn, I put the metal tray in with my baffles and buttoned it up. I don't have time or money this go-around to do anything about it aside from the baffles. The plan is to run this while I look for another short block to spend some time doing some oiling mods to and developing a better windage tray/baffle solution.

Time to get some rest, it really was a marathon day for me and my buddy Jim getting this engine together and back on the subframe.

WP_20150523_21_44_43_Pro.jpg
 
Last edited:
If you dont mind before you throw it back in the car can you take a good picture of where the mount sits on the subframe?
 
as an fyi i run the early 1030 or the later 5w30 spring with 1-3 #10 washers tucked inside the regulator piston for my oil pressure mods. turbo car runs 5w40 diesel, all others 5w30 with moly/zddp additive since the SJ oils suck ass thanks to the lack of zinc since they decided it was smart to sacrifice the engine for a longer cat life.

I run royal purple cus looking at the spec sheets comparing other oils they run higher zinc.
 
I like to see a better view of the filter side and whether you can trim the horse-shoe mount and brace it to clear the reatta mount....
you could always do a remote filter block and use the much larger, better ferd filter like I have to use on my WaGN


How did you go about mounting the trans on the aluminum subframe? Im just gonna use my aluminum for weight reduction. Was thinking im gonna pull the motor trans and subframe, mount it in place then raise the engine slightly, pull the auto, mount the 284 and drop it getting it as close as possible to where it was factory. I already am fabricating a completely custom mount because I have no original to go off.

Also how many miles have you put on the the new input shaft seal and how does it seem to hold up?


Originally I swapped to a steel subframe, as the bolt holes for the 284 mount are for some reason drilled into the bottom layer from the factory so that made placement simple. When I switched back to the aluminum subframe, I took a bunch of measurements from everything mocked up on the steel subframe, so I could kind of triangulate where the holes should be drilled on the aluminum one. I'll take some pictures for you today.

I put a few hundred miles on the input shaft seal so far. When I took it apart this time, everything looks nice and dry so I think it is a success. Still want to buy a couple extras though before I spill the beans on it, very limited supply.
 
I like to see a better view of the filter side and whether you can trim the horse-shoe mount and brace it to clear the reatta mount....
you could always do a remote filter block and use the much larger, better ferd filter like I have to use on my WaGN


I'm kind of using the Reatta filter as a remote filter block with a screw on adapter to run a remote oil filter with a big ford filter. I'd love to a filter block like you have pictured, but the Intense one is pricey and this project already cost me way more than planned this year. I'll post a pic of this setup later today.

I would like to do the filter bypass delete that you have talked about if that's something you recommend. You just drill it, tap it, and plug it? Have any pictures of what it looks like?


The u-bracket is impossible to run with the Reatta OFA, and I don't think it would clear my alternator. And one of my lower "dog bone" brackets bolts to where the u-bracket used to bolt. So the u-bracket would require a lot of re-working. I'm wondering if there is a way to improve or redesign the aluminum pan's steel windage tray so that I don't have to re-design everything else.


I read the thread you sent me from beginning to end. So much good info in there and I will most likely copy some of your designs for the oiling mods you have done. Very impressive. Like I said, I'm going to pick up another short block and start working on that while this one wears itself out. That way I'm not in a rush with it and I can spend some time and do things right.
 
that was a 2x3" block of aluminum that i could have reproduced with a drill press...hardest part is the slot for the pressure bypass and the upper rear portion where it has a funky outside shape to clear the cover/block...coulda done that with a 4.5" grinder though it wouldnt have looked as nice....

3/8ths npt...pry out OEM valve, tap, clean (tha****outtait), install
 
Awesome, gonna do that today.

I guess I don't understand why GM would have put that there in the first place. What was the need to bypass the oil filter? For people who don't change the filter and let it get clogged?
 
as is usual things are designed for the dumbest common denominator....

i just make sure i keep filters on the shelf and i only do this with the tall S10 filter. just change the filter before a hard track or dyno day and your set...

the OEM 9c1 cooler adaptor has a similar valve thats to bypass the cooler when the restriction is too much to keep the motor from starving if the cooler is say 7* or a line gets kinked/crimped.

with high revs and volume demand that the filter cant handle or upon cold starts the valve opens...while most of the time its not a big deal...sometimes it lets a little debris get to the bearings....once clitter glitter starts to collect and the filter starts to plug its a real fcuking quick downward spiral till your just circulating grit through the whole motor.

we saved a GS that had started to glitter the oil...two changes and a third filter got it back to clean oil and its still driving a getting beat upon with a 3.2 non IC'd to this day.

if that bypass had not been deleted back when he first got the car and we did a new timing tensioner with the S1x im not sure that it would have survived. part of it mightv been luck at doing the filter change and see'n the cliter glitter but at least with a 3k filter change regimen your gonna see the **** before it hits the proverbial fan....


Been a while since an update. Car has been back up and running for over a week, but haven't gotten a chance to drive it very much.


Deleted the oil filter bypass valve.

WP_20150524_13_47_37_Pro.jpg


WP_20150524_13_50_42_Pro.jpg


Added in a couple washers to bump oil pressure a bit.

WP_20150524_14_30_55_Pro.jpg


Really sick of scraping rtv off the LIM, IC, and SC, so Jim made me some badass gaskets out of some silicone rubber sheet that I bought. These should be reusable and they seal great!

WP_20150524_18_46_38_Pro.jpg


Re-assembly

WP_20150524_19_08_06_Pro.jpg


WP_20150524_19_43_50_Pro.jpg


WP_20150525_15_41_20_Pro.jpg


Took it to Albany Speed Shop where I have a part time job and they let me put it on the alignment rack and align it myself. What a difference!

WP_20150602_15_22_09_Pro.jpg


WP_20150602_11_58_55_Pro.jpg


And another random photo. Can't wait to do an actual shoot with the new wheels!

WP_20150527_19_58_49_Pro.jpg
 
So here's something to ponder..

I'm on the 2.8" pulley now, and I'm only getting about 4psi. Car pulls hard but nowhere near as hard as I think it should. People talk about burning the tires off and while mine are pretty sticky I think it should do better with this setup. Replaced the BBV actuator today as I suspected it was the problem. That solved my vacuum issue, it was definitely leaking. Took it out for a drive and the fuel trims look much better but I am still only boosting to 4psi. SC screams and I'm not seeing any belt dust but something has to be up for it to be making such little boost. Belt slip? Is there something else I should be looking for?
 
Back
Top