shift kit did this recently tot he GTP when i changed the fluid. cost was $13 before trans fluid i just got normal dex III as there is not need for any thing higher in are tranmissions they where not designed for it
Credits: ReaglGS
Synopsis: Install a shift kit utilizing shims in the transaxle shift pressure accumulator.
Difficulty: 3/5. Requires dropping the bottom transaxle pan, removing the shift pressure accumulator, changing the transaxle filter, and refilling the transaxle with fluid.
Parts required:
The parts you need are determined by whether you want to do the medium (light street/strip) or hard (heavy street/strip) shift kit. There's also an optional spring used to firm up the 1-2 shift (usable with either medium or hard). The shims used are available from McMaster-Carr online.
Medium Shift Kit
(2) 92415A865 :: Zinc-Plated Steel Unthreaded Round Spacer 1/2" OD, 1/2" Length, 1/4" Screw Size
(2) 92415A867 :: Zinc-Plated Steel Unthreaded Round Spacer 1/2" OD, 3/4" Length, 1/4" Screw Size
Hard Shift Kit
(2) 92415A867 :: Zinc-Plated Steel Unthreaded Round Spacer 1/2" OD, 3/4" Length, 1/4" Screw Size
(2) 92415A869 :: Zinc-Plated Steel Unthreaded Round Spacer 1/2" OD, 1" Length, 1/4" Screw Size
Required for both kits
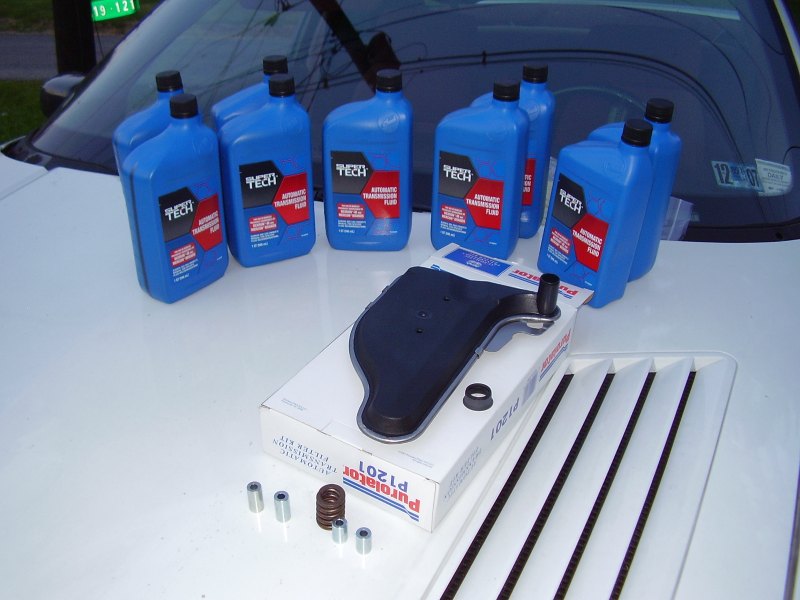
8-10 quarts of Dexron III or Dexron VI transmission fluid
Transmission filter
Optional for either kit
2-3 shift accumulator spring (used to replace the stock 1-2 shift spring). GM part number 24203977.
Directions:
1. Raise the front of the car and begin loosening the 10mm bolts on the transmission pan. Loosen the ones toward the back of the car more than the front so the fluid drips toward the long end of the pan. Allow it to nearly fully drain to avoid a huge mess (which is going to happen anyway, it's just saving you at least a little bit of a headache). Remove the pan and clean it off along with the magnet and gasket.
2. With the pan removed we can now access the filter. Pull it straight down firmly, twisting it side to side to break it loose. Change the filter neck gasket if required.
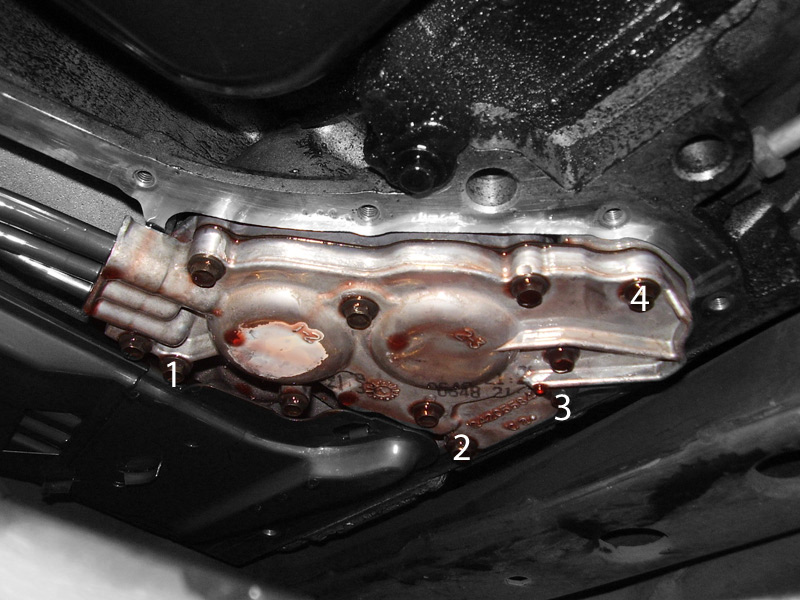
3. Now that the filter is removed, we can now take out the accumulator itself. It's seen below in color, along with the bolts that need to be removed numbered for easy reference. Once these bolts are removed, the accumulator will want to drop down and spill transmission fluid everywhere. Use one hand to hold up the accumulator and another to remove the bolts by hand once they're broken loose. Pull the hard metal lines out of the accumulator using care as not to bend them. Note the location of each metal line.
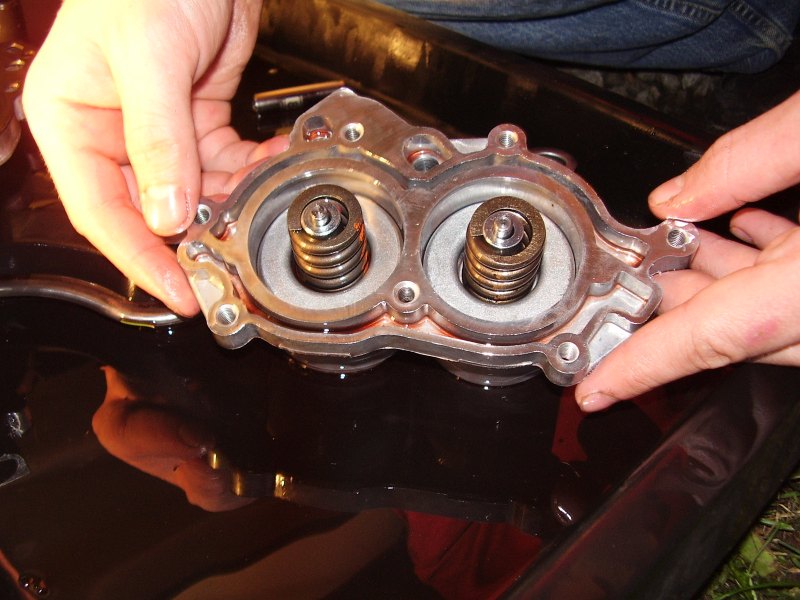
4. Once the accumulator is removed, place it face-up and remove the remaining bolts. Remove the cover. Inside you'll find two cylinders, both with visible springs. Do one side at a time. Pull up on a spring and remove it. Try to take out only the small spring and the metal plate it sits on, leaving behind the rod and large spring. Put one of the longer shims at the bottom of the rod. If you're using the optional 2-3 spring, and you're working on the 1-2 accumulator, remove the small spring from it's base, and press the new spring onto it. Reinstall the small spring and base onto the rod. Add a short shim in the middle of the spring. Repeat for the other side.

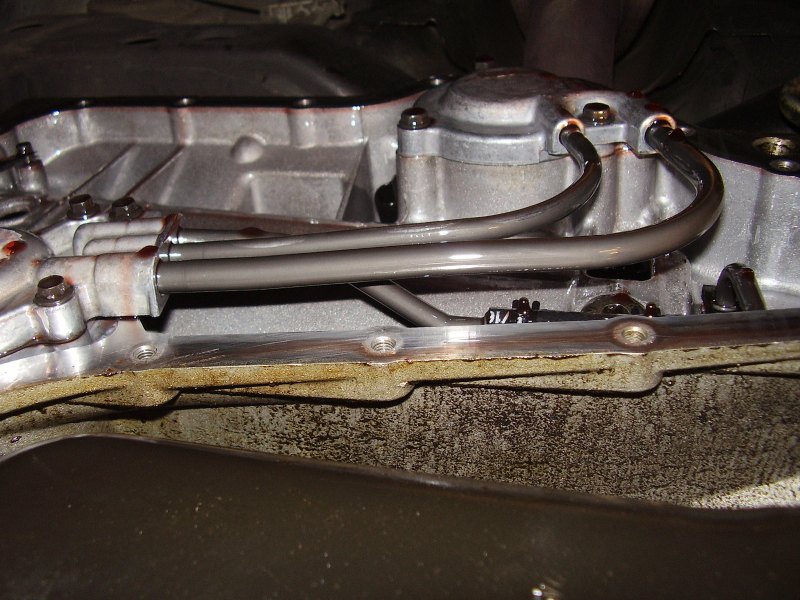
5. Reinstall the cover to the accumulator. Bolt it back into the transmission, using extreme care to reinstall and reseat the hard metal lines. Make absolute certain the lines are reseated properly. If they're not, you'll be left with a slipping transaxle that burns up clutches. In case you forgot where the lines go, here's a picture:
6. Reinstall the trans axle filter. Put the pan cover back on, and fill the trans axle with approximately 8-10 quarts of ATF, depending on how much fluid you lost. Once you're sure you have the proper fluid level, take the car for a spin and make sure that it's not slipping. If it's all good to go, enjoy your new shift kit! Your wallet will thank you for it!

")