• The site migration is complete! Hopefully everything transferred properly from the multiple decades old software we were using before. If you notice any issues please let me know, thanks! Also, I'm still working on things like chatbox, etc so hopefully those will be working in the next week or two.

Luke's GTP

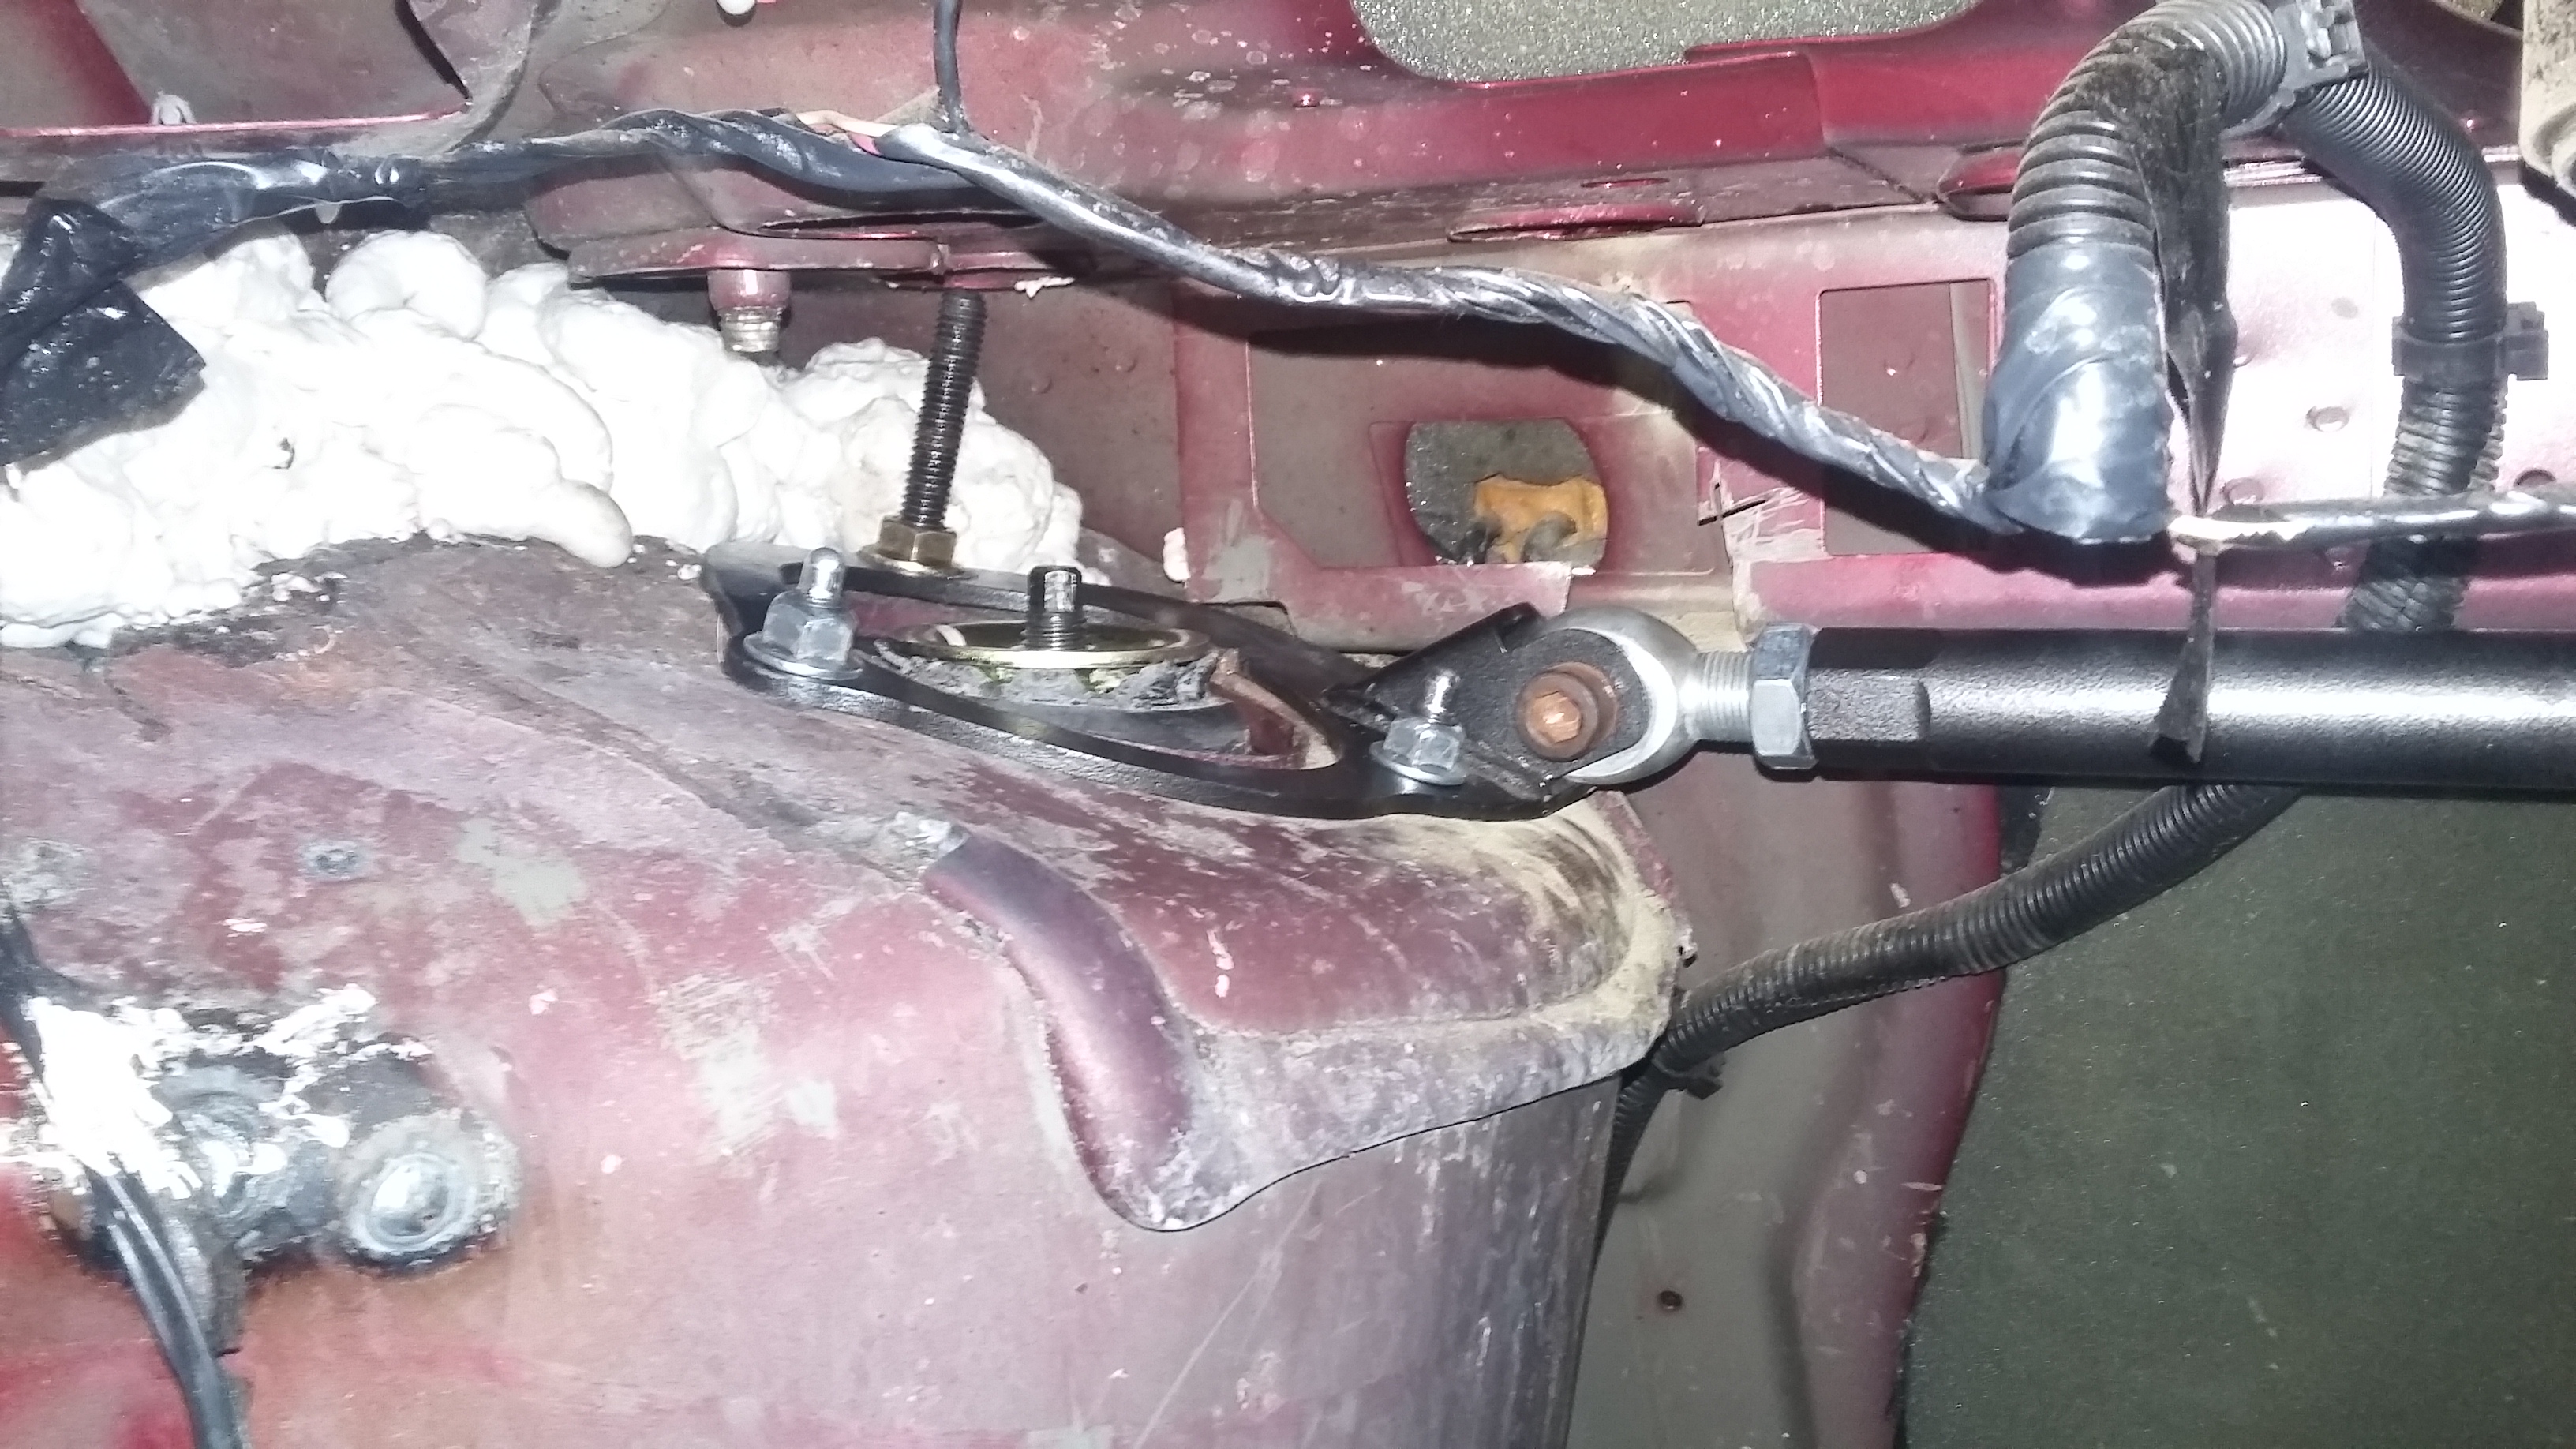
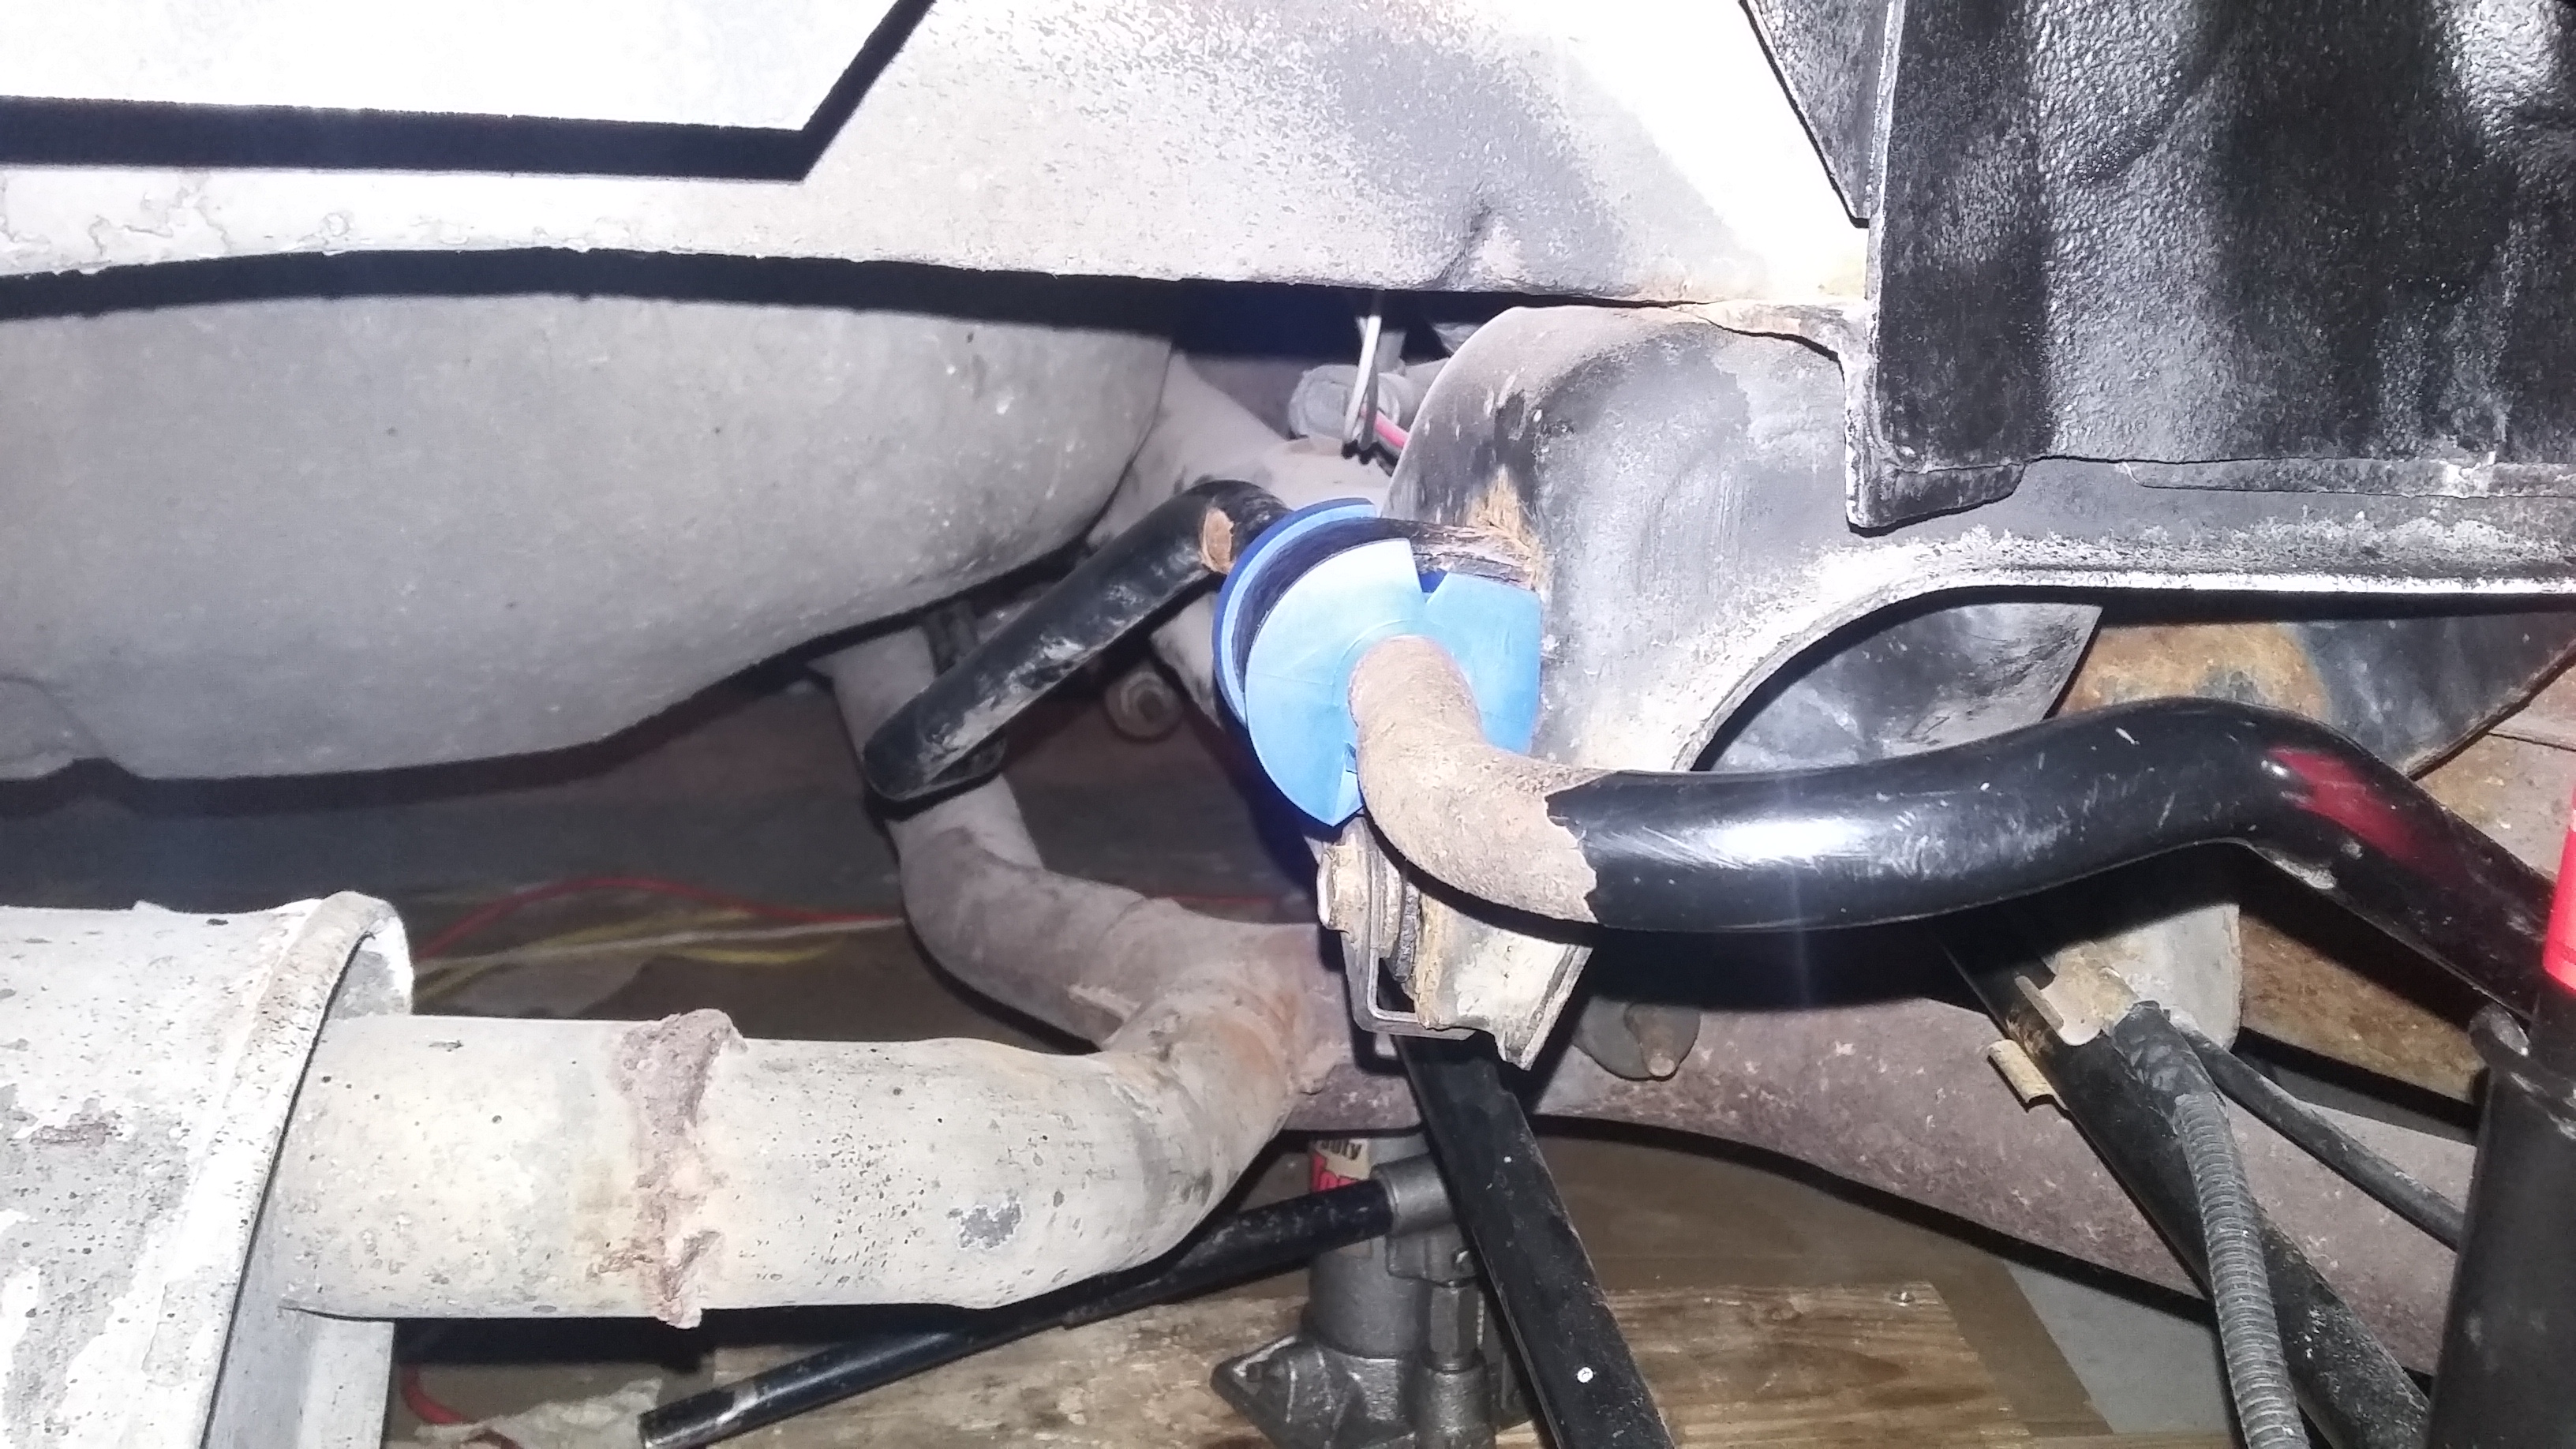
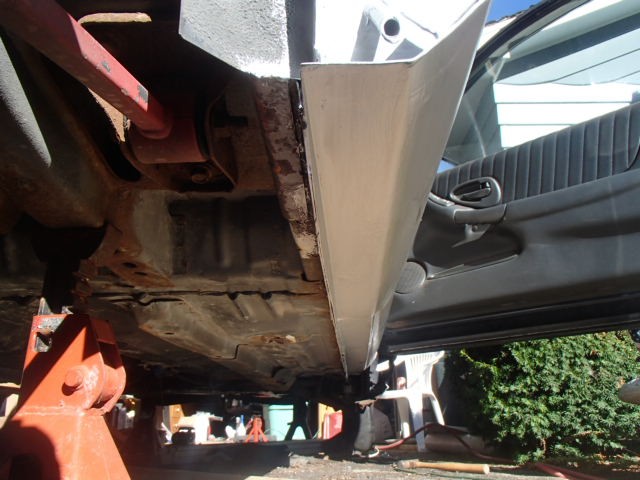
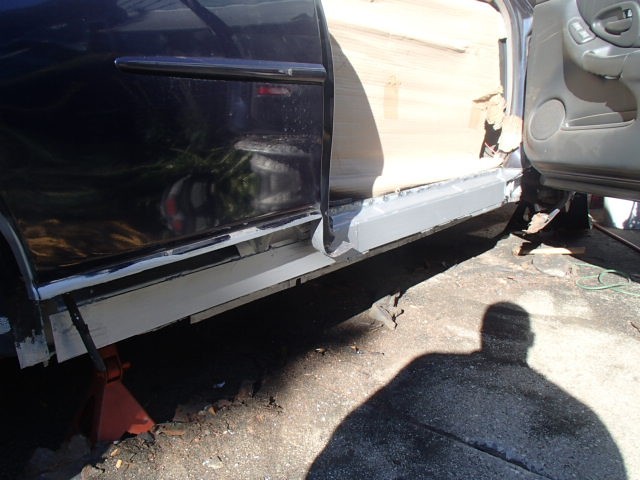
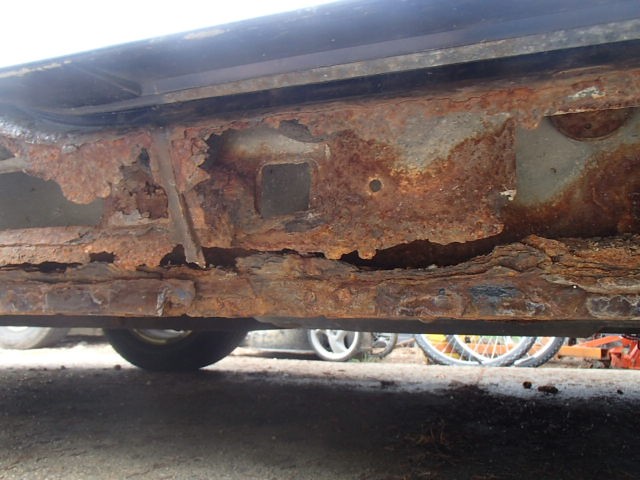
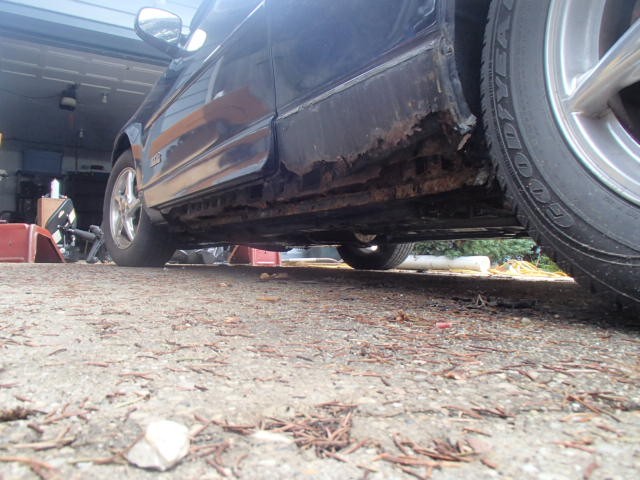
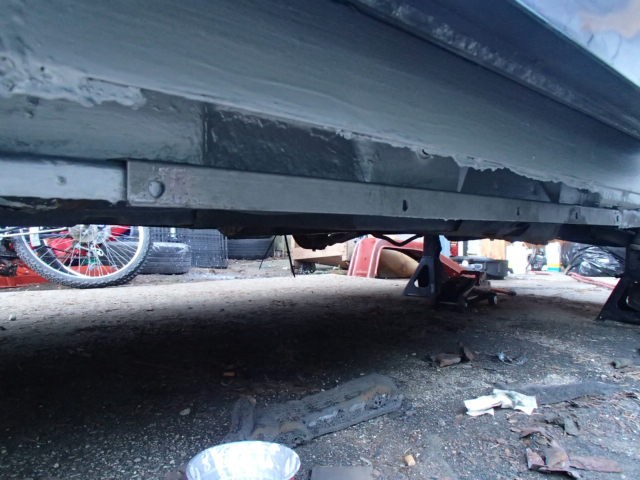
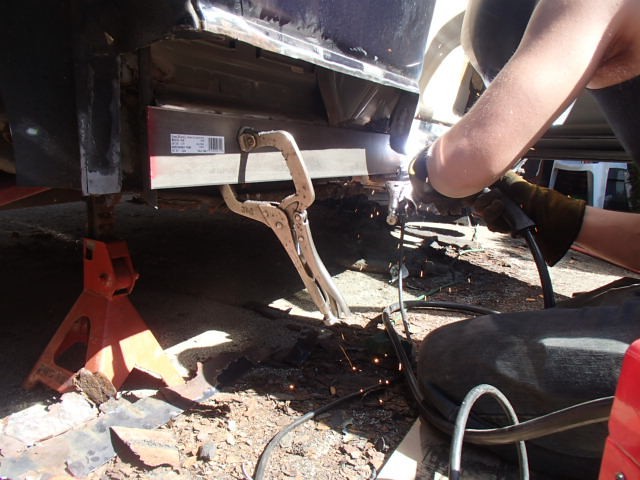
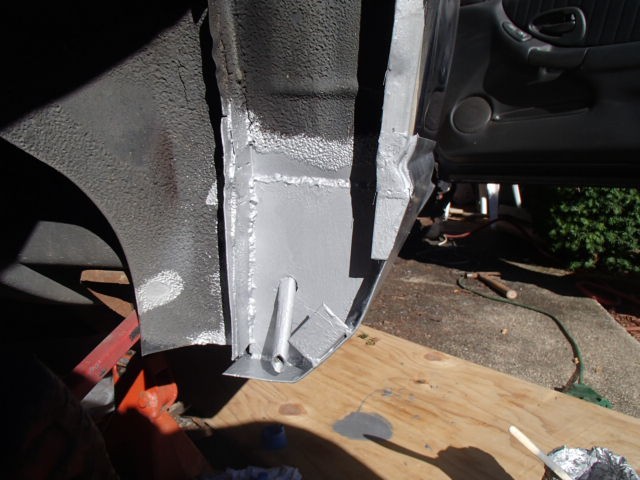
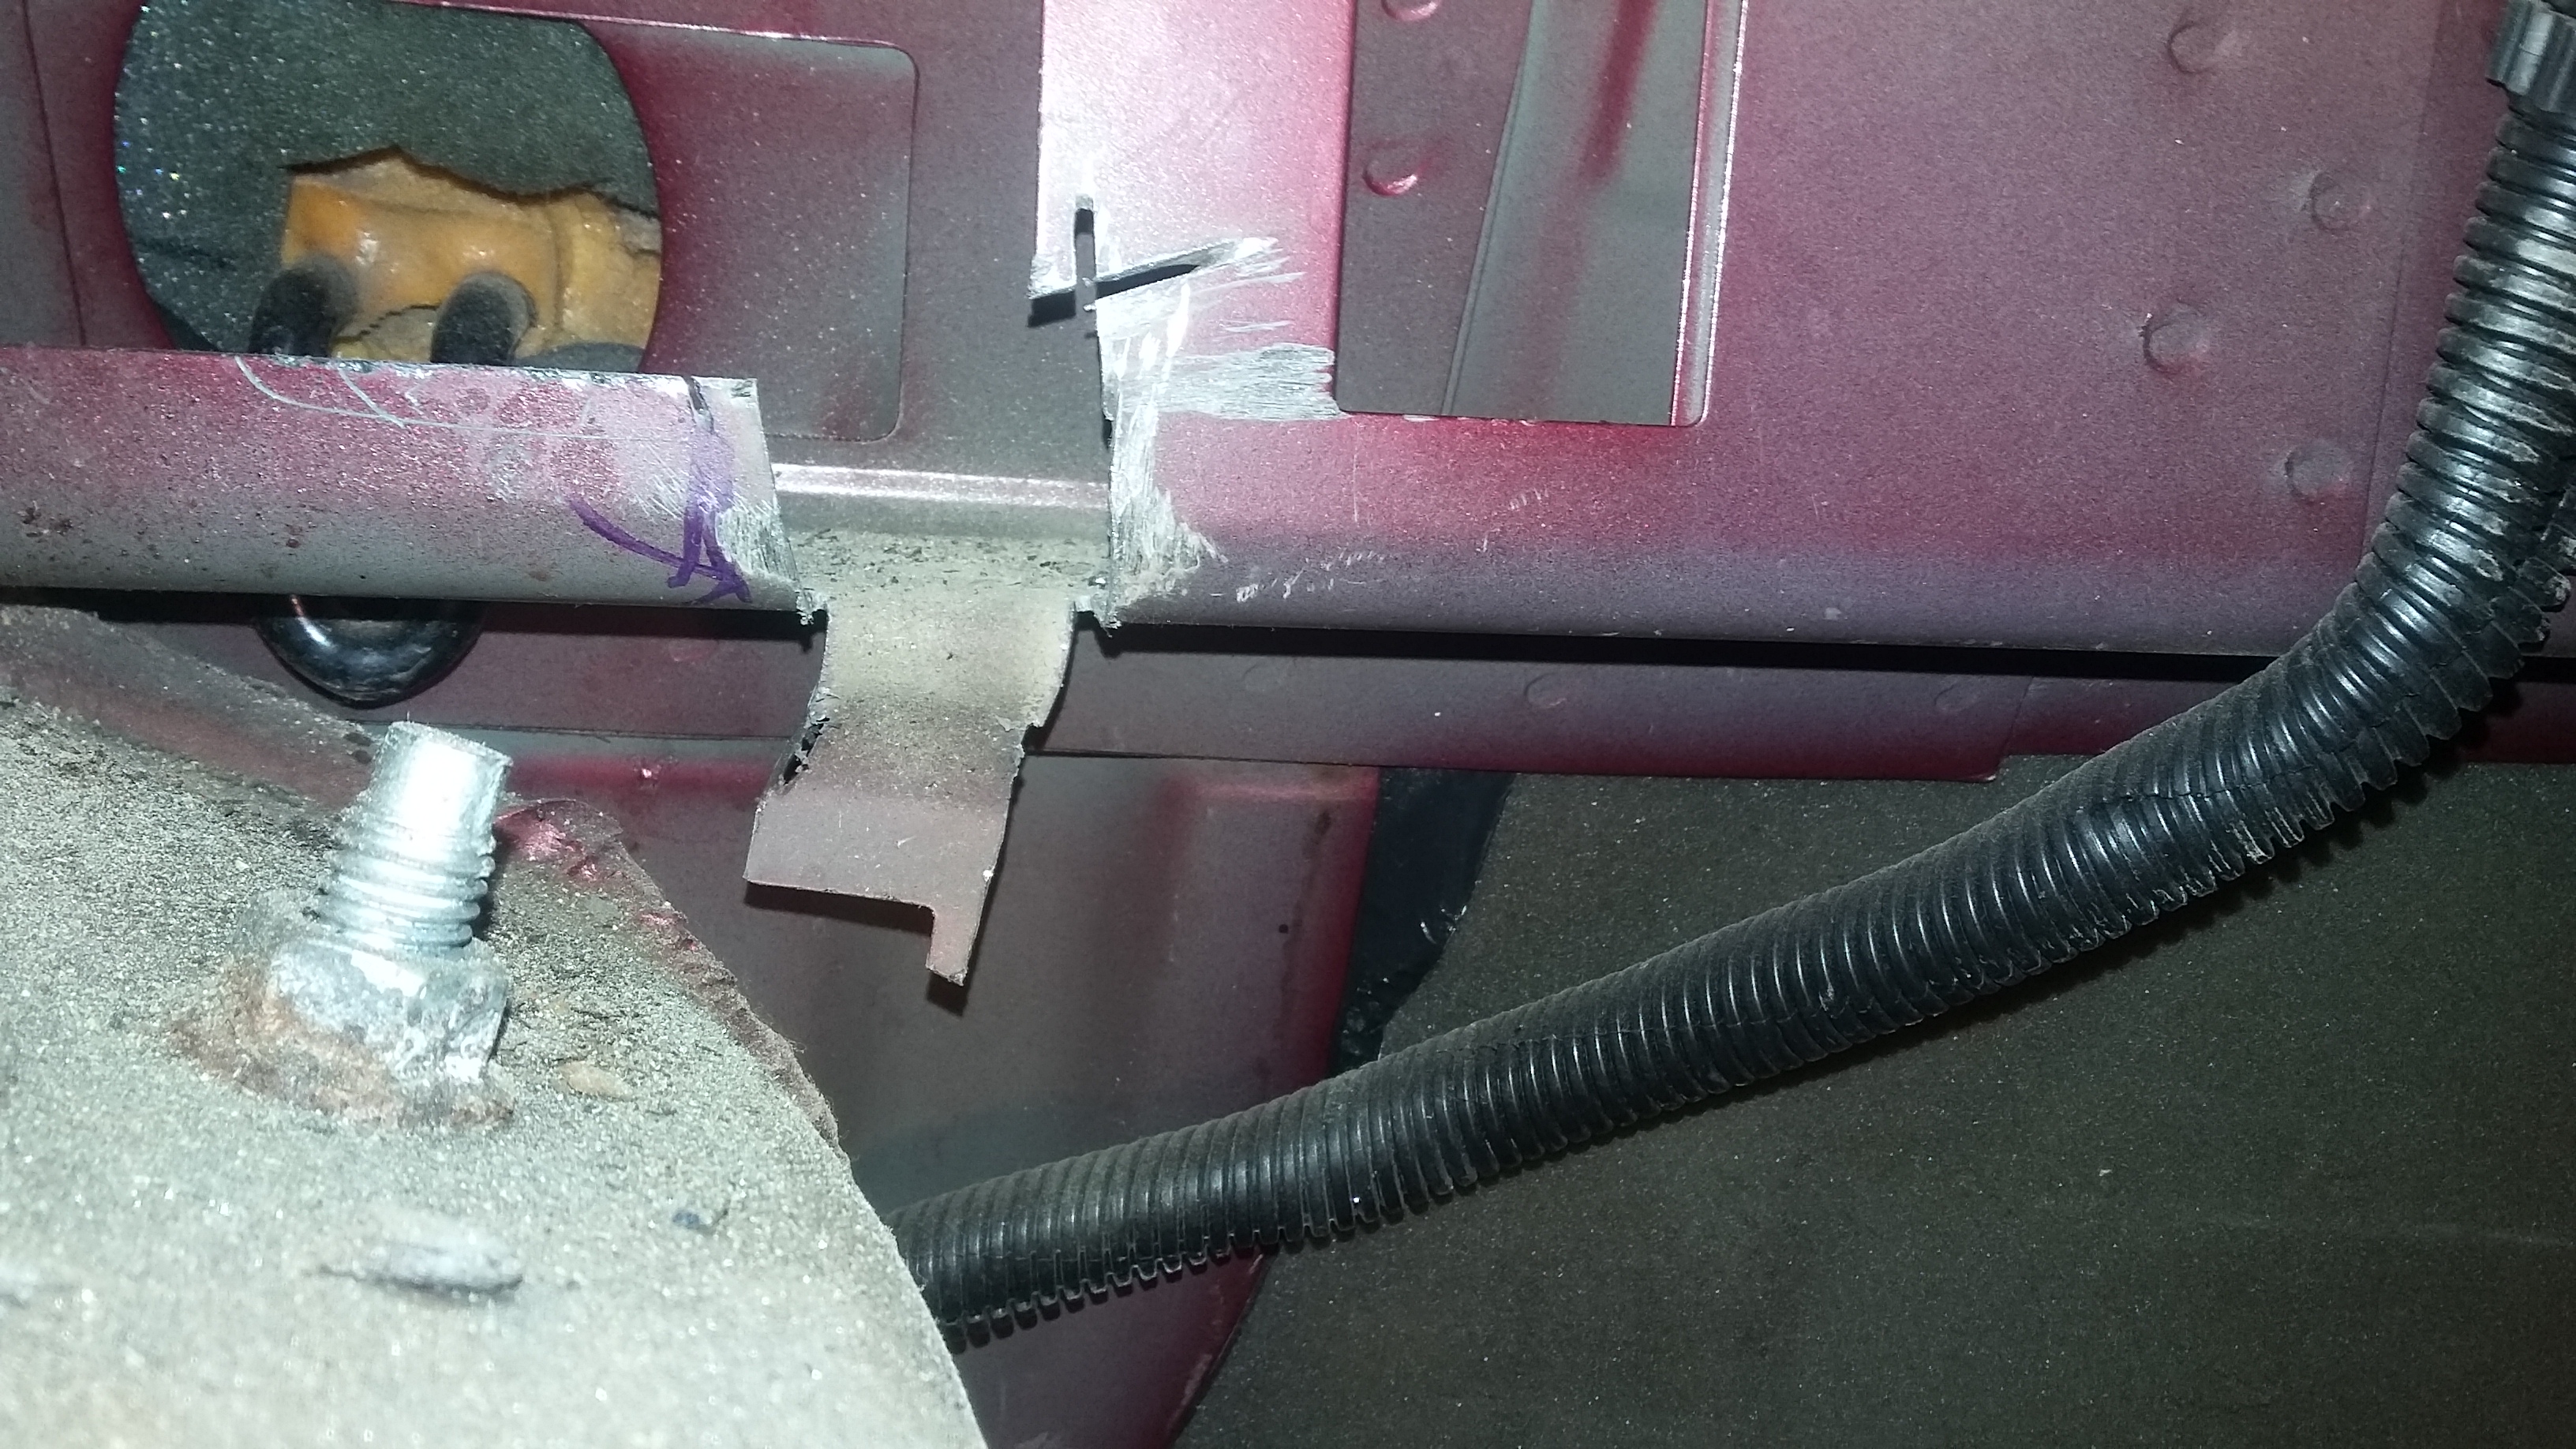
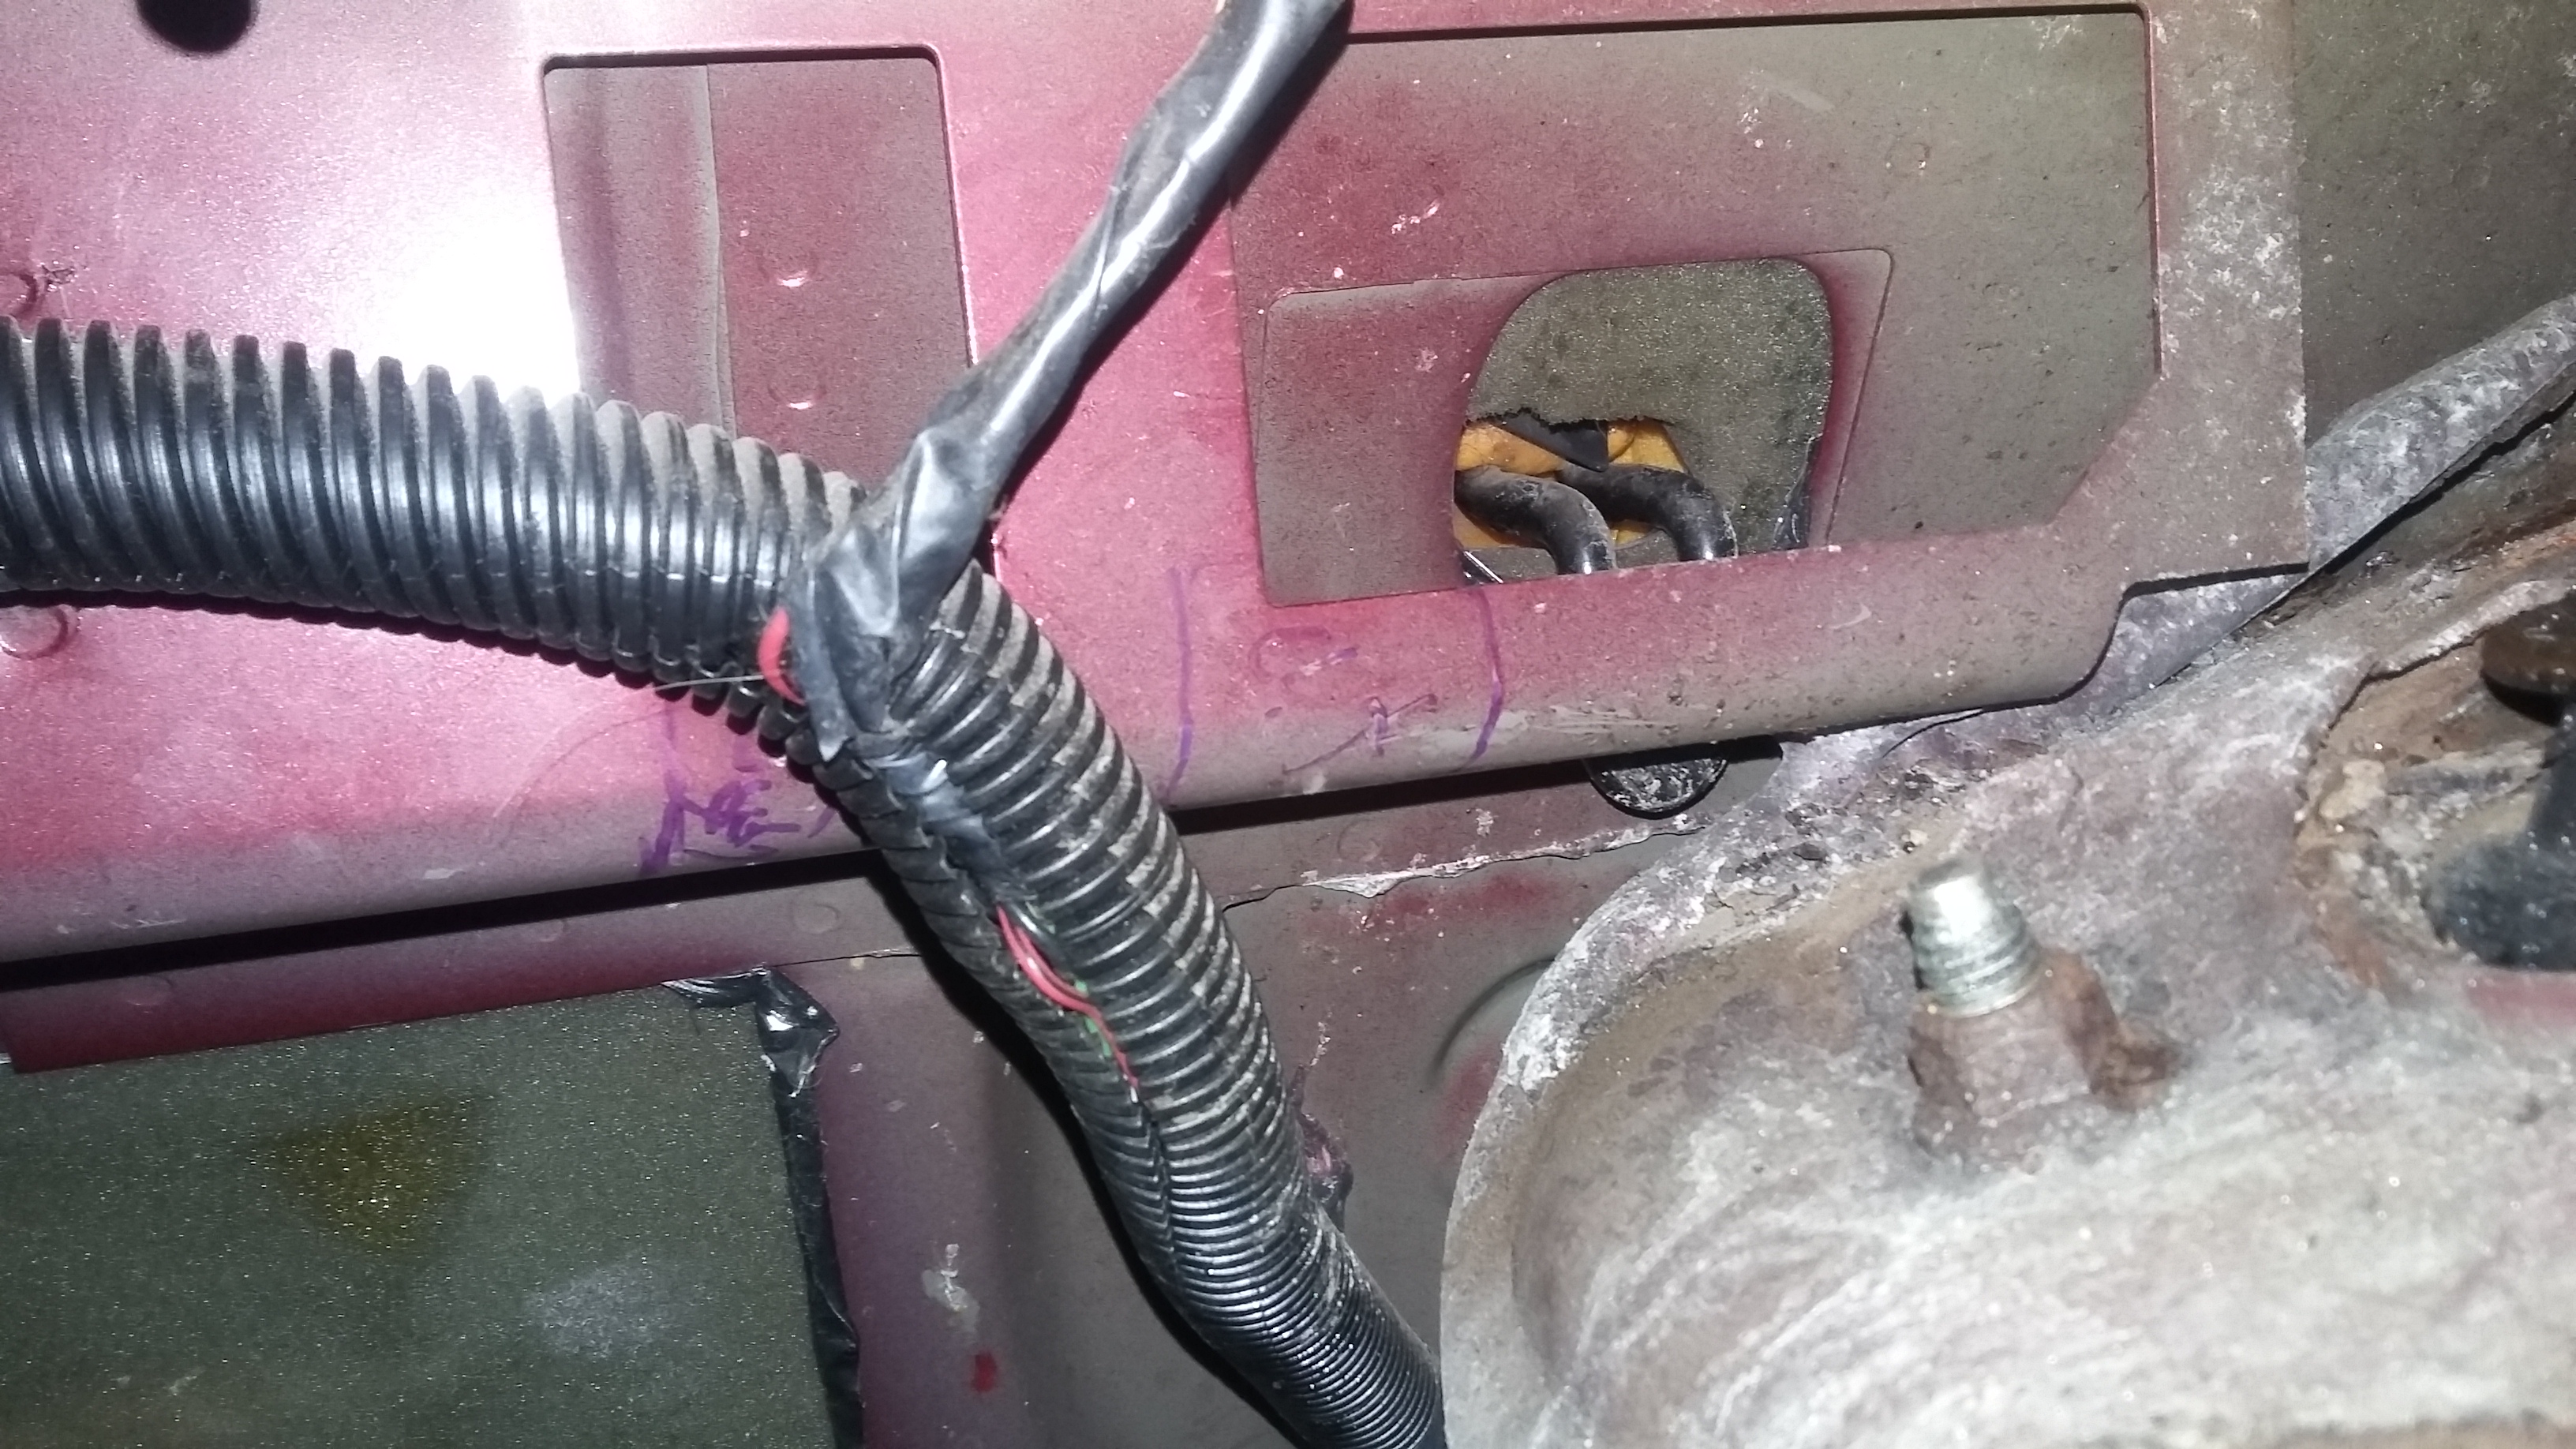
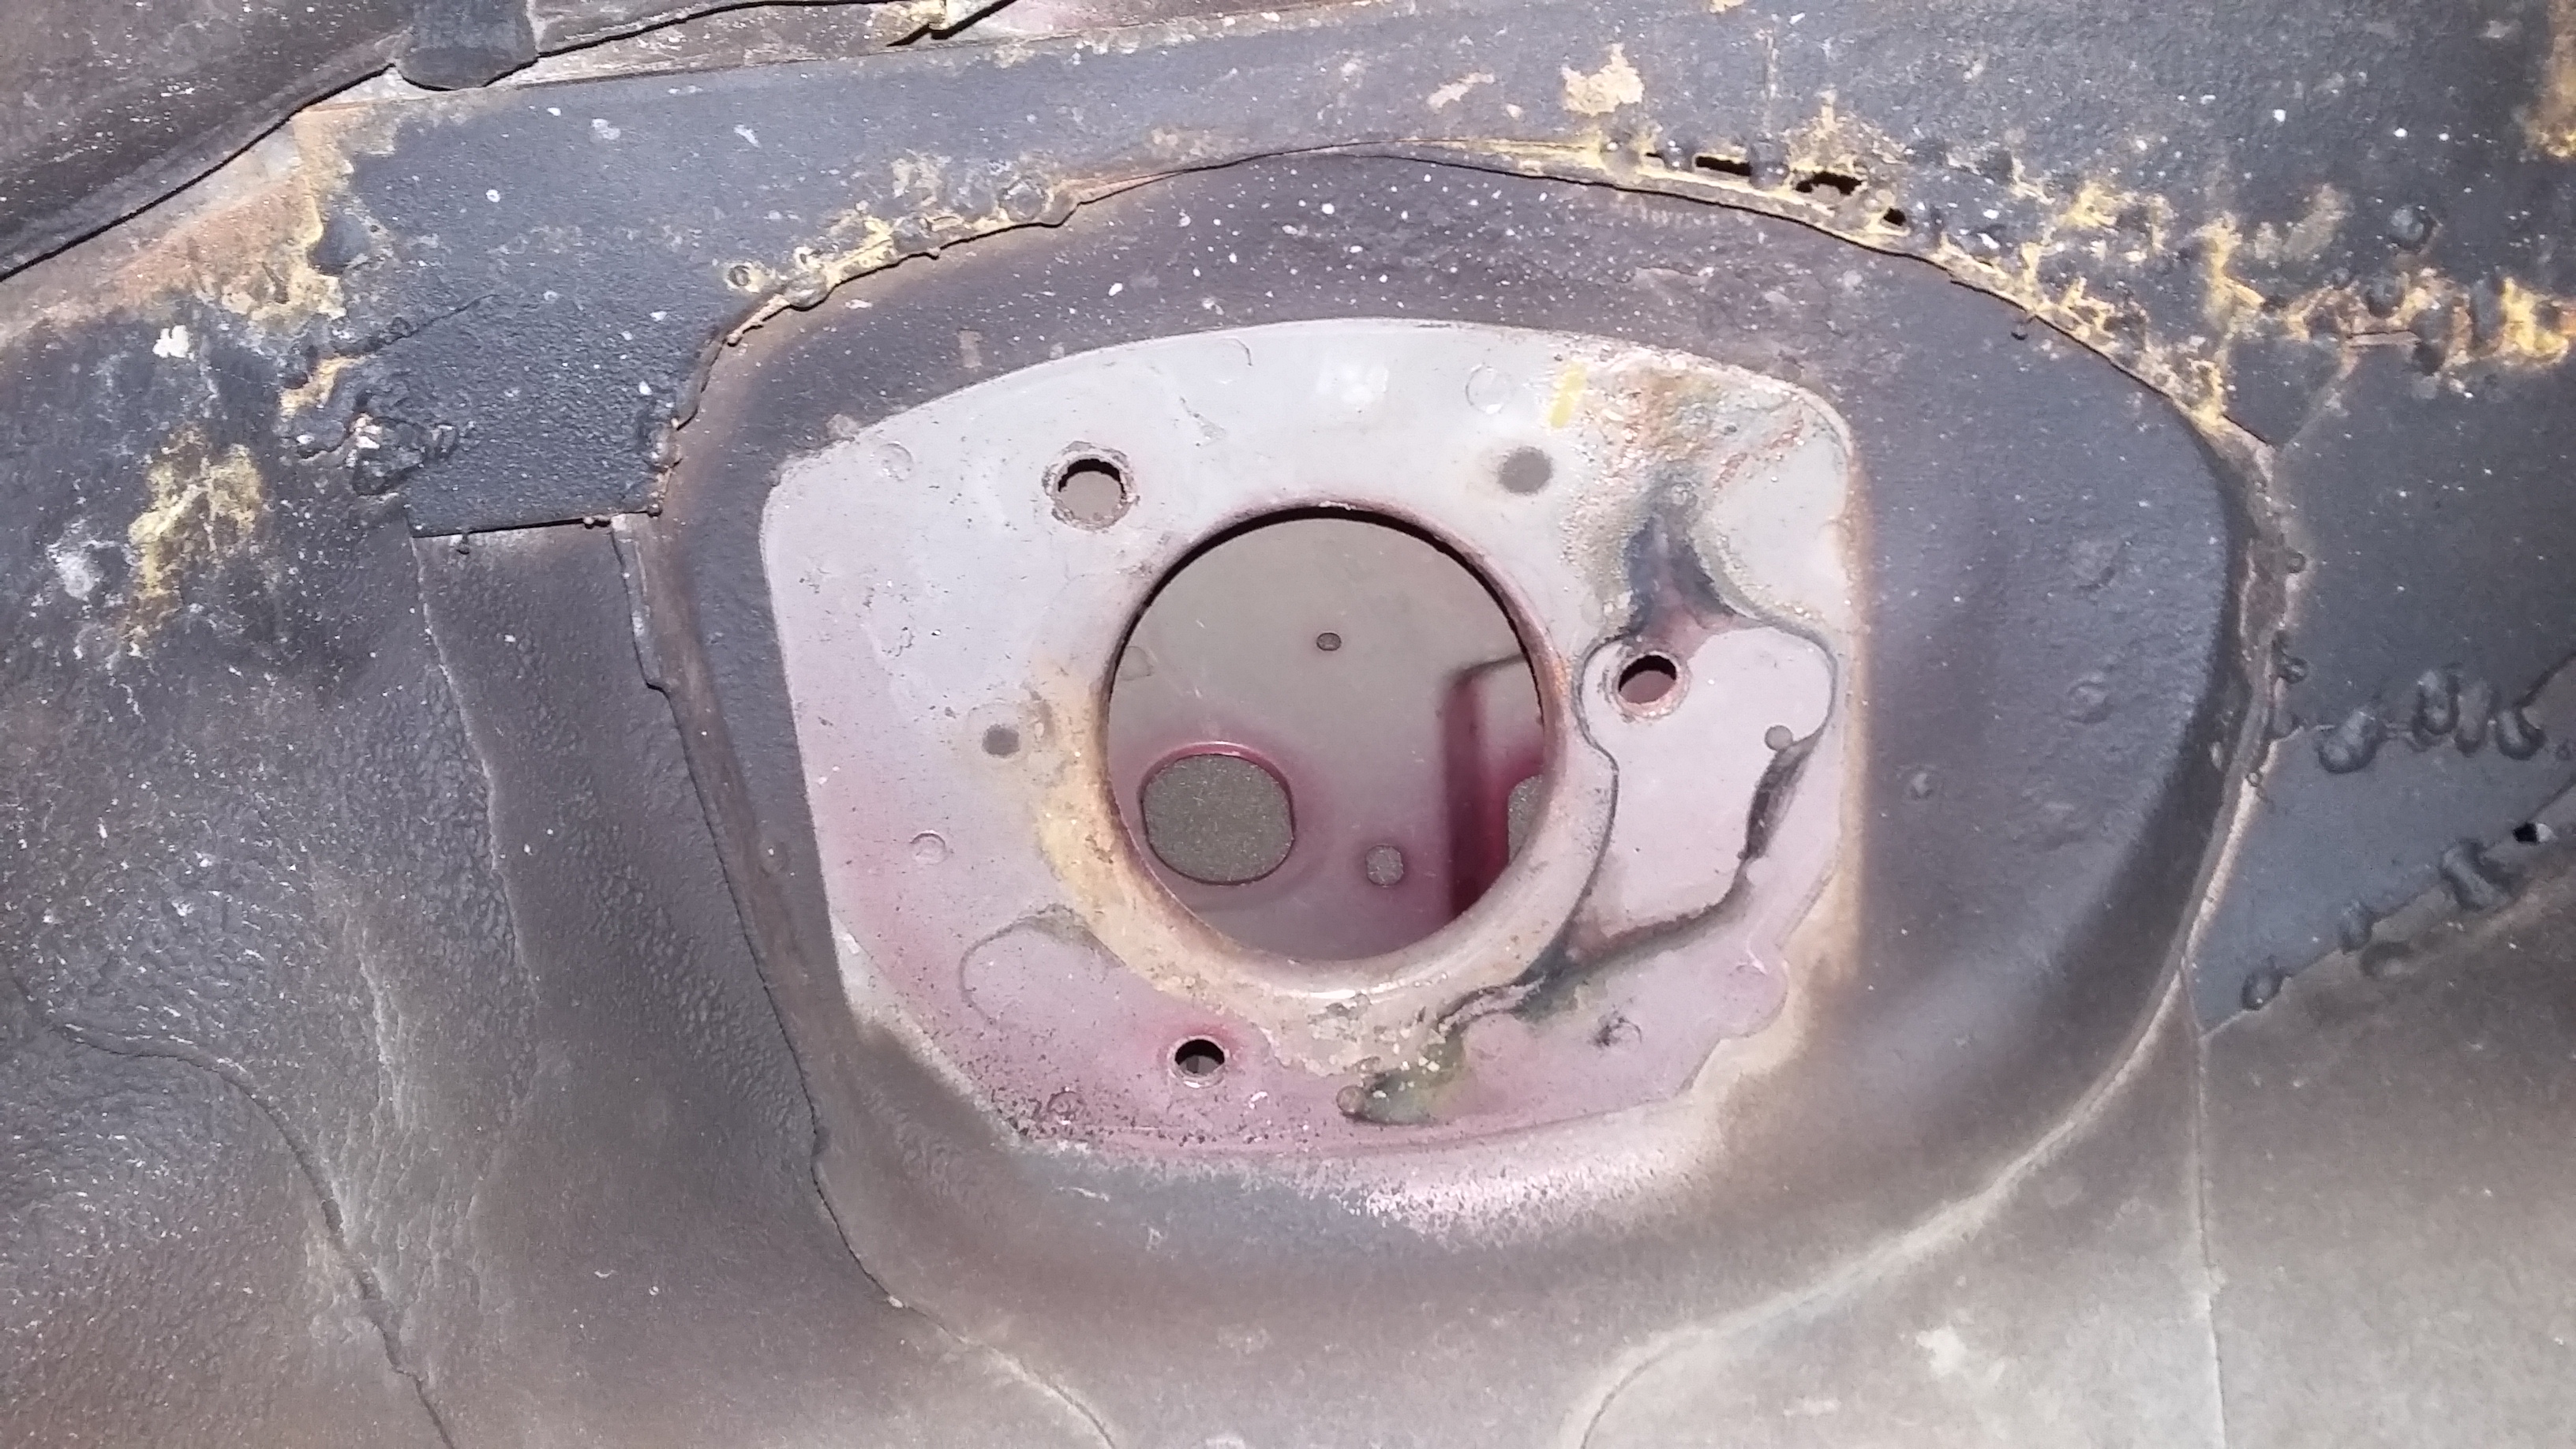
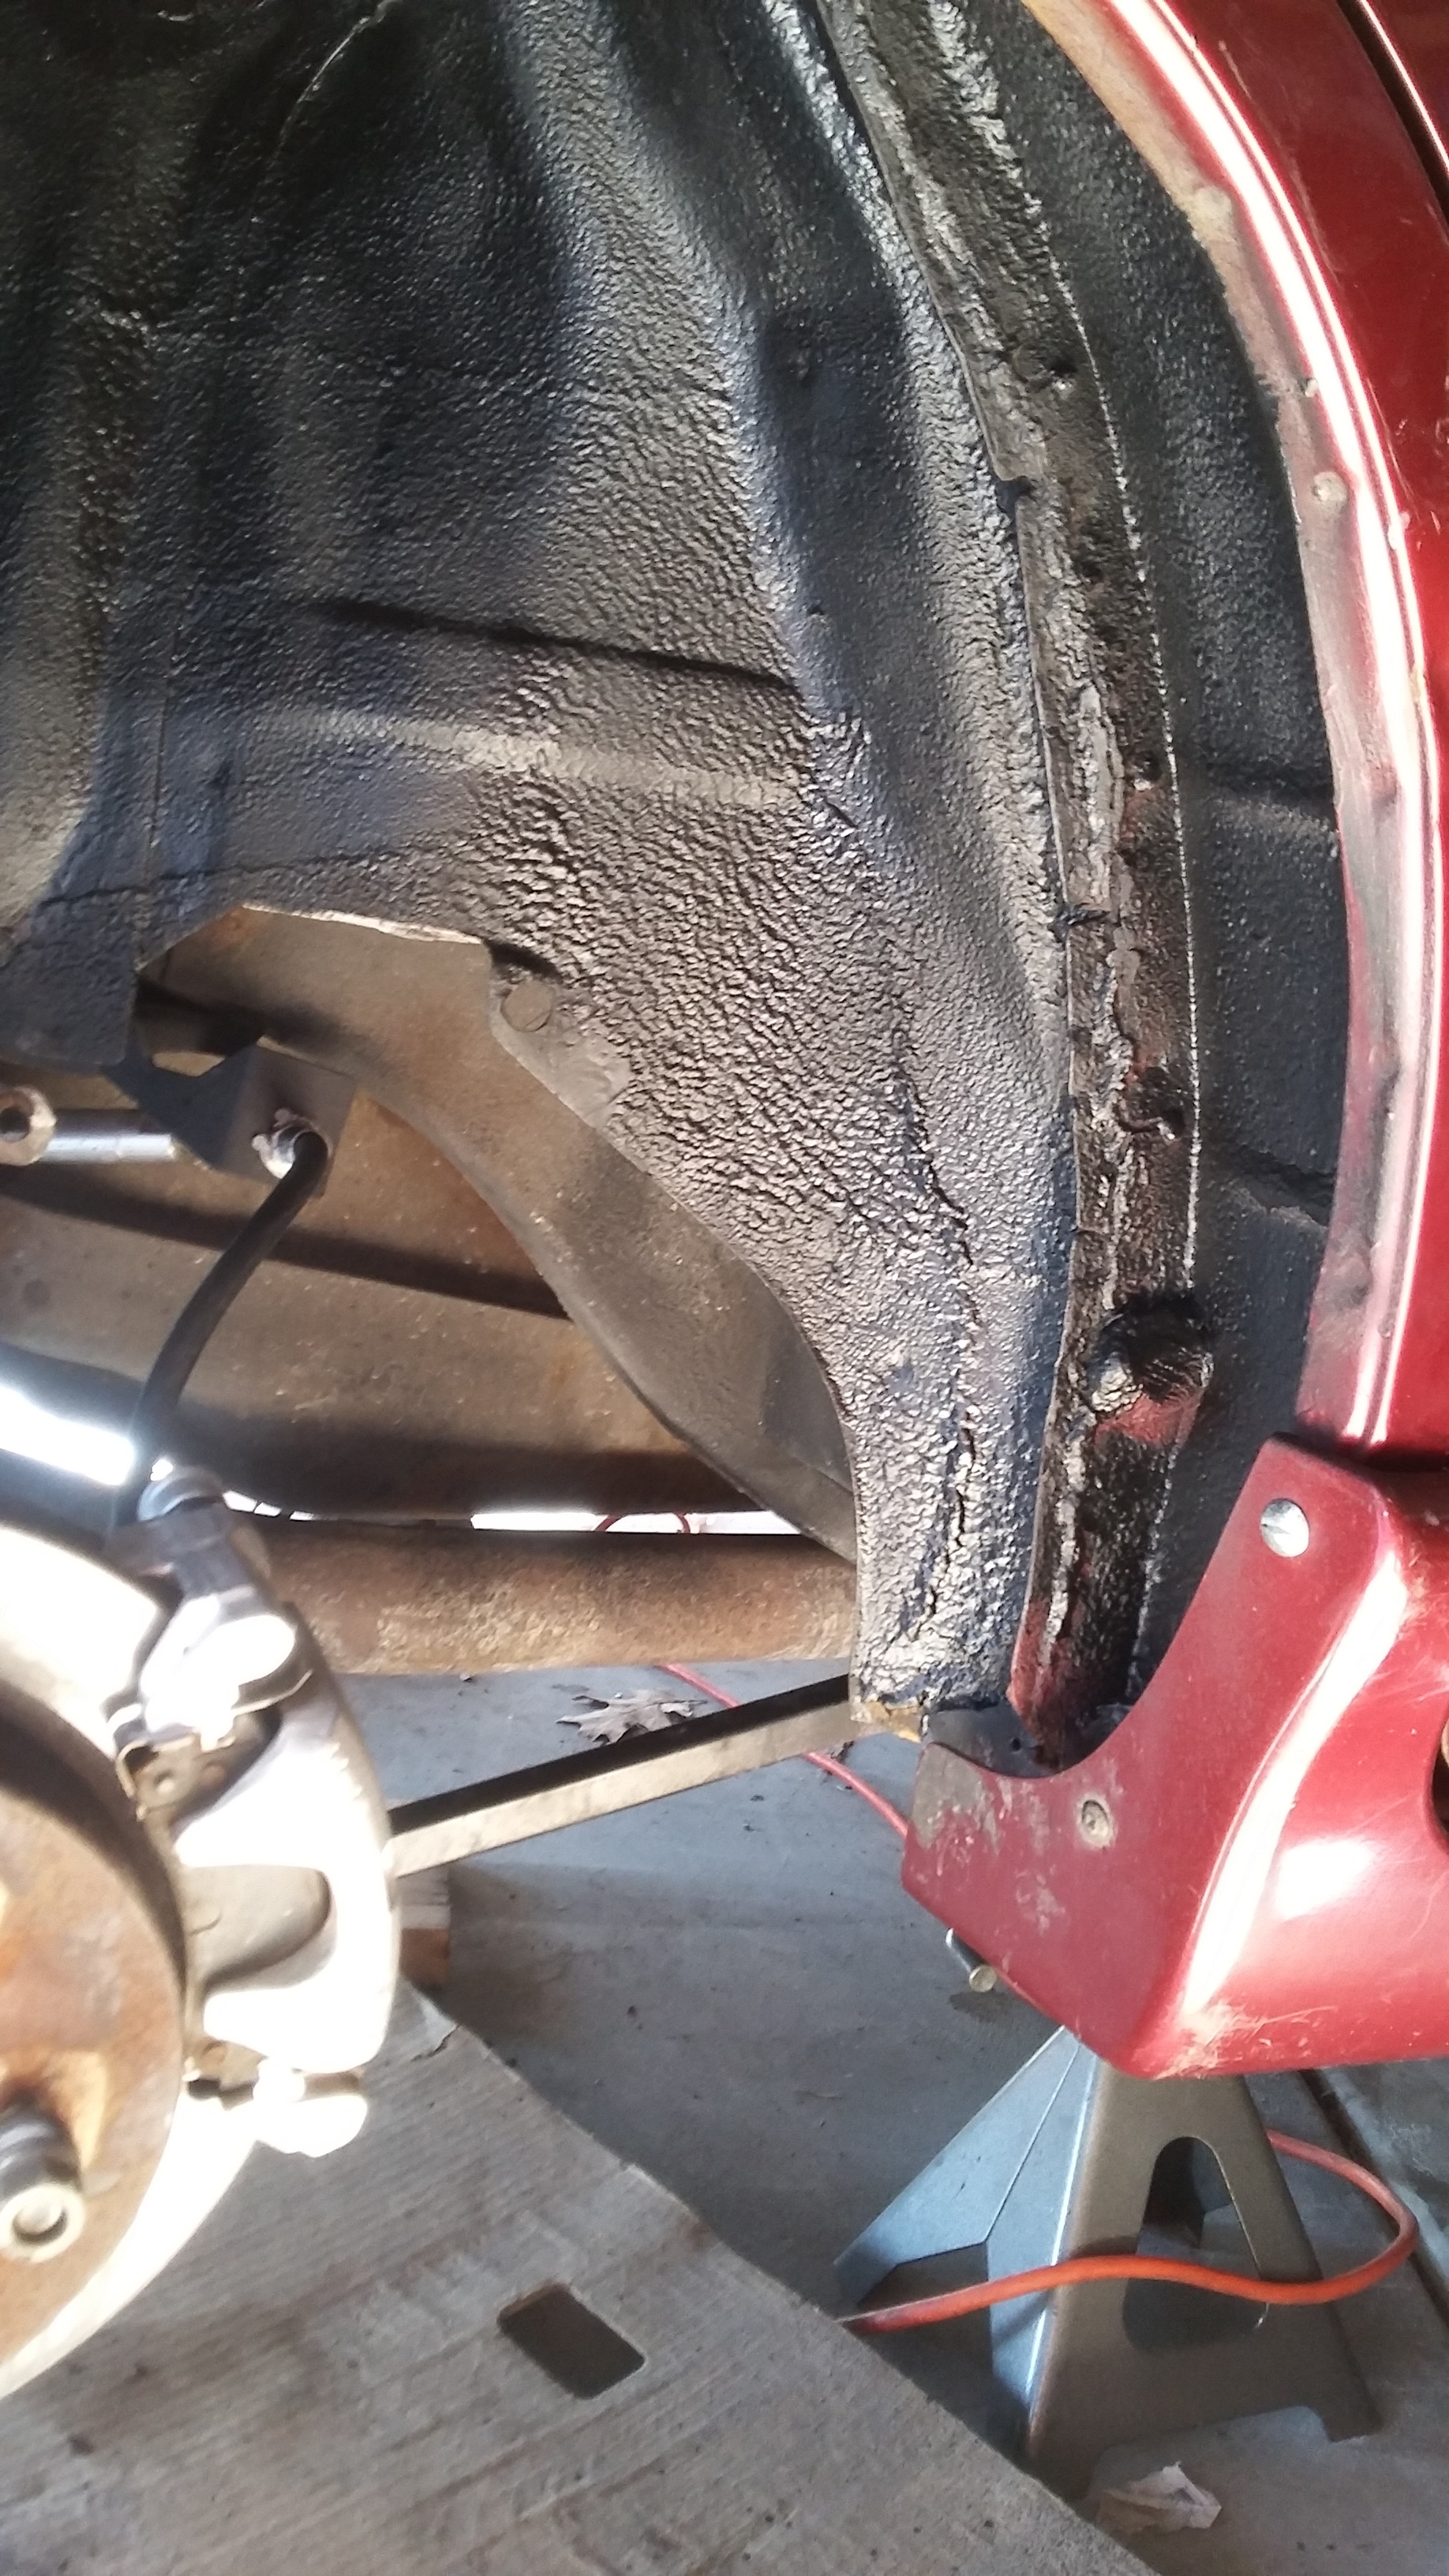
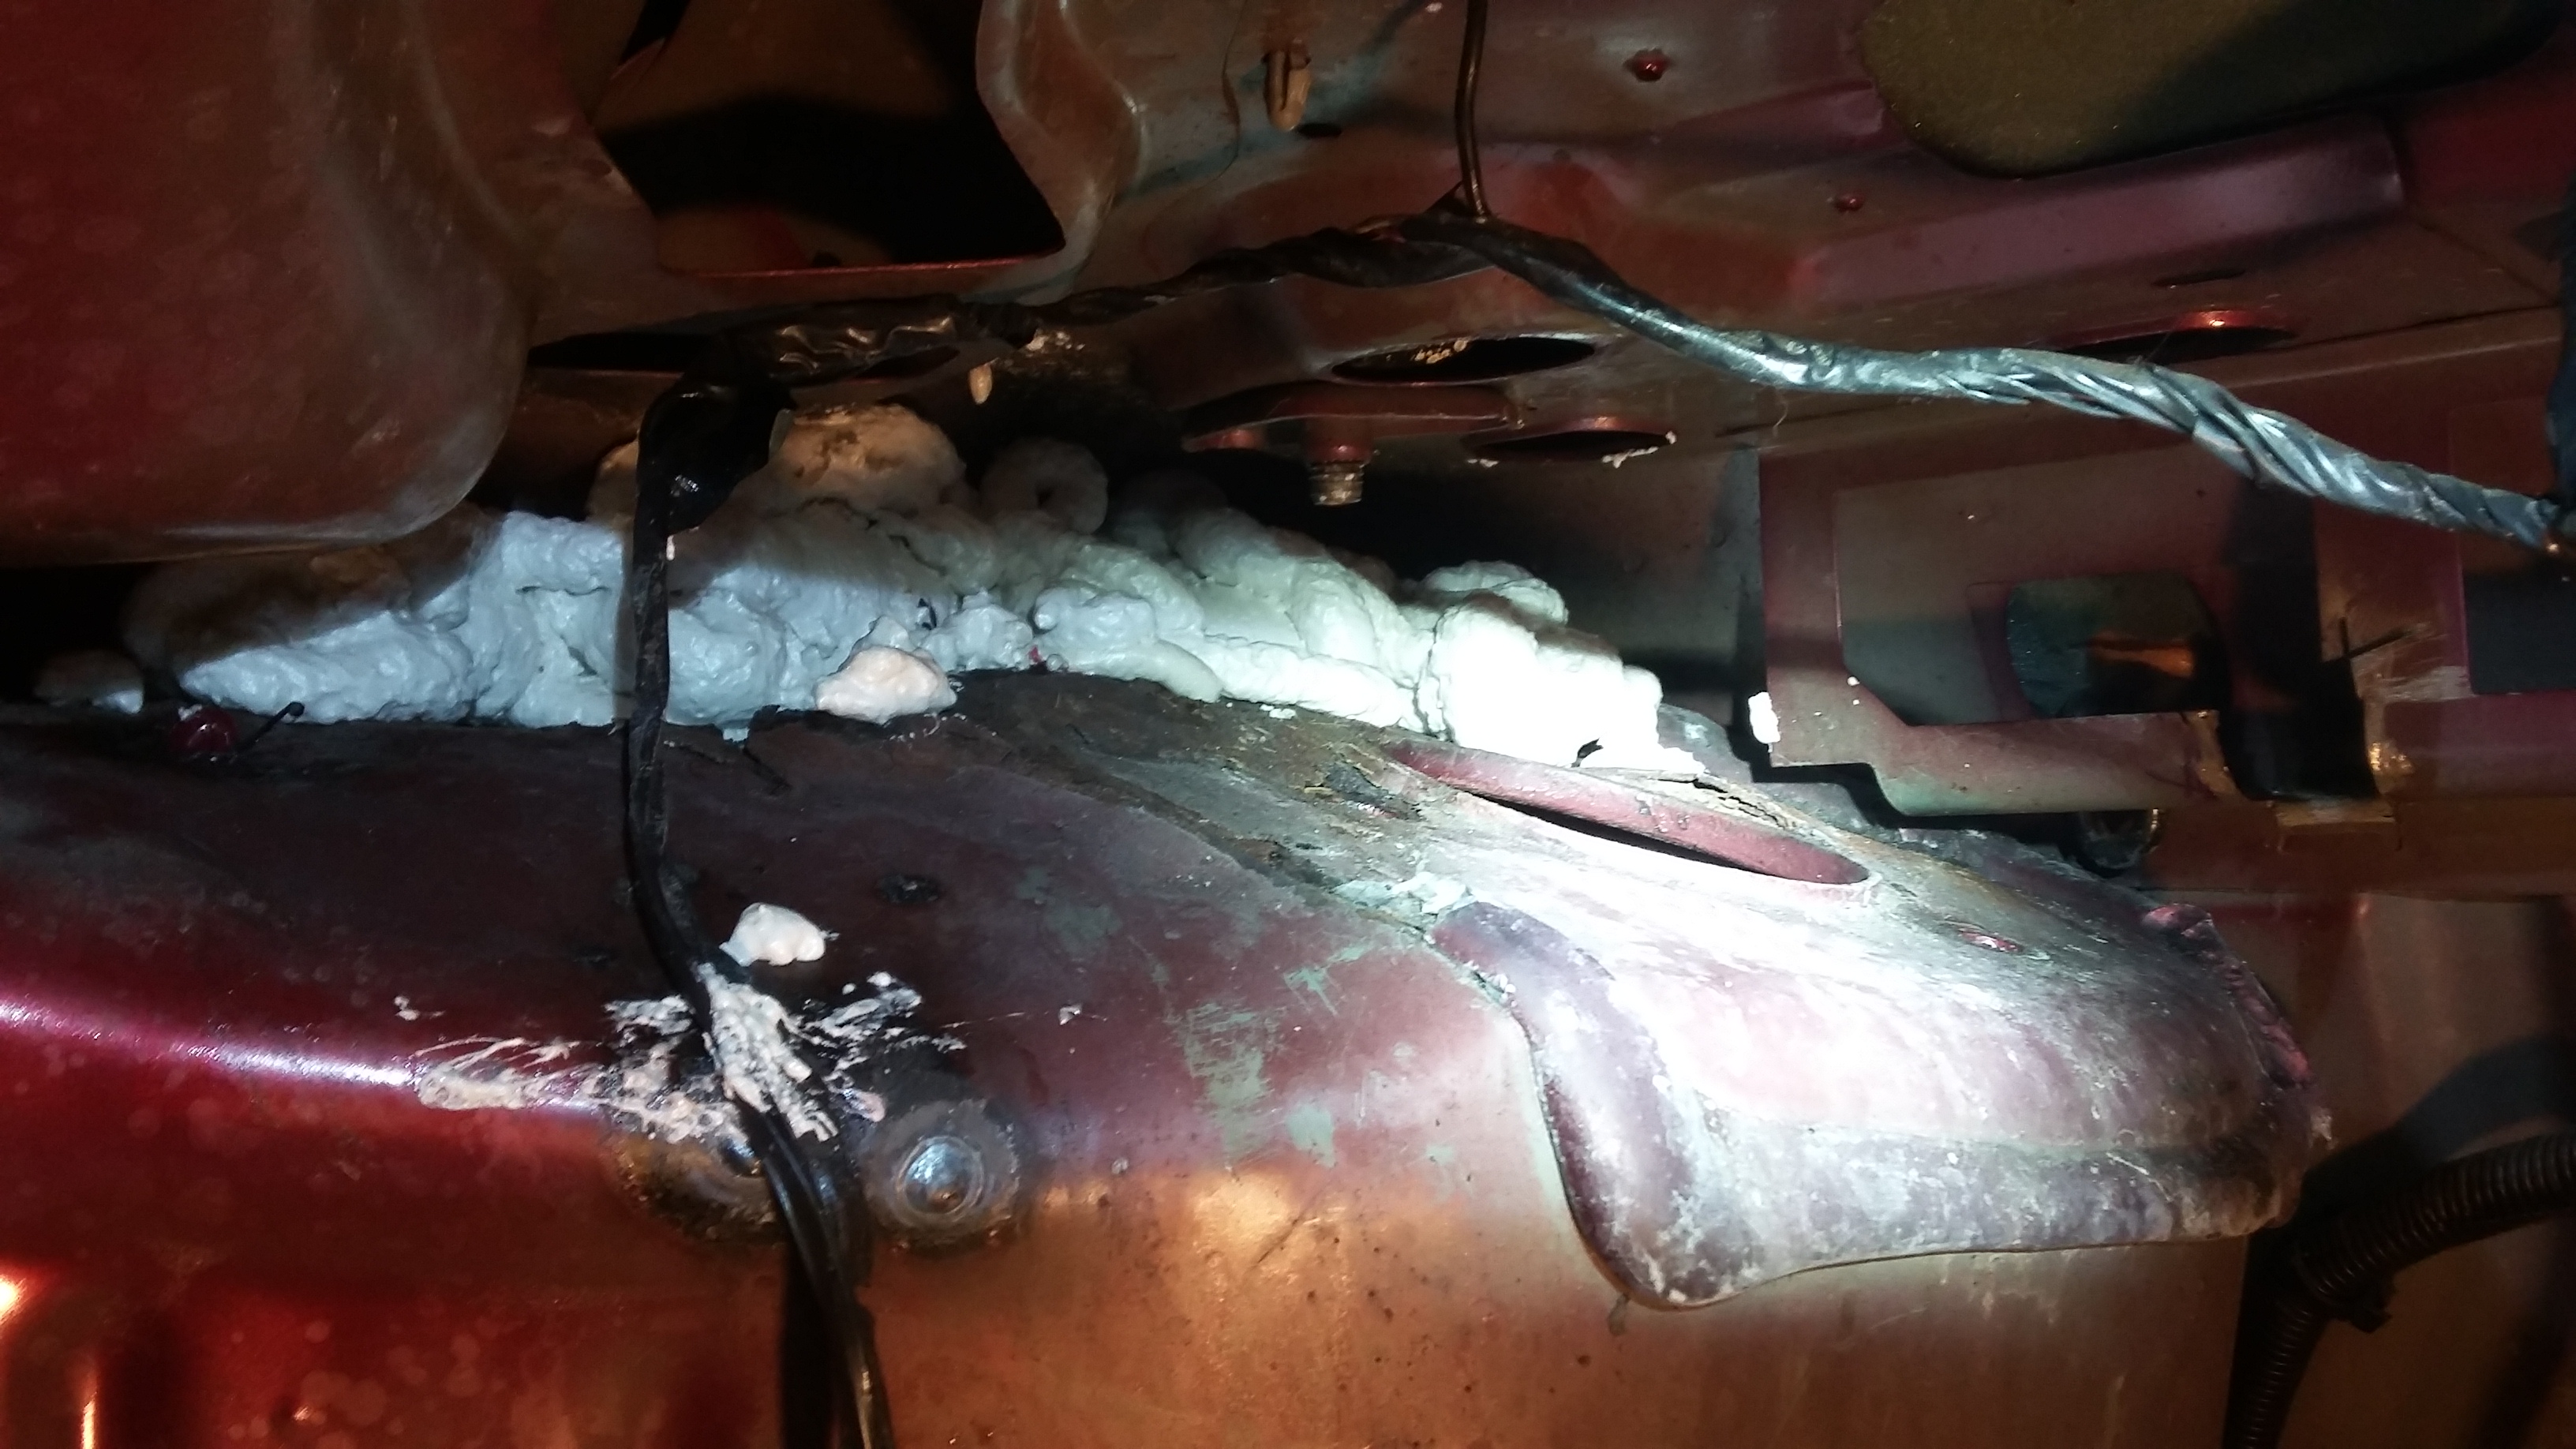
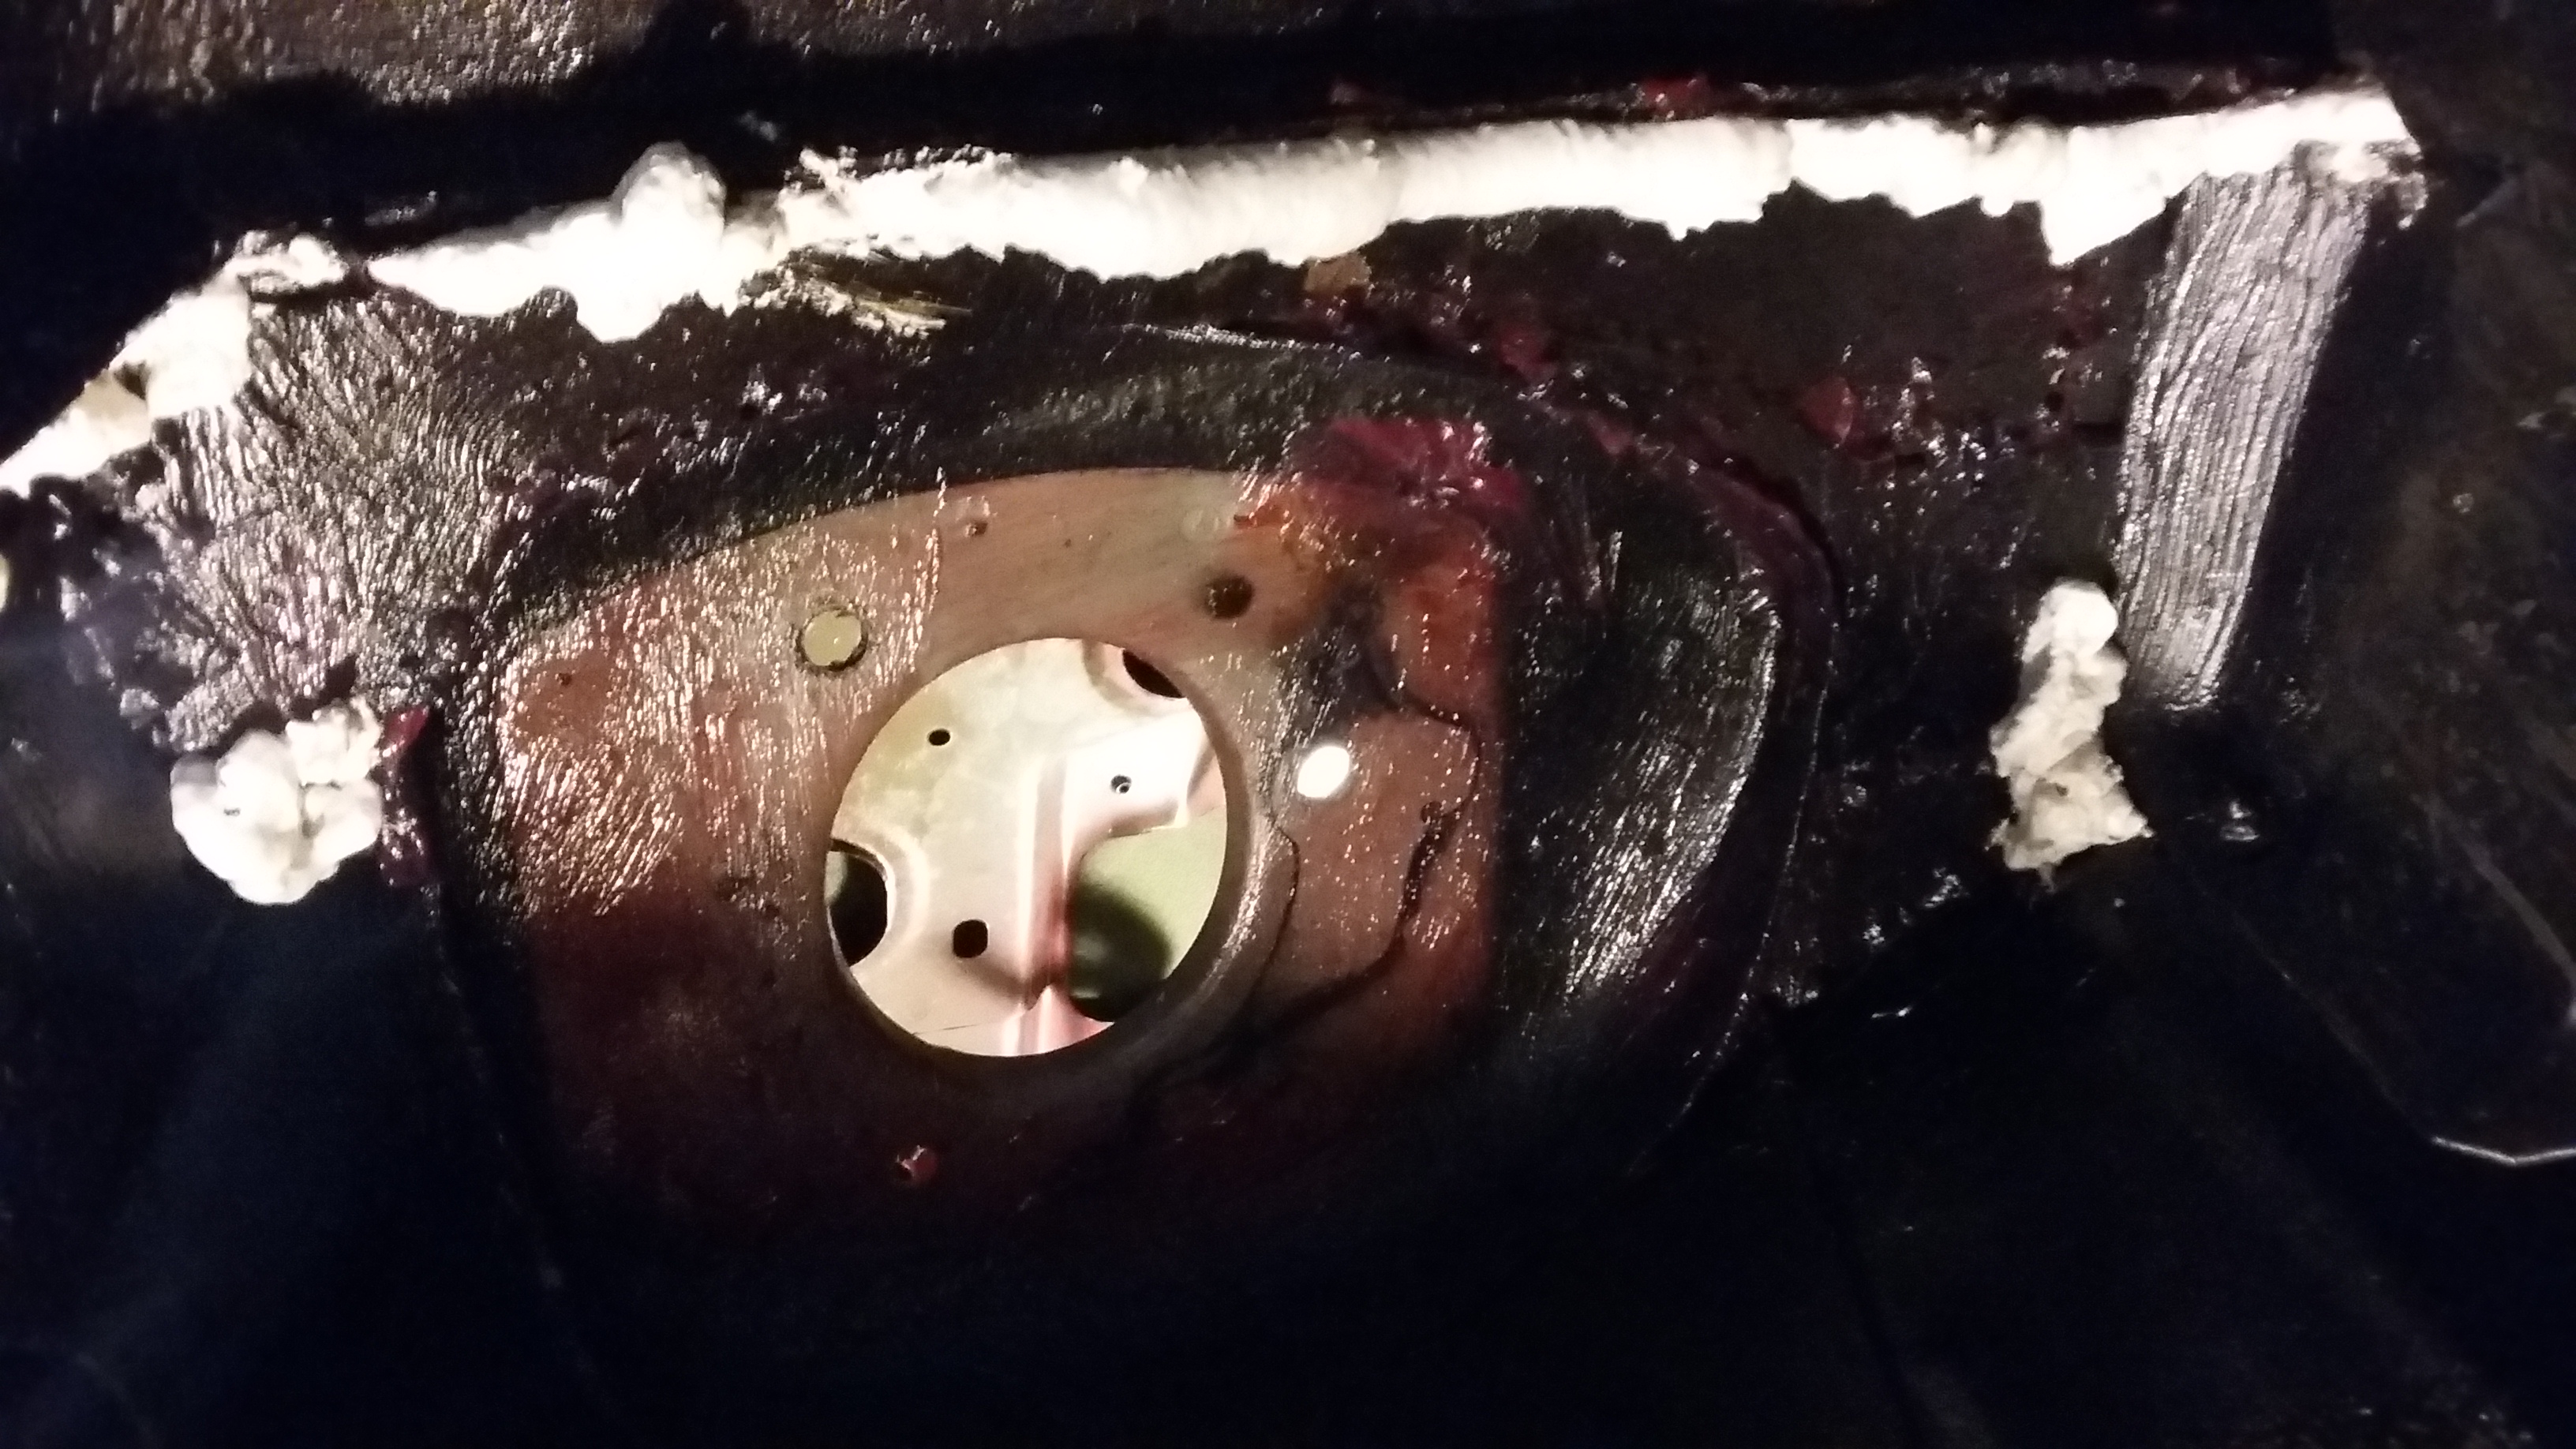
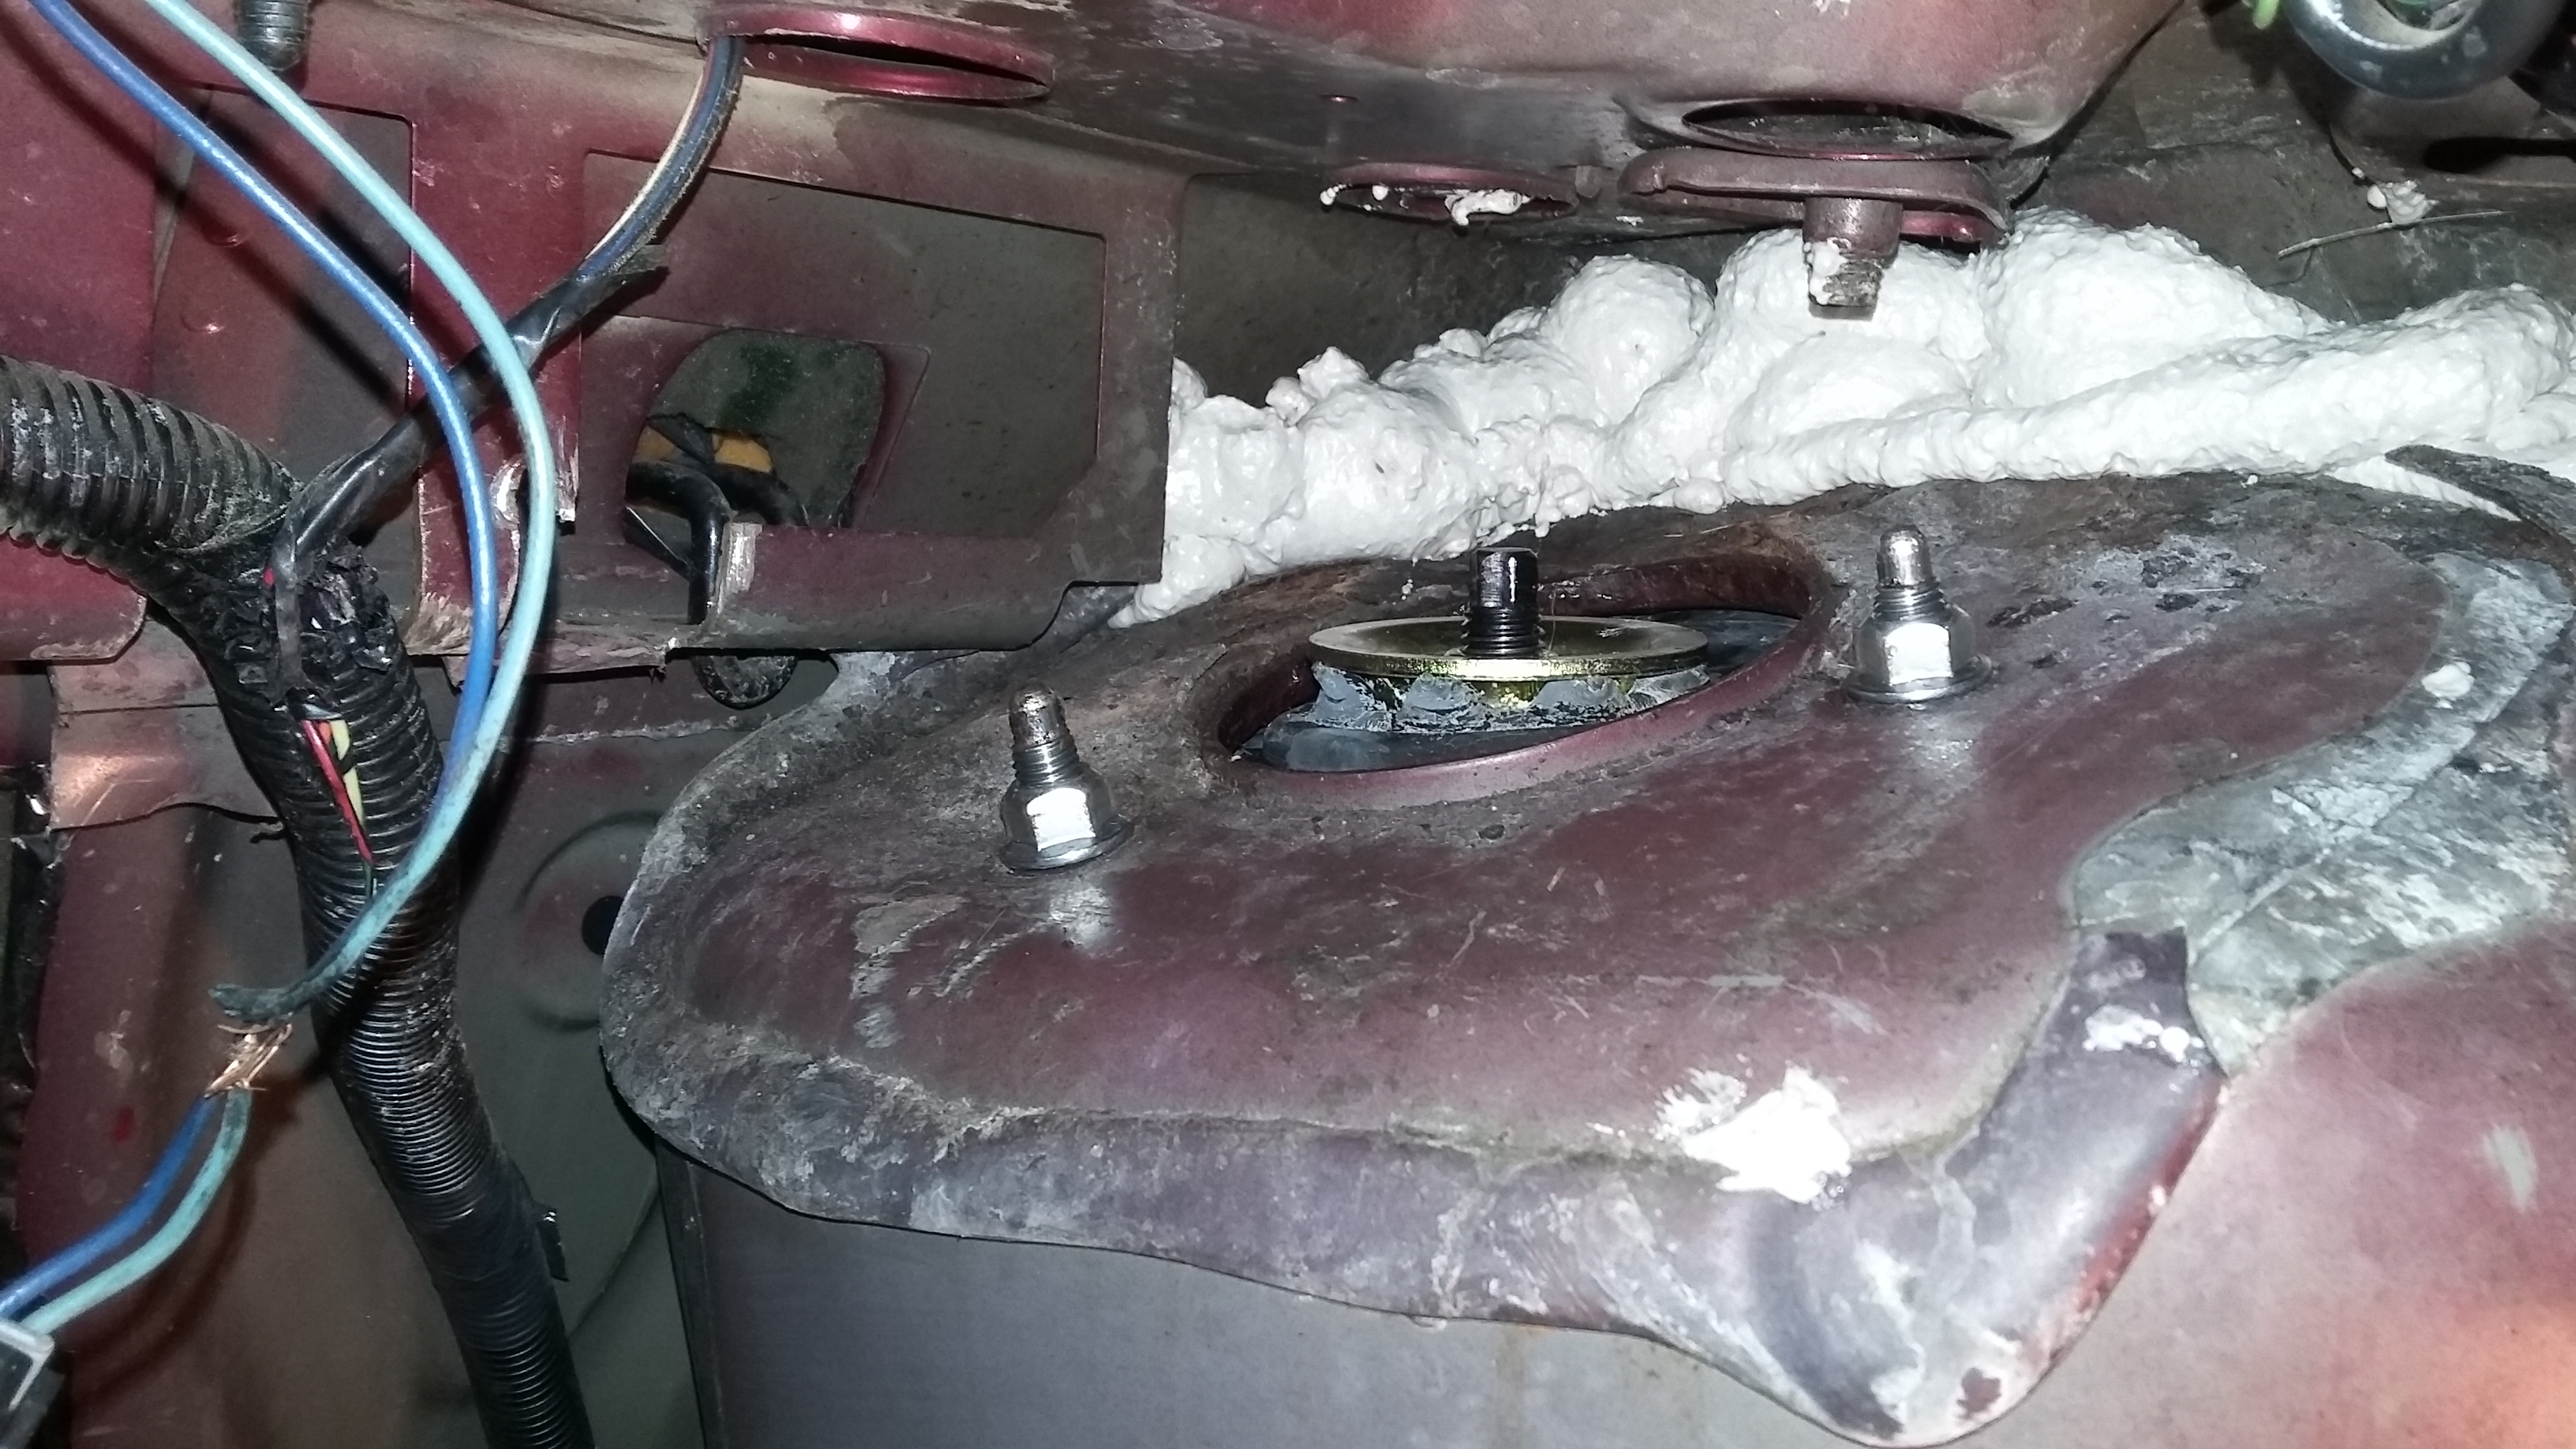
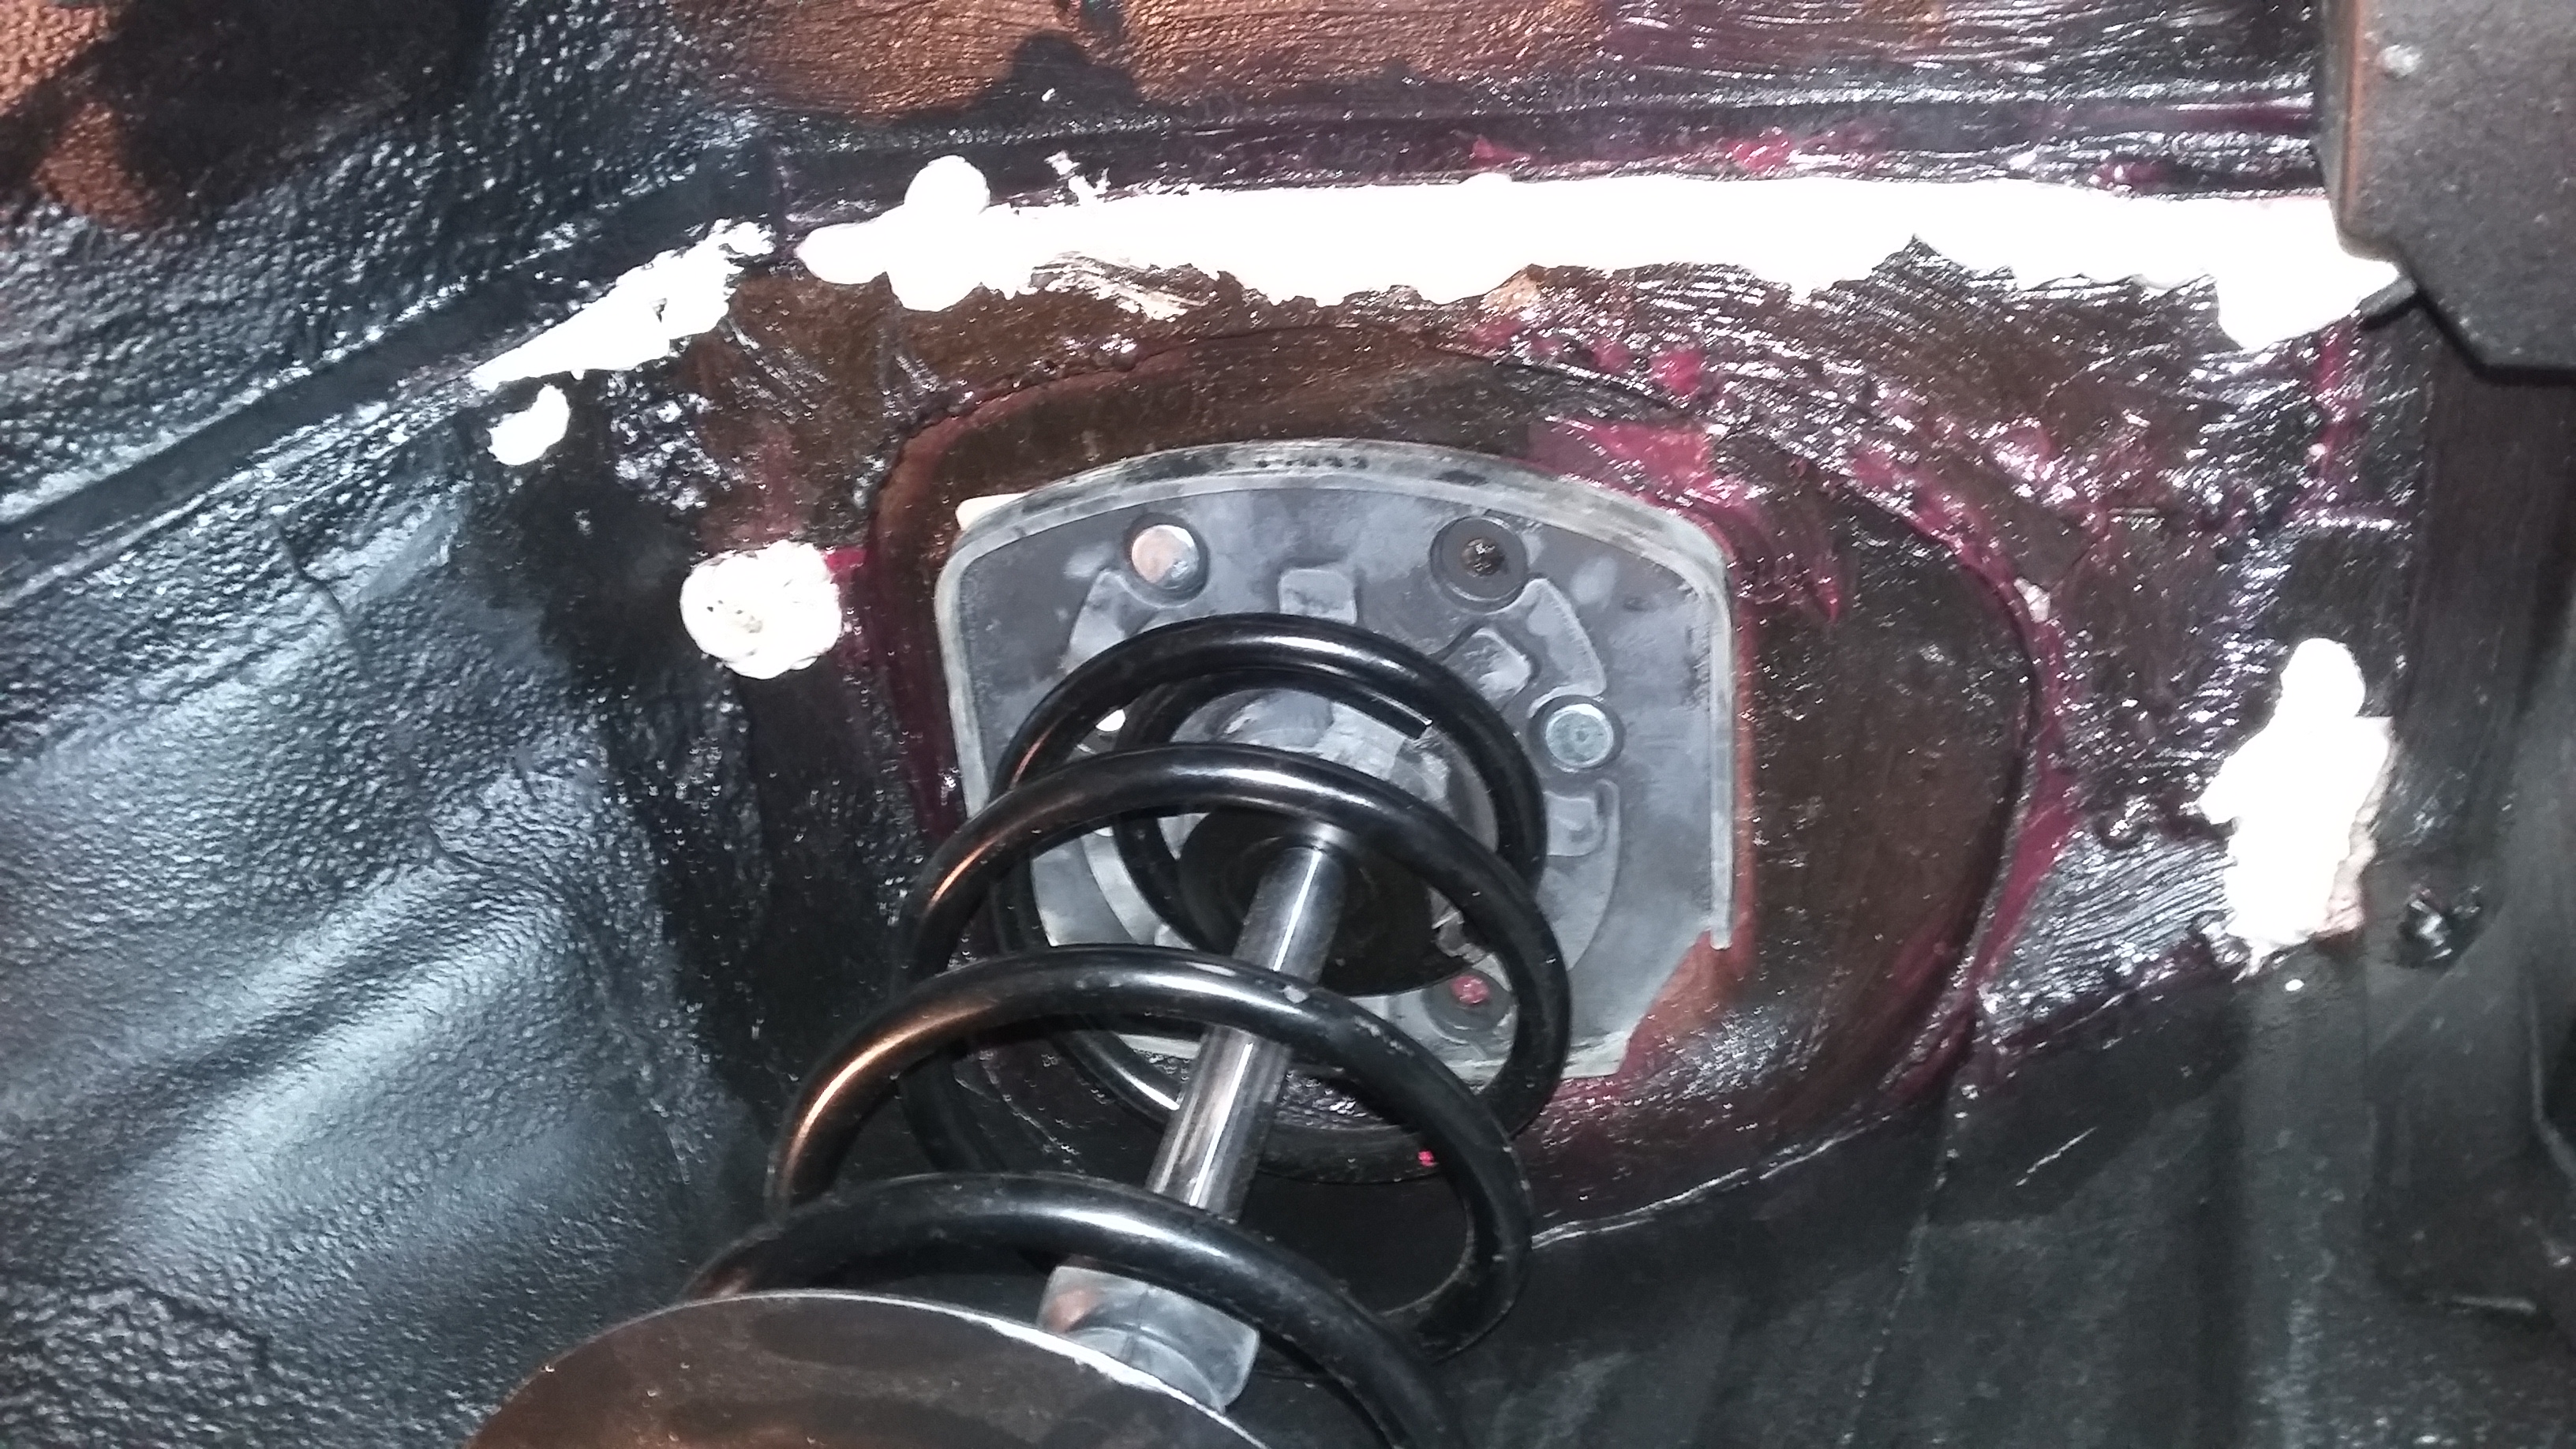
Dude those inners are toast. Now I understand the $1200 you got billed, he did what he could with what you gave him it looks like. The fact that the outters are not even attached to the inners though........... there was no point in even doing the outers, there is no structure there. To rebuild those inners would have been $$$. Compared to mine it looks like I had alot more metal to work with

845c34952297dde7b78f421f7eb964f6 by Corey S, on Flickr
61316b048699f207524cd6476af2bb7e by Corey S, on Flickr
c452d3bd0c9bd3ef87a0e7f32ad560a9 by Corey S, on Flickr
d25e08b69c90cc5b60ceea6b25ea12f6 by Corey S, on Flickr
dcb0eb3d9c8899bcddf3dd1fac0efc82 by Corey S, on Flickr
de4f23e50b5a96bf9d1a2273c82ca458 by Corey S, on Flickr
mske by Corey S, on Flickr


He told me he couldn't attach the inner and outer rockers cuz the floor pan was too rusted to weld to. Looks to be true but not sure he tried hard enough. I wish he had cut out the old rot a little bit better. A lot better really. Strut towers need some help. Sealant and some sort of expanding foam at the very least. Maybe I'll get 2 years out of them. All a little depressing to be honest with ya.

Your rockers were done Pro style looks like, and with some love. Mine didn't get that treatment. People were surprised how little I paid for all that, and shyt, that's what I got. I'm gonna get a second opinion from this other career welder I know. I had posted his business card in this thread somewhere. In the end though, Im likely gonna have to get a rust free shell in a couple years or so...
 
Drove the car to the mechanic to get the trans cooler lines replaced. I provided the parts, Just needed them to do the labor. Happy I did too cuz I didn't wanna deal with using a pick to take off those bent up metal clips, and deal with trans fluid pouring out. They got the job done. No more leaks.

On the way to the mechanic, I was hearing a rubbing/thumping noise coming from the back. Arghhh!! Now what. Turns out the super cool braided brake hoses I got were still rubbing up against the rim. Actually rubbing up against the weight on the inside of the rim, to be specific. I've already adjusted them for the rubbing once, maybe twice now. I don't know. Anyway, fukk it, went out and bought OEM rubber hoses from OReilly's. Fit great, no more rubbing. Had to bleed the brakes again too, like 5th F'ing time.

Front end has a clanking noise when going over small bumps. Trying to chase that down. I've seen a few posts about that same problem on here just recently from others. All the bolts are tight as can be, and everything is new, so hard to say. I didn't check the ball joint crown nuts because they are a pain in the ass with the cotter pin there, and barely enough room to turn a wrench. I remember telling myself to tighten those down good when putting them in.

The clank isn't that much of an issue and I can't keep it curbed much longer. Hoping to do emissions this Saturday and get the carpet in this Saturday. Anddd anddd ,,,, yes. Start driving the bishh while I finish up with the BMR braces and cone intake. Then, I wanna install the Aeroforce I bought from PurpleGuy a while back, figure out how much knock I have, and send my PCM to Scotty for a tune. Scotty, it that cool with you? Is that something you can do?


Passenger side hose:
20180318_164849.jpg


Drivers side hose:
20180318_164904.jpg


OEM Hoses:
20180318_164951.jpg
 
Worked on the turd last few nights. Finally got to installing the parts I got from [MENTION=45]Handsome Jesus[/MENTION].


Front brace was a cake walk. Obviously. Looks good. On there nice and tight.


20180404_201848.jpg


20180404_201857.jpg


20180404_201907.jpg


Rear brace was a No Go for now. Couple problems.
1. The rust has made the metal swell up, and the flippers on the ends of the braces don’t quite lay right. My rust issues are well documented, so I was expecting some trouble. I didn’t expect it top prevent me from installing them completely. SMH. The solution is longer bolts for the strut mounts.
2. The bolts that are on the braces protrude so much, that I couldn’t even get the braces to seat correctly onto the bolts. Had to cut out some of the metal rail in the trunk.
3. The head from one the strut mounts bolts, on the passenger side, straight sheared off. Needs to be replaced. I’m guessing it was weakened during the welding. That entire strut needs to go though. It’s leaking fluid at only 5,000 miles new. Again, I’m guessing it was damaged from being overheated when the welding happened.


20180404_201848.jpg


20180404_201857.jpg


20180404_201907.jpg


20180404_202002.jpg


20180404_202027.jpg


20180404_202059.jpg


20180404_202209.jpg


20180404_202147.jpg


20180404_202448.jpg


20180404_202230.jpg


20180404_214642.jpg


20180404_214612.jpg


Okayyy. Moved on to the intake. Air box removed. Sizing things up... Clearly have some metal to be cut out. Filter is used and beat up on the outside, but looks good on the inside. I wanna be cheap and just re-use it.


20180404_225319.jpg


20180404_225341.jpg


20180404_222154.jpg


20180404_222206.jpg


20180404_222211.jpg


PCM laying its new tray from a ’92 Blazer:


20180404_225207.jpg


The monkeys that did my trans lines didn’t tighten the 13mm bolt and bracket as the transmission itself. Why didn’t they?? Cuz the ****ers cross threaded the damn thing. ****k. I haven’t a cross-threaded a single ****ing bolt yet in 2 years of wrenching on this piece. Drop it off with the pros, and BAM. Problem. I removed it the bolt. Tried to re-thread it but that spot is tough to get at correctly. Let alone apply the torque and power needed for it to catch the thread correctly. I’m thinking removing it is likely inconsequential, but still, it was meant to be there.


20180404_215640.jpg
 
Nut snapped because off all the exposure to the elements and rusted. Thats why I dont do the pro thing, they are just diy'ers who get a paycheck. We are the idiots who do it for free lol.


Worked on the GTP last few days. 3 steps forward, 1 step back. Every damn time. Proof of my labor:


Made the cuts in the trunk so the BMR brace would fit:
20180414_182225.jpg


Made the cuts in the fender wall for my CAI. Might get away with not having to cut the brace that’s supporting the fender:
20180414_182341.jpg


Rear sway bar removed because I couldn’t loosen the bottom bolt on the end-links. There wasn’t enough room for a breaker bar and those ****ers were frozen solid. It was easier to work on the them attached to sway bar, and sway bar removed:
20180414_182017.jpg


End links were shot to ****. Probably stockers. I spent so much time monkeying with the rear suspension. Not sure why I never replaced them. Now is my chance:
20180414_182131.jpg


20180414_182107.jpg


Passenger strut and driver strut. They are getting replaced. With the struts removed, I will be coating the wheel well and towers with a rubberized spray-on protectant. Should be easy peezy with all that room:
20180415_143053.jpg


20180415_143130.jpg


20180415_143153.jpg


20180415_143232.jpg
 
Got the intake installed. Soaked, and I mean absolutely soaked, both rear towers in OSPHO to neutralize the rust some. Let that completely dry for a few days. Then greased those suckers up. New rear struts and end links were purchased. Yummy Yummy.


Jammed that ****er in there. Didn’t need to cut out the fender support brace either.
20180422_132413.jpg

20180422_132424.jpg


When showering the towers in OSPHO, it poured down the wheel wells leaving this ugly mess. That **** SIZZLED the entire way as it flowed down the wheel well. Crackled and popped like some fried pork chops. Just feeding on all that rust.
20180422_132557.jpg


Passenger side:
20180422_132530.jpg


Drivers Side:
20180422_132646.jpg


New Monroe struts. I was gonna save some cash and buy the cheapo-depot ones from AM Auto for $55 a pop. That’s what I had on there now. However, I decided to get the better ones for $80 each on Amazon. Advanced wanted like $140 for them! I can already tell their better than the ones for $55 I have now. The spring diameter around the strut is much wider, and the spring itself is noticeably thicker.
20180424_144100.jpg


MOOG end-links. Lookin good. Interesting looking bushing. Seems solid.
20180424_144321.jpg


20180424_144345.jpg
 
I used heavy grease on the strut towers, but ended up using the rubberized coating anyway. If you look at my previous post, the OSPHO bath that the towers got left dirty looking streaks down the wheel well. The spray covered all that nicely and sprayed right over the grease and looks to be kinda holding it in place. I then sealed the towers are best I could using Great Stuff expanding foam. Maybe not the best solution because it can hold in moisture… But there is NO good solution for what I’ve got going on.
All this really started because I couldn’t get the rear BMR Strut Tower brace installed. The metal on the towers is too swollen for the flipper that’s on the brace to lay flat. This meant that I couldn’t thread the nut on the rear most screw on both struts. I had to replace the rear-most screw with a longer screw. Ordered Grade 8 screws from Specialty Fasteners out in CA. First order I got, the thread didn’t go all the way down the screw. Had to order again, wait another 3 days, and finally got the right screws.


Wheel well. Post spray:
20180428_164551.jpg


00-.20180428_164546.jpg


00.-20180428_164742.jpg


Crevices from welding got sealed up. It’s half ass, hoping it holds. Gonna spray that white foam down with the same rubberized coating to seal it some more:
20180511_204647.jpg


20180511_204711.jpg


20180511_221203.jpg


Screws I got. I needed a long screw to mount the flipper correctly. Top left corner. The black bolt is the correct one:
20180511_205554.jpg


Pounded out the factory strut bolt. New bolt was just a too wide. Needed to file out that hole just 2 widths of a **** hair, no more. Fit perfect after that:
20180511_211637.jpg


I got overzealous and ordered 4in screws. Wayyy too long. Had to MacGyver a solution to make it shorter on the back end:
20180511_221624.jpg


Strut Mounted. Got the brace on as well. Forgot to take pic of that. Doh! Next post…
20180511_221308.jpg


20180511_221302.jpg


20180511_221315.jpg
 
A couple pictures of the rear brace. You can see how flipper, or mount, or whatever, warps to the shape of the tower. I imagine that this brace reinforces and strengthens the towers well. Also, new sway bar bushings. Painted the endlinks too. All the MOOG stuff is nice but rusts fast! First I wiped them down, then primer, then POR-15, cure 72hrs., then 20min in the oven at 350*.


20180517_224928.jpg


20180517_224935.jpg


20180517_224916.jpg


20180515_211447.jpg


20180519_192110.jpg


20180519_192939.jpg


20180519_205305.jpg


20180519_205316.jpg


Couple quick updates. Car is back on the ground, all 4 wheels touching. Before it came down I put some muffler cement on the seams of the mufflers as preventative maintenance. I got the carpet in and started cutting the holes for seats and ducts, etc. Next step is to take it back out and glue the old foam to the bottom of it. Wrestling the carpet into the car was no fun, taking it out will suck, and then getting it back in with that thick ass foam attached is going to be murder.


Also got the chance to drive it. Also enjoy starting it and driving it, even if for a few minutes. But I got a couple annoying things going on:


1. First thing being a "POP" noise I hear when going over bumps, and a general clanking from the front end. Everything seems buttoned up tight so not sure what that is. I suspect and ball joint needs ever more tightening.


2. Next is the steering. Remember that I have new ACDelco rack, and new MOOG outer tie rods… But still, it takes more effort to turn the wheel to the right, than to the left! Wtf. The wheel is all kinds of crooked too despite having an alignment done in October 2017 with almost zero driving since then.


20180613_000058.jpg


20180601_223842.jpg


20180601_223851.jpg


20180601_223915.jpg


20180601_224004.jpg


20180613_000020.jpg


20180613_000031.jpg


Foam that needs to be glued:


06.jpg


Bit of an update. Work on the GTP slowed down in the last month as I was completely immersed in looking for a house ; buying a house ; and moving. Securing the mortgage and moving were both terrible experiences I hope to never repeat, LOL! After 10 years of living in Chicago at Belmont and Addison (Polish town).... me and the Misses bought a little split-level bungalow in Lombard, IL. Never thought I'd be a homeowner, so feeling pretty good about it. I finally have a garage of my own to work on the GTP. No more alley ways and parking lots and working outdoors. No more driving to my sisters garage... She actually lives down the street now, haha.


I have to say that living in Chicago was a great experience for us. It really is an awesome place. The lakefront, the rooftop bars, the beaches, the museums, the parks, the L train, riding bikes with my kids. Not to mention all gorgeous women downtown. It was tough leaving our gigantic apartment, but time to move on and have something in my name.


Alright. Moving on to GTP stuff. Bought the poly motor mounts. Have wanted these since like forever. I ordered black. Could swear these look green tho. Hmmm


20180713_131531.jpg
 
Haha! Yup. New mounts man. That's all I got this round! But mostly wanted to post about what I've been up to. In case someone thought I gave up. NEVAA!!

New house should be great. Thanks. It's an old house (1960s) but move in ready. Appliances have a lot of life left in them. I have a fukkin back yard instead of a 10 by 10 patch. Was gonna mow this morning but its been pouring for hours :/
 
Congrats on the house ! It may own you more than you own it at times, but hey, it's gonna be yours. Just like cars, the list never ends when it comes to home ownership, but staying on top of things will save $$ and work in the long run. There's SOOO much stuff you can DIY to save big bucks. Research and planning go a long way.
 
Back
Top