Abrasive
I say it with pictures
Alright guys and gals, here it is, the permanent fix to the chinzy rubber water deflector under the cowl. This new part will completely eliminate the problem once and for all along with the worry of ruining a blower motor or your interior carpet. No more questions like, "Is the rubber seal going to stay on?" or "Is the cowl going to seal against the rubber good enough?". This diverts any water 100% and deletes the rubber bulb seal for good. It is also super easy to remove for cabin air filter installation and replacement.
This installation write up is for the Grand Prix since that is what I own and have readily available.
First off, here is the new part. It is rigid ABS plastic with a soft rubber on the front and rear edges. The rear rubber edge is contoured to fit and seal against the bottom of the metal flange that the factory bulb seal attaches to. Probably not 100% necessary, but it is there just in case any water gets blown backwards under and over the underside lip.
GM part is #15794785 It can be bought at any local gm dealer
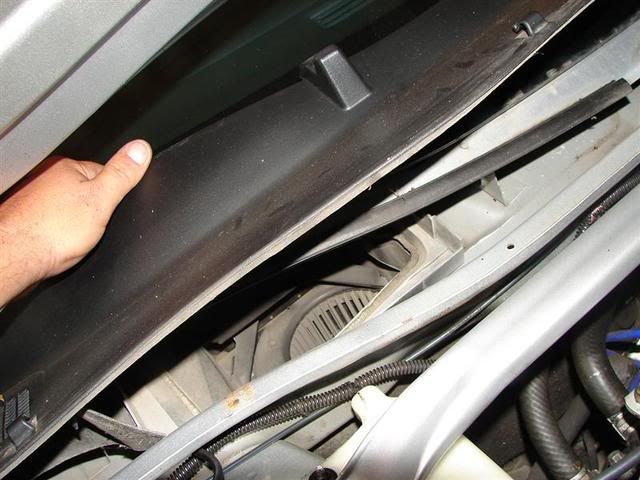
Now, my Grand Prix has the 2-piece cowling so I only need to remove the passenger side half. If you have the 1-piece cowling, you will need to remove the wiper arms and remove the entire cowl. Some have also stated that you can pull the 1-piece cowl up far enough on the passenger side to gain access to the area below it without removing the wipers.
The 2-piece cowl has a split in the center and is easily recognizable if your's looks like this in the center.
For the 2-piece cowl, turn on your ignition and then turn on your wipers. When they are in the full up position, turn off your ignition so that they remain up.

Next, remove your rubber hood seal.

Now unclip the windshield washer hose from the two clips on the passenger side. I then just tuck it under the cowl area so that it's out of the way.

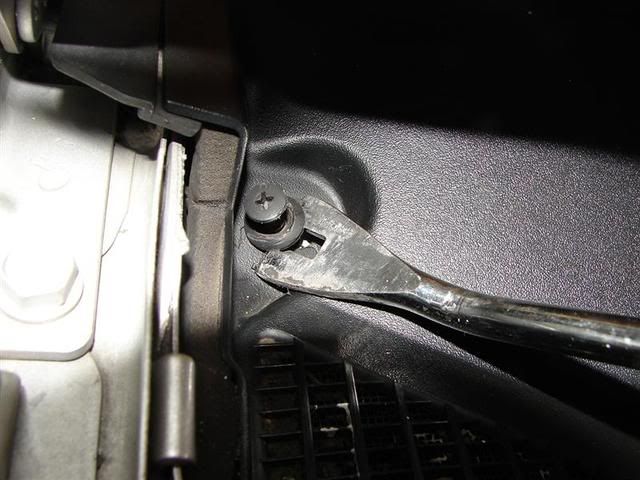
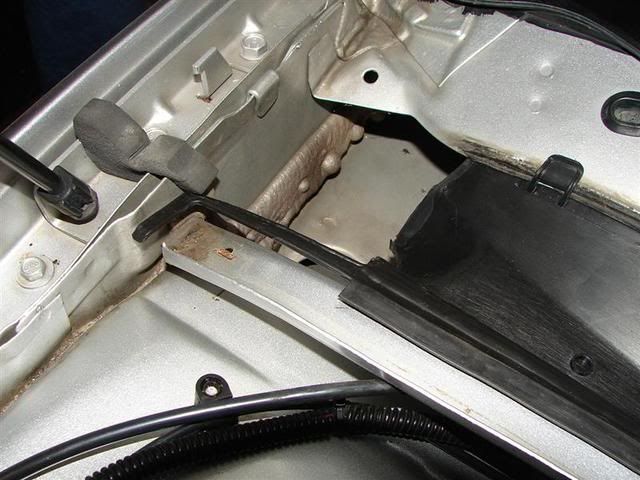
Next, there is a large retainer with a slot in it. Remove this. It should simply unscrew with your fingers without much effort.
Now you must remove the two plastic cowl retainers with the phillips heads on them. There is one on the far passenger side and one in the center. You need to pull the center of the plug up first and then remove the lower portion. You can sometimes unscrew the center enough to get it out, but sometimes it just spins. If it just spins, you can pry the center portion up with a small flat screwdriver and then remove the bottom half. A panel tool works very well for these as I have pictured.
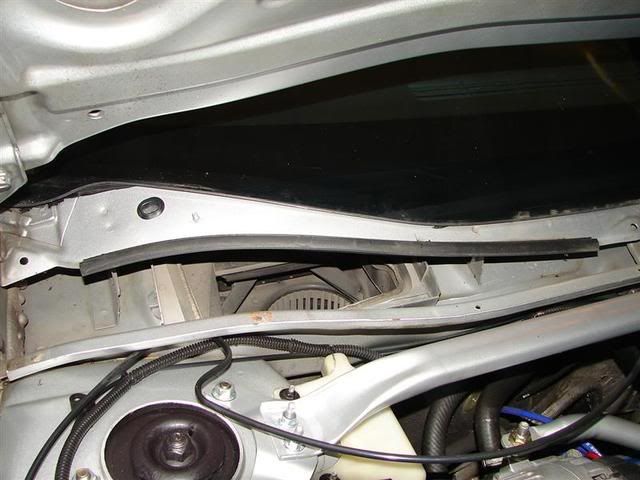
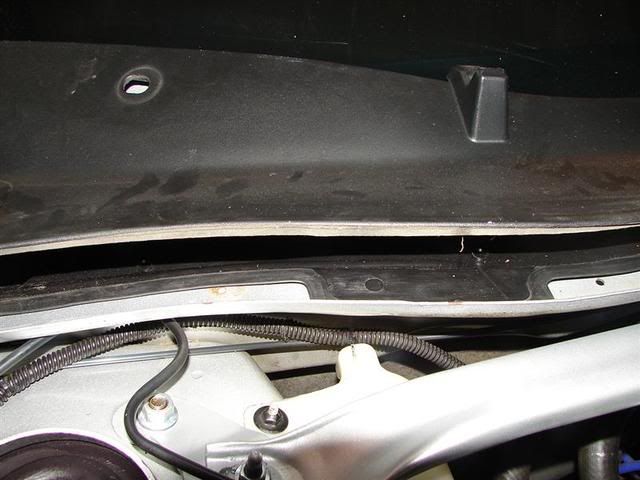
Now you can remove the half of the cowl.
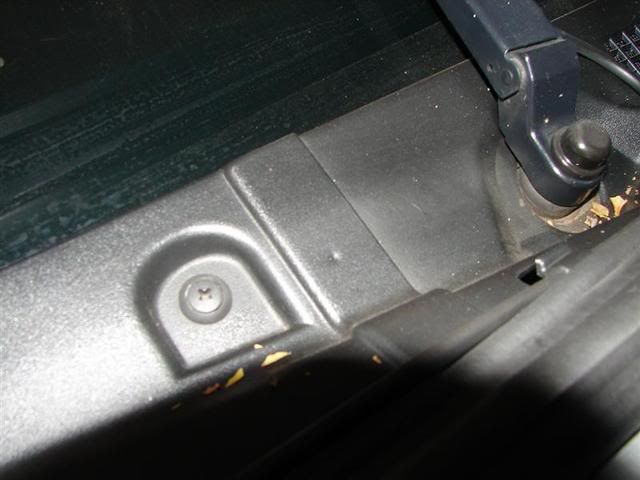
Once removed, you can see the factory rubber bulb seal. This is what usually falls off and lets water run right down the windshield, under the cowl and right into the blower fan. Not good. Normally this sets in place and relies on the cowl you just removed to seal against it. The large retainer with the slot in it is supposed to hold the cowl down firmly against it allowing it to divert the water around the blower opening. However, the cowl does not always seal against it 100% even when the seal is in place, thus allowing some water into the fan no matter what.
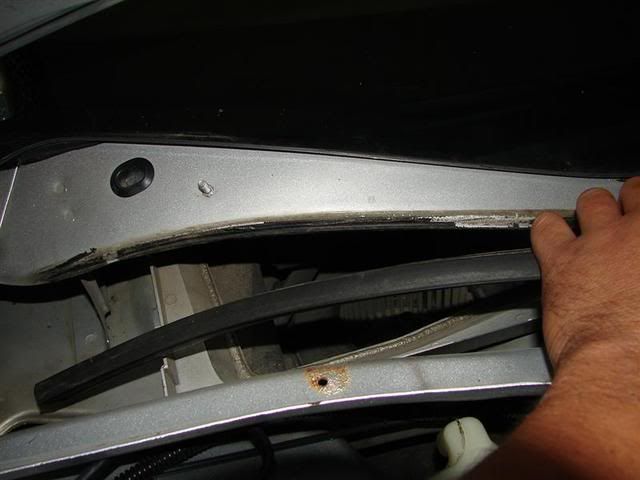
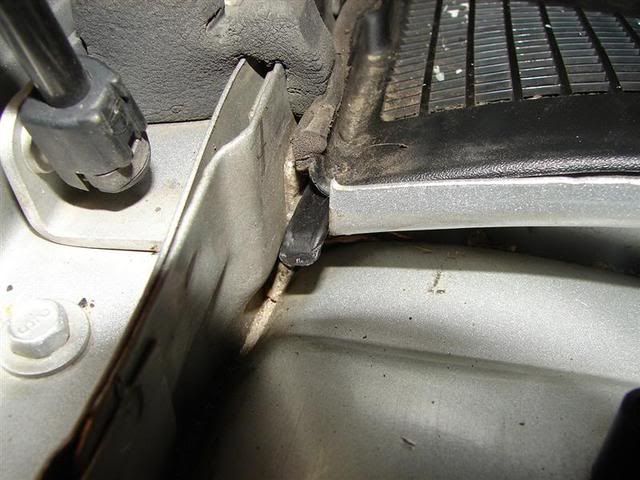
Now, remove the factory rubber seal. You can toss it in the nearest trash can if you want since it will no longer be used. Mine was glued on (from the old How-To fix) so you can see the black RTV on the metal flange in this picture. If you have never had this apart, there will be no glue and the rubber seal will most likely already be off the flange.
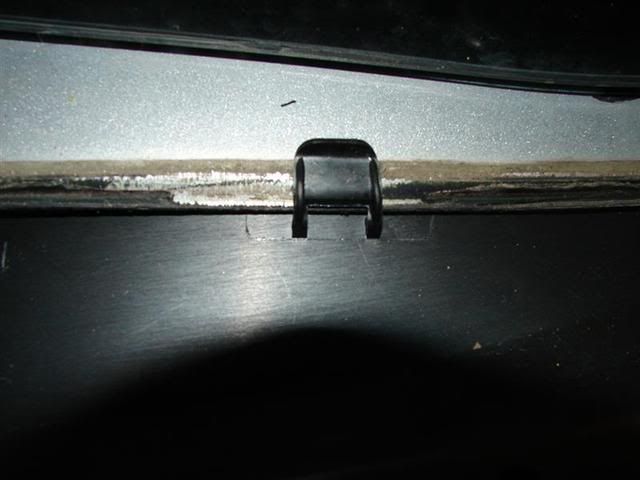
Here's the new piece ready to go in. You will see that it has three "fingers" that go over the metal flange where the old rubber seal used to be. These hold it tight against the flange on the bottom side so that the contoured rubber edge will seal snugly against the metal on the bottom.
The new part is designed with a built in gauge to space it to the correct position. It is just a long finger on the far passenger side of it. When it is slid all the way over to the passenger side against the metal edge, the entire part is correctly positioned.
The rear contoured rubber edge goes under the metal flange and the three "fingers" go over it.
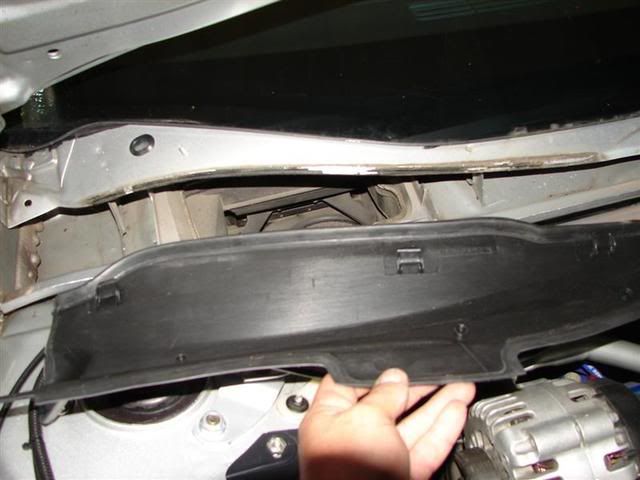
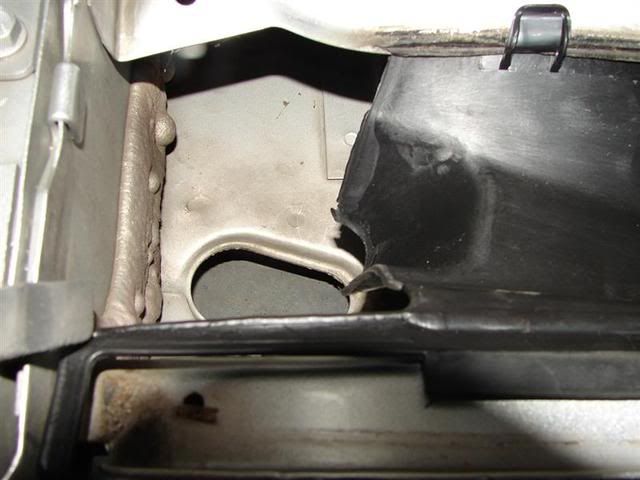
Here it is correctly installed. Once the back edge is on, the front simply lays down where the cowl half normally sits. It has an extended section in the center to fit snugly and keep the whole part from sliding forward and off the flange. There is also a soft rubber edge on the front mainly just so that when the cowl half is placed back over it, it give the part some grip on the metal below it.
This part will divert 100% of the water that gets down here around the blower motor opening. It will not allow for even a drop to get past it since it completely covers the opening. There is still ample space underneath it, so there is no worry of blocking air flow at all. You will even note that the passenger side of the part is even molded to funnel water directly into the factory drain.
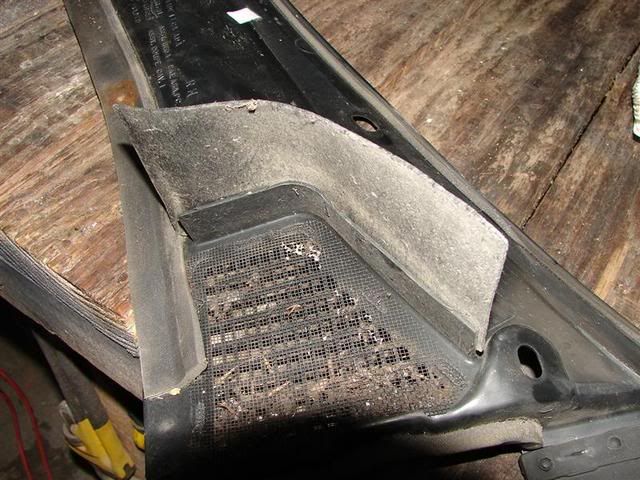
Now that it is in place, there is a little bit of work to do to the Grand Prix's cowl half. It has a large rubber flap on the bottom of it that has to be removed. This flap used to keep water that drained through the screen on the cowl from splashing over into the blower inlet. The new part eliminates that possibility also and this will have to be removed for the cowl to fit over the new part.
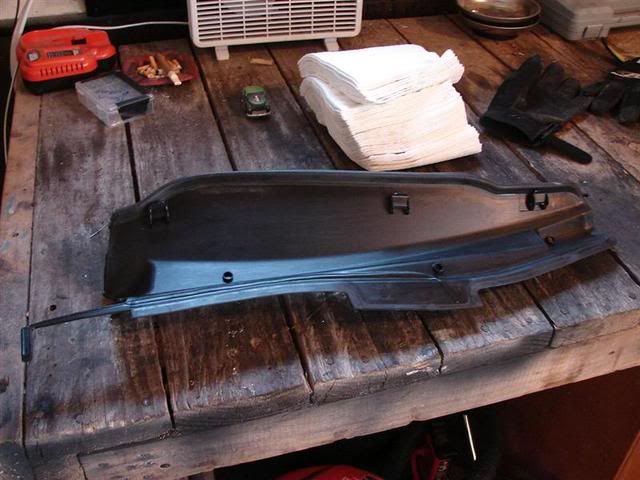
Here's what the bottom of the cowl looks like
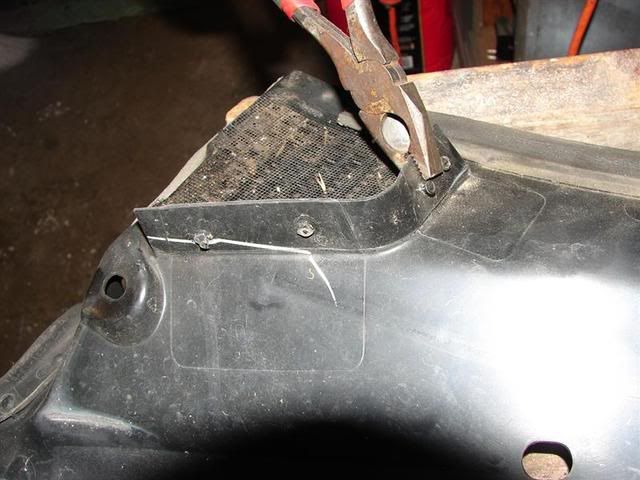
Simply pull off the rubber flap. Then I scored around the plastic flange twice with a razor blade knife.

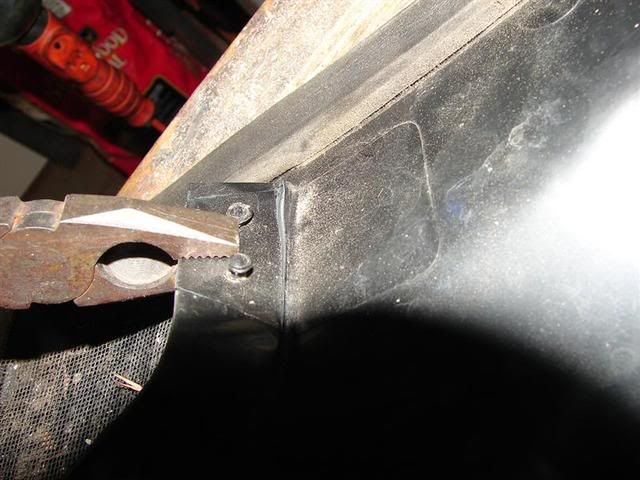
Once scored, you can simply break the flange right off with a pair of pliers.
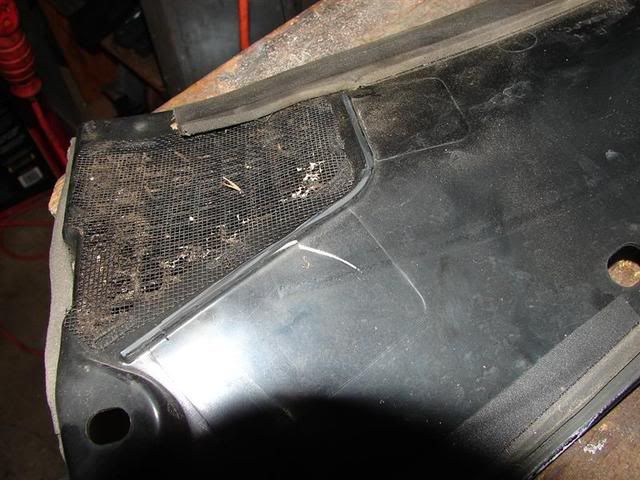
Now here's what it looks like when you're finished.
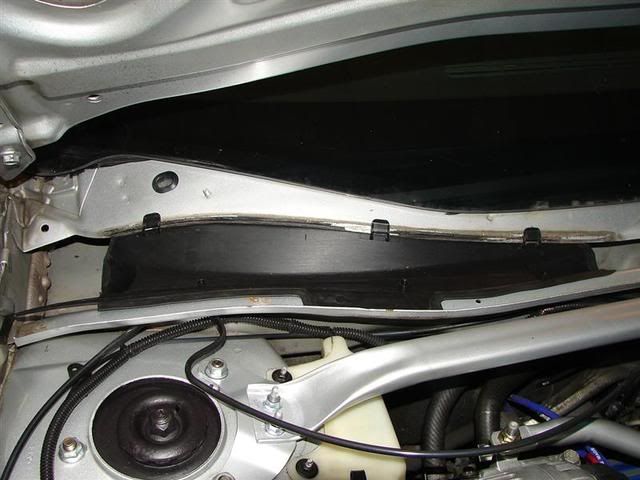
Next step is to replace the cowl half back onto the car. You will see that the cowl will stack on top of the new part on the front edge. The front edge of the cowl is lifted up about 1" in this picture just so you can see the new part below it.
Once the cowl half is on, you will see the alignment guide of the new part fits perfectly into the the factory notch in the hood seal metal flange.
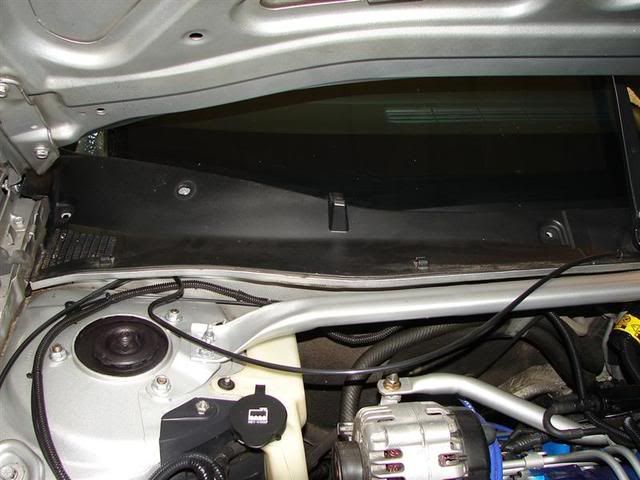
Once the cowl is back in place, you can't even tell the part is there.
Replace all your cowl retainers, your windshield washer hose goes back into it's two clips, and turn on your ignition key to let your wipers park and you are finished. That's it!
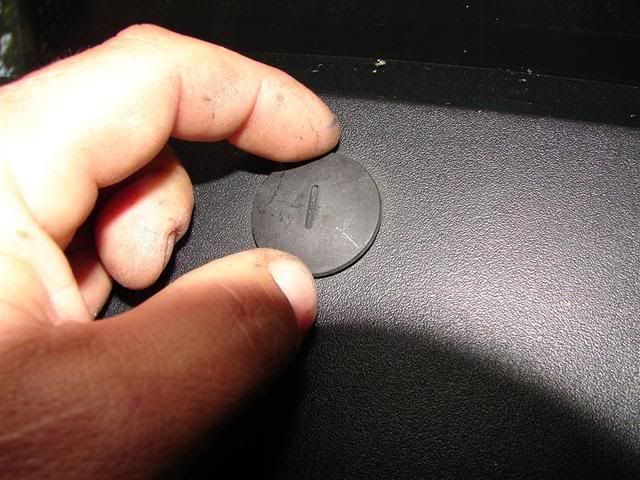
Here is a picture of what you removed and is no longer needed.

:th_thumbsup-wink:
This installation write up is for the Grand Prix since that is what I own and have readily available.
First off, here is the new part. It is rigid ABS plastic with a soft rubber on the front and rear edges. The rear rubber edge is contoured to fit and seal against the bottom of the metal flange that the factory bulb seal attaches to. Probably not 100% necessary, but it is there just in case any water gets blown backwards under and over the underside lip.
GM part is #15794785 It can be bought at any local gm dealer
Now, my Grand Prix has the 2-piece cowling so I only need to remove the passenger side half. If you have the 1-piece cowling, you will need to remove the wiper arms and remove the entire cowl. Some have also stated that you can pull the 1-piece cowl up far enough on the passenger side to gain access to the area below it without removing the wipers.
The 2-piece cowl has a split in the center and is easily recognizable if your's looks like this in the center.
For the 2-piece cowl, turn on your ignition and then turn on your wipers. When they are in the full up position, turn off your ignition so that they remain up.
Next, remove your rubber hood seal.
Now unclip the windshield washer hose from the two clips on the passenger side. I then just tuck it under the cowl area so that it's out of the way.
Next, there is a large retainer with a slot in it. Remove this. It should simply unscrew with your fingers without much effort.
Now you must remove the two plastic cowl retainers with the phillips heads on them. There is one on the far passenger side and one in the center. You need to pull the center of the plug up first and then remove the lower portion. You can sometimes unscrew the center enough to get it out, but sometimes it just spins. If it just spins, you can pry the center portion up with a small flat screwdriver and then remove the bottom half. A panel tool works very well for these as I have pictured.
Now you can remove the half of the cowl.
Once removed, you can see the factory rubber bulb seal. This is what usually falls off and lets water run right down the windshield, under the cowl and right into the blower fan. Not good. Normally this sets in place and relies on the cowl you just removed to seal against it. The large retainer with the slot in it is supposed to hold the cowl down firmly against it allowing it to divert the water around the blower opening. However, the cowl does not always seal against it 100% even when the seal is in place, thus allowing some water into the fan no matter what.
Now, remove the factory rubber seal. You can toss it in the nearest trash can if you want since it will no longer be used. Mine was glued on (from the old How-To fix) so you can see the black RTV on the metal flange in this picture. If you have never had this apart, there will be no glue and the rubber seal will most likely already be off the flange.
Here's the new piece ready to go in. You will see that it has three "fingers" that go over the metal flange where the old rubber seal used to be. These hold it tight against the flange on the bottom side so that the contoured rubber edge will seal snugly against the metal on the bottom.
The new part is designed with a built in gauge to space it to the correct position. It is just a long finger on the far passenger side of it. When it is slid all the way over to the passenger side against the metal edge, the entire part is correctly positioned.
The rear contoured rubber edge goes under the metal flange and the three "fingers" go over it.
Here it is correctly installed. Once the back edge is on, the front simply lays down where the cowl half normally sits. It has an extended section in the center to fit snugly and keep the whole part from sliding forward and off the flange. There is also a soft rubber edge on the front mainly just so that when the cowl half is placed back over it, it give the part some grip on the metal below it.
This part will divert 100% of the water that gets down here around the blower motor opening. It will not allow for even a drop to get past it since it completely covers the opening. There is still ample space underneath it, so there is no worry of blocking air flow at all. You will even note that the passenger side of the part is even molded to funnel water directly into the factory drain.
Now that it is in place, there is a little bit of work to do to the Grand Prix's cowl half. It has a large rubber flap on the bottom of it that has to be removed. This flap used to keep water that drained through the screen on the cowl from splashing over into the blower inlet. The new part eliminates that possibility also and this will have to be removed for the cowl to fit over the new part.
Here's what the bottom of the cowl looks like
Simply pull off the rubber flap. Then I scored around the plastic flange twice with a razor blade knife.
Once scored, you can simply break the flange right off with a pair of pliers.
Now here's what it looks like when you're finished.
Next step is to replace the cowl half back onto the car. You will see that the cowl will stack on top of the new part on the front edge. The front edge of the cowl is lifted up about 1" in this picture just so you can see the new part below it.
Once the cowl half is on, you will see the alignment guide of the new part fits perfectly into the the factory notch in the hood seal metal flange.
Once the cowl is back in place, you can't even tell the part is there.
Replace all your cowl retainers, your windshield washer hose goes back into it's two clips, and turn on your ignition key to let your wipers park and you are finished. That's it!
Here is a picture of what you removed and is no longer needed.
:th_thumbsup-wink:
Last edited:
