• The site migration is complete! Hopefully everything transferred properly from the multiple decades old software we were using before. If you notice any issues please let me know, thanks! Also, I'm still working on things like chatbox, etc so hopefully those will be working in the next week or two.

TLSheff - Silver Sled

TLSheff

New member
I figured its high time I make one of these. Alot has happened over the past couple years, unfortunately not much in favor of the car being exciting :th_shakinghead2: but lots of pictures for each occasion.
This may get to be picture heavy, and lots of updates as I bring stuff in. Plan to really get in deep this next spring once she's paid off. :D

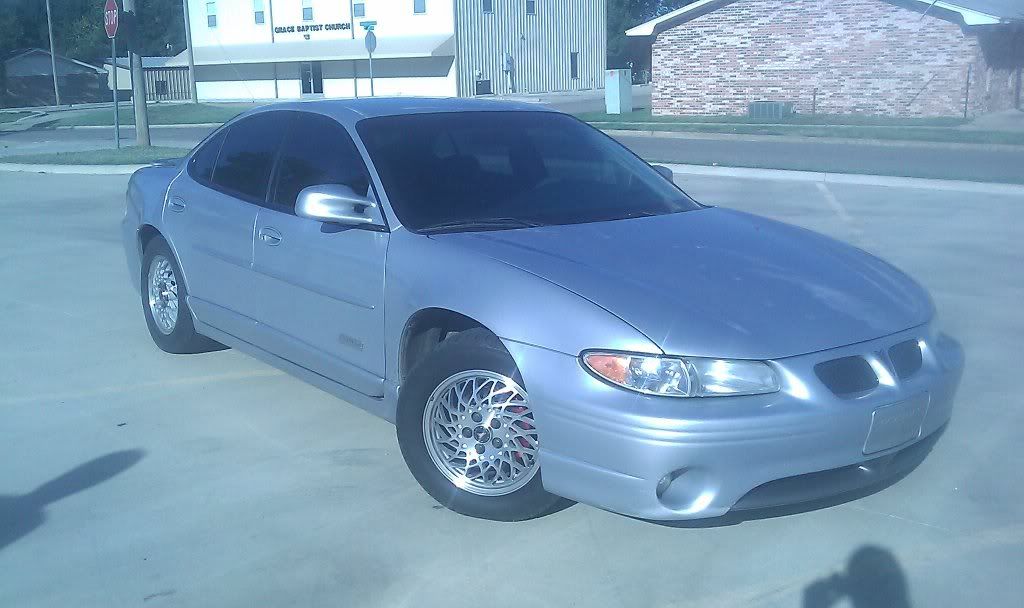
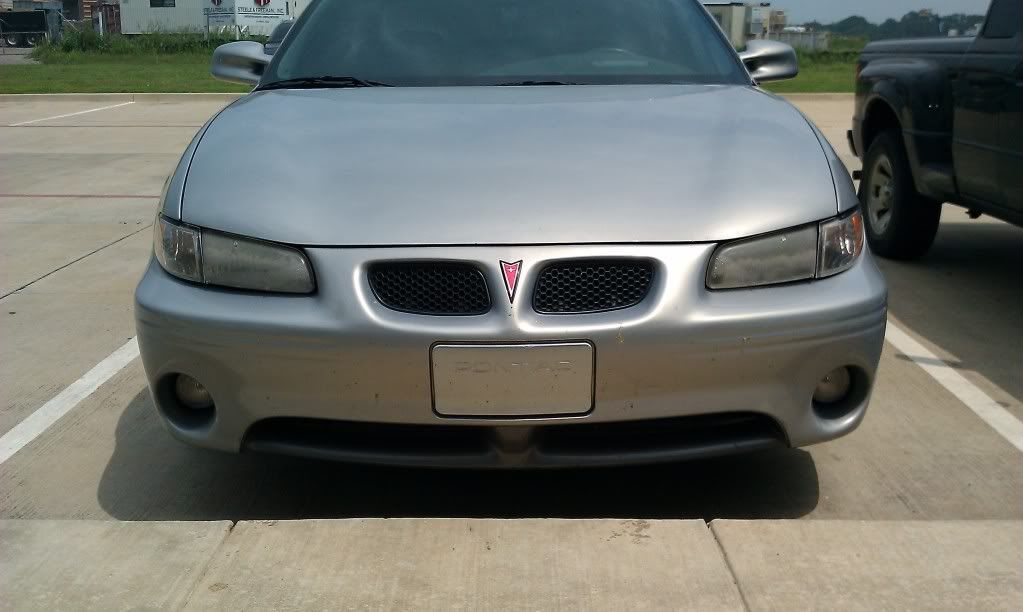
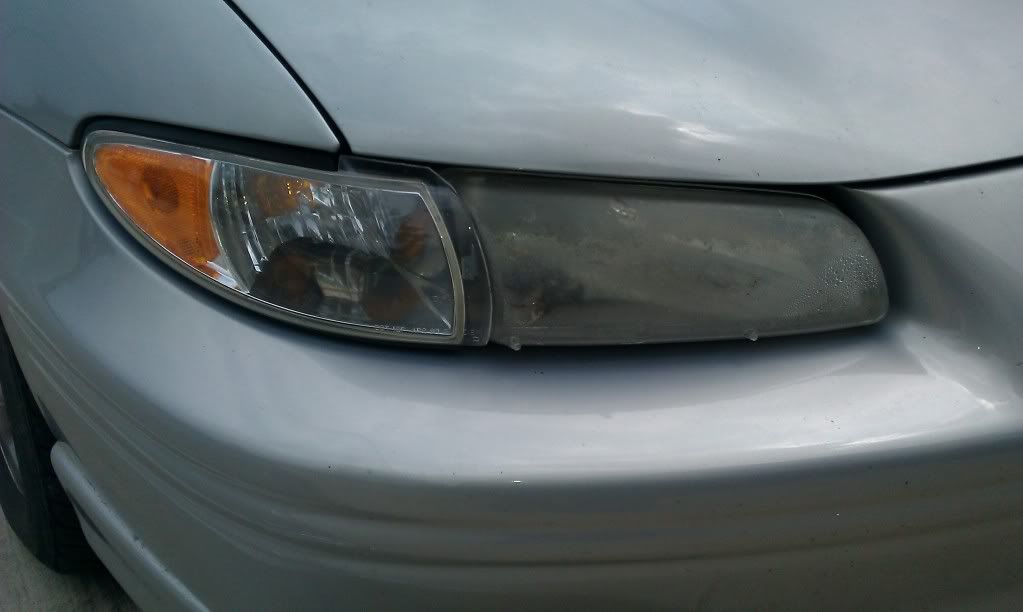
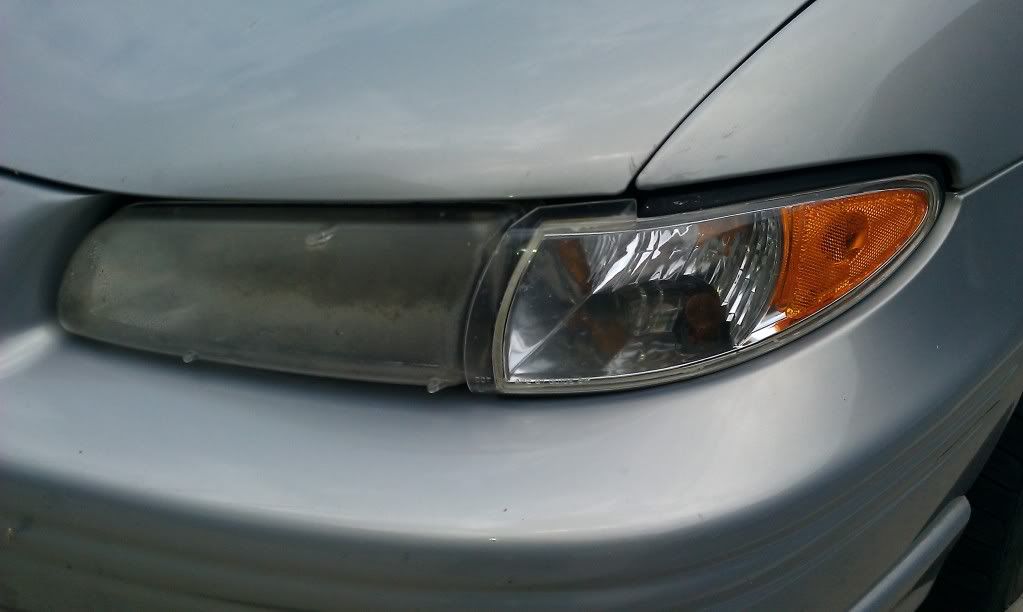
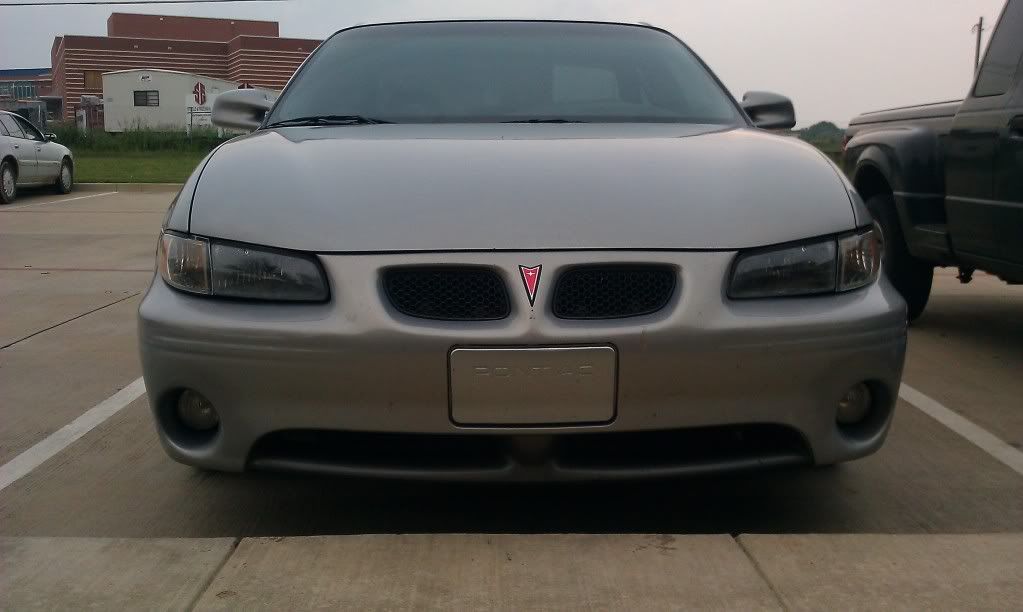
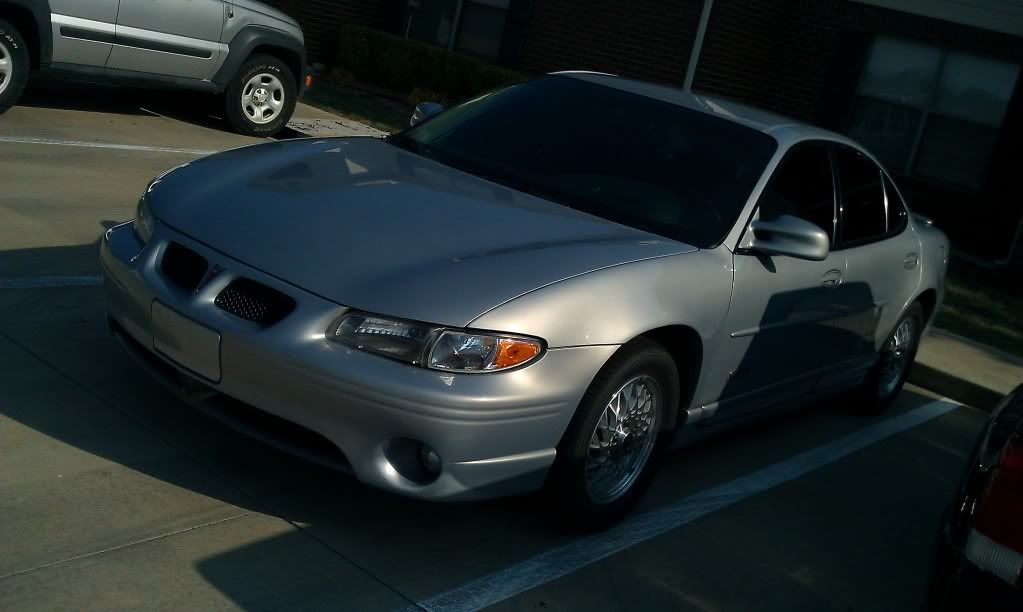
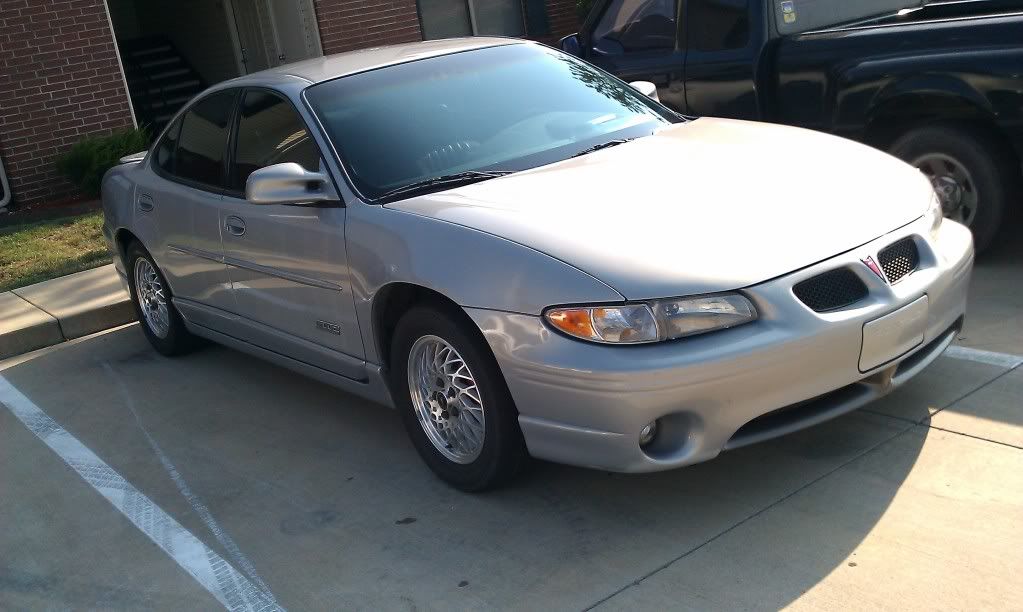
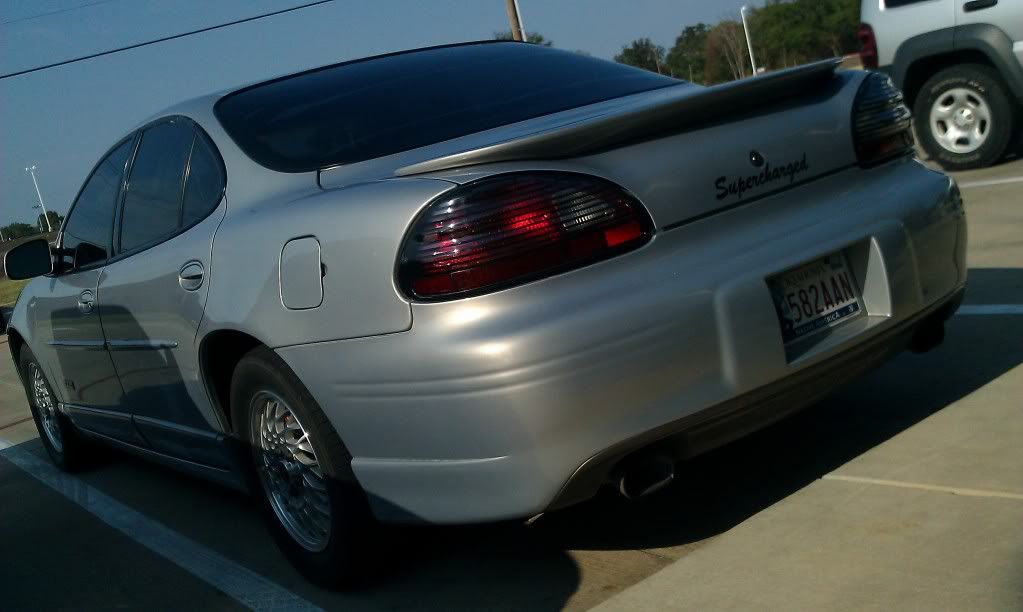
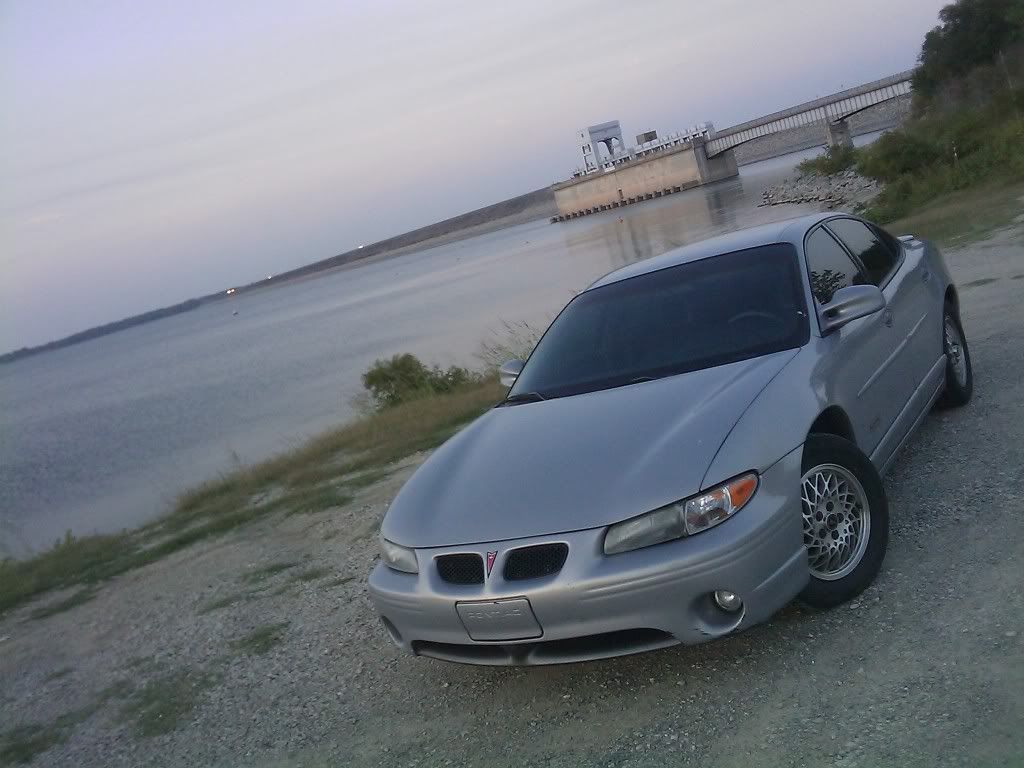
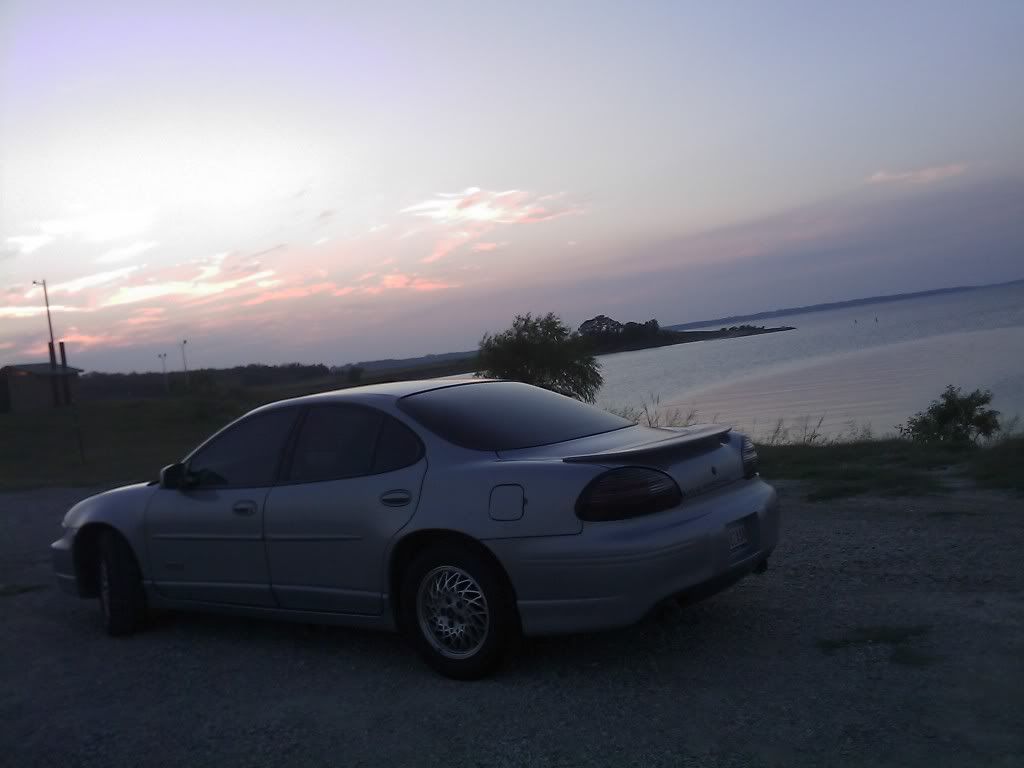
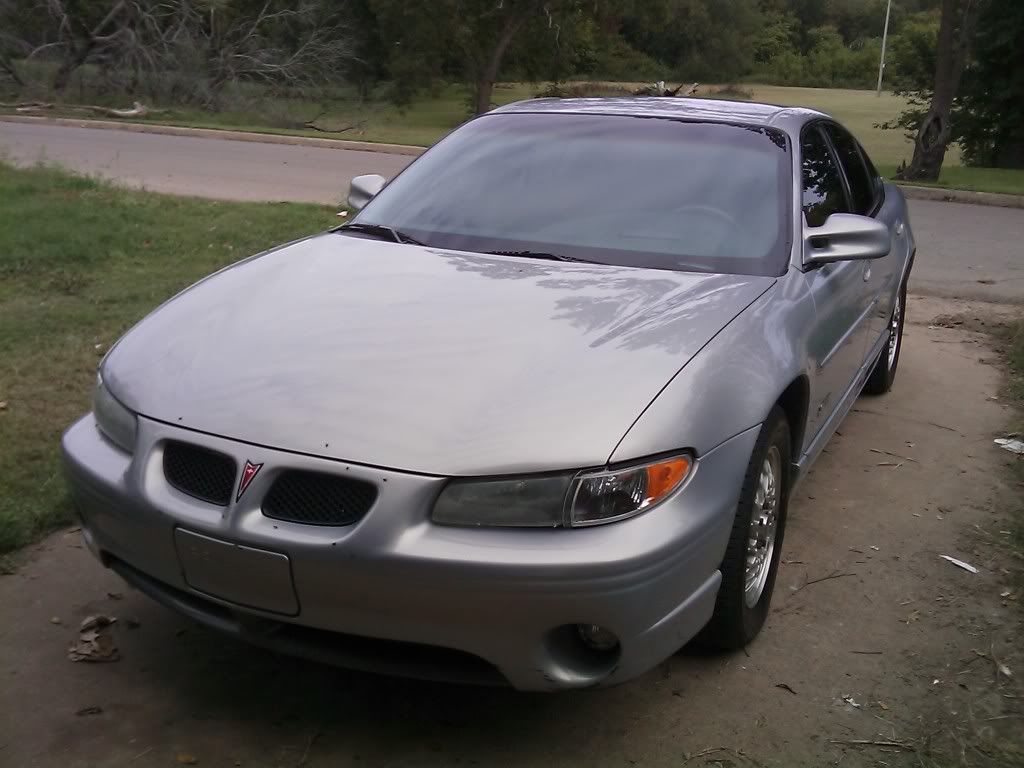
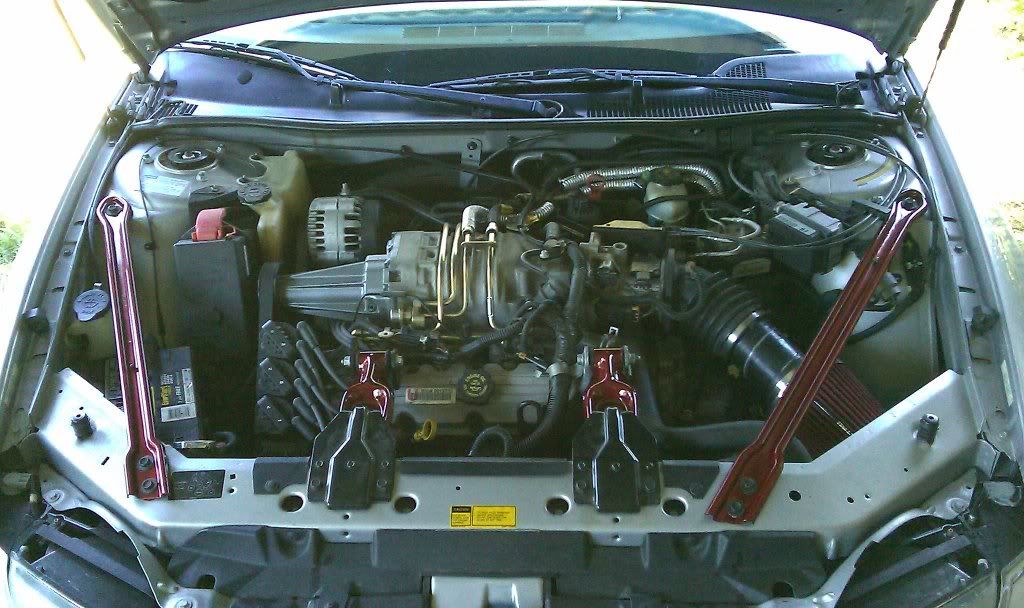
For starts, I bought her 1999 GTP Silvermist Sedan. 66k @ $4500 from the GM Dealership I work at, was traded in and all the service records were from the dealership... so good deal.... :th_shakinghead1: could have been better lol but I took starter pictures the first day

IMAG0039.jpg


IMAG0040.jpg


IMAG0043.jpg


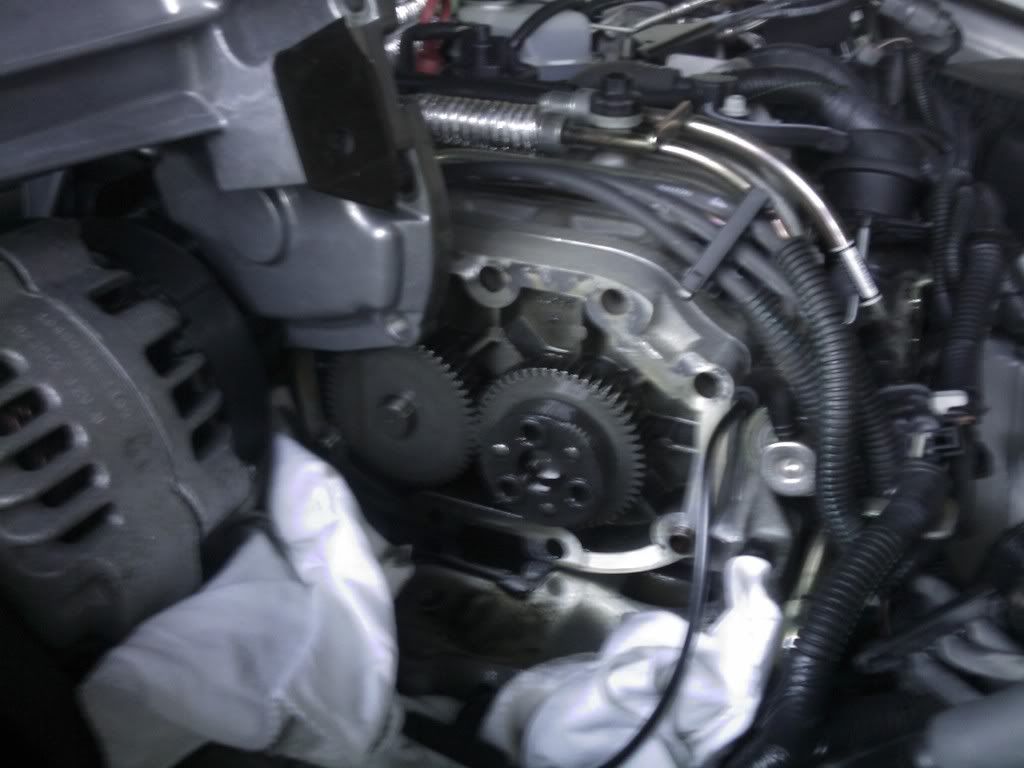
Miles at 67,641.5 at the time of the pictures. The only recorded problem was the supercharger was messed up and I needed to replace it. So as I was accustomed to doing when I had problems with my 94 SSEi Bonnie... I sought a forum, recommended highly by those at GMForum (old PontiacBonnevilleForum) and after a quick coupler change I was smooth as glass.

Didn't even have to take off the alternator... Like a Boss :th_laugh-lol2:
IMAG0061.jpg


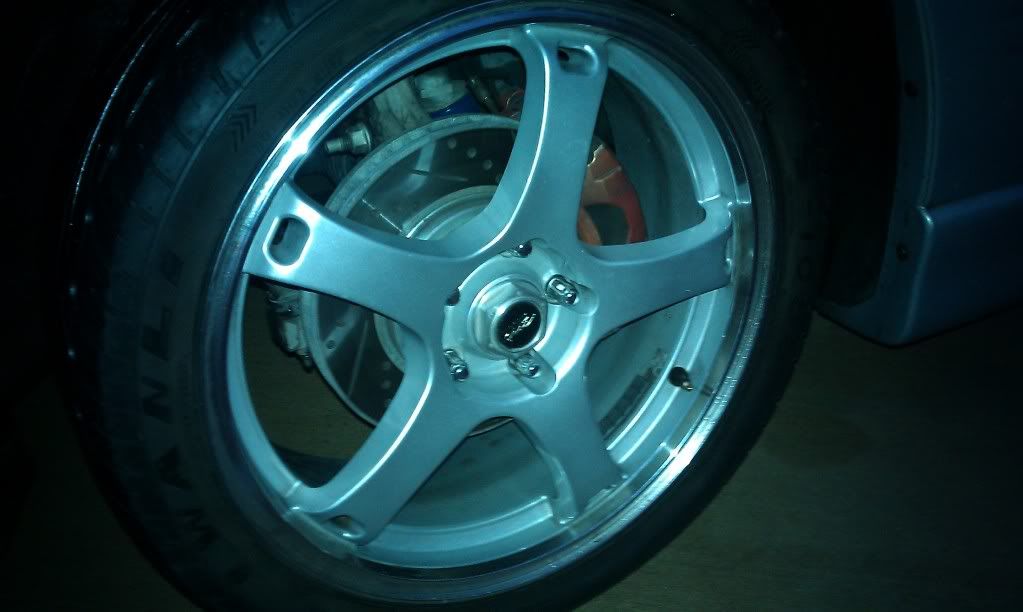
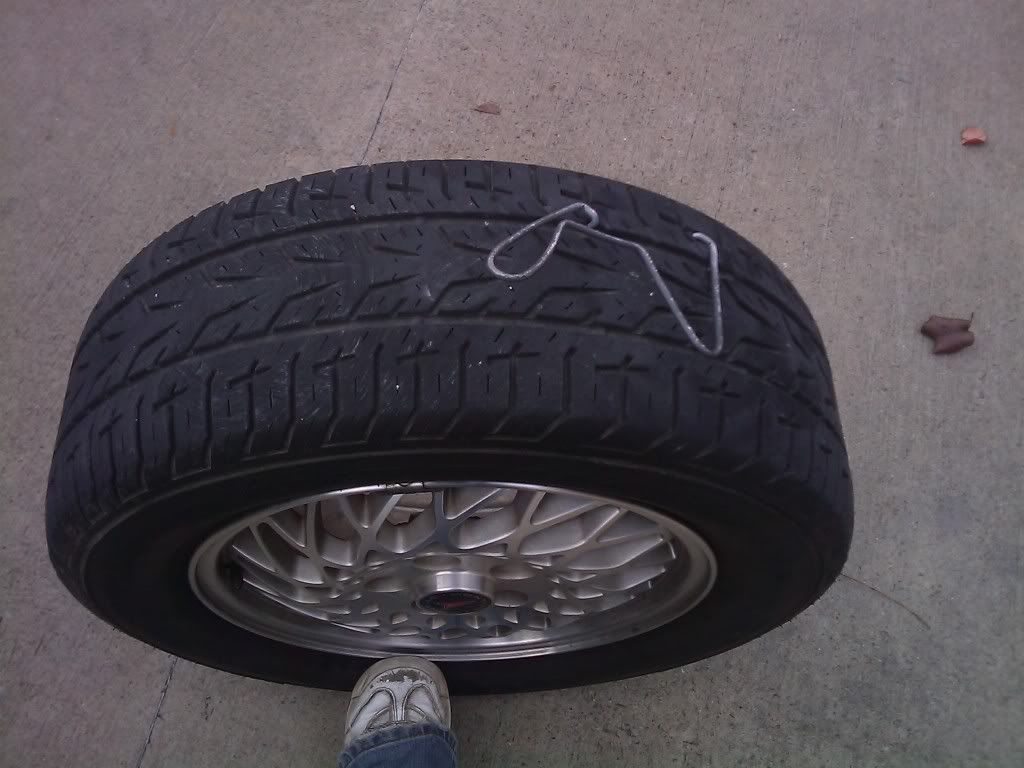
Had a bad day, found this in the road... WITH MY TIRE!!!! :eek:
BadDay2.jpg


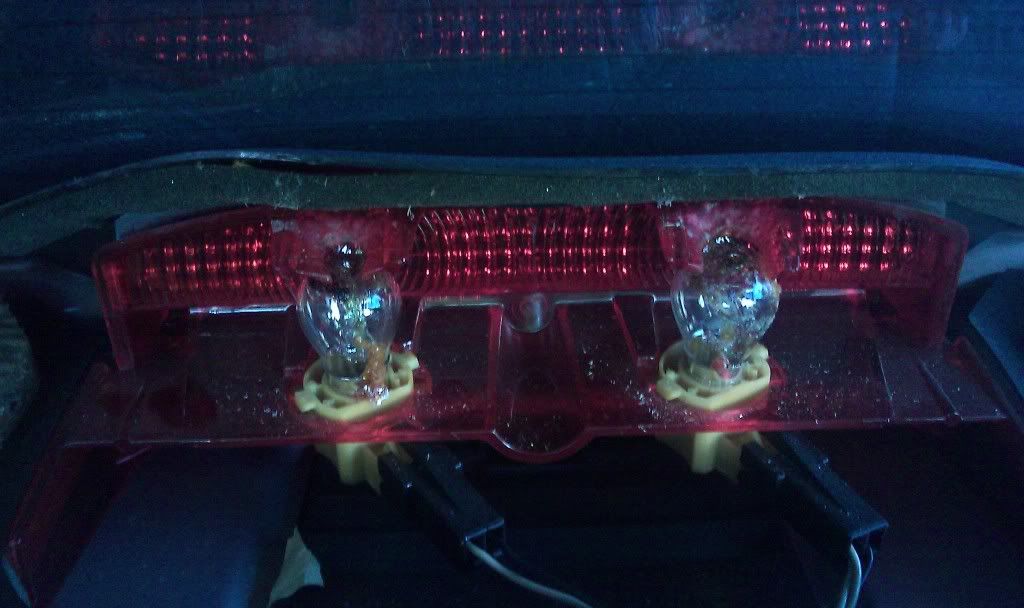
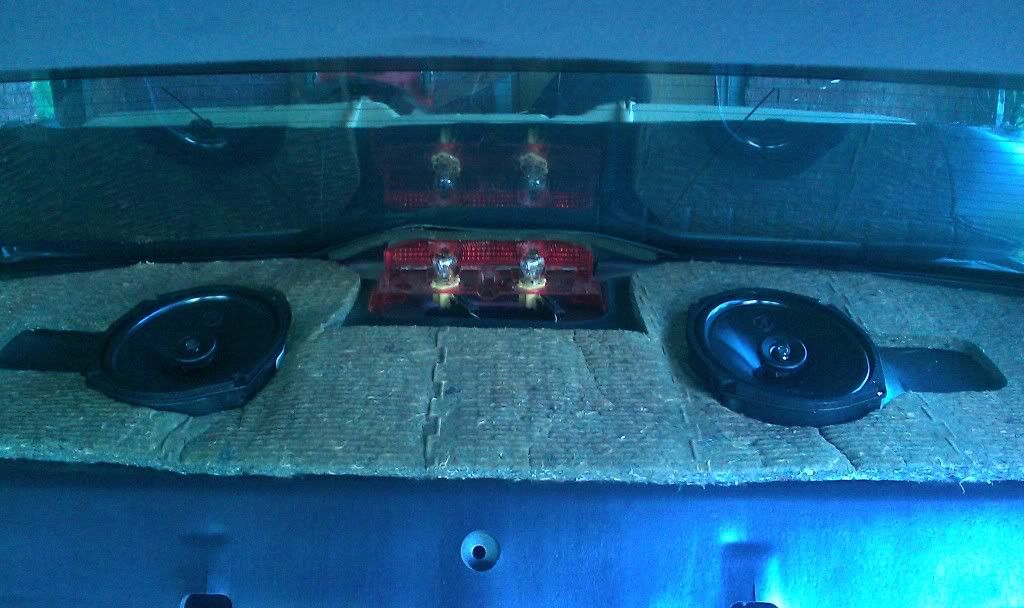
For Birthday GF was a doll and bought me new Memphis PR speakers to replace the halfway blown factory ones. Durant install of the back ones I found out the red cover over the 3rd brake light bulbs was melting on to the bulbs... amazing what happens when someone installs the wrong kind of bulbs in a tight spot... had to trim it up and buy replacements, O well
IMAG0049-1.jpg


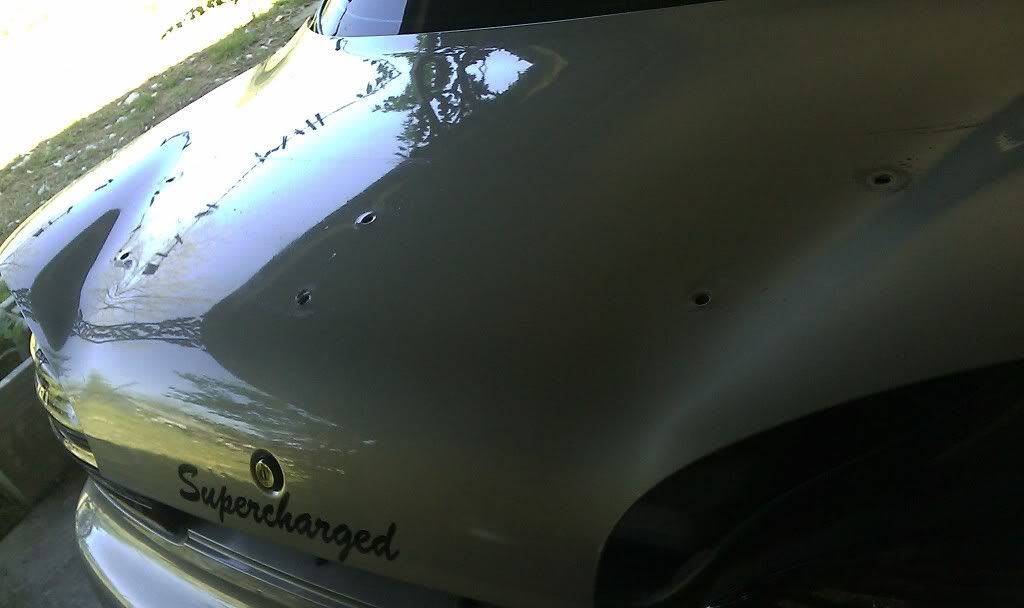
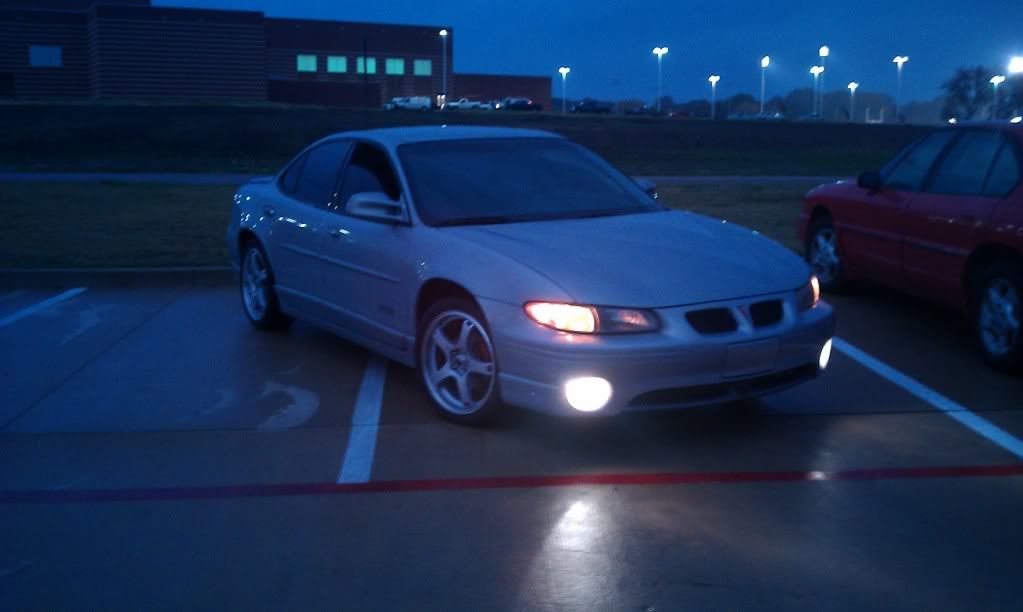
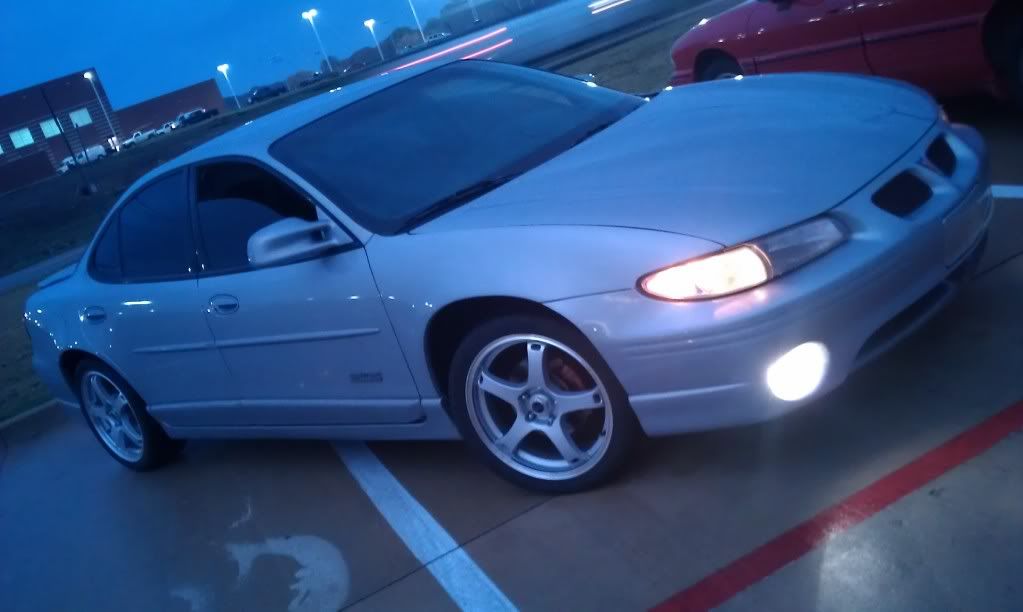
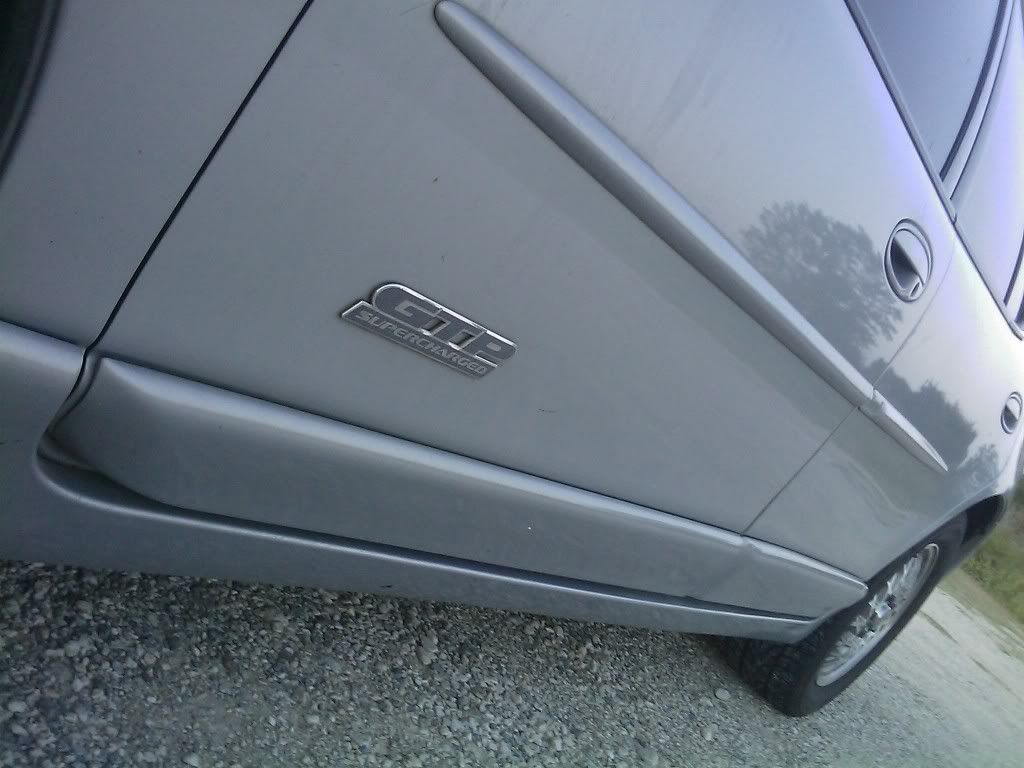
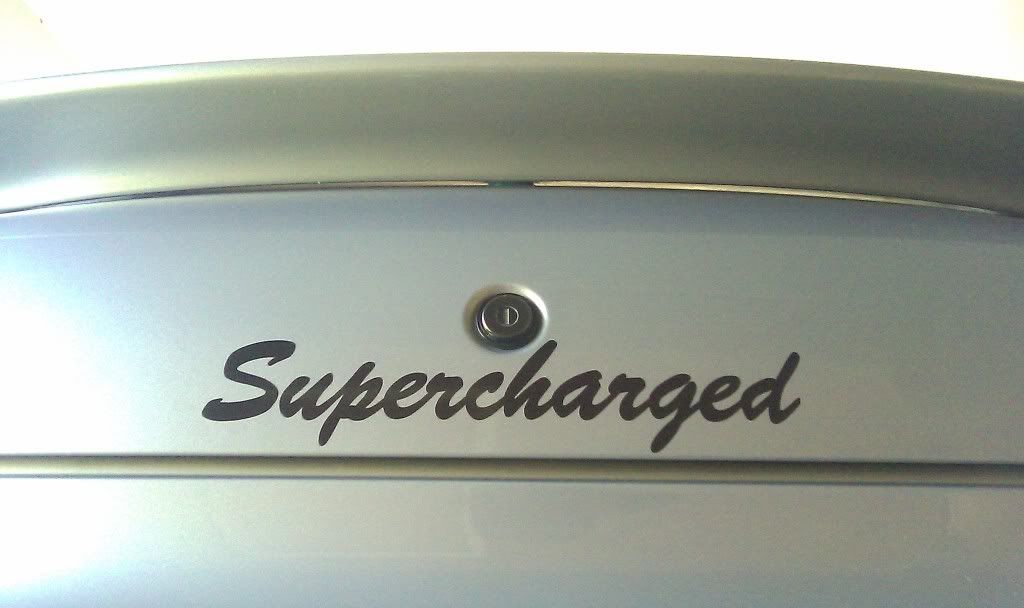
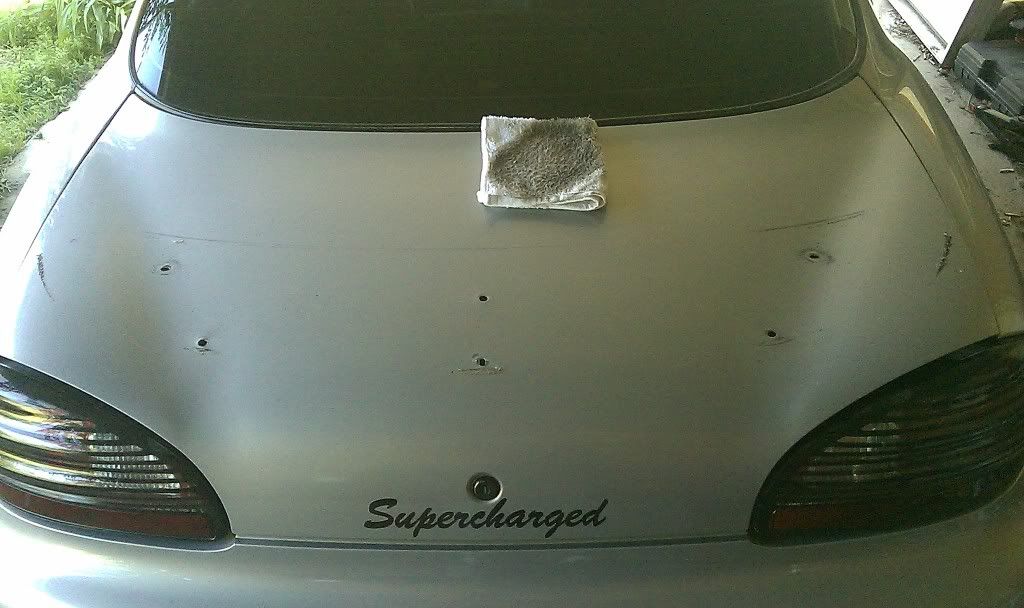
Summer time was a good time for a full wax job and to add "Supercharged" Decal (thanks to best bud with his vinyl shop it was freeeee :th_thumbsup-wink:) Also invested in the "Spoiler List/Drain" mod while I was doing the wax job... go her completely clean.
IMAG0042-1.jpg


IMAG0036.jpg


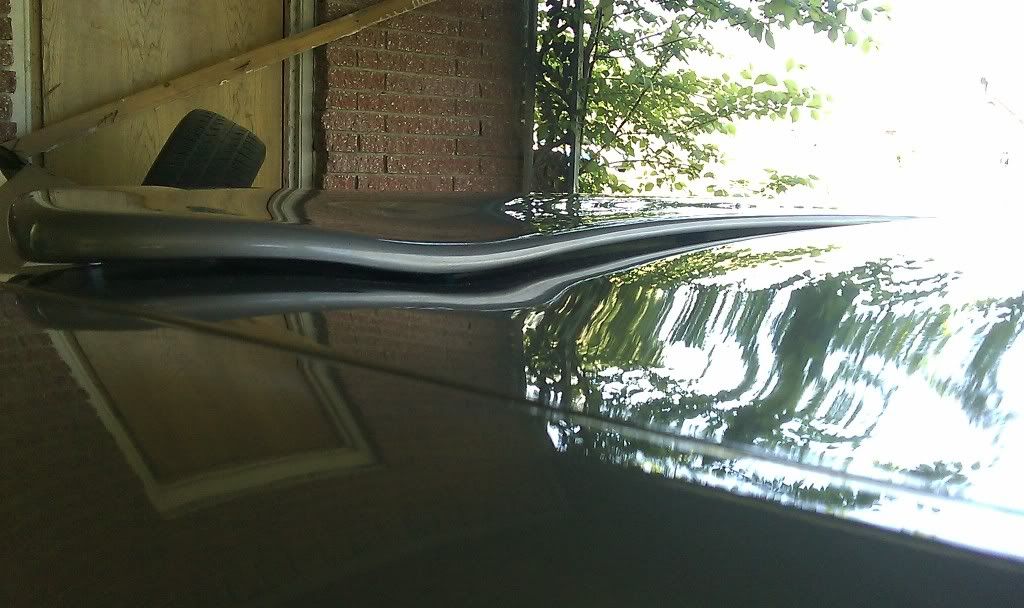
\/ Black spots are stupid flys that were attracted to my front bumper \/
IMAG0054.jpg


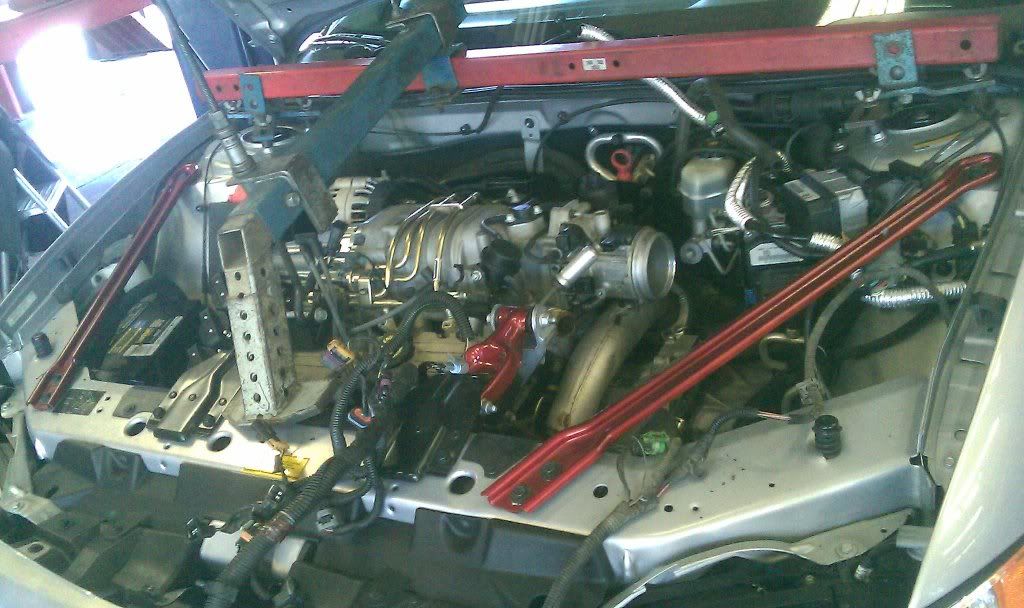
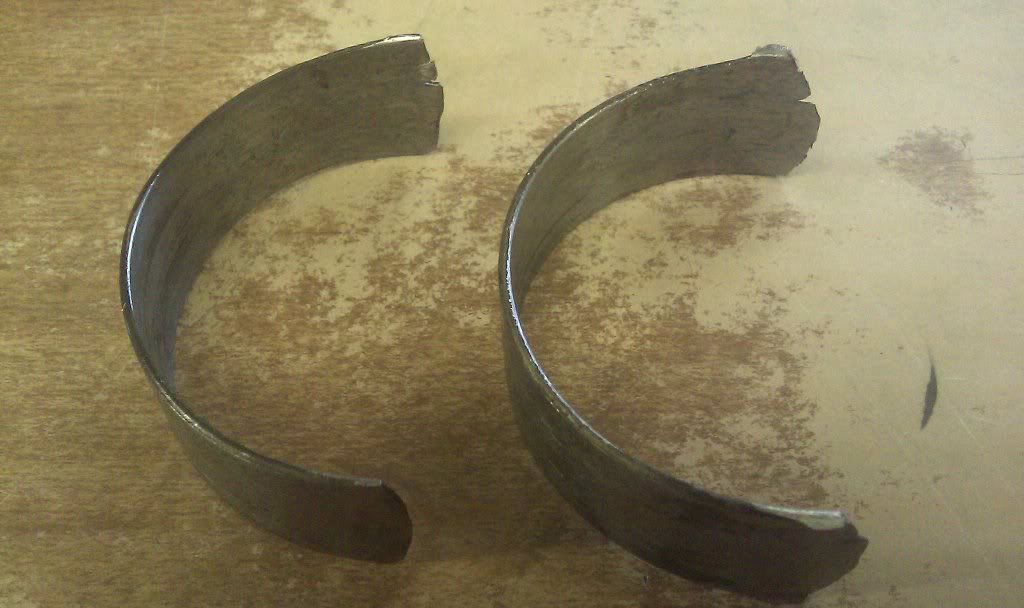
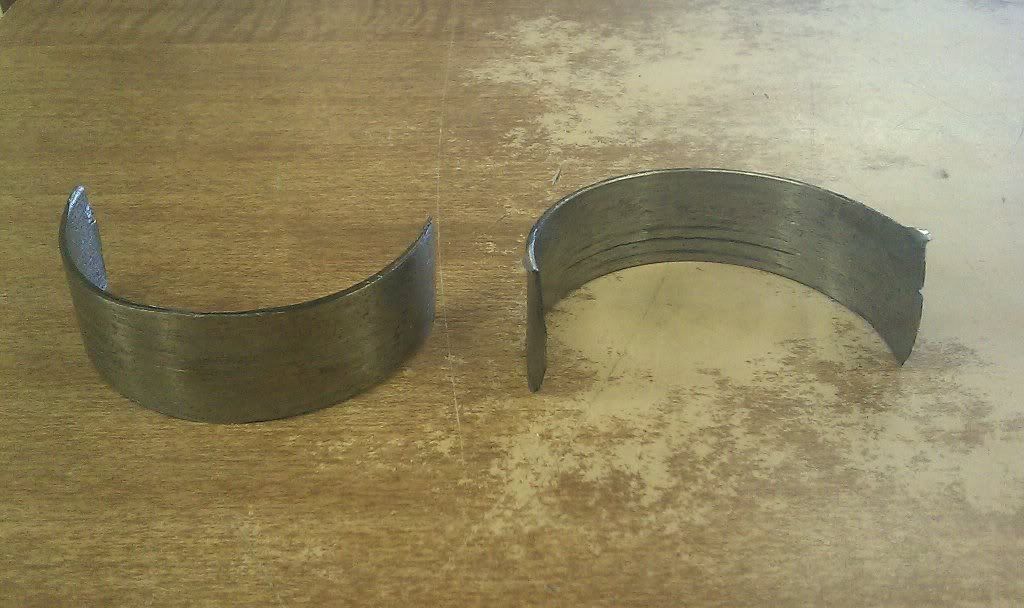
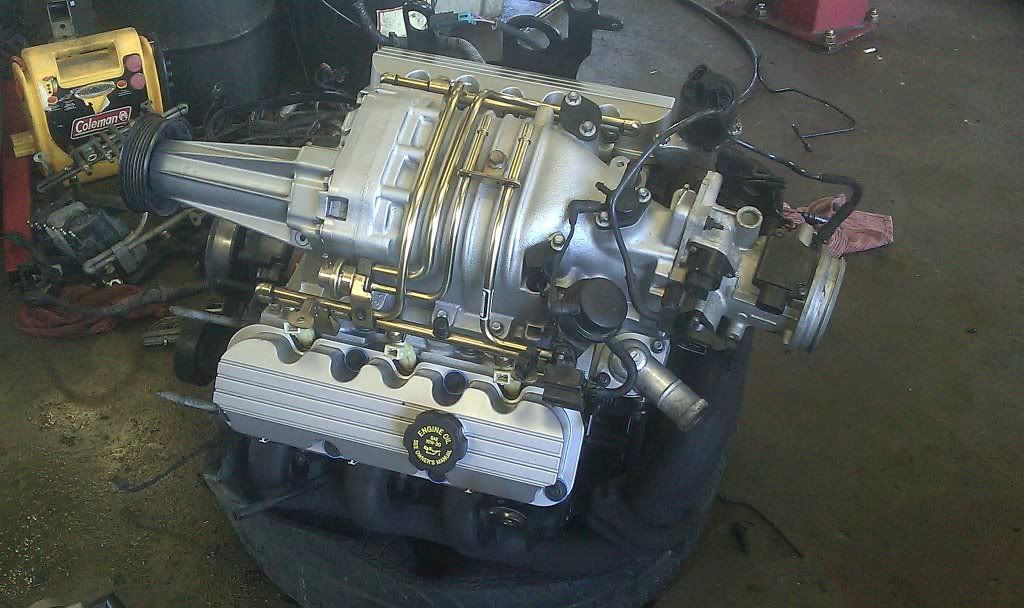
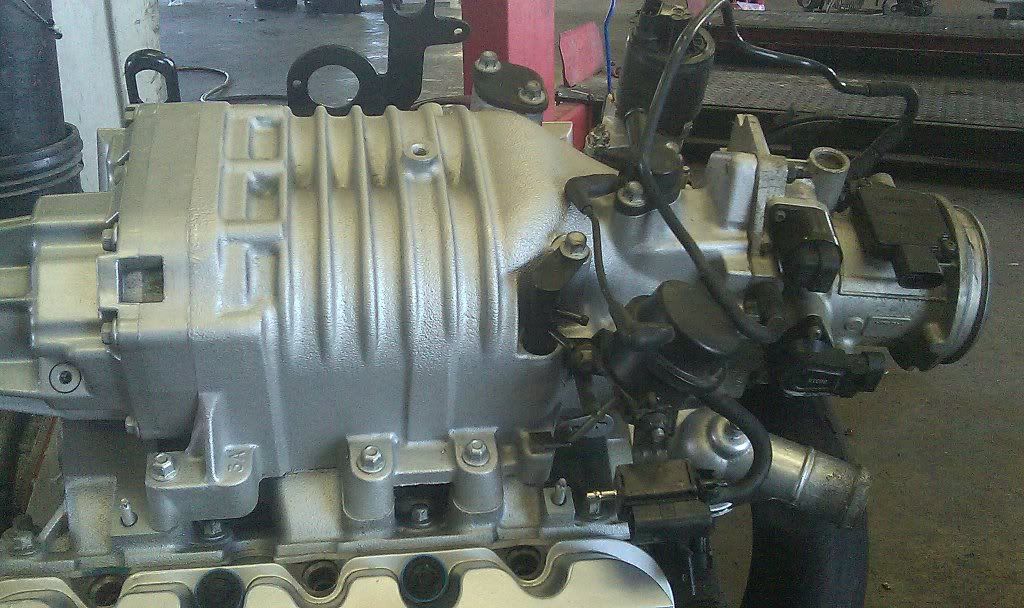
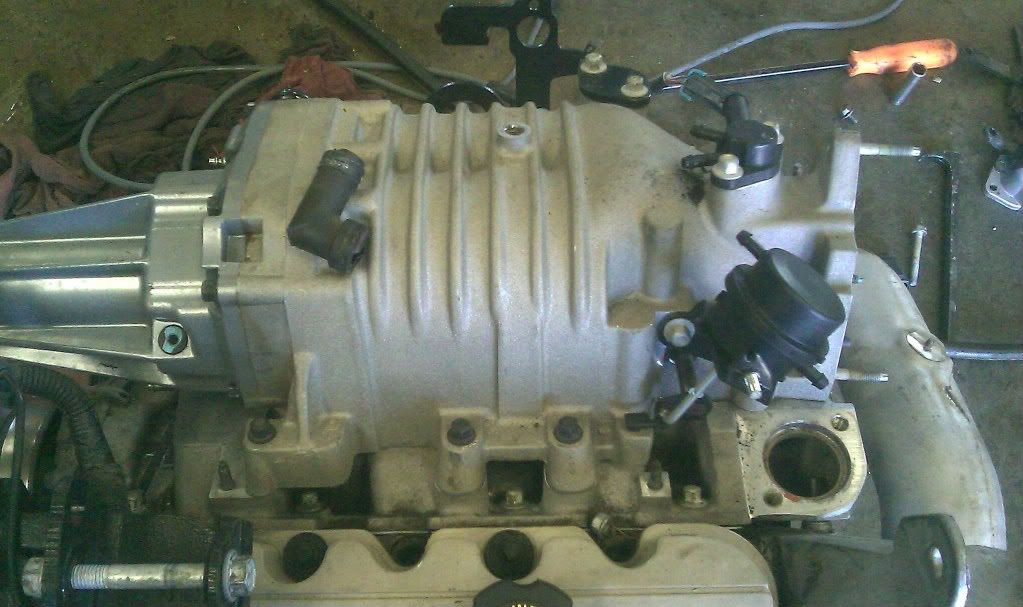
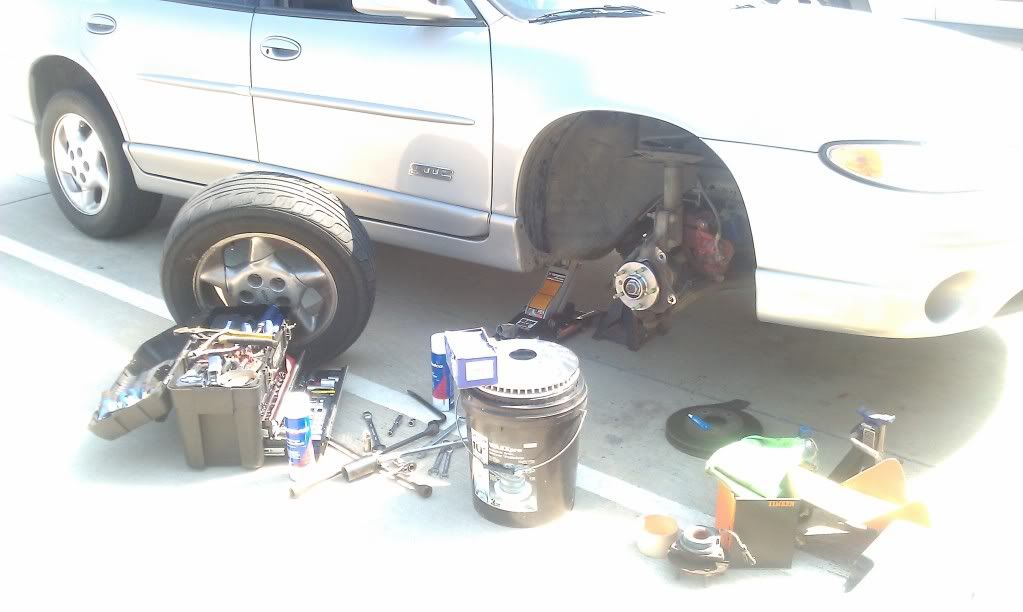
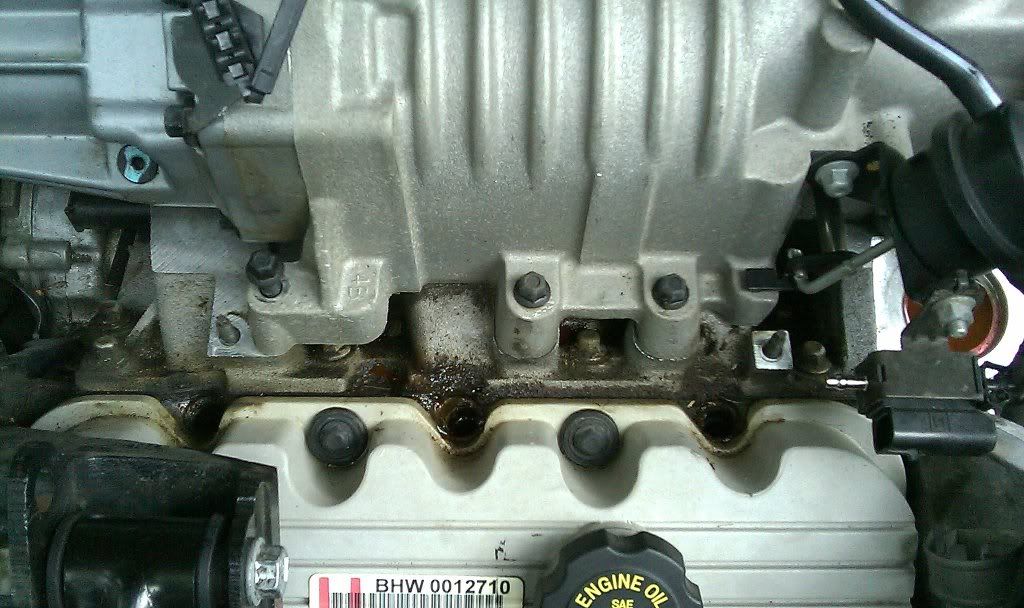
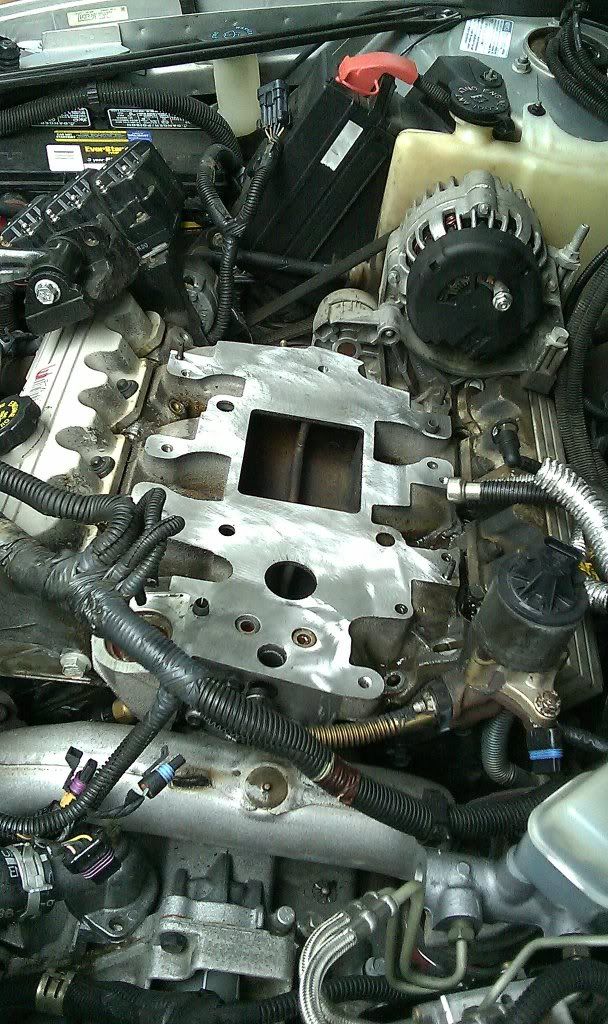
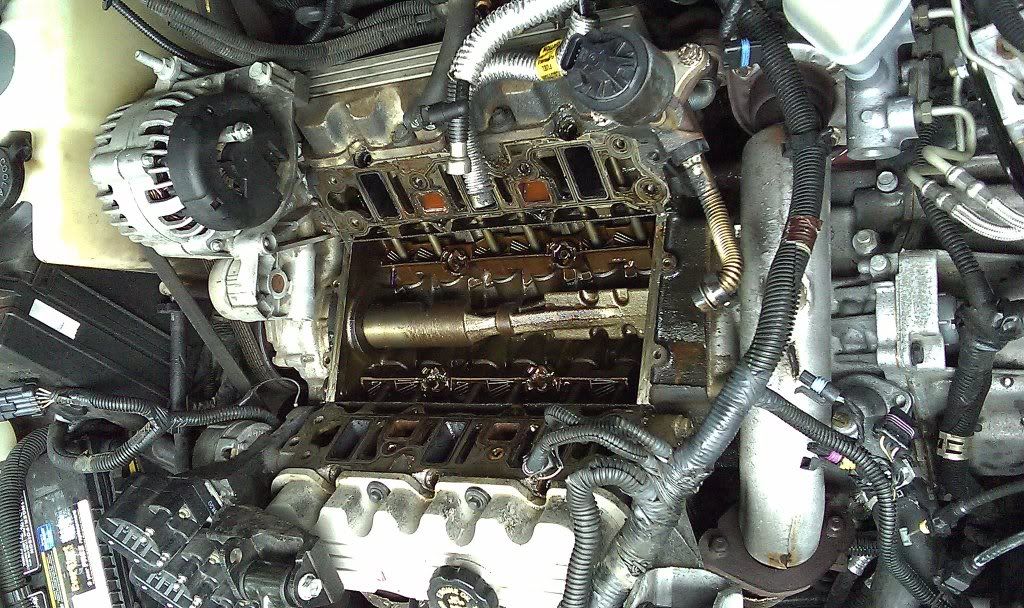
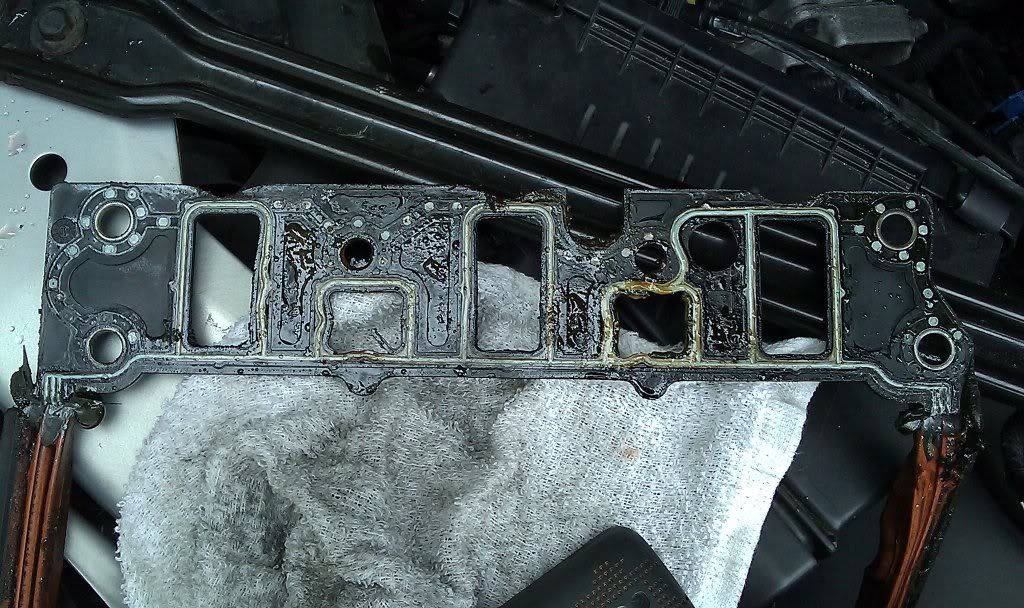
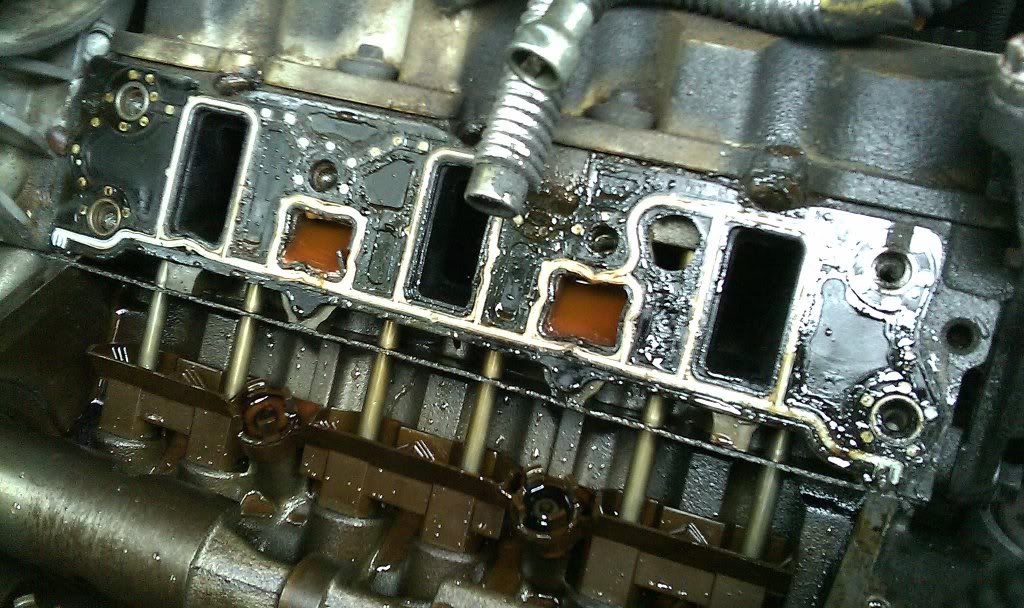
Everything was going good for the first year, didn't want to risk anything so when I hit 74k I bought all the stuff to change the LIM gaskets. Never replaced and 11yrs old, figured the Dex has worked some wear in the gaskets and they would fail sometime soon... guess who was right
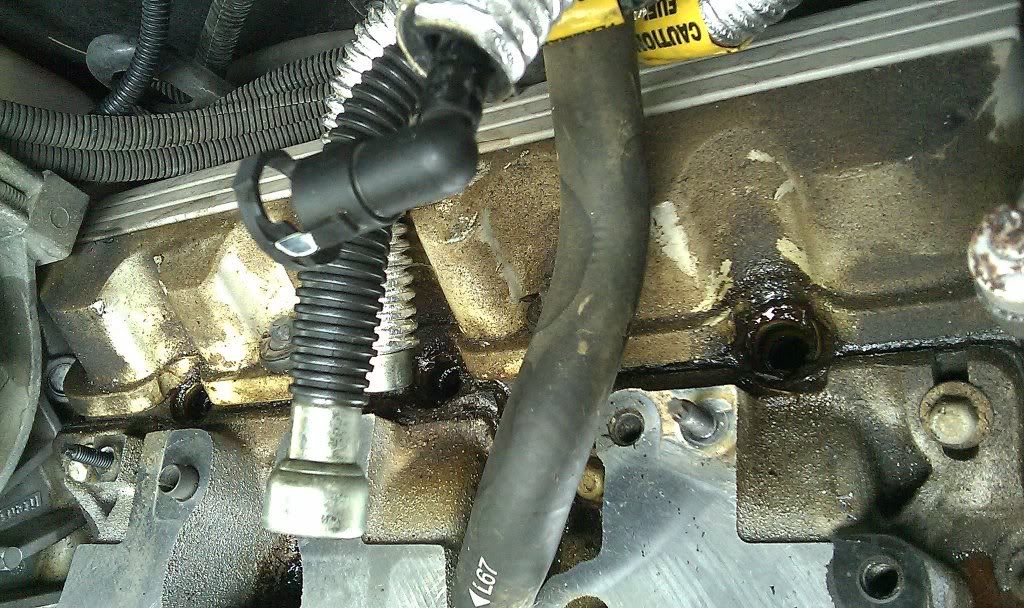
Noticed grim around the injectors...
Eng75k1.jpg


Found other pictures YAY
Eng75k2.jpg


Eng75k4.jpg


Eng75k7.jpg


Eng75k12.jpg


IMAG0010.jpg


IMAG0011.jpg


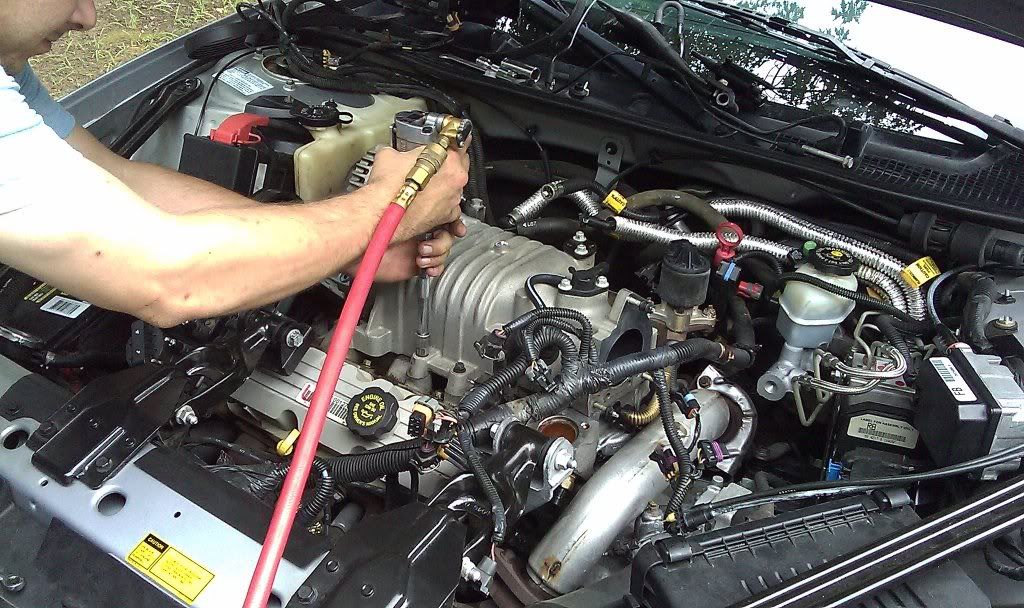
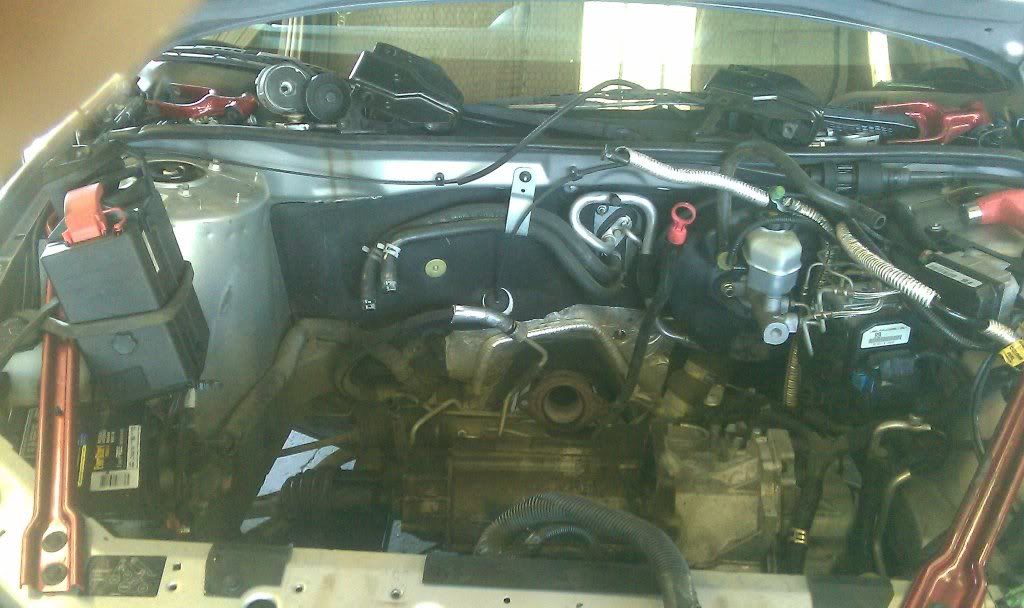
I didn't get many pictures as it started raining most of the time, once the engine came apart. At the edge of the garage and little cover, we had to wait for stopping points, scattered showers suck :th_laugh-lol2:
 
Last edited:


Nice car man. love silvermist. love the color choice under the hood.

can't wait to see more

edit: FIRST!
 
LOL good job #2 :th_laugh-lol2:

Okay... got to searching and I found several pictures I wanted posted in the first one... but Im not going to edit them in... its too long and I have alot more comming today. This has been building up and I don't want 5 pages next spring of what all has been done :th_laugh-lol2: Also had to move Painted Engine Bay parts down due to picture limits in the first post

Moving on... Last summer I started to get bored, bought some paint, had some fun with the engine bay.
IMAG0011-1.jpg


IMAG0013-1.jpg


Prepped the bars, Primer, 2 Silver Metallic Base coats, 3 Anodized Red Top coats, 3 layers of clear, and they are much better looking in person than my camera phone could capture :th_winking:

Also painted the calipers the same way, lost the pictures when my phone broke :( but I have shots in later pix... will get to those later... stay tuned

First missing.... Mirror Finish results... yes please
SpoilerSeals7.jpg


SpoilerSeals9.jpg


Sexy... I know
Now the bulbs I was talking about with the speakers... DAM!!! this made me go WTF? :eek:
3rdBrake2.jpg

You can literally see the plastic melted down the left side bulb. I just assumed they were blown from age, I was wrong. Some trimming of some plastic and I haven't had any problems since :th_thumbsup-wink:

Clean2.jpg

Kinda hard to notice, but the calipers were freshly painted and cured when these were shot. Cleaned the car while we were waiting for them to dry lol

Now after all this happened... Bad news struck
83,000+ and I was all :th_nervous:. GF and I got off the highway and I thought it was the Dodge Diesel next to me... it wasnt... so into the shop she goes.
Notice the bar matches... that's how I roll... not really, the tech wouldn't let me have the bar :th_laugh-lol2:
IMAG0080.jpg


Cyl #1 mains should NOT look like this
IMAG0068.jpg


IMAG0069.jpg


So we emptied the bay
IMAG0089.jpg


Made some room and put in another engine, old original is at the parents garage... to be rebuilt someday in the hopefully somewhat near future :D
Meantime, bought a used one with 88k and replaced the gaskets and gave a thorough check thru... 93k today and still kicking strong as an ox.

Painted and prepped to go in
IMAG0097.jpg


In other news
Brought this up many moons ago... apparently came from a older Bonnie... compare the Tee in this next picture to the following one... the one without is from the 99 GTP... capped off and no difference, but just found it interesting while working on trading parts
IMAG0093.jpg


IMAG0096.jpg
 
Last edited:
Next Item up for viewing is this summers starter project. Headlight RESTORATION!!! A BIG thank you to those with *How-To-Do* postings!!!

Starting out with
IMAG0086.jpg


Closeups
IMAG0087.jpg

IMAG0088.jpg


Just Plain NASTY! :th_sick1:
So I bought some sand paper, actually followed Warbeavers Post#3 in
http://www.grandprixforums.net/head-light-restoration-30843.html
You will see the results... mind you, NO CLEARING required. I just put on Tron and by the time it was over I realized I was still sanding the first one... its time consuming but Ooooo Soooo worth it.

Random Pictures during the process.
IMAG0089.jpg


IMAG0091.jpg


IMAG0095.jpg


Finished ONE! ugh... other is comming out nicely tho
Just had to let it dry and buffed it clean with some wax and she is still shiny months later... loving it
IMAG0098.jpg


Final Product
IMAG0101.jpg


And (again) Before I started just for a fast reference
IMAG0086.jpg


Now I just need some retro-fits... :th_jester:
 
Latest Edition, last for today :th_laugh-lol2:

Last weekends project... Fun idea in 108* weather.
R1 Concepts Drilled/Slotted Rotors, Pads, and both from Timkin Hubs

Its was a hot sum-beech so only a few pictures during the process
IMAG0143.jpg


Old Hub... amazingly wasn't welded on like some horror stories had. glad for dry southern weather for ONCE :th_shakinghead2:
IMAG0151.jpg


New is much MUCH nicer tho
IMAG0142.jpg


IMAG0144.jpg


IMAG0145.jpg


Almost pulled a noob move and installed backwards lol glad I caught myself tho, delirium was setting in, I had no idea what was going on. Soaked the shirt so i could maintain cooler body temps and handle it, sun dried the shirt in 30 mins... :th_shakinghead1:
IMAG0146.jpg


Time for the backs... they were pretty nasty too
IMAG0147.jpg


No worries... new is purty
IMAG0148.jpg


Hard to tell with these wheels on... plans for income tax... new wheels and shoes. Hopefully nice set of 18s
IMAG0149.jpg


Window Regulator to follow this next weekends... should have a couple pictures of that and the detailing that will follow suit. stick around and thanks for viewing :th_thumbsup-wink:


This is not a good look... so REPLACEMENT TIME!!!

IMAG0155.jpg


The old regulator was all kinds of busted
IMAG0153.jpg


New one is soo much better... ignore the holy jeans, it was sunday :p
IMAG0156.jpg


....
Im skipping the installation pictures and info. There's a how-to that I followed if you really want to see how it was done :D

But after.... I CLEANED HER!!!! Ooooo so nice to have my baby washed and waxed again. Love this color when its all clean and shiny
IMAG0157.jpg


IMAG0158.jpg


IMAG0159.jpg


So far that's all Ive got. With any luck Ill have rock some new wheels and she'll be paid off soon then I can let the mod bug dig in deep :th_king-evil:
 
Looks good man, but you have different wheels in one picture?

HAHA Yea off my old Bonnie. I swapped out wheels for a little while to keep them rolling so they don't get flat spots. She's just sitting atm, won't run under own power right now, so I swapped wheels. Put them back on during the brake/hub replacement.

Was hoping nobody noticed :th_laugh-pointup:
 
If you are looking for wheels you should look at KV5's they would look good on your car, but your wheels right now are nice too. You just cant really show off your calipers and rotors right now haha.


Nice work man.

You should look into the crosslaces from the 94-96's. They would look really cool on your car and be a nice little upgrade.
 
Ive actually been considering the KV5s or something similar. I really like the look of 18s on these cars :D

18" Wheels and Tires
Really want to get the 600 together to steal these...
3m93p43lc5V65W15X0b8ja6379a440fee1684.jpg


Straight up sexy, but I blew 600 between the hubs, brakes and window regulator :( ... but it had to be done so I'm just stuck. I told the GF if she really loved me she would buy them for me as an early Christmas present... don't think it worked :th_burger:
 
those are really nice, I would get those if I had $600, but I would just save for new kv5s or something idk. When I get into the wheel ballpark, I will be researching ALOT!
 
buy new hl capsules for retros. u can only clean so much oxidation. and theyre cheap.
 
buy new hl capsules for retros. u can only clean so much oxidation. and theyre cheap.

At some point, yes... for the time being, they are much better, I can see at night, and was able to save money for brakes and hubs so I can actually drive my car on the highway. :p

I want a set of retros, but there are things that I want more first


:th_sinister:


Just a little whorage because I had a moment...


A special kind of moment....


A :th_sign-ohsnap: Moment even...


:th_sign-woot: #2000 POST!!!

:D
 
Well inspite of my http://www.grandprixforums.net/stupid-craigslist-shady-sellers-grrr-54084.html Rant Posting, after work I put the car on the lift and installed the MB Drifter 18's. Fit was flawless, need spacers as the backs are pulled in further than I'd like (+48 offset I think).

Since it balanced out on the bent wheel, driving was a breeze. Smooth even up to highway speeds, for now anyways. Love the look of them, figure I'll be careful with them and hopefully they will work out til next spring and then Ill fix the wheel properly.

Anywho... pix!!!

IMAG0268.jpg


IMAG0269.jpg


IMAG0270.jpg


Its been raining this week... so this weekend I'll give her a bath and take some better shots

Enjoy
 
Seeing this for the first time.. I'd like to help any newbs that happen to read it.

How did dex mess up the LIM gasket at the intake runner? Right..it didn't. Heat did. Dex sludges, doesn't seem to effect the gaskets, I've done the swap and seen teh gaskets do the same with green coolant. It's a heat issue with a nylon gasket.

On the SC vacuum port. It's not only a Bonne thing. All 97 chargers had the tree. The 98+ didn't have the tree. Just a different way to run vacuum and probably save one machining step.

Car looks good. Really good.
 
LOL Welcome Bill :th_laugh-lol2:

Thanks for the clarification, always nice to have your input. Didn't want to drag on between old pictures so I summized most stuff and it could have been misleading so this helps.

Also, thanks for the compliment :th_thumbsup-wink:
 
Back
Top