• The site migration is complete! Hopefully everything transferred properly from the multiple decades old software we were using before. If you notice any issues please let me know, thanks! Also, I'm still working on things like chatbox, etc so hopefully those will be working in the next week or two.

My Latest Mod - Lighted cupholders

Abrasive

I say it with pictures
I guess this falls into Visual Electronics.

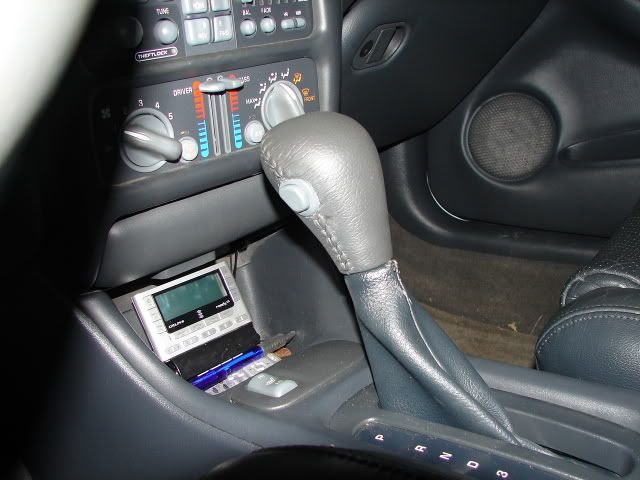
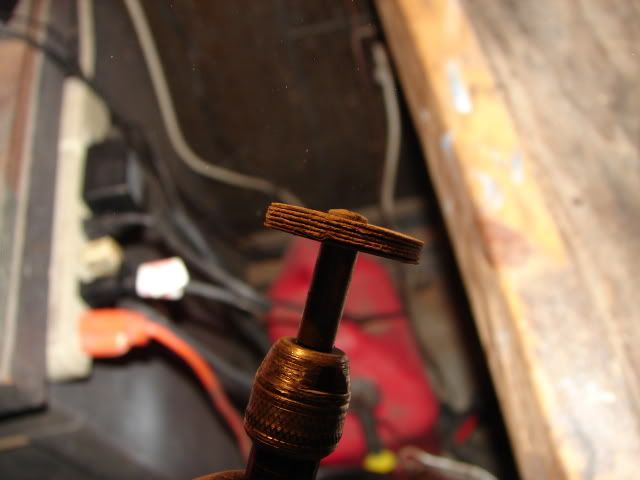
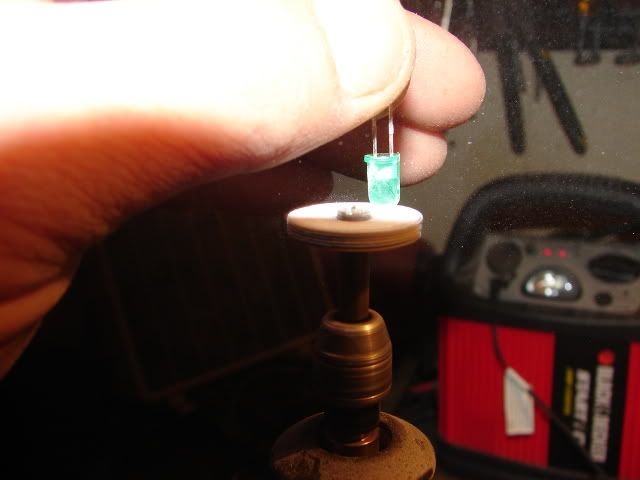
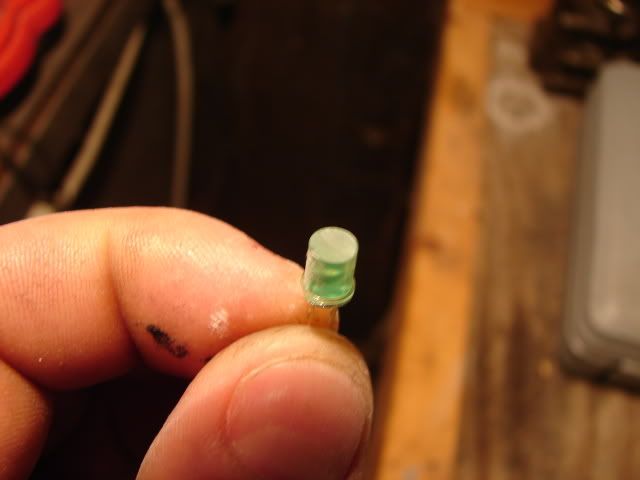
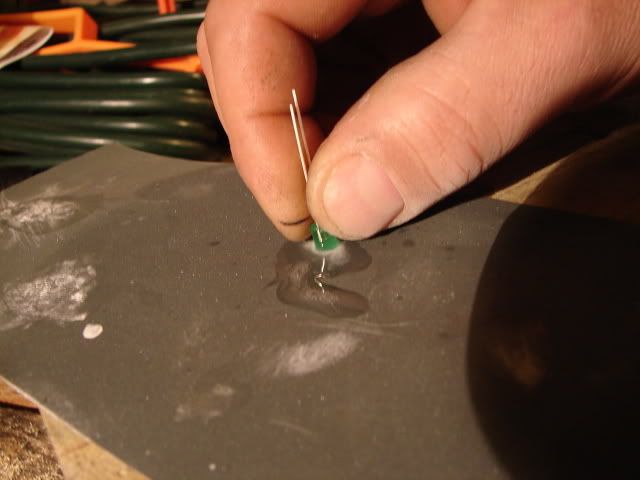
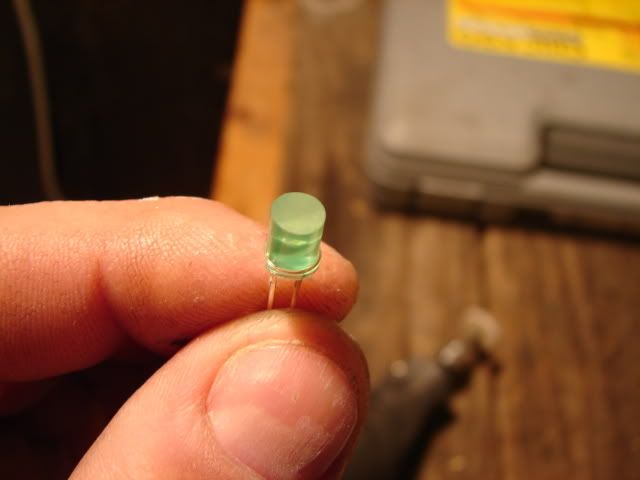
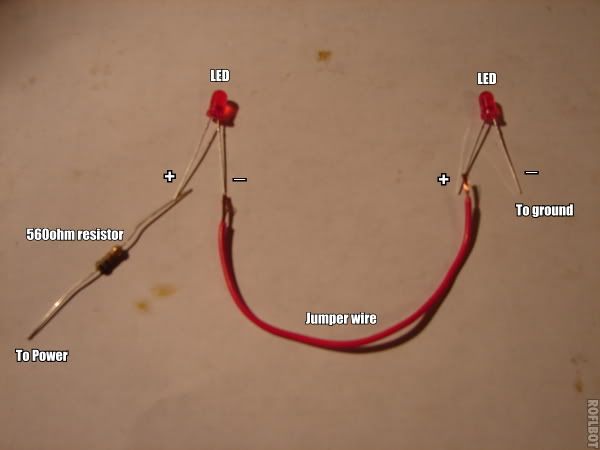
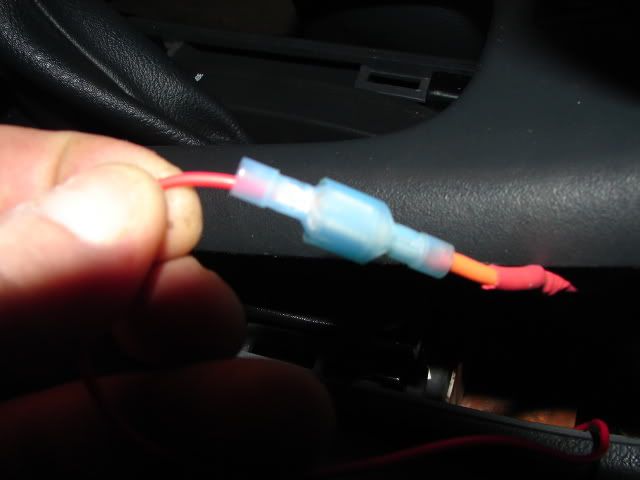
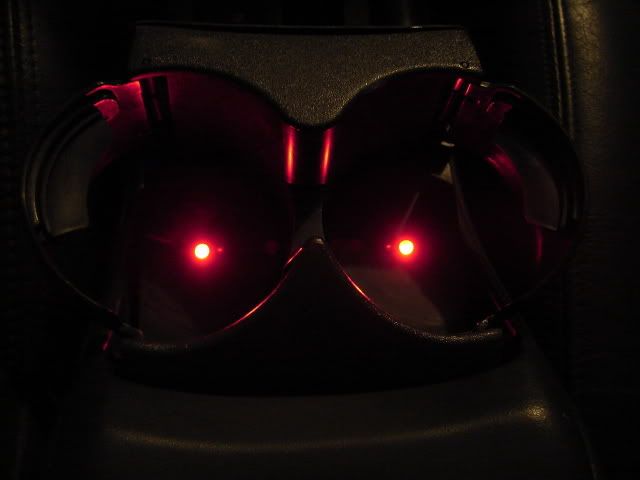
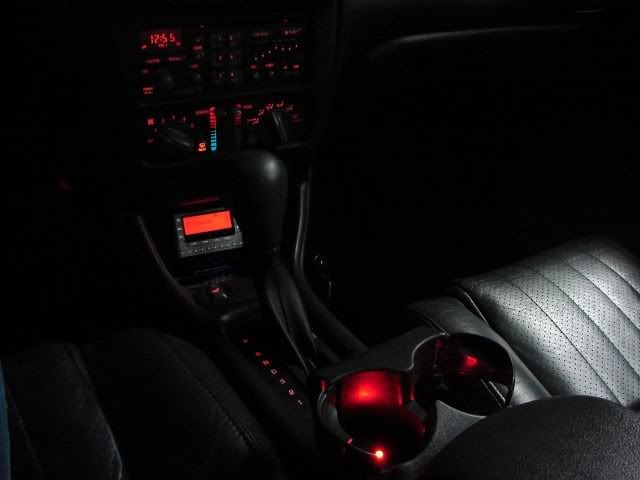
Been working on this for a little while and the reason I was aking how to remove the cupholders. I'm sure some of you will think it's rice, but I don't care. Took my time, did everything they way I wanted it with solder, shrink tube and insulated easy disconnects in case I need to take the center console off again in the future. Put them on a switch also so they can be turned on and off as I please. I used two red LEDs and sanded them down so they are flat on top and then wetsanded them on top with 1000 grit to shine them back up. I did this so that when I insert them in the bottom of the cupholders in the two holes I drilled, they sit flush with the bottom and fill the holes completely, making them nearly vanish when they are off. The cupholders still open and close into the console just like they always did. The two LEDs are wired in series with one 560 ohm resistor.

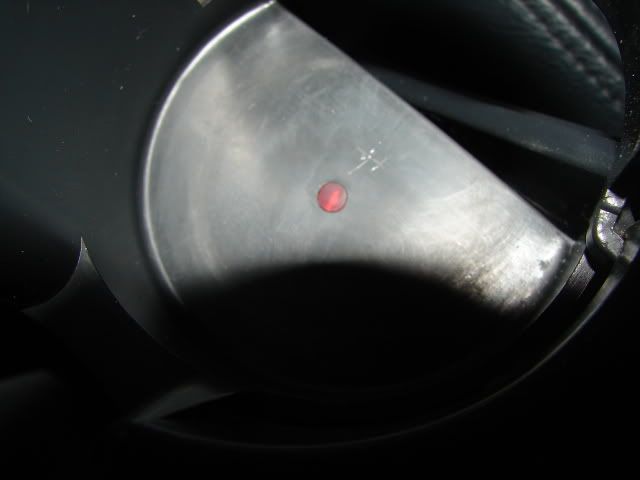
Here they are off, you can barely tell they are even there.
DSC01714.jpg


Here they are lit up with the rest of the lights on. Pretty bright, which is why I put them on their own switch so that I don't always have to have them on.
DSC01715.jpg


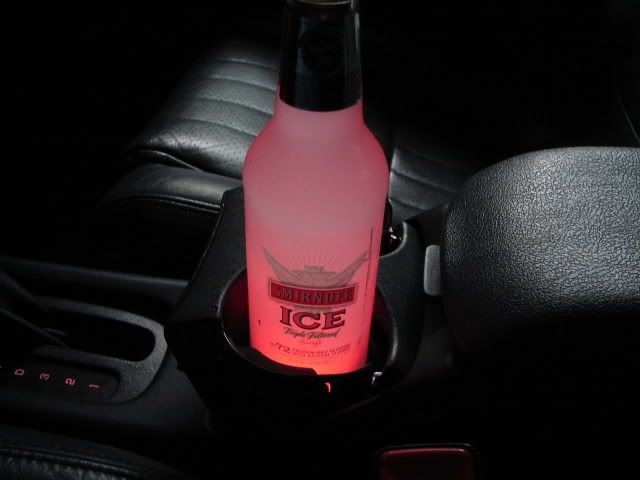
I don't drink and drive, but this was the only clear bottle I had available in the garage refrigerator at the moment. Pretty cool effect I think.
DSC01716.jpg


Abrasive thats pretty awesome. Are you gonna do a writeup on that? I think thats a mod i would be willing to attempt. How do you determine on and off? Are they just on a flipswitch or do you have them on some sort of switch that opens an closes the circuit when you open or close the cup holder?


Looks like something out of the rainbow coalition gift catalog, LOL


Nah, just kidding, that looks extremely nice. I hope you do a write up so I can copy ya.
 
Looks like something out of the rainbow coalition gift catalog, LOL

Been looking through their catalog have ya? One question, when that comes to your house in the mail, does it come in a brown sleeve or just "out" where everyone knows? :th_laugh-lol3:
 
hahaha...rainbow coalition catalog!? never heard that, good one! they look pretty damn good! are they wired into the center console lights so they come on when the dash lights are on?
 
Do a write up! I've been thinking about doing this after seeing it done a few times, but I haven't seen such a clean install as yours. :)

I have so many LEDs and resistors sitting around from my interior conversion I want to put them to use.


Abrasive thats pretty awesome. Are you gonna do a writeup on that? I think thats a mod i would be willing to attempt. How do you determine on and off? Are they just on a flipswitch or do you have them on some sort of switch that opens an closes the circuit when you open or close the cup holder?


They are on just a low profile flip switch. Two reasons for this is one, I can turn them off even with the cup holders out in case they come to the point where they are distracting while driving. It's dark here now and I lit them up out in the dark and they are not as bright as they seemed they would be. Just about right in my opinion.

The second reason is that I already had a switch in the center console. The previous owner had installed it for the performance shift. Well, as a side mod to this LED project, I got a performance shift shifter knob from a friend of mine. So now I had this switch in the console that I wasn't going to be using and I couldn't just remove it because of the hole it would leave behind. The switch he used was lighted, but never was hooked to power, so I swapped it out with one exactly the same only all black and not lit (because I didn't want it lighted) and decided to just use it for these LEDs in the cupholders. Not where I would like to have had it, but unless I replace the top of the console, not much I can do about it.

DSC01745.jpg


The shifter knob I got was pretty beat up and had some cuts in the leather. I ended up carefully cutting the leather on mine and then dremeling out a hole in mine for the perf shift button. I then installed the button from the ragged knob into my stock one. Turned out pretty good I think.

DSC01719.jpg
 
Last edited:
Do a write up! I've been thinking about doing this after seeing it done a few times, but I haven't seen such a clean install as yours. :)

I have so many LEDs and resistors sitting around from my interior conversion I want to put them to use.

I could do a basic write-up I guess. Honestly, I didn't take any pics on the way through because I wasn't sure how good it was going to turn out. LOL! I'll put together something for you guys though, even if it's just a few pointers to follow along with.
 
Last edited:
Ic ic sounds like a good use for the switch an a good idea behind making it switchable like that. As far as the shift knob it looks pretty good.


I could do a basic write-up I guess. Honestly, I didn't take any pics on the way through because I wasn't sure how good it was going to turn out. LOL! I'll put together something for you guys though, even if it's just a few pointers to follow along with.

The only part I'm slightly fuzzy on is how to attach the LEDs to the plastic and keep them there over time. I can handle the rest.
 
The only part I'm slightly fuzzy on is how to attach the LEDs to the plastic and keep them there over time. I can handle the rest.


I used 5mm leds and drilled the holes in the cupholders using a 13/64 drillbit and I kinda wiggled it around in the holes a bit. They fit very tightly and I doubt they would have fallen out, but I did put a drop of gorrilla glue on the underside just in case. Probably would have been better to use a drop of silicone or rtv so you could take it back out easier later if need be. I bought various led holders, but none of the ones I got really would have worked without putting them through from the top side. I wanted them flush so anything with a flat bottom wouldn't wobble in the cupholder.
 
Well, here is the very basics to this mod.

First I started out at Radio Shack and picked up a small variety pack of 5mm LEDs and a pack of 560ohm resistors. I got the variety pack because it was actually cheaper than buying the LEDs seperately and it had 4 red ones in it so in case I messed one up I would have a couple extras.

These first few sanding steps can be skipped if you want to order your LEDs from superbrightleds.com since they actually sell 5mm LEDs that are already flat on top. This would save you some work if you want to wait on them to be shipped to you. I had the means to make them myself, so I did it this way.

First thing I did was to take my dremel tool and stack a bunch of sanding disks on top of eachother. This was to make it more solid so I would end up with a more true flat surface on the LED.
DSC01724.jpg


Next I sanded down the rounded end of the LED so that it was flat.
DSC01722.jpg


Here's after the dremel sanding. I used a green one just for these pics since I probably won't ever use it anyway and I already had the ones in my cupholders done.
DSC01725.jpg


Next I laid a piece of 1000 grit sandpaper on a block of wood (again, just to keep things flat) and wetsanded the end of the led to take the roughness off from the dremel sanding.
DSC01729.jpg


Here's the LED after the wetsanding. Not totally clear but much smoother than just after the dremel, and this probably diffuses the light a little better anyway.
DSC01731.jpg


Next you need to wire up your LEDs and resistor. You will need a short piece of wire to connect in between the LEDs. When I soldered mine together, I covered all of the wires and resistor with shrink tube so there were no bare wires when I was finished. Here is a very helpful website for calculating what resistors to use if you decide to use different/more/less LEDs - http://ledcalc.com/
roflbot-95tT.jpg


Now you will have to remove the top of your center console. I measured out and drilled one hole in each cupholder with a 13/64 drill bit. I then inserted the LED circuit I made in from the bottom of the cupholders. The LEDs fit very tightly and could probably be left as is, but I did use a drop of glue on the bottom side of each one to make sure they never fell out. You can also see in this picture where I marked true center of the cupholder if it were a complete circle. I ended up changing this since most bottles will not fill the entire cupholder. There was a slight ring on the bottom of the cupholder left behind from cans and such, so I centered the LED in that circle so it would end up more centered under a bottle. After thinking about this a while, I am glad I did this. I think they would have looked odd over closer to that flat edge of the bottom.
DSC01737.jpg


Now all that's left is to wire your LED circuit to power and ground. I will leave these decisions up to you. I used a switch to turn mine on and off and got power from the auxillary power outlet on the front passenger side of the console. This is a constant 12v source. You could also easily tap power from the light bulb in the shifter display if you would like them to just come on and dim with the rest of the car's lights. You could get fancy with a mercury switch on the cupholder itself also if you wanted them to just some on when you open the cupholders. As for the ground, the easiest place was directly below the cupholder to one of the two 10mm bolts that hold the center console in place, which is where I grounded mine.

I highly suggest using some sort of disconnects so that you can easily unhook the wires in the event you need to remove the top of the center console. It also makes wiring easier since you can get it all ready then just plug it right in when you put the top of the console back on. I used these on both my power and ground wires.
DSC01742.jpg


Here's the finished product.
DSC01744.jpg


My switch location. I already had a switch there from an old performance shift install which I changed once I got a perf shift knob, so I just made use of what was already here.
DSC01745.jpg
 
Back
Top