BillBoost37
New member
Ok...here goes.
Air tools method:
Jack and support the passenger side of the car.
Remove the tension from the belt(s) and let them sit there.
Remove the passengerside wheel (stock is 19mm)
Remove the plastic splash shield that keeps you from seeing the harmonic balancer. (trim pop tool and sometimes phillips screwdriver)
With a 24mm socket, remove the harmonic balancer bolt.
Using an HB/steering wheel puller find the correct pieces to pull the balancer because the bolt hole area can be quite long. It requires the short rod and pulling piece in my kit. Along with three bolts M6 x 1.00 and 70-75mm in length. Check that you have these bolts before trying this procedure. 1/4 by 28 bolts will work in a pinch.
Pull the balancer off and set it aside
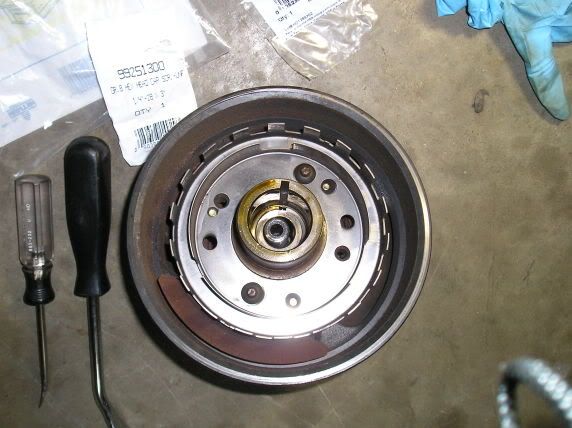
Looking at the motor now, this is what you see. Plastic shield in way of the sensor.

Disconnect the crank connector from the sensor.
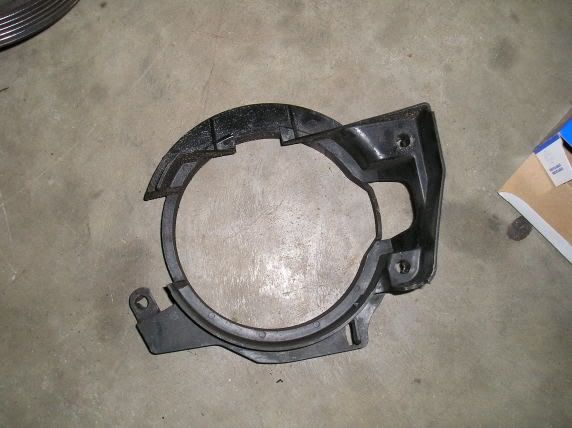
Carefully pop all three holding positions of the plastic shield off to remove it.
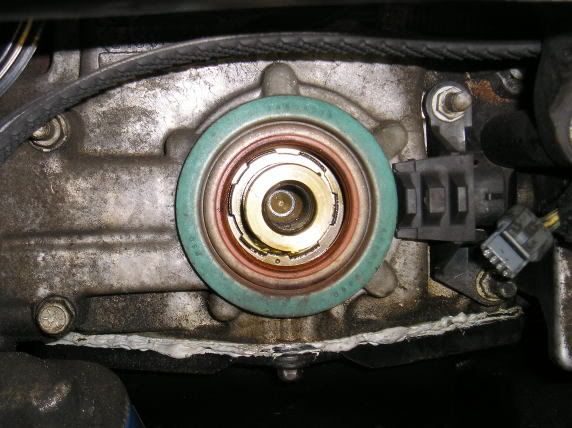
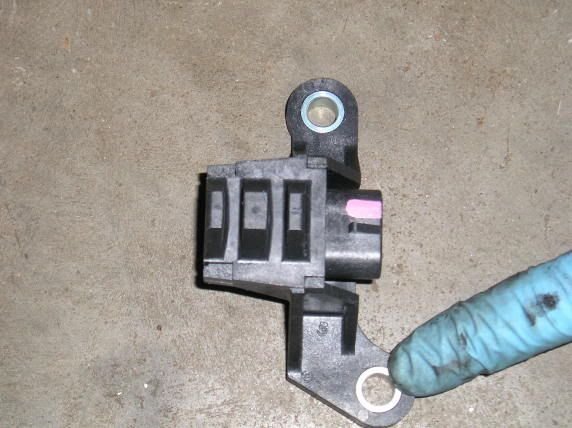
Now you are looking at the sensor. Using a 13mm, remove the two bolts holding it to the cover.
Wiggle the sensor free. It sits on a post that aligns it on the timing cover. It can be quite a pain sometimes. Wiggling and gentle prying will get it off.
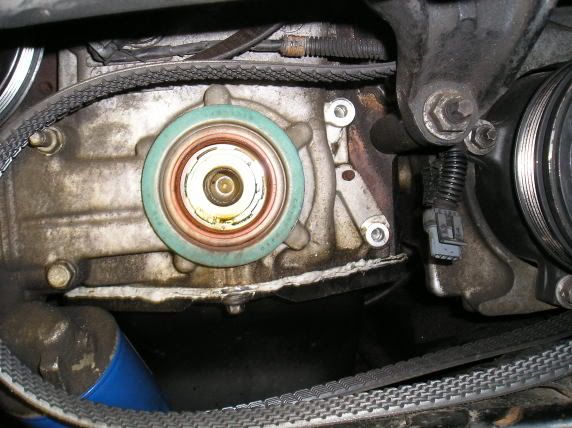
Put the new sensor in place and torque the bolts to 13ft lbs.
Install the shield back in place and using your 13mm socket and extension, give each of the three holding areas a slight tap to ensure they are fully seated.
Connect the crank sensor connector.
Put the harmonic balancer on the crank and rotate it by hand while pushing inward to the motor. At a point it will push in and engage the key into it's keyway. You will no longer be able to turn it.
Reinstall the harmonic balancer bolt. (I gun this on with an impact (this pulls the balancer on the rest of the way) and do not torque it properly. No loctite, no sealant, just reuse the stock bolt. Technically its a TTY bolt and per the FSM should be replaced. I never do and never have any issues with it.)
Put the belts back on and tension them
Start the car to ensure the new sensor works.
Put the splash shield back in place
Put your tire back on
Put the car back on it's feet and perform a case learn if you have the ability. (I also only typically do this when needed. If the car starts and runs well..a case learn will only optimize things.)
Hand tools method:
Loosen lug nuts
Jack and support the passenger side of the car.
Remove the tension from the belt(s) and let them sit there.
Remove the passengerside wheel (stock is 19mm)
Remove the plastic splash shield that keeps you from seeing the harmonic balancer. (trim pop tool and sometimes phillips screwdriver)
Remove the flexplate inspection cover.
Hold flex with a pair of vice grips
With a 24mm socket, remove the harmonic balancer bolt.
Using an HB/steering wheel puller find the correct pieces to pull the balancer because the bolt hole area can be quite long. It requires the short rod and pulling piece in my kit. Along with three bolts M6 x 1.00 and 70-75mm in length. Check that you have these bolts before trying this procedure. 1/4 by 20 bolts will work in a pinch.
Pull the balancer off and set it aside
Looking at the motor now, this is what you see. Plastic shield in way of the sensor.
Disconnect the crank connector from the sensor.
Carefully pop all three holding positions of the plastic shield off to remove it.
Now you are looking at the sensor. Using a 13mm, remove the two bolts holding it to the cover.
Wiggle the sensor free. It sits on a post that aligns it on the timing cover. It can be quite a pain sometimes. Wiggling and gentle prying will get it off.
Put the new sensor in place and torque the bolts to 13ft lbs.
Install the shield back in place and using your 13mm socket and extension, give each of the three holding areas a slight tap to ensure they are fully seated.
Connect the crank sensor connector.
Put the harmonic balancer on the crank and rotate it by hand while pushing inward to the motor. At a point it will push in and engage the key into it's keyway. You will no longer be able to turn it.
Move vice grips to other side to hold flexplate while tightening balancer bolt.
Reinstall the harmonic balancer bolt and torque to ensure it's tight.
Remove vice grips and reinstall flexplate inspection shield.
Put the belts back on and tension them
Start the car to ensure the new sensor works.
Put the splash shield back in place
Put your tire back on
Lower car and tighten lugs.
Put the car back on it's feet and perform a case learn if you have the ability. (I also only typically do this when needed. If the car starts and runs well..a case learn will only optimize things.)
Air tools method:
Jack and support the passenger side of the car.
Remove the tension from the belt(s) and let them sit there.
Remove the passengerside wheel (stock is 19mm)
Remove the plastic splash shield that keeps you from seeing the harmonic balancer. (trim pop tool and sometimes phillips screwdriver)
With a 24mm socket, remove the harmonic balancer bolt.
Using an HB/steering wheel puller find the correct pieces to pull the balancer because the bolt hole area can be quite long. It requires the short rod and pulling piece in my kit. Along with three bolts M6 x 1.00 and 70-75mm in length. Check that you have these bolts before trying this procedure. 1/4 by 28 bolts will work in a pinch.
Pull the balancer off and set it aside
Looking at the motor now, this is what you see. Plastic shield in way of the sensor.
Disconnect the crank connector from the sensor.
Carefully pop all three holding positions of the plastic shield off to remove it.
Now you are looking at the sensor. Using a 13mm, remove the two bolts holding it to the cover.
Wiggle the sensor free. It sits on a post that aligns it on the timing cover. It can be quite a pain sometimes. Wiggling and gentle prying will get it off.
Put the new sensor in place and torque the bolts to 13ft lbs.
Install the shield back in place and using your 13mm socket and extension, give each of the three holding areas a slight tap to ensure they are fully seated.
Connect the crank sensor connector.
Put the harmonic balancer on the crank and rotate it by hand while pushing inward to the motor. At a point it will push in and engage the key into it's keyway. You will no longer be able to turn it.
Reinstall the harmonic balancer bolt. (I gun this on with an impact (this pulls the balancer on the rest of the way) and do not torque it properly. No loctite, no sealant, just reuse the stock bolt. Technically its a TTY bolt and per the FSM should be replaced. I never do and never have any issues with it.)
Put the belts back on and tension them
Start the car to ensure the new sensor works.
Put the splash shield back in place
Put your tire back on
Put the car back on it's feet and perform a case learn if you have the ability. (I also only typically do this when needed. If the car starts and runs well..a case learn will only optimize things.)
Hand tools method:
Loosen lug nuts
Jack and support the passenger side of the car.
Remove the tension from the belt(s) and let them sit there.
Remove the passengerside wheel (stock is 19mm)
Remove the plastic splash shield that keeps you from seeing the harmonic balancer. (trim pop tool and sometimes phillips screwdriver)
Remove the flexplate inspection cover.
Hold flex with a pair of vice grips
With a 24mm socket, remove the harmonic balancer bolt.
Using an HB/steering wheel puller find the correct pieces to pull the balancer because the bolt hole area can be quite long. It requires the short rod and pulling piece in my kit. Along with three bolts M6 x 1.00 and 70-75mm in length. Check that you have these bolts before trying this procedure. 1/4 by 20 bolts will work in a pinch.
Pull the balancer off and set it aside
Looking at the motor now, this is what you see. Plastic shield in way of the sensor.
Disconnect the crank connector from the sensor.
Carefully pop all three holding positions of the plastic shield off to remove it.
Now you are looking at the sensor. Using a 13mm, remove the two bolts holding it to the cover.
Wiggle the sensor free. It sits on a post that aligns it on the timing cover. It can be quite a pain sometimes. Wiggling and gentle prying will get it off.
Put the new sensor in place and torque the bolts to 13ft lbs.
Install the shield back in place and using your 13mm socket and extension, give each of the three holding areas a slight tap to ensure they are fully seated.
Connect the crank sensor connector.
Put the harmonic balancer on the crank and rotate it by hand while pushing inward to the motor. At a point it will push in and engage the key into it's keyway. You will no longer be able to turn it.
Move vice grips to other side to hold flexplate while tightening balancer bolt.
Reinstall the harmonic balancer bolt and torque to ensure it's tight.
Remove vice grips and reinstall flexplate inspection shield.
Put the belts back on and tension them
Start the car to ensure the new sensor works.
Put the splash shield back in place
Put your tire back on
Lower car and tighten lugs.
Put the car back on it's feet and perform a case learn if you have the ability. (I also only typically do this when needed. If the car starts and runs well..a case learn will only optimize things.)
Last edited:
")