• The site migration is complete! Hopefully everything transferred properly from the multiple decades old software we were using before. If you notice any issues please let me know, thanks! Also, I'm still working on things like chatbox, etc so hopefully those will be working in the next week or two.

glendayle's 99 Buick Regal GS

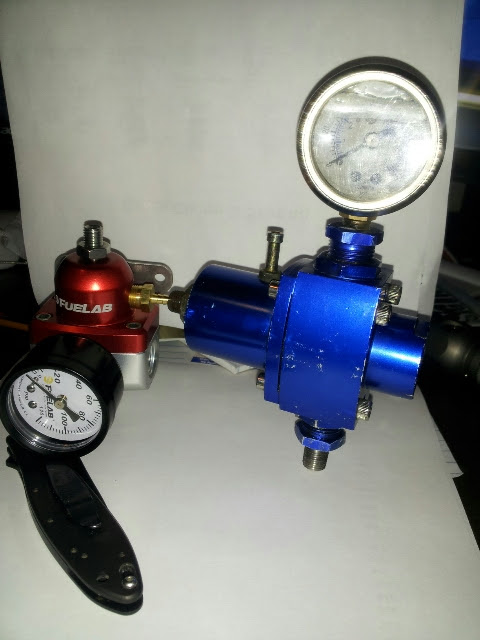
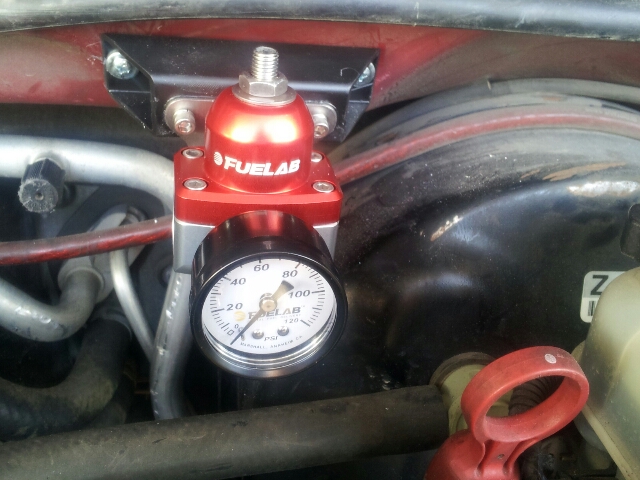
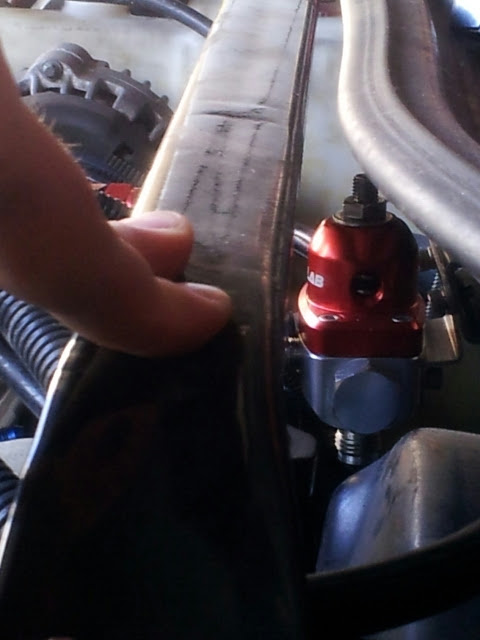
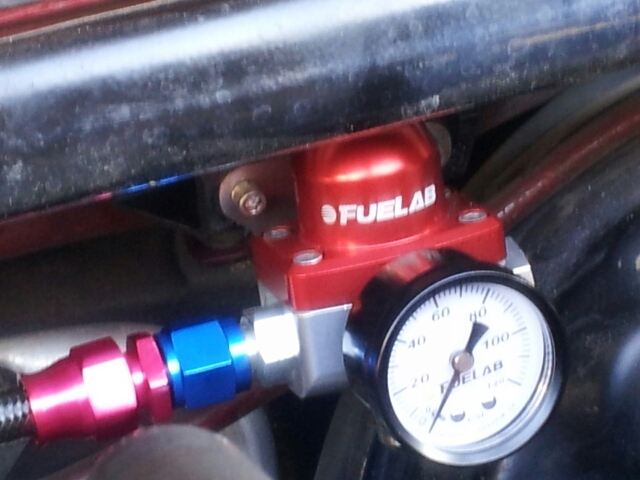
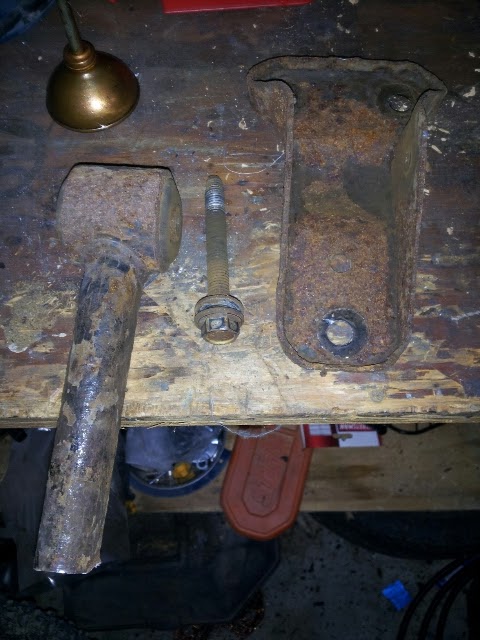
Picked up some of my parts for install of fuel lines. I only need to order a universal filter as I forgot to get one with my last order. Those Swagelok fittings weren't cheap.

%255BUNSET%255D.jpg


Also, Bill, if you read this, I may still need help on which wire is the correct wire to tap for the mirror turn signal lights. I couldn't figure it out, so I just ran the wires all the way to the taillights. I just need to figure out which one controls the blinker and then I can tap that and ground the return.


Wow, so I've been lazy.

Well, went out and did my passenger door. Everything takes way longer than I think it's going to, but oh well. At least I got something done.

Was trying to figure out a good method to make my hole covers for the door. I came up with this method and it worked pretty well. The other nice thing is that the openings on both doors were the same, so I could use the same tape templates on both sides and it worked out great.

1st, I put a bunch of strips of masking tape over the opening.
20130309_141348.jpg


Next I took at a razor blade and cut out the outline that I wanted and peeled away the extra ends.
20130309_141745.jpg


Then I pulled my tape outline off the door and placed it on my metal mesh(pretty sure this is the stucko base stuff) and used a cutout wheel to cut out my shape.
20130309_142002.jpg


Then I screwed it in place. Make sure if you have any wires coming out that you put on some additional wire loom or some sort of protector.
20130309_143742.jpg


I noticed when I did my back doors that there was a little bit of interference with the lock and handle mechanisms, so this time I used some thin cardboard to make sort of a "sleeve" of sorts. This worked remarkably well so I will be doing the same thing on the drivers side.
20130309_152430.jpg


Then the vibration dampener.
20130309_154202.jpg


And the sound barrier.(forgot to take a pic)

And then finally put the door card back together, screwed everything in place and plugged in my switches.
20130309_162856.jpg
 
Today came my new FPR. I went with the "mini" fuelab version. I love how small it is. Thinking about not mounting it to the rails, but putting it on the firewall. You can see how small it is compared to the old one. BTW, that one is FS. Feel free to throw any offers at me. Has some damaged threads that I think are repairable. If any one is interested, PM me and I can try to send some pics.

20130311_194749.jpg
 
Yeah, I'm sure there is a lot of different stuff floating around, but I purchased my stuff from RAAMaudio - Automotive sound deadening products. Obviously there will be people stating that dynamat, or second skin or whatever is the best. I went with the RAAMmat because it's the lightest of the 100% butyl deadeners that are out there. After deciding on this stuff and looking the company up, it turns out that the guy that owns it lives a little jaunt from where I live. I drove over and he gave me a good deal and some pointers on installation. He said you want to cover up all of the holes and that will help with the sound reflections. There are a couple of parts. 1st there is the deadener, and then there is the sound barrier. I put them both on the inside of the door skin and also on the inner door panel. I even threw a couple of shots of foam sealer in the corners of my doors. Hopefully this will keep out the road noise and make my cabin nice and quiet.


Got my new FPR in the other day. I decided I did not want to mount it to the fuel rails. I found a place where it should fit nicely. I needed to gap it off the firewall a little bit so that I could hit the adjustment screw.

Took a piece of tubing and made a bracket. Hopefully my fuel line parts will get in tomorrow and I can finish up my fuel lines.
20130315_093635.jpg
20130315_093626.jpg


Here's what it looks like with the supply side of the return.
20130316_001456.jpg


And yes, it does clear the STB.
20130316_090447.jpg
20130316_090528.jpg
 
Well, waiting for another fuel line part. Man I'm getting tired of this LOL. But in the spirit of actually getting everything done went to swap out my trailing arms and yeah, what I was afraid of. The galvanic corrosion between the TA bolt and the spindle mount is crazy. I beat on this thing for about 5 minutes with a hammer and couldn't get it to budge. thoughts?! Anyone know what would help loosen that galvanic corrosion bond?

20130317_094839.jpg
 
heat the area around the threads, not the threaded stud its self. works 99% of the time for me.


i use a plumbers soldering torch, get the metal cherry red, then crank it out.
 
not a chance, when you heat the piss out of metal it expands, and breaks its hold on the threads. when hot, it will back out 99% of the time.

the key is to not heat the threads of the bolt or stud, even if you only get the lower 1/2 of the casting cherry red the stud should still come out.

cant tell you how many times ive done this, its a basic trick most mechanics will use.

if you have oxygen and acetylene with a rose bud tip i think its called, it will cherry it up fast, but propane is cheaper, it just takes a bit longer.


This is the torch I have. Didn't work, but maybe I didn't get it hot enough. Maybe I need to get a different color bottle. I know the different colors are different fuels, but not sure which is which.
20130317_103042.jpg


I did however cut the TA off and used a hammer to beat the living daylights out of this bolt to get it out. Cleaned up the mounting bracket with a wire wheel and paint is drying as we speak.
20130317_105601.jpg
 
that will work, it takes a while to get it hot, as thats pretty thick. you may use 1/2 a bottle of gas. or set it up so its pointed ot it at a good angle and let it burn for 10 minutes straight or more. if your inside, shut the door so its a bit darker so you can see when its cherrys up

you may have better luck from behind if you have a clear shot at it.
 
alright, I have to give it another go later. It's burning the rubber from the TA bushing. I wouldn't dare just leave it there burning. Should I try a different fuel?


if you have a nice blue flame coming out of the tip you should be ok. its hotter if the flame is just touching the metal, not bending the flame around the metal. one inch of the tip of the flame touching the metal should be best.

ive made some heat shields when needed, vice grip some metal to shield whats you dont want to get burnt up. or remove it if you can.
 
The map gas is the one you want, it burns hotter than regular propane....so at least you are set there....good luck
 
Yeah, this is not working for me. Put the torch on it for over 5 minutes. It was not glowing, but it was pretty hot. Hotter than I feel comfortable with. I think I'm going to end up just cutting the bolt off and drilling it out.
 
A couple of things I do. Large breaker bar, penetrating oil etc.

I start at the knuckle to have the body side hold it for me. Beating, fighting etc, don't give up. It's force over time etc that wins the battle.

Interesting enough, a machine shop told me a secret they use to get bolts out of aluminum heads etc. They heat the bolt itself, let it cool, heat the bolt, let it cool. Typically the steel expansion/contraction will break that bond. I have always heard/seen the surface around it, but they specificially said the bolt, not area around it.
 
Back
Top