• The site migration is complete! Hopefully everything transferred properly from the multiple decades old software we were using before. If you notice any issues please let me know, thanks! Also, I'm still working on things like chatbox, etc so hopefully those will be working in the next week or two.

Gas Cap Rust.

DanPrixGTP

Moderator
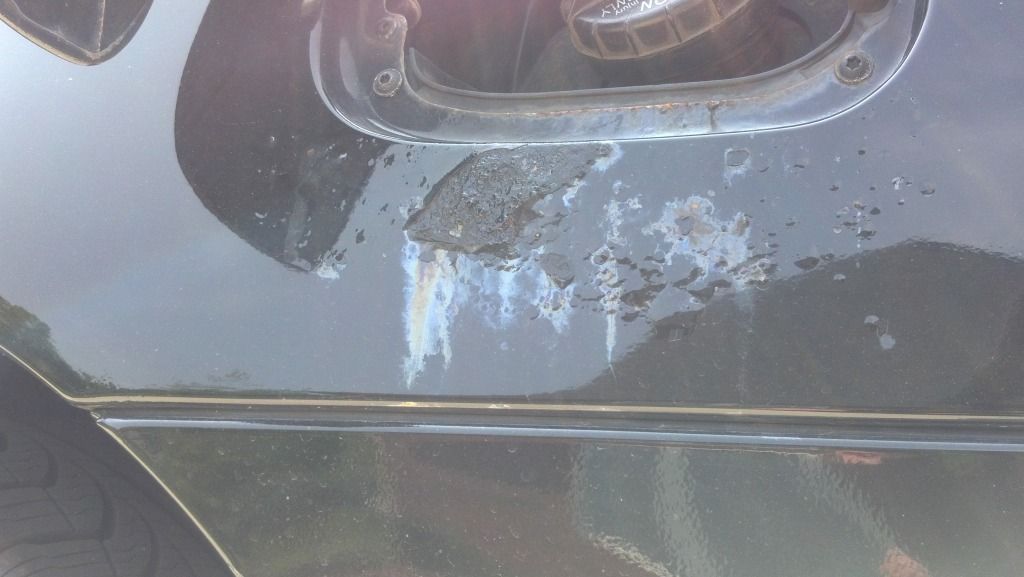
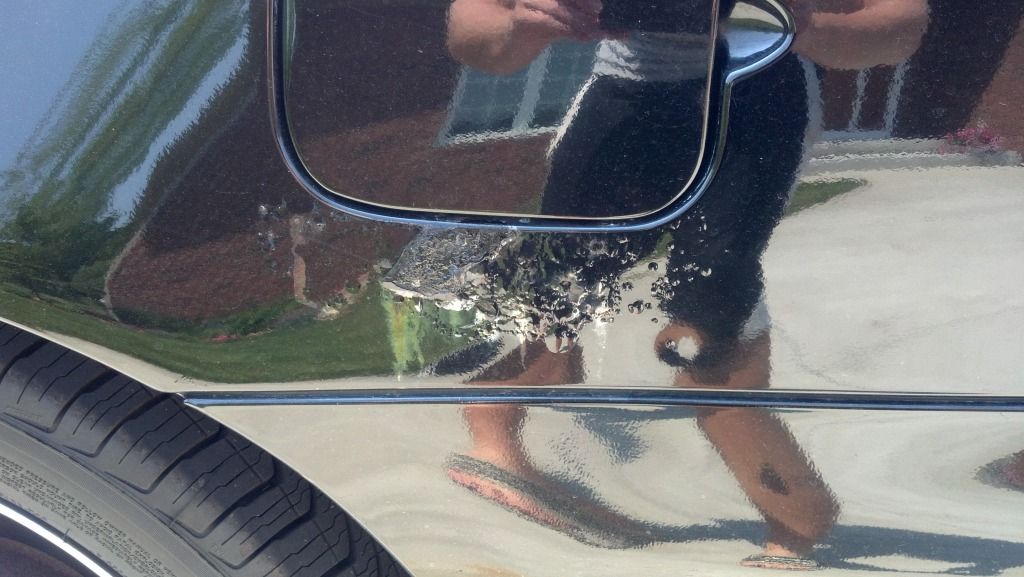
Well, i have the problem much others have with Grand Prix's. Rust by the gas cap! yay me. Before i try to bring it to a shop and get it fixed for X amount of money, why dont i try to fix it myself? Any suggestions on what to do? New piece need to be welded in? i would like to at least try before bringing it to a shop.

2012-05-20_11-56-15_191.jpg


2012-05-20_11-56-08_160.jpg


2012-05-20_11-55-54_272.jpg


2012-05-20_11-56-01_622.jpg


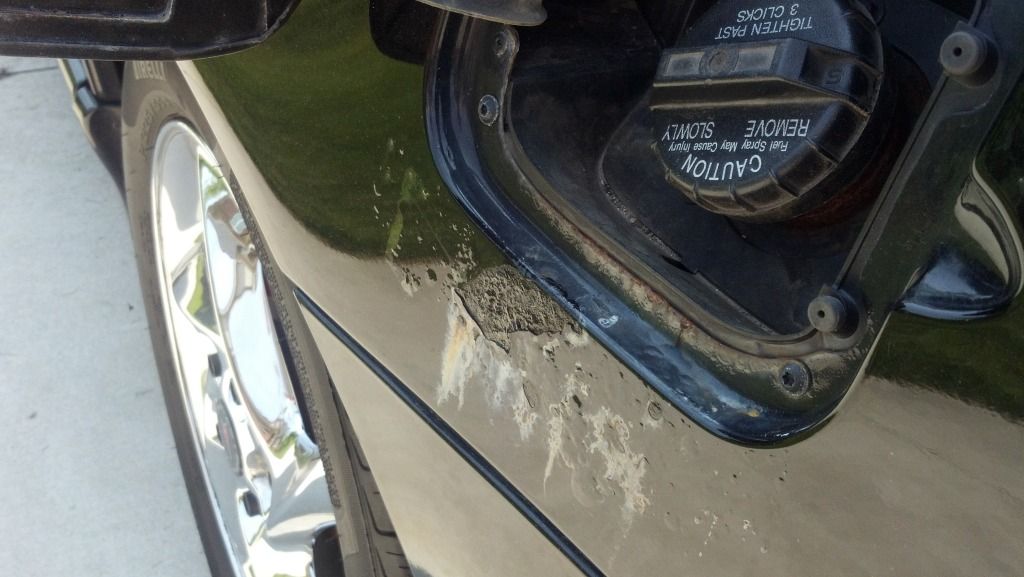
And i paint the rust black with Touch Up paint. Im so smart


its done! lmao, no for real you have to grind on affected area and filler patch, remeber that it happens from the inside out so grind on both sides, and just for kicks i bet your strut mounts are rusting throung on that side also
 
its done! lmao, no for real you have to grind on affected area and filler patch, remeber that it happens from the inside out so grind on both sides, and just for kicks i bet your strut mounts are rusting throung on that side also

Not always true.. I have about the same amount of rust near my gas cap but the drivers side rear strut tower was in good shape...
 
its done! lmao, no for real you have to grind on affected area and filler patch, remeber that it happens from the inside out so grind on both sides, and just for kicks i bet your strut mounts are rusting throung on that side also

Grind with what? and what filler to use?
 
grinder, duh lol, and metal if it bad enough or if your cheap bondo.

i know absolutely nothing about fixing rust. Here is what i was going to do.

1: Tape off a square that needs repairing, then cover alot of the car with like newspaper or something
2: Sand down rust, sand, sand, and sand some more.
3: Fill it with like bondo or something
4: Sand to nice flat finsih
5: Prime
6: Paint
7: Clear
8: let dry
9: Remove tape and everything else, then buff the Sh*t out of it cause im sure there will be some paint lines from the taped off square.


well cars has sense sold but no lines but you could tell new to old paint, my magic happend with the clear coat and some buffing. it really depends on your skills
 
how to fix this:

1. wax and grease clean the area
2. use a grinder (3" or 5") with 36 or 40 grit
3. wipe down u and apply fiberglass filler not body filler yet.
4. sand with 80 grit to knock down the fiberglass filler a bit but not to much
5. wipe down and apply body filler or putty coat depends on how much you need sand it with 80 grit then to 120
6. sand down with 220 grit (wet or dry) then primer it use epoxy or self etching if there is metal showing
7. sand the primed area of panel down with 600 grit wet IMO (where you will spray base coat)
8.NOTE: you are not suppose to blend clear. so sand off all the clear to the front of the A-pillar yes all the way to the A-pillar with 1200 with out blowing through the base coat you just want to knock off the clear
9. tack down and spray the area with your base coat (just to cover the sealer area and a little more)
10. tack down and spray 2 coats of clear over the whole panel (do not tack in between coats of clear)


thats a long ride haha maybe when i finish my garage and get my compressor hooked up you can ride down if you dont have it fixed lol i would bring it into the shop but idk how my boss would feel about me working on someones car during work hours lol
 
thats a 5 hr drive easy, one way, and all days worth of work if not a day and a half to finish. its all about dry times and stuff. most body shops will do so much on this car, let it dry, work on this one come back to the other one, back to the next one all day so they keep busy.

bring his boss a gift or a gift for his wife :cool:
 
Back
Top