Mad Monkey
The Mod Monkey
How to update from a 3 button to a 5 button DIC 2004+ Grand Prix
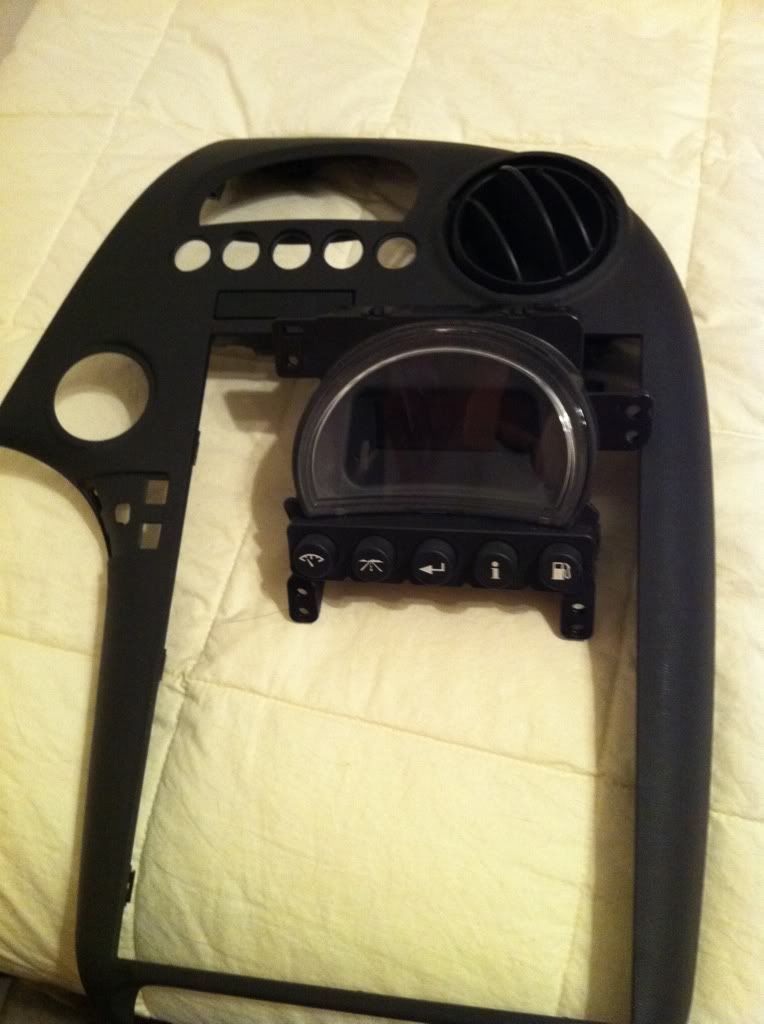
1. Get yourself a 5 button DIC and bezel (cutting out holes just isn’t classy enough)
2. Go to a junkyard and cut out the DIC connector with some wire attached
3. Cut out the DIC connector from your current car (don’t cut it too far into the car you want to leave space to work)
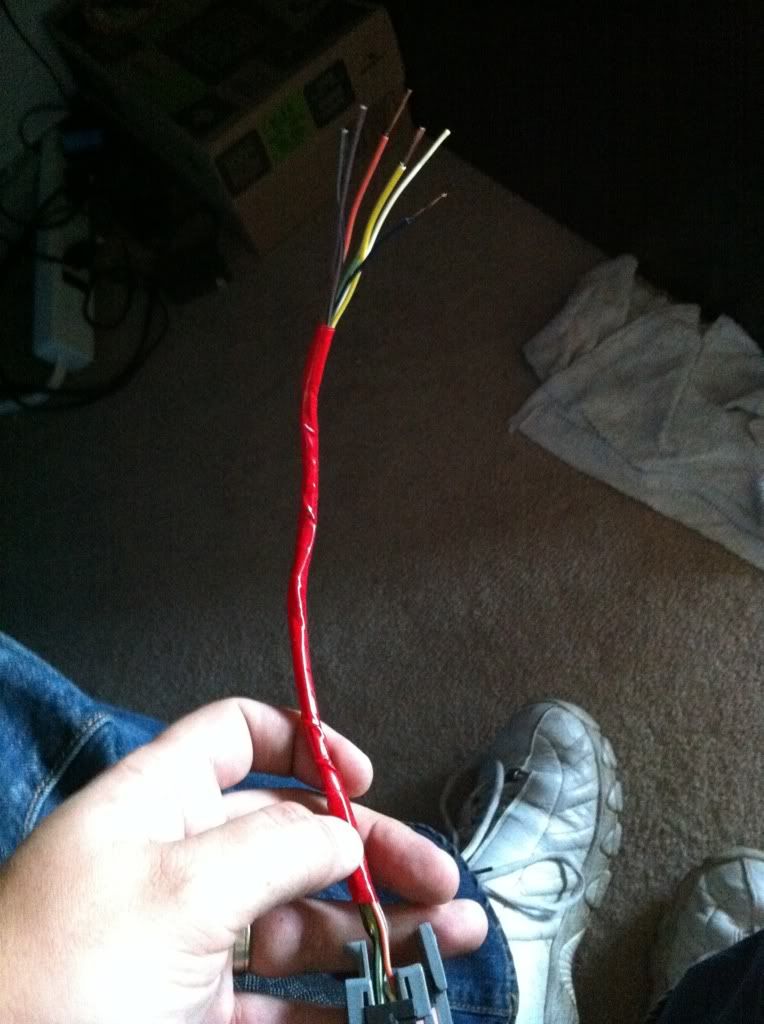
4. Connect the 2 DIC connectors into 1 Y piece (solder and heat shrink tubing are best obviously)
I didn’t get a pic of this being done, but it’s pretty basic. Just match the connectors, make them nice ,you literally want a Y 2 plus one side, and a pigtail out the back.
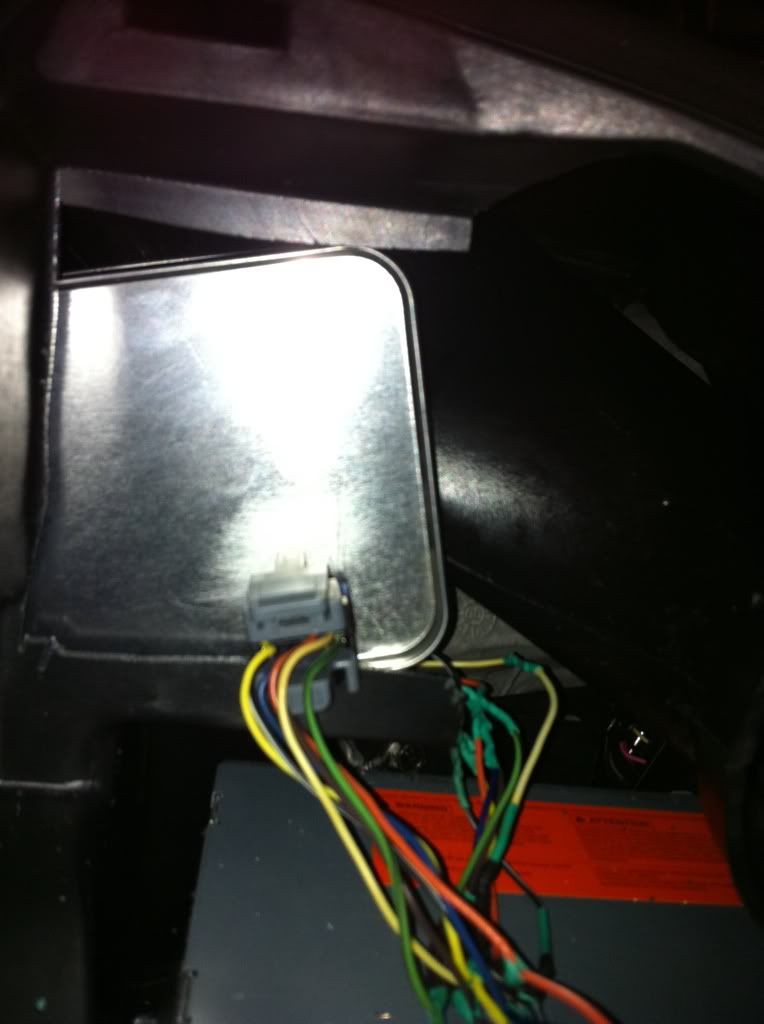
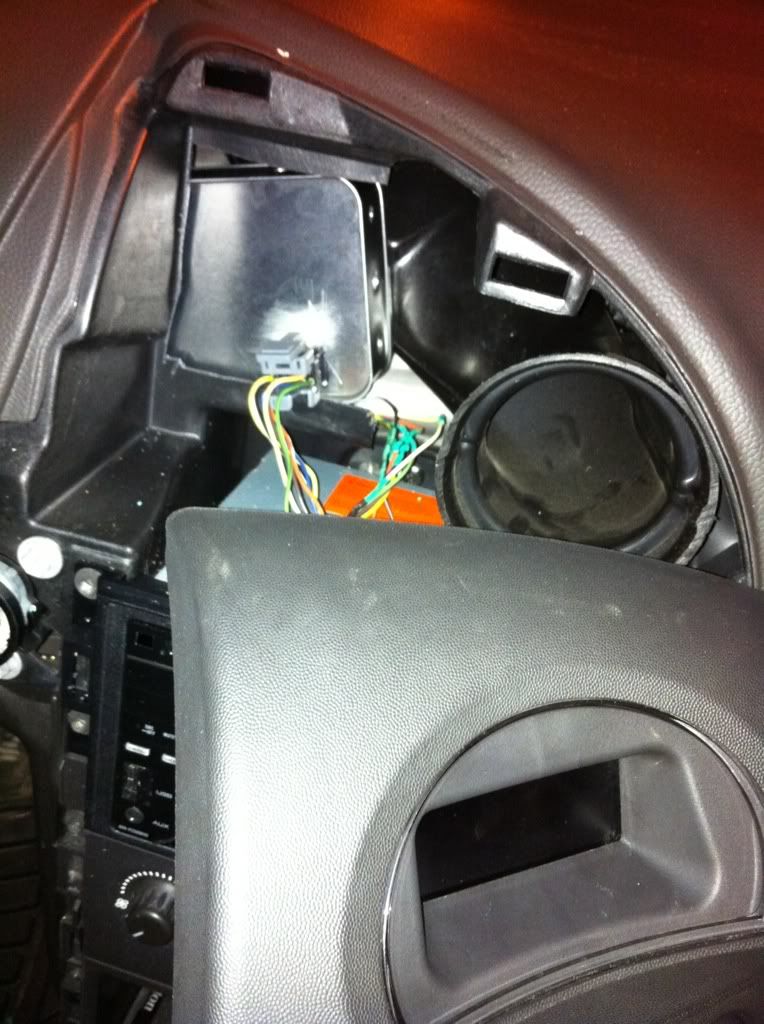
5. Next comes the “fun” part, cutting out part of your dash. When you take the DIC bezel off you will see the round air vent on the right and a square plastic piece on the left. You need to cut out some of that square plastic piece so that you have room to slip the DIC behind it. (you could really run the DIC to anywhere you want, but the dash is easy)
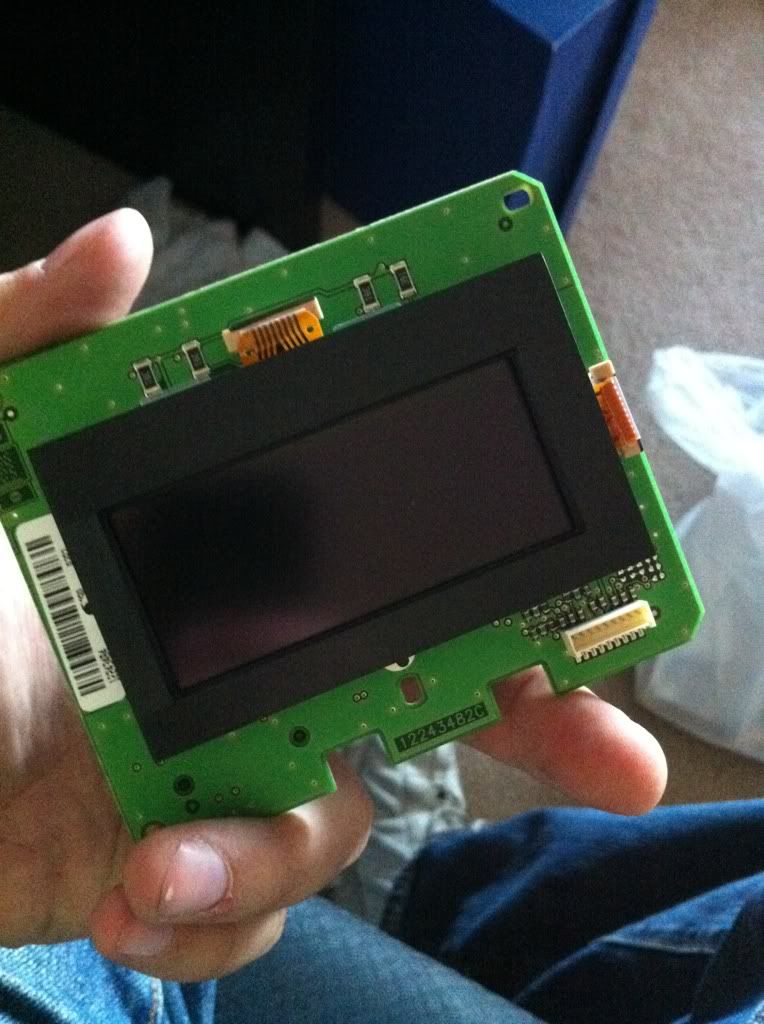
6. Next take the 3 button DIC and take it apart CAREFULLY! You are going to need to keep the 3 button housing for a later date and don’t wanna break it. Unhook the main screen, this is the part we want.

7. We need something to store this unit in, can’t have it bouncing around shorting out or causing issues. So let’s get a box!
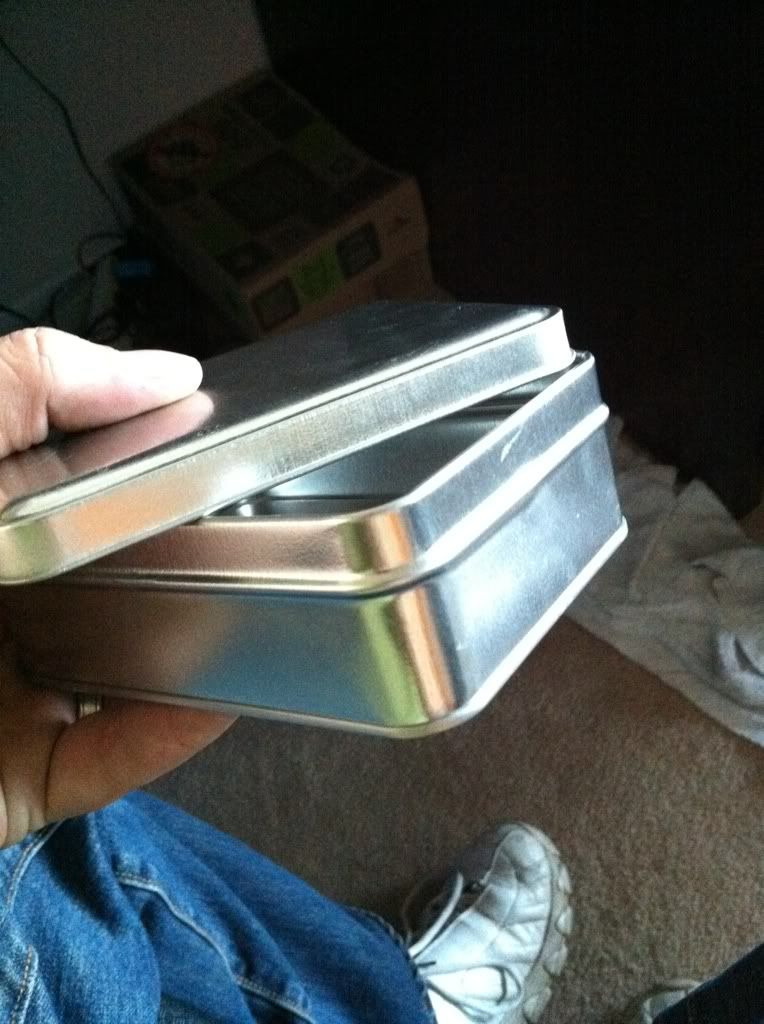
I got this tin at Micheals crafts shop, who knows if that’s available in America! Just get a small box that will hold the unit.
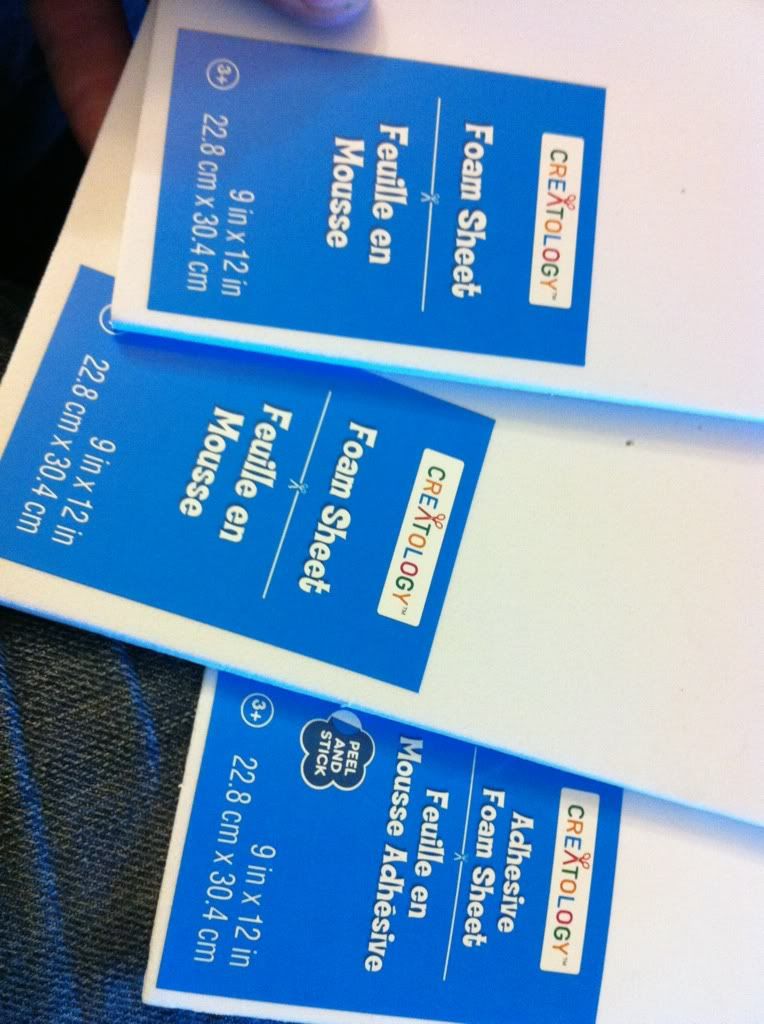
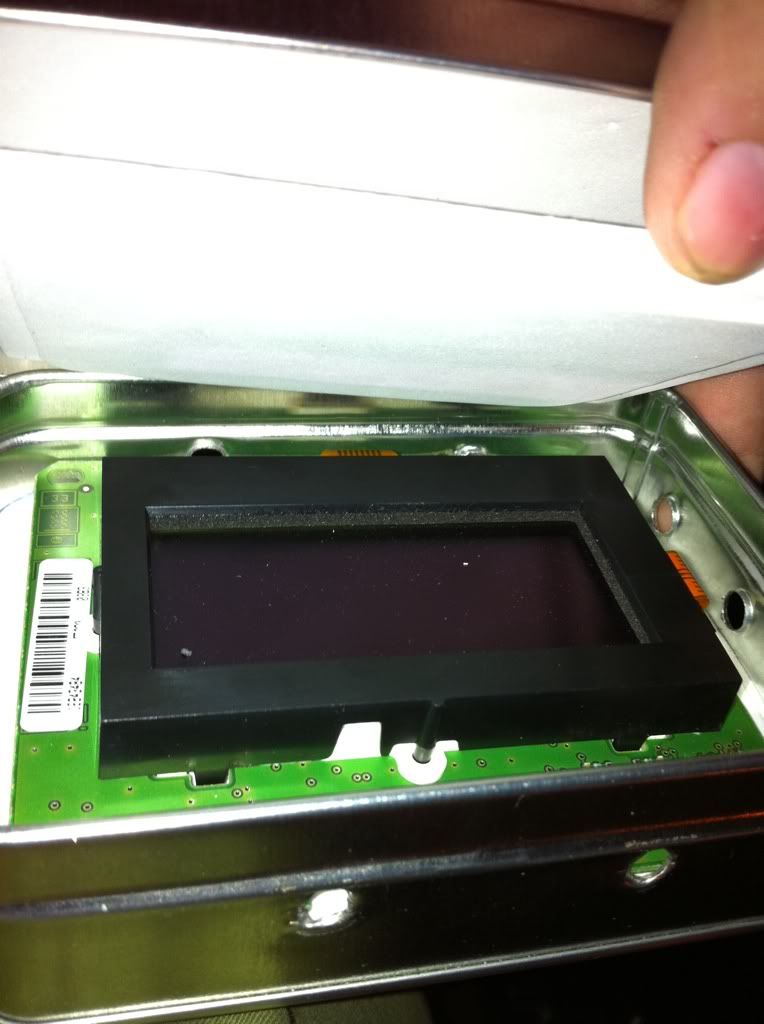
8. Since the box I used was metal I had to insulate it somehow, so I used craft foam, self adhesive and thick ones too
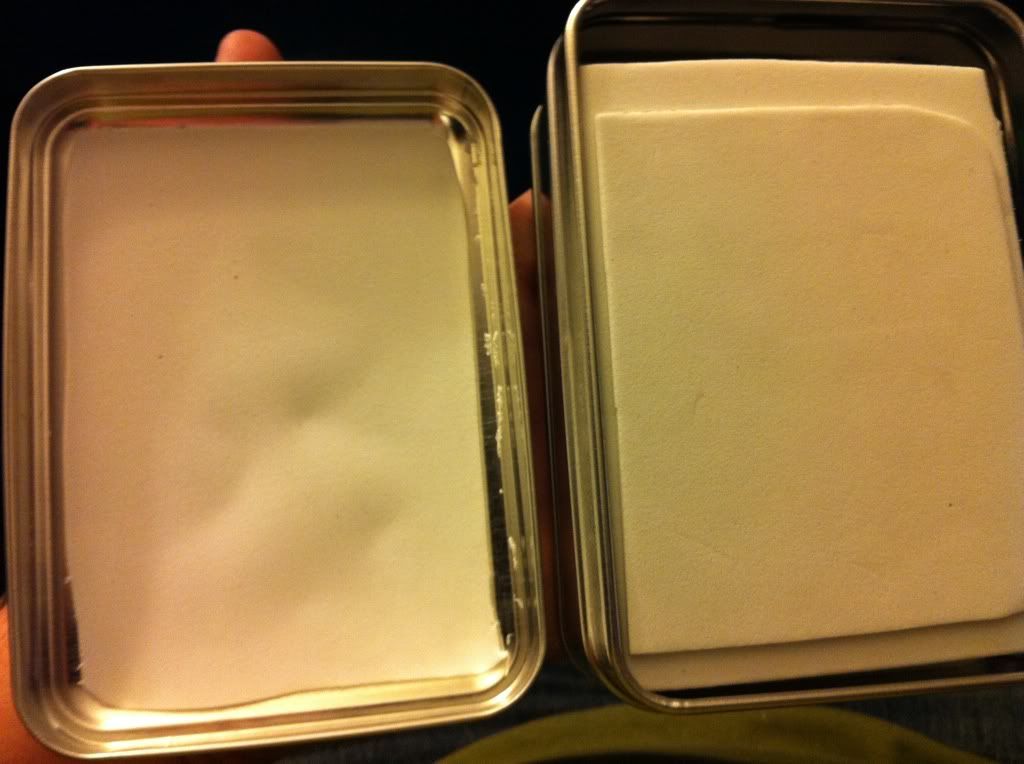
9. You’re going to want to essentially line the box with the stuff, also make some pieces that will go on top to help stuff the box so the DIC screen doesn’t rattle around
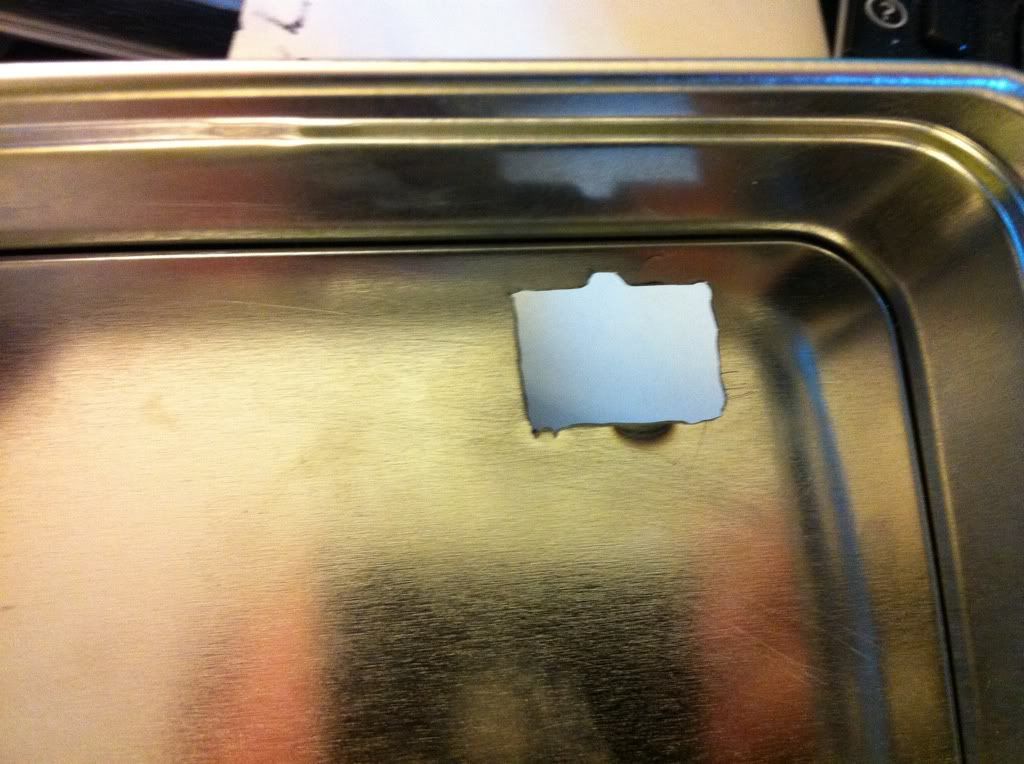
10. Cut a hole in the box to allow the connector to slide in.
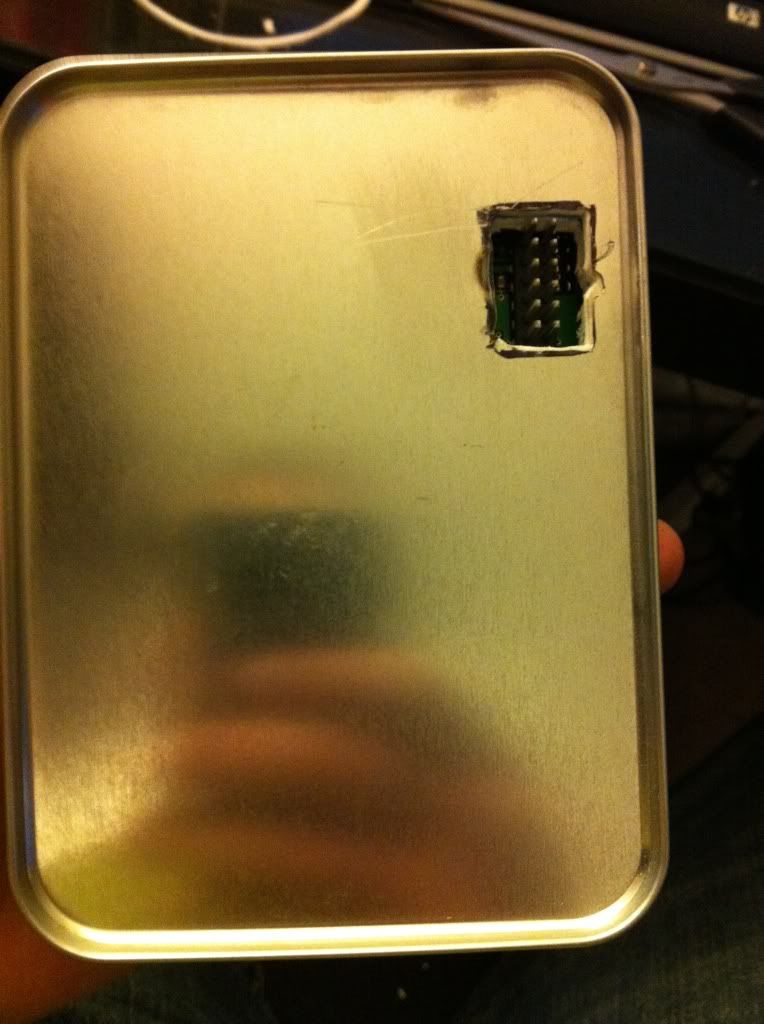
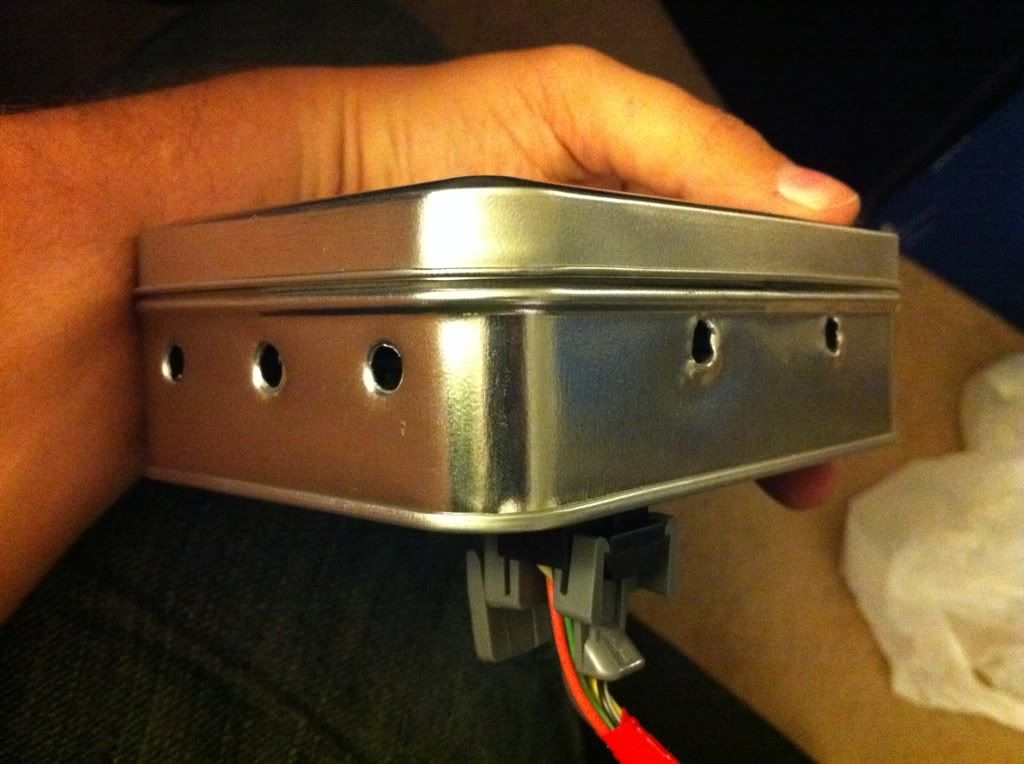
11. Also take a moment to add some ventilation holes
12. Stick the screen in the box
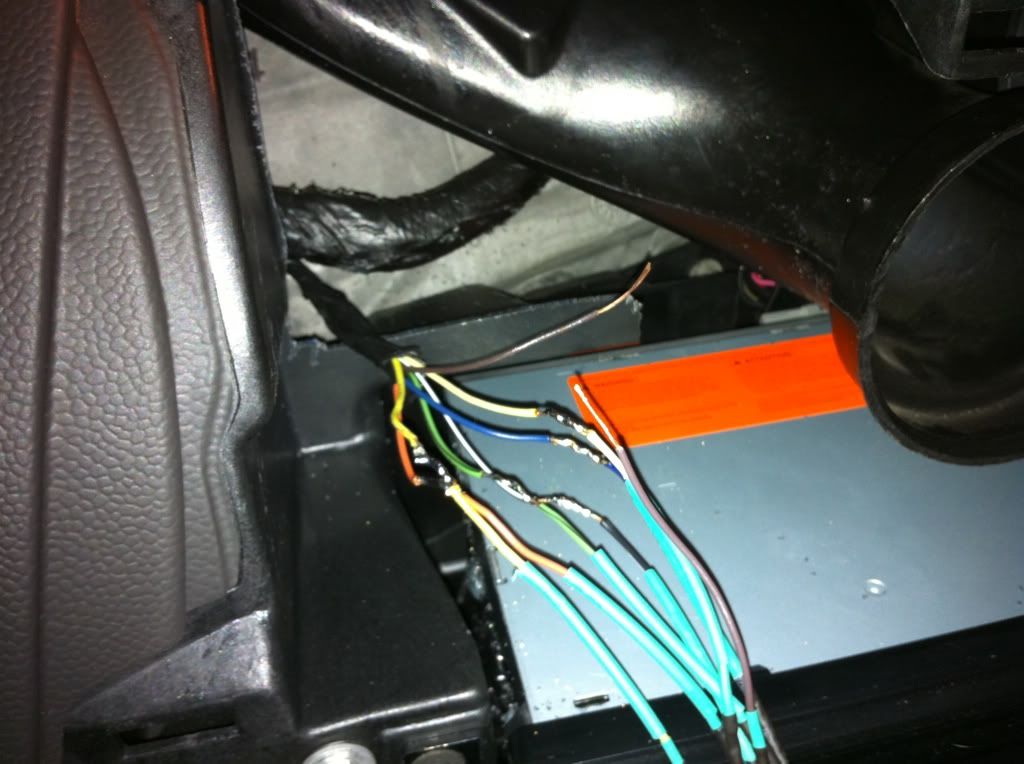
13. Next comes another “fun” part, we need to do some soldering in the car! I really don’t ever recommend crimp connectors, or just twist and tape... do it right people!
We are going to solder the pigtail end of the Y into the main harness of the DIC, simple stuff, just match the colours like you did when making the Y
14. Now that you have the Y connector soldered into the harness you can plug in the 3 button in the box, make sure that you plug it in properly, the tines on the DIC should go in the middle of the connector (has 4 rows of holes for the tines) have a few spare 10amp mini fuses on hand, I had a panic when I blew a fuse and didn’t realize, thought I broke everything, I had just plugged it in wrong!
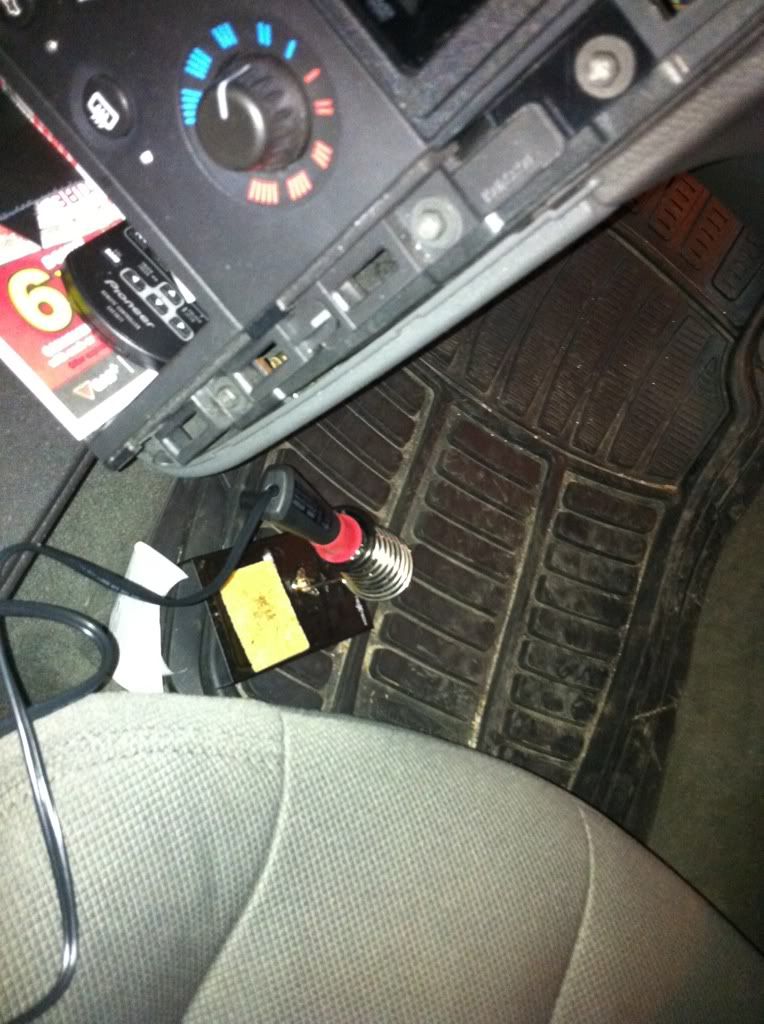
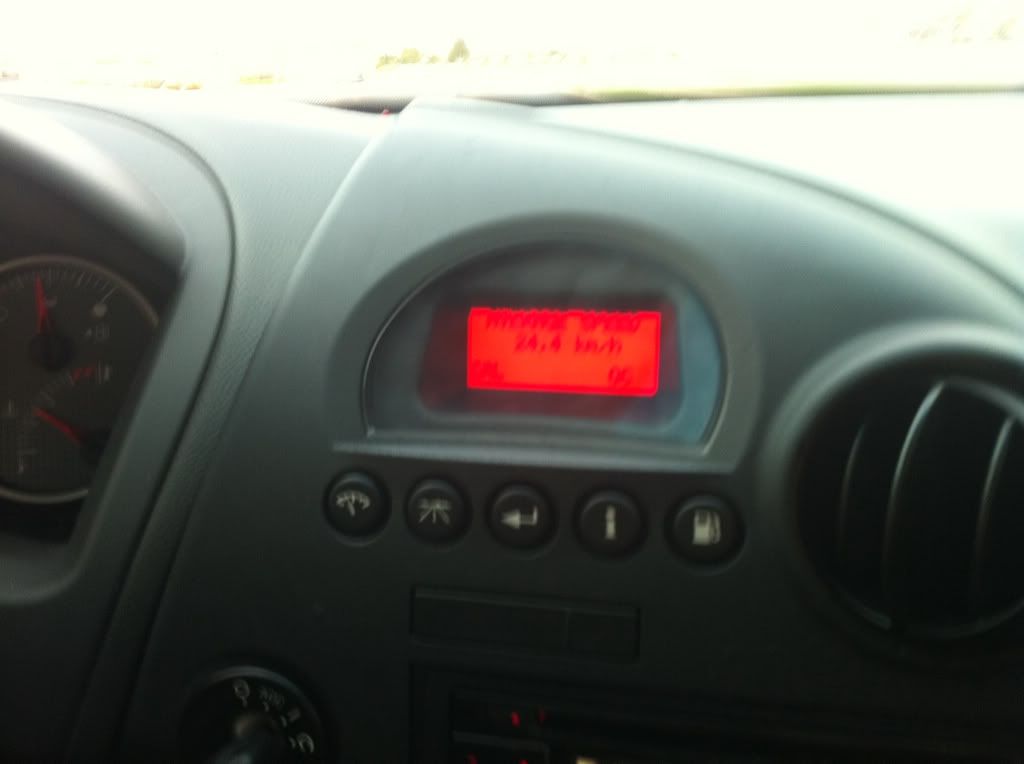
15. Once it plugged in, you can see on the screen if it works or not, then stuff that baby behind the dash in the hole you cut out earlier
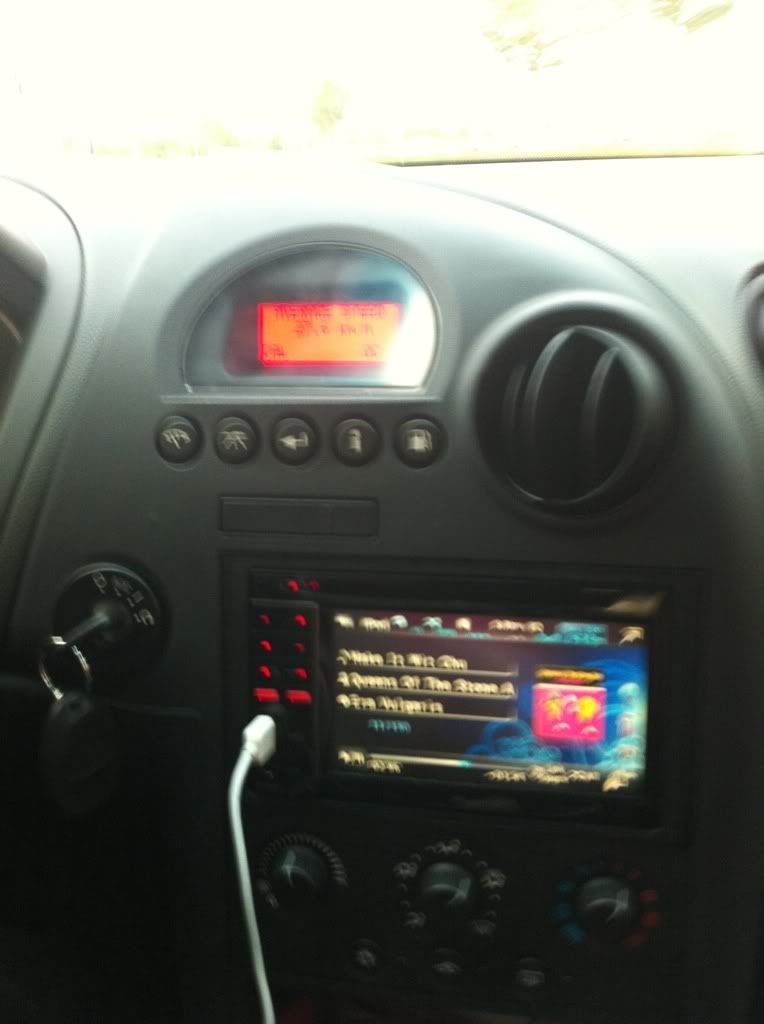
16. Hook up the 5 button unit
17. Enjoy your 5 button success!!! And you only spent a few more bucks then buying the DIC. Way better than paying to have a tech reprogram it, or buying all those parts online as the other DIY method says.
When I did this on mine to help make the transition easier I left the 3 button plugged in until I had reached a easy to remember spot. So my 3 button had 192226km and the 5 button had 77510km, so I ran up the 3 button until it reached 192510km, then plugged in the 5 button, they are now both picking up the KM’s and I’m only off by exactly 115000km.
The reason you are keeping the 3 button housing is so that if you ever need to you can take it outta the box then reassemble the unit, and use it as you need to. Just remember soon as you unplug it it will change the screen it’s on! But if you ever need to show your exact mileage or anything you can just reassemble the 3 button, and put it in the 5 button bezel (you will have 2 extra holes) but who cares! Or you can keep the 3 button trim too, and just swap whenever you need to. Choice is yours.
This is just a guideline, not exact details. I have no liability for this working or not, or your car exploding into a firey mess. If you have any questions about this or want help, just PM me and I will see what I can do!
1. Get yourself a 5 button DIC and bezel (cutting out holes just isn’t classy enough)
2. Go to a junkyard and cut out the DIC connector with some wire attached
3. Cut out the DIC connector from your current car (don’t cut it too far into the car you want to leave space to work)
4. Connect the 2 DIC connectors into 1 Y piece (solder and heat shrink tubing are best obviously)
I didn’t get a pic of this being done, but it’s pretty basic. Just match the connectors, make them nice ,you literally want a Y 2 plus one side, and a pigtail out the back.
5. Next comes the “fun” part, cutting out part of your dash. When you take the DIC bezel off you will see the round air vent on the right and a square plastic piece on the left. You need to cut out some of that square plastic piece so that you have room to slip the DIC behind it. (you could really run the DIC to anywhere you want, but the dash is easy)
6. Next take the 3 button DIC and take it apart CAREFULLY! You are going to need to keep the 3 button housing for a later date and don’t wanna break it. Unhook the main screen, this is the part we want.
7. We need something to store this unit in, can’t have it bouncing around shorting out or causing issues. So let’s get a box!
I got this tin at Micheals crafts shop, who knows if that’s available in America! Just get a small box that will hold the unit.
8. Since the box I used was metal I had to insulate it somehow, so I used craft foam, self adhesive and thick ones too
9. You’re going to want to essentially line the box with the stuff, also make some pieces that will go on top to help stuff the box so the DIC screen doesn’t rattle around
10. Cut a hole in the box to allow the connector to slide in.
11. Also take a moment to add some ventilation holes
12. Stick the screen in the box
13. Next comes another “fun” part, we need to do some soldering in the car! I really don’t ever recommend crimp connectors, or just twist and tape... do it right people!
We are going to solder the pigtail end of the Y into the main harness of the DIC, simple stuff, just match the colours like you did when making the Y
14. Now that you have the Y connector soldered into the harness you can plug in the 3 button in the box, make sure that you plug it in properly, the tines on the DIC should go in the middle of the connector (has 4 rows of holes for the tines) have a few spare 10amp mini fuses on hand, I had a panic when I blew a fuse and didn’t realize, thought I broke everything, I had just plugged it in wrong!
15. Once it plugged in, you can see on the screen if it works or not, then stuff that baby behind the dash in the hole you cut out earlier
16. Hook up the 5 button unit
17. Enjoy your 5 button success!!! And you only spent a few more bucks then buying the DIC. Way better than paying to have a tech reprogram it, or buying all those parts online as the other DIY method says.
When I did this on mine to help make the transition easier I left the 3 button plugged in until I had reached a easy to remember spot. So my 3 button had 192226km and the 5 button had 77510km, so I ran up the 3 button until it reached 192510km, then plugged in the 5 button, they are now both picking up the KM’s and I’m only off by exactly 115000km.
The reason you are keeping the 3 button housing is so that if you ever need to you can take it outta the box then reassemble the unit, and use it as you need to. Just remember soon as you unplug it it will change the screen it’s on! But if you ever need to show your exact mileage or anything you can just reassemble the 3 button, and put it in the 5 button bezel (you will have 2 extra holes) but who cares! Or you can keep the 3 button trim too, and just swap whenever you need to. Choice is yours.
This is just a guideline, not exact details. I have no liability for this working or not, or your car exploding into a firey mess. If you have any questions about this or want help, just PM me and I will see what I can do!
")
