• The site migration is complete! Hopefully everything transferred properly from the multiple decades old software we were using before. If you notice any issues please let me know, thanks! Also, I'm still working on things like chatbox, etc so hopefully those will be working in the next week or two.

Tune up the 05 Grand Prix with 3800 III

Do Rag

New member
My intro thread

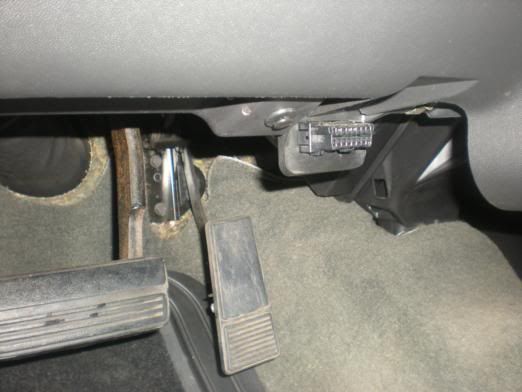
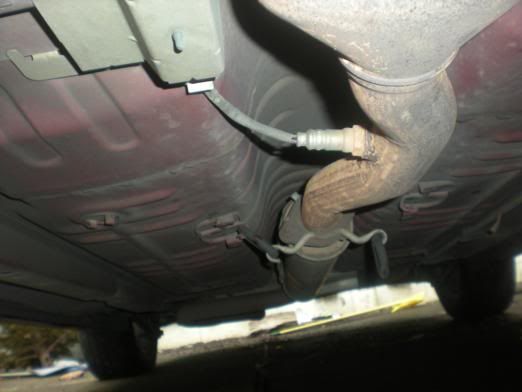
The OBDII connector to read the CEL codes.
I had Costless do this when I bought the tune up materials. It turned out to be a 128, or Coolant temp too low.
DSCN3058_522x392.jpg
I didn't get everything done but I got a lot.
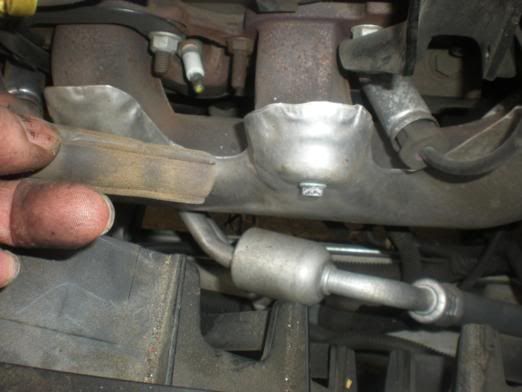
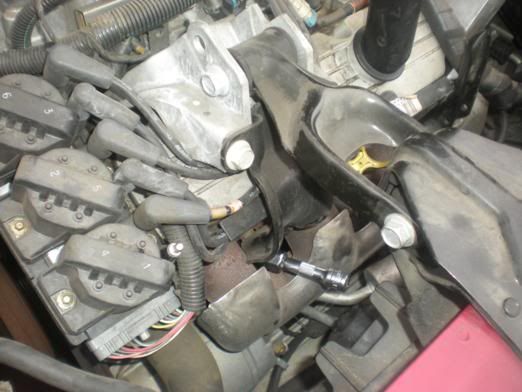
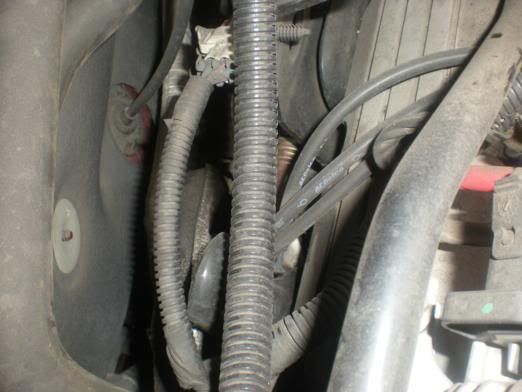
Dirty engine bay. I've been thinking about a little pressure wash in there. I'd be messed up if I got water someplace it wasn't supposed to be and I couldn't find it.
DSCN3059_522x392.jpg

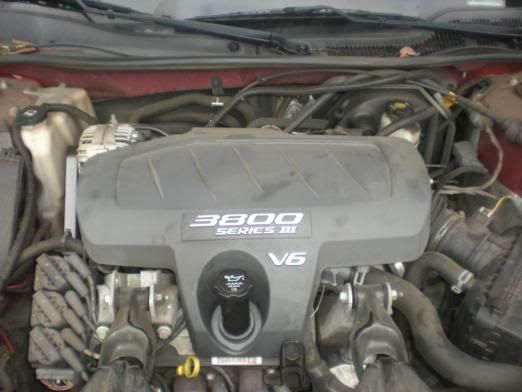
I'll just wash the engine cover for now. Spray on some Simple Green, let it sit for a minute, then hose it off. Beautiful. I'll have to take another pic of the finished product. It turned out as well as can be expected.
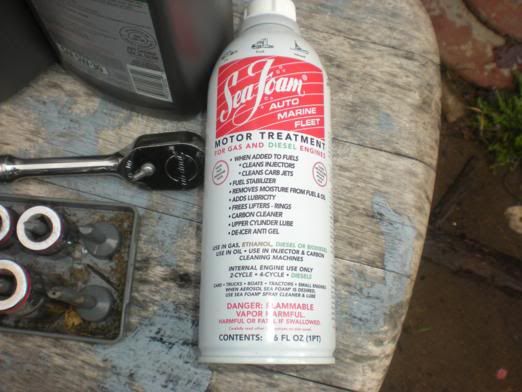
DSCN3062_522x392.jpg

SeaFoam in the gas
DSCN3081_522x392.jpg

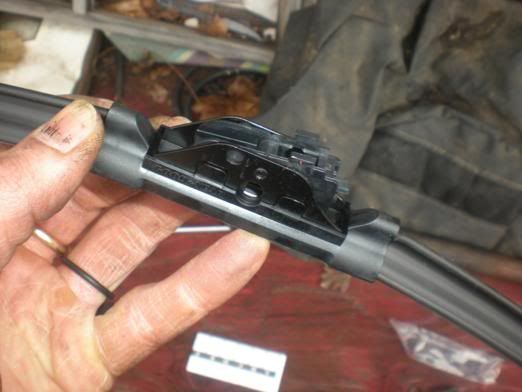
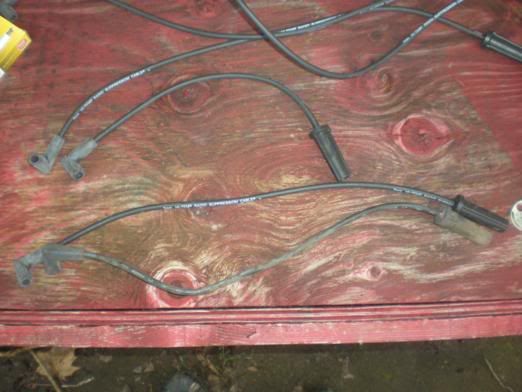
Comparing the old blade with the new just to make sure the 22" are correct. Wait till you need them to find out their wrong and you get what you get. This was a nice fix too. His wipers were older than old.
DSCN3090_522x392.jpg

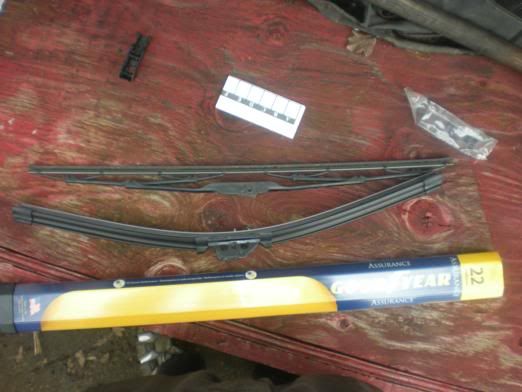
I laugh every time I hear the guys at Costless offer to install peoples wipers for them. A drunk monkey could do it. The Good Year's are a different style of wiper but I'm pleased with the performance. No extra pieces needed.
DSCN3091_522x392.jpg

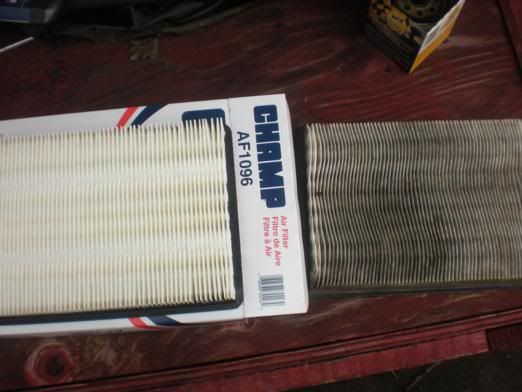
Making sure the air filter will fit before I try to install it. It looks like it's been a while since the old one was done. Better gas millage anyone?
DSCN3085_522x392.jpg

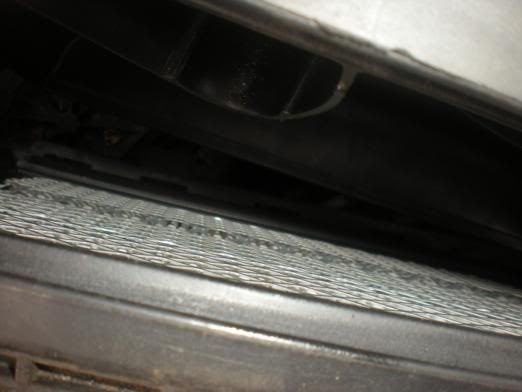
It's kind of hard to see but those holes for the bottom tabs make sense when trying to put the cover back on.
DSCN3086_522x392.jpg

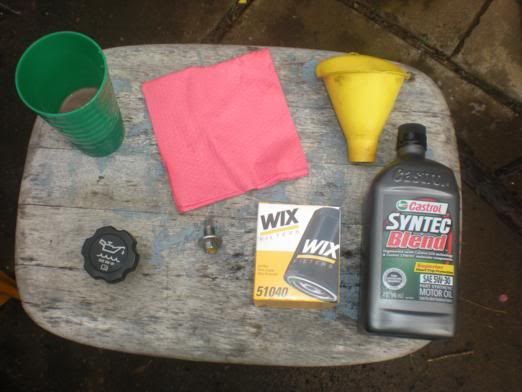
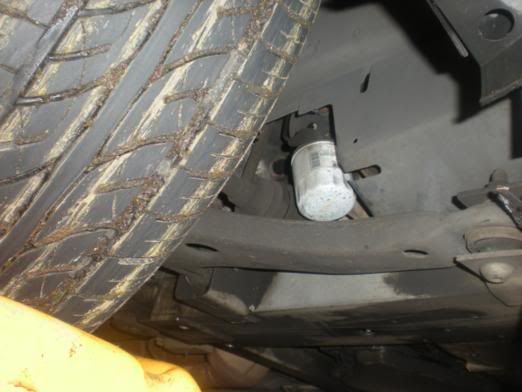
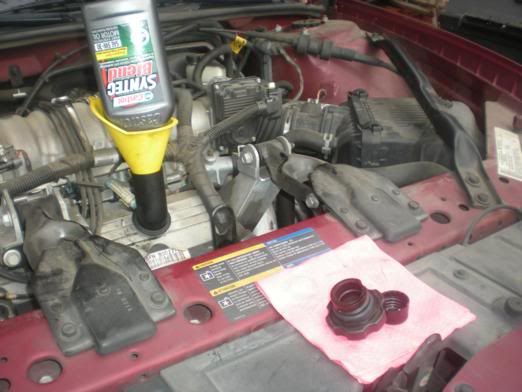
Oil change time. If you can't see it, that's 5w-30 weight oil. You can't really go wrong since it's printed on the cap as well. The drain plug is 13mm so best to use an end wrench and not some adjustable wrench.
DSCN3070_522x392.jpg

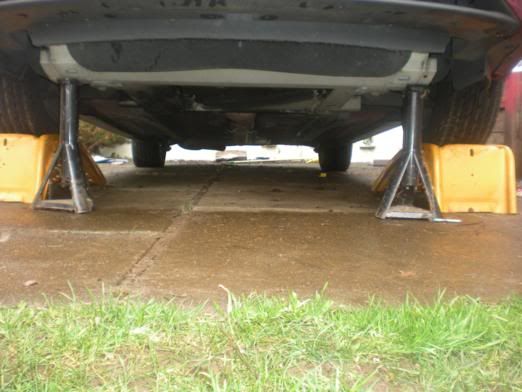
Jack stands. A car doesn't ever say "HEY, I'm about to kill you"! It just does.
DSCN3063_522x392.jpg

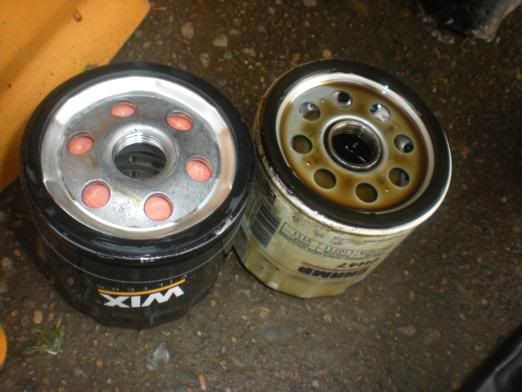
Comparing the filters and putting a little oil on the gasket. I found it was easiest to reach in front of the passenger side tire and just use my hand. What a pleasant surprise. It was easy.
DSCN3074_522x392.jpg

DSCN3078_522x392.jpg

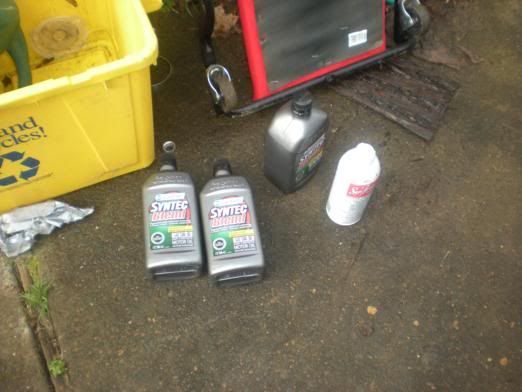
Counting the empties. I never do this when drinking, but always do it for oil changes. Go figure.
DSCN3082_522x392.jpg

This funnel has been one of the most useful tools I've ever bought.
DSCN3080_522x392.jpg
 
Last edited:


On to the plugs and wires
Tools needed, 3/8" drive ratchet, 3" extension, 5/8" spark plug socket, and spark plug wire pliers. I also ended up using some needle nose pliers, a 16mm deep socket, and some steel wool, but I don't think a normal job would require them.
I didn't include pics of the old plugs because they all looked normal. If you want to see normal wear for spark plugs, check the back of your Hains manual.
Also, this engine calls for Iridium plugs. I went with platinum because they were a nice middle of the road alternative. Not cheap, but not expensive either. They may not last as long but I doubt this car is going to be around for another 78K. I'm sure they'll be fine
DSCN3096_522x392.jpg


DSCN3106_522x392.jpg

Taper seat, 7-14lb/ft of torque
DSCN3108_522x392.jpg

DSCN3098_522x392.jpg

Not sure what the little aluminum prophylactic is for. Maybe to keep the spark energy from flirting with the rest of the engine.
DSCN3097_522x392.jpg

Some plugs come pre-gapped. These did not. .60 on the feeler gauge.
DSCN3112_522x392.jpg

Doing them one at a time to keep is all straight
DSCN3117_522x392.jpg

Matching up the wires of course. The old ones were 5mm and the new are 7mm. I guess that's good. Besides that, they look to be a good match.
DSCN3115_522x392.jpg

I can't even see the ones in back. What am I in for?
DSCN3099_522x392.jpg

DSCN3100_522x392.jpg


If you wondered where the down stream O2 sensor is, there you go.
DSCN3104_522x392.jpg

I found this which was interesting. Not sure what caused it but a little steel wool cleaned it up pretty well.
DSCN3118_522x392.jpg

The rest is mostly a lot of swearing and the pics don't really show much. It's kind of a balance between reaching from the top or the bottom. If you don't have spark plug wire pliers, don't even start this job.

#6 cylinder was by far the hardest. It wasn't just because I had to crawl under the car, or because it was behind the upstream O2 sensor. The plug wire just did not wan't to come off. The pic should give some idea. Beware the edges on the heat shield.
DSCN3124_522x392.jpg

When I got all done, the car had a miss and started throwing codes again. I took it back to Costless where they told me #6 was not firing. I climbed on top of the engine and was able to get the wire seated from there. (HOT) I had them clear the codes one more time and that's how I left it. So far so good.

Tomorrow I'm going to flush the cooling system and replace the Dex-Cool with Prestone Long Life. I bought 3 gallons of distilled water just for this project. I'm a little concerned about flushing because I think this is probably some pretty nasty stuff. I'll save the coolant from the engine in jugs and let the flush roll down the driveway. Sorry Free Willy.
 
Just a tip for the next spark plug change, take the 2 front dog dones off, put car in Netural, DO NOT START!! and push forward and set E-brake and u will have more room to work on back plugs
 
Just a tip for the next spark plug change, take the 2 front dog dones off, put car in Netural, DO NOT START!! and push forward and set E-brake and u will have more room to work on back plugs
This is good information. Someone else posted it too but it was too late. I'll know next time.

Something else though. I don't know where the fuel filter is. That's not a big deal since I can just follow the fuel lines. What I don't know is how it's clipped into the system. My 02 Grand Am had these diabolical clips that I had to access from under the car, and since they were on top, I couldn't see then.

I don't know where the PCV valve is either. I can't say as I've really looked for it yet but a heads up about where and how would probably save me some skin:)

Edit-Oh, I think I see what you mean about the dog bones. Huh, that would have made it, um, easier. lol.
 
This is good information. Someone else posted it too but it was too late. I'll know next time.

Something else though. I don't know where the fuel filter is. That's not a big deal since I can just follow the fuel lines. What I don't know is how it's clipped into the system. My 02 Grand Am had these diabolical clips that I had to access from under the car, and since they were on top, I couldn't see then.

I don't know where the PCV valve is either. I can't say as I've really looked for it yet but a heads up about where and how would probably save me some skin:)


PCV is on the passenger side of the upper intake manifold, under the wire connector, and as far as i know there is no fuel filter on these, just the one in the tank
 
PCV is on the passenger side of the upper intake manifold, under the wire connector, and as far as i know there is no fuel filter on these, just the one in the tank

I was able to buy a fuel filter for it. Funny looking thing too. Of course that doesn't mean this make and model has one. I'll look for it and see what I come up with.

I have a 99 Neon that I was trying to find the fuel filter on. It was having TPS issues and I wanted to change the filter as a part of my problem solving. You know, start with the cheap and easy and work your way from there. Turned out not to have one. No biggy as long as the car runs fine. I'd think EFI would require some type of filter.


Just take off the dog bones and remove those pointless engine brackets by the coil pack bracket and the one in the back...it'll give you tons more room to work with...also...nice to know that GM still used the U-Bend in later model cars...I thought they didn't.
 
Did u find the PCV?

No, not yet. That's what brings me back in here.

I'm not going to flush the coolant even though the overflow bottle looks like it has 3/16" of rusty mud in the bottom. I just don't have time to pull the lower engine cover off and do all that. The rain is having a dampening effect on my motivation as well.

I can't find the overflow for the power steering pump either. It doesn't look like it has one.


The car is back with it's owner now so the tune up is done.
I wasn't able to find the PCV or the PS reservoir, and I didn't look for the fuel filter. The coolant flush will have to wait for another day as well.

I know the PCV valve is there if I had just taken more time to look for it. I'm not so sure about the power steering reservoir though. That appears to be a sealed system.
 
The power steering has a capped resivior just like most other ones...so just open and fill if it was low.

The PCV is under the MAP sensor on the left side of the intake manifold behind the plug wires...you have to remove the MAP sensor from the manifold and it is underneath it...see it here off the car...

IMG_1718.JPG
 
Turns out the car has a rough idle now. I noticed it when I was sitting at a light and the car was in drive. The RPM's would fluctuate and the car would vibrate. I have two ideas to explain this.
1. the seafoam in the gas.
2. with the changes in air, injectors, and spark, the computer is taking a little while to adjust. Both will resolve themselves in short order.

Any other ideas?


vacuum leakkkkkkkkkkk
Hmmm, interesting.
Thanks
edit-I just realized that one of the exhaust hangers isn't connected. You can see it in the down stream O2 pic.
With the rain like it is, I can't get the thing up on the ramps anyway. I just have to wait.
 
Last edited:
I'm going to have another shot at this car soon so am just freshening up on some of the things to get done. Will update as able.
 
Um hehe, how the hell do you get the splash guard off the bottom of the engine? I took out all the fasteners that I can see but it doesn't seem to want to come out. Do I have to take the bumper off too? lol. A shop manual would sure be useful.

I plan to change the coolant which is why I'm doing this. My 02 Grand am was nuked by Dexcool so would like to freshen this motor up with some long life Prestone.
 
Back
Top