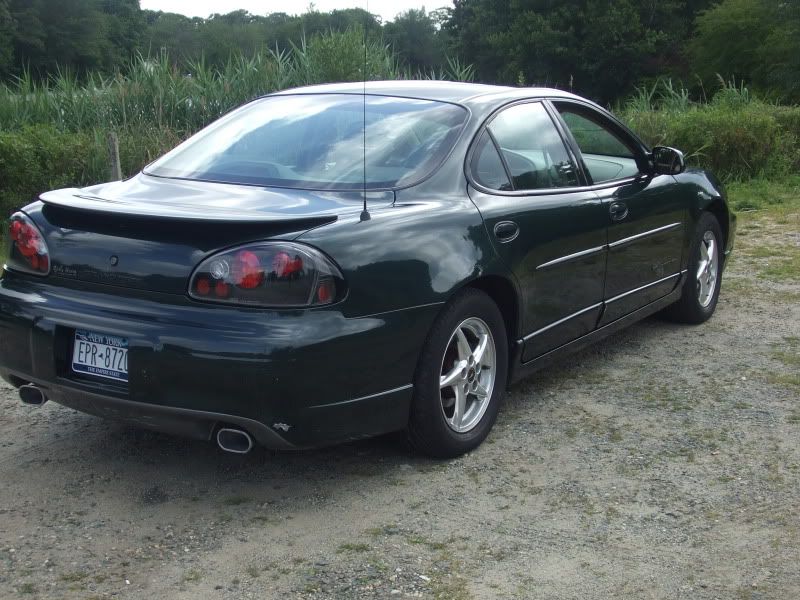
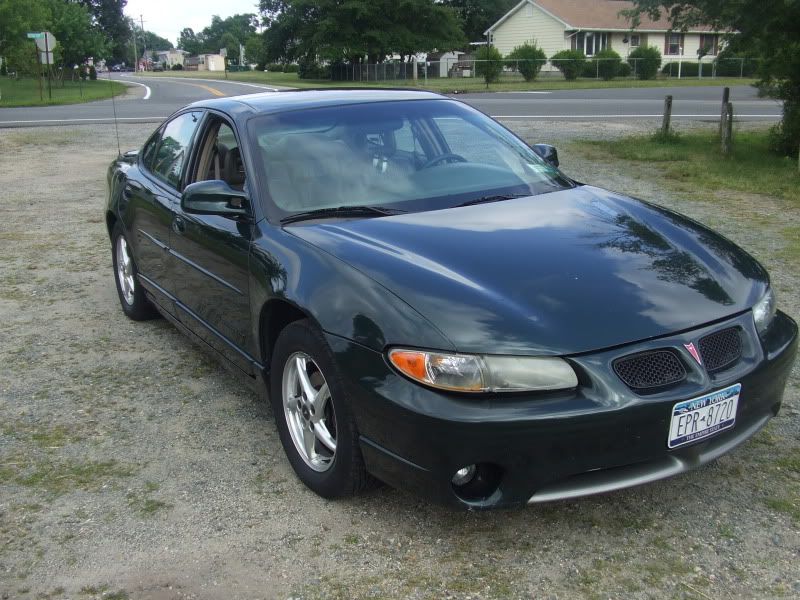
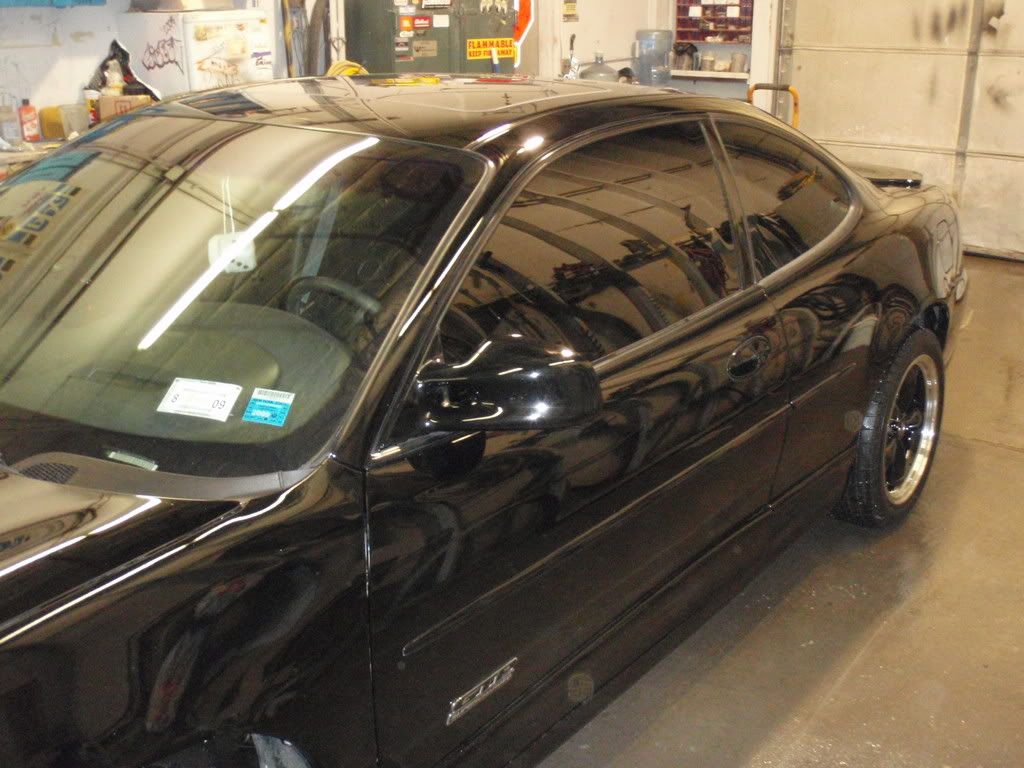
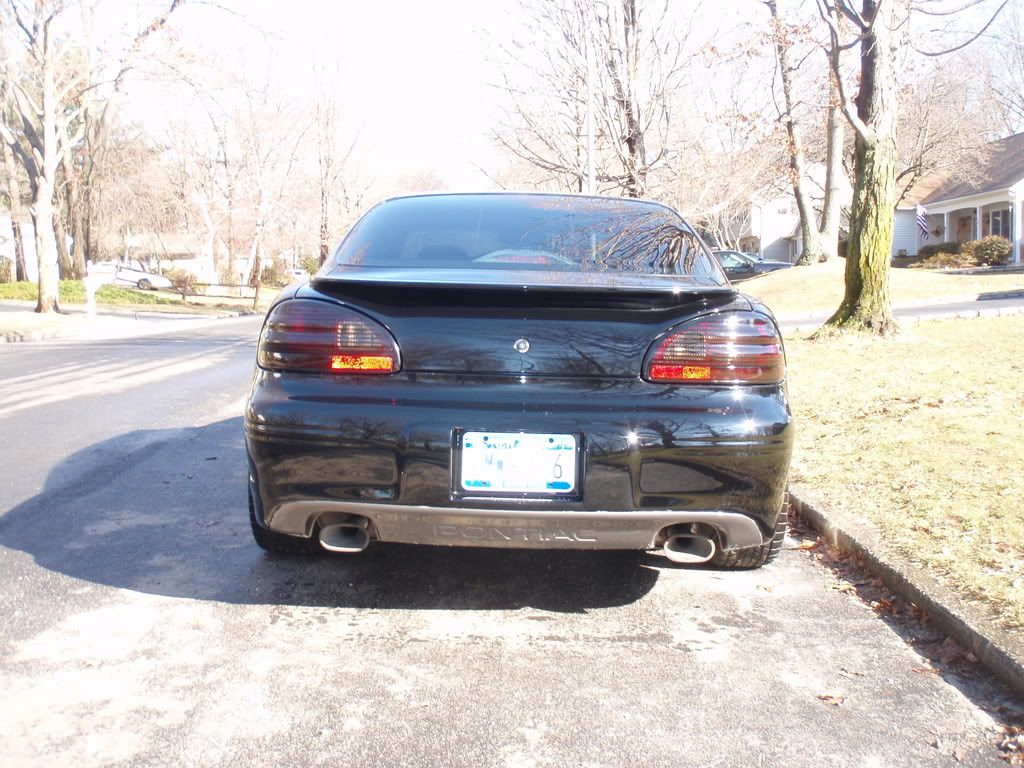
Alright, cut out a little early from work one day last week and spent nearly 6 hours on the exterior of the car. This was my first time with a clay bar and I'm sold on it. Amazing how much crap it lifted out of what I thought was clean paint. I've never seen this car shine or feel this smooth since I've owned it.
Here's the steps I took.
1) Entire car blasted with the garden hose to blow off anything I could before hand washing.
2) Entire car hand washed with Dawn dishwashing soap and water using a microfiber wash mit.
3) All stubborn bugs and tar spots I could find removed with the
smooth side of a Scrub (Scrubs in a Bucket) while the car was still wet. These are great for bugs and tar, but most people don't realize that they unfold and are soft on the inside. The rough side can be used for stubborn spots though and I have personally not seen any damage done from using the rough side in moderation.
4) Entire car washed again with Dawn to remove tar, bug and scrub residue.
5) Dried the entire car with my Absorber drying towel.
6) Every painted part of the car except the front bumper and hood clay barred with Meguiar's Clay bar kit. Clay lubed with Meguiar's Spray Detailer. I went ahead and clayed the front fenders even though the new paint was blended into them and had no issue doing so. I didn't however want to push my luck with the clay on the new paint on the hood and front bumper this time around. I clayed one panel at a time and wiped down each one with a microfiber towel before moving on to the next.
7) Did a quick once over with a clean microfiber towel. More than anything just because I was amazed how smooth and slick the paint was already even before putting on the final coat of wax.
8) Moved the car into the garage out of the sunny driveway. The paint really wasn't that warm and I had no real trouble with it with the clay, but I decided I was going to wax in only two stages so I wanted it out of the sun for that.
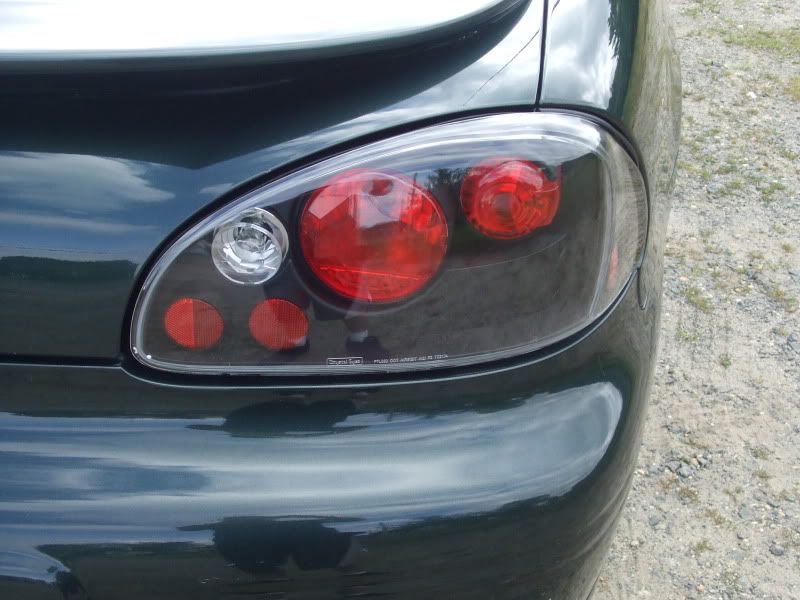
9) Hand applied Meguiar's Gold Class liquid wax with a wax applicator sponge to the hood, all glass, mirrors, roof, trunk lid, spoiler and tail lights.
10) Let the wax dry completely and then buffed it off with my Craftsman 10" orbital and a terrycloth bonnet.
11) Hand applied the same Meguiar's Gold Class wax to the rest of the car... fenders, doors, rockers, headlights, bumpers, license plates, etc.
12) Let the wax dry completely and buffed it off with the same orbital and terrycloth bonnet.
13) Pulled the car back out in the driveway so I could see any places I missed with the orbital a little better.
14) Wiped the car down again with a clean microfiber towel paying special attention to any areas and crevices I could not get with the orbital.
15) Sprayed down the tires, inner fenders, and front air dam with No Touch foaming tire shine.
16) Wiped any excess tire shine off of the paint and wheels with another microfiber towel.
17) I have one larger microfiber that is devoted only to the tires. It was white at one time but is now almost entirely black. I wiped off all the tires to remove any excess tire shine. I do this after the No Touch has had time to sit on the tires for a little while. I like to wipe the tires down because it gives them a more even shine than just letting the No Touch dry on it's own. When it dries on it's own, it tends to leave streaks and light and dark spots on the tires.
18) Hand applied the Meguiar' Gold Class wax to all of the wheels and also put a coat on the exahust tips.
19) Let the wax dry completely and buffed it all off by hand with a microfiber towel.
20) Took the car for a quick spin around the block. Yeah, primarily just to show off all my hard work, but also because I am always amazed how much water from washing finds it's way out of places after a quick drive.
21) Wipe off any water streaks from the drive and I was finally done!
RESULTS!
 which is ok tho, but i plan on using the clay bar very soon when i get some more nice weekends off! i want 18s for my car too haha


")