• The site migration is complete! Hopefully everything transferred properly from the multiple decades old software we were using before. If you notice any issues please let me know, thanks! Also, I'm still working on things like chatbox, etc so hopefully those will be working in the next week or two.

Car wax and buff methods

Hpiracr28

New member
Just curious as to what others use to wax their rides. Today I did both my cars with some Turtle Wax and a 10 inch buff wheel. I've never put any effort or time into waxing a vehicle, but I can see the effect it can have on the paint. My wife's black car is a nice deep black now and is like a mirror. My silver metallic grand prix, while the color won't reflect like black does, you can really see the "depth" of the paint, as well as the sparkle. What do you guys use for wax, and do you hand buff, of use a buff wheel?


Clay bar if bad and I have always hand waxed with liquid carnuba. Nice forearm workout.


Sent from my iPhone using Tapatalk
 
It's the polishing step that will make the car shine.

Meguiars Ultimate wax is good but can be tricky to not get streaks after take off.
Collinite 845(winter) or Wolfgang deep gloss paint sealant 3.0 (summer) are my old way.
Optimum Gloss Coat followed by Opti-seal after every wash are my new way.
 
I have a DA polisher from Harbor freight. I do a major buff and wax twice a year. First I wash the car with a no wax car wash with Simple green added to remove any wax on the car. I use Meguires Ultimate compound first. I love that stuff!!!!! works great on headlights too. Then I use PB Blaster Polish. I use it on the windows and everything. Then I use Collinite 845 insulator wax.
 
It's the polishing step that will make the car shine.

Meguiars Ultimate wax is good but can be tricky to not get streaks after take off.
Collinite 845(winter) or Wolfgang deep gloss paint sealant 3.0 (summer) are my old way.
Optimum Gloss Coat followed by Opti-seal after every wash are my new way.

damn. How do you wax a car with only 10 or 20cc of wax?


My uncle is a limo driver and wash and waxes his own car. Swears by meguiars. I'm going to try that next time I wax. For a first wax with "beginner wax", I don't think my cars came out too bad. I'd like to see how meguiars does.
 
Collinite 845 is my go to for wax... Very durable... And a little goes a long way... Cheap enough $20 and will probably last you years! If you choose to you can top it off with another wax or quick wax every blue moon.


Sent from my iPhone using Tapatalk
 
damn. How do you wax a car with only 10 or 20cc of wax?
Its a polymer resin, doesn't take much.
Honestly 10cc is all you need. I buy the 20 to do other peoples cars.
Take off the wheels and do them inside out too.

This is all done after decontaminating and polishing the paint. A couple of wipe downs with a paint prep(optimum paint prep/ Eraser, etc.) and away you go.
Wipes on and it flashes, wipe down the high spots and done.

Best thing I ever did.

Get sum on da Regal

im listening .....

I need to do the Spyder and Regal for fall and this sounds good... List your recommendations and ill order em up (maybe Amazon prime it and start sooner)


If my car were in better shape I would definitely do this. Unfortunately the Cleveland winters have been rough on the car the last 14 years. :(

I think I do a decent job hiding the imperfections but the rust under is bad. The idiots at Firestone lifted it by the rockers after I told them not to. Needless to say they crushed both rear sides. I didn't notice until a week later so I really couldn't say anything.
 
If my car were in better shape I would definitely do this. Unfortunately the BUFFALO winters have been rough on the car the last 13 years. :(

I think I do a decent job hiding the imperfections but the rust under is bad. The idiots at Firestone lifted it by the rockers after I told them not to. Needless to say they crushed both rear sides. I didn't notice until a week later so I really couldn't say anything.

now we're talking about the same thing ....


The reason for the coating was for salt prevention mainly.
This past weekend I dumped a black can of Rustoleum Industrial spray under it wherever I saw the brown.
I use Salt Away dilution in a 1 gallon sprayer in winter to pre-treat it before a rinse-less wash .

So anyway....before coating you need virgin paint. The easiest way is to polish the car.
This works to rid the swirls and remove the sealant at the same time.

So be happy with the way it looks before coating. I didn't get too carried away.
I used M205 with white Lake country pads followed by Menzerna SF4500(new # is 3800) on a black LC pads.
You can rip the pads of the DA and use by hand for the tight areas or use a yellow wax applicator.

Then I wiped it down with Griots paint prep followed by a Car Pro Eraser wipe down. I didn't have any Optimum Paint prep at the time but that is what I would prefer.
2X's worked for me but next time I will do 3. After 16 hours I was anxious.

You need to use a lot of Microfibers in the wipe down stage to make sure the paint is CLEAN, so make sure you have some good ones.
In a pinch the Costco yellows will do but some from the Rag Company would be ideal.
Wearing latex gloves is a must to prevent oils from the skin transferring.

I haven't used the blue applicator that comes with Gloss Coat yet and have done 3 cars. The Guz reassured me it wasn't wasting any product compared to using a micro suede wrapped around a Car Pro block(the more traditional way)

You just put a few lines on the end of the blue pad to prime and start. After that it is a few drops or drizzle.
You can tell when the sponge needs a squirt because of the coverage.

Here is Mikes (The Guz) newest write up. He does it up good.

http://www.autogeekonline.net/forum...ck-c5-corvette-coated-optimum-gloss-coat.html

There is a write up on the Detailed Image by Zach McGovern that shows how easy it is but the site isn't working right now.

Application is the easiest part, just like anything else it's in the prep.

Amazon has the 20cc from Detail King for around 86(if you are doing 2 cars). I bought from them and they are quick.
They didn't have the Optimum paint prep last time I looked for it but they have Car Pro Eraser which works great.

Depending on what you have for micro fibers there is some deals there from the Rag Co.
Don't buy any microfibers from Chemical Guys they are junk.

A bottle of Opti-seal would be nice for after it's coated. I ordered the 3 pack last time.
The stuff is stupidly simple to use with phenomenal results. You can spray it on everything.

Let me know if you have any questions.
Hopefully the Guz pipes in.
 
Wow. Just wow ... Thanks man. Bookmarked for later !


ya know maybe I should just pop over and see The Guz with my cars....
 
Whenever I first clean my car after winter, I typically do a full clean up, pressure washer and no-wax soap, lots of it, rubbing with two buckets of water.
Then I hit it up with a light touch of claybar just to remove any remaining dirt without wearing my clear coat too much.

After I usually do Mother's 2 step cleaning/polishing stuff, some scratch x wherever needed by hand and with the 10" orbital polisher, polish my headlights, fog lights and tail lights with Meguiar's Ultimate compound.
Then I usually inspect whatever's left, and do a fine polishing on needed/rougher places with the Ultimate compound.

Then I hit it up with two coats of Mother's carnauba wax or sometimes Armor All Ultra gloss wax or Meguiar's one. All by hand and I polish with a bunch of clean microfibers.
Annnnd a step I usually add is any kind of ultra-high gloss gloss enhancer to seal the wax underneath, which is what I maintain over the course of the summer with liquid waxes and quick detailers.
(Which I admit doing at least 2 to 4 times a month during summer to keep the gloss high and the paint well sealed from the elements.)

Keeps my 2004 (Made in early 2003) Canadian car, driven all winters since the beginning, with a baby-smooth paint.
Still isn't perfect and far from rust-less, but it doesn't look old and neglected like most cars of this age.

Looky bellow for some reflections.


M2e9nXL.jpg
 
Instead of the link I borrowed this from the Detailed Image. Great store to order from. They have some good sales.
This visually makes it come alive.

>>>>... Just to note the review date is 2014 and they have released a new Gloss Coat that is slicker and has a 3 year lifetime.

Product Review: Optimum Gloss-Coat by Zach McGovern
Optimum Polymer Technologies is a well known and respected brand among the detailing community. They are perhaps most known for their Opti-Coat product that has been one of the industry leading paint coating products for years. Without going into much detail, this product previously existed in two forms – a certified professional only product which is most recently known as “Opti-Coat Pro”, and a consumer based product which was called Opti-Coat 2.0. Recently, Optimum had decided to completely discontinue their Opti-Coat 2.0 and introduce a new coating called Optimum Gloss Coat.
15451337821_91f12d0541_b.jpg


Opti-Coat 2.0’s claim to fame was its durable protection, however there were several characteristics that were in need of some minor tweaking. Perhaps the most common comments about 2.0 was that it felt tacky on the surface after it had dried and that it was not as visually appealing as some other products. Gloss Coat has set out to resolve these concerns by increasing gloss and surface slickness while still maintaining an impressive layer of protection on your paint, and my first impressions indicate that it has certainly succeeded.

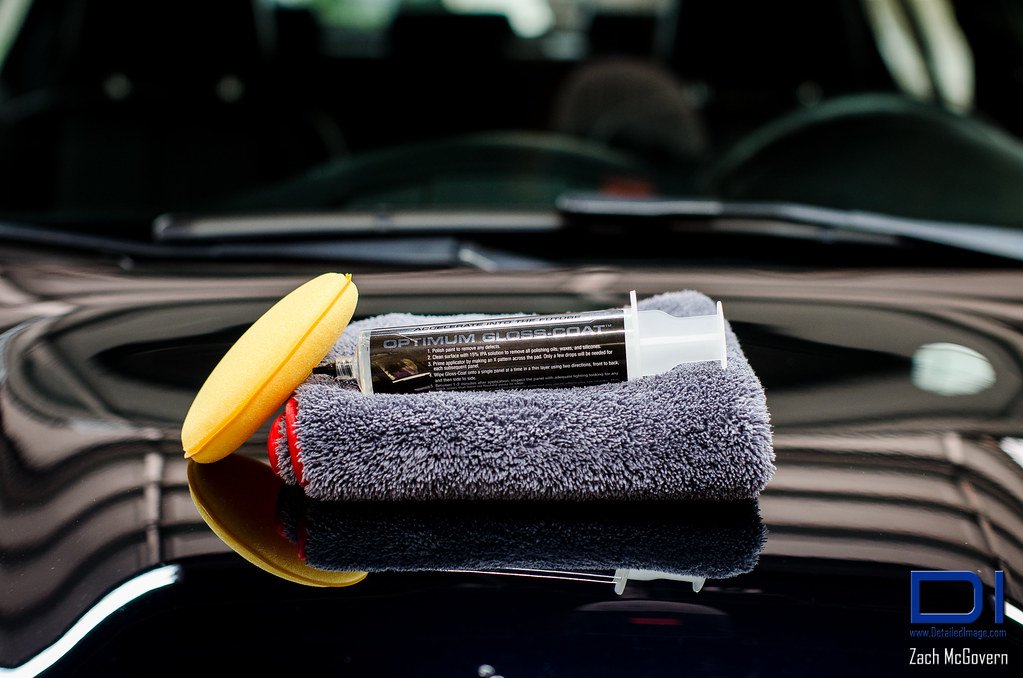
The application process of Gloss Coat is nearly identical to Opti-Coat 2.0. Prior to applying the coating, the paint should be properly corrected and then wiped with isopropyl alcohol or CarPro Eraser to eliminate any residual polishing oils. Next, apply Gloss Coat to the applicator of your choice by squeezing several drops of product from the syringe. Note that you may need many more drops initially in order to prime the applicator, but will not need nearly as much as you continue with application as there will be residual product on the face of the applicator.

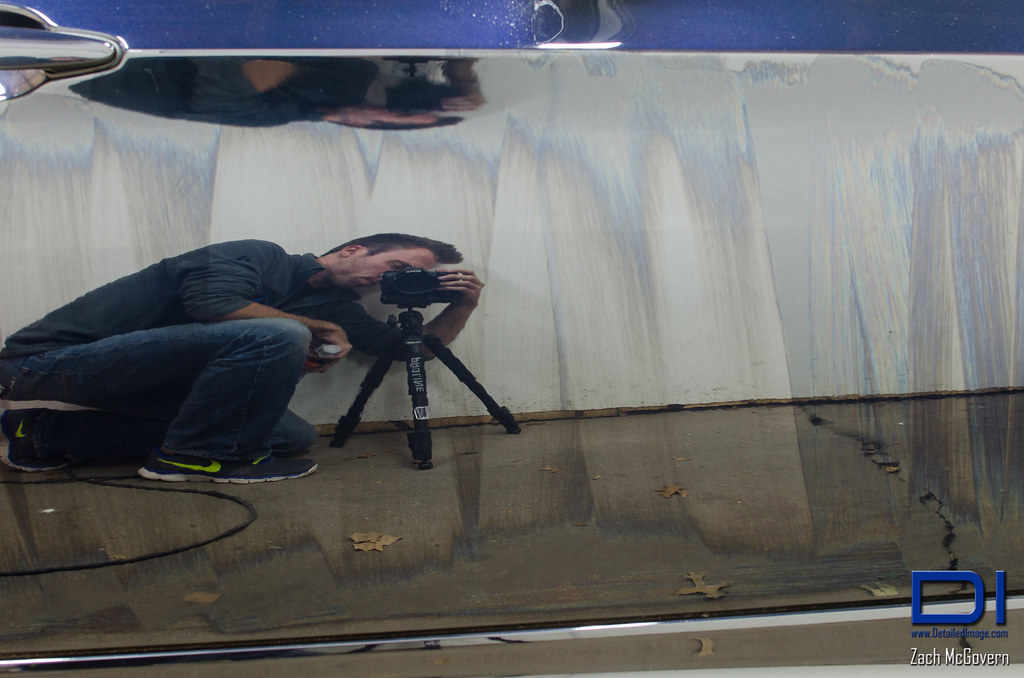
Spread a thin layer of product onto the paint, working on one panel or section at a time. When the product no longer spreads evenly, it is time to add more to the applicator. The following photo shows a panel that had just been covered with Gloss Coat roughly 45 seconds prior to taking the picture. You will notice that some of the product has already disappeared. This is the “self leveling effect” of the product. Flash time will vary with ambient temperature and humidity, so be aware of how the product is reacting based on your particular environment.

15267791790_be1f203222_b.jpg


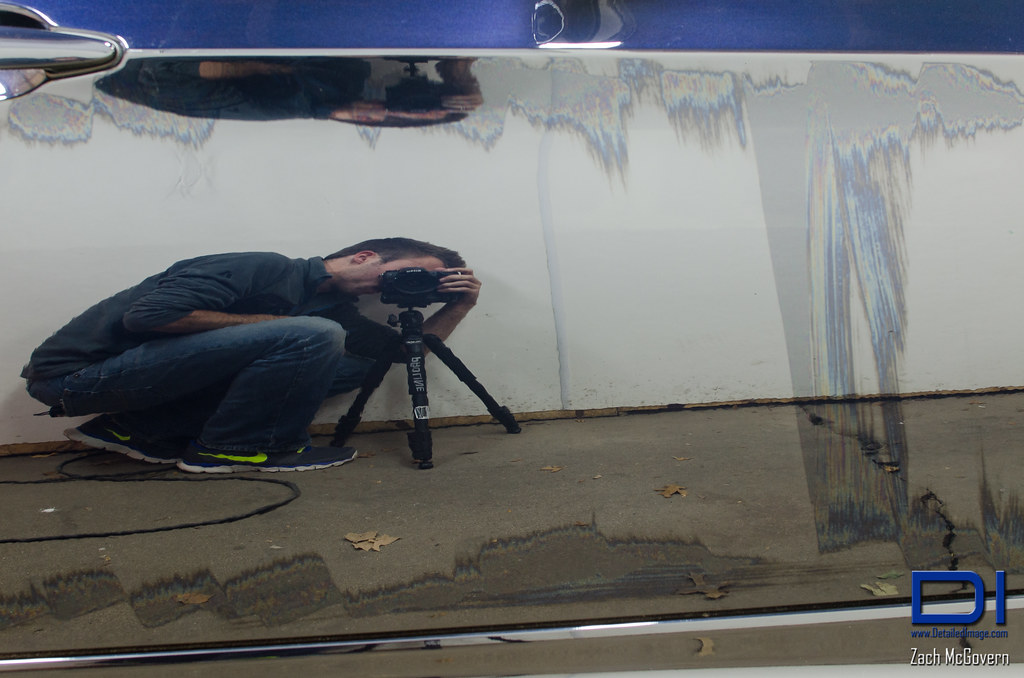
After another minute or so, the majority of the coating had flashed away on its own (I have not wiped away any residual product at this point), and only the heavier spots at the top and bottom of my strokes remained. This is common as these areas where you start/stop your wiping usually have more built up product as it is not being spread out.
15267929357_8d15c3ebbc_b.jpg


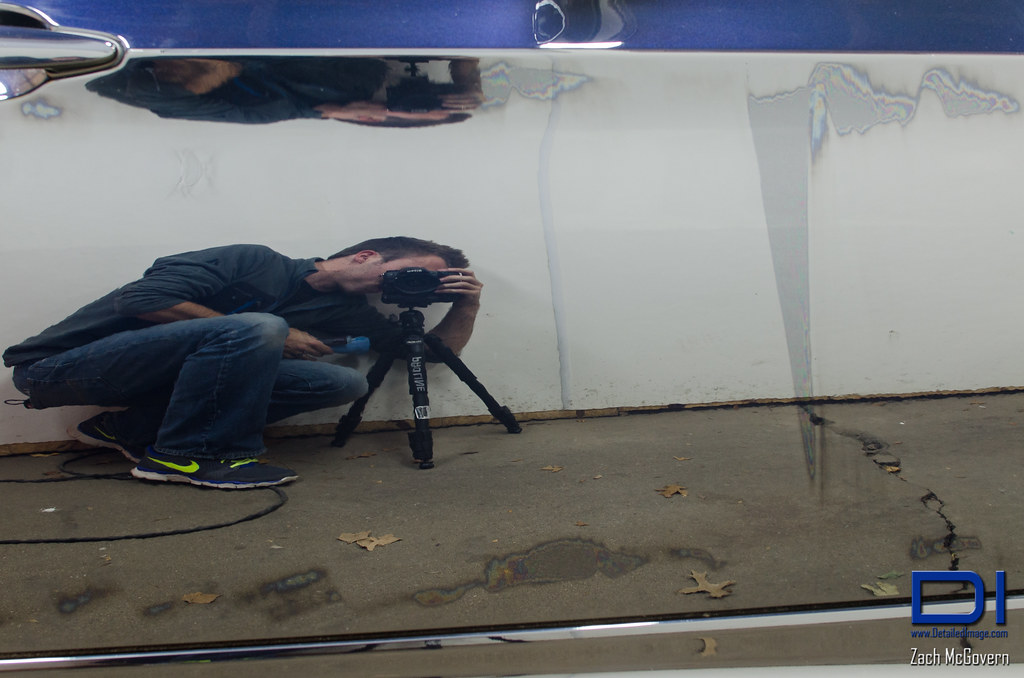
After another minute or so, even more of the product had disappeared. At this point I decided that it had been long enough and I would have to level the remaining high spots. I chose to use a new microfiber towel to lightly spread the remaining product so that it would disappear. This was noticeably easier than the previous Opti-Coat 2.0 as the residual product wiped away without any issues and was not grabby or tacky feeling at all.

15267879208_6213789faa_b.jpg


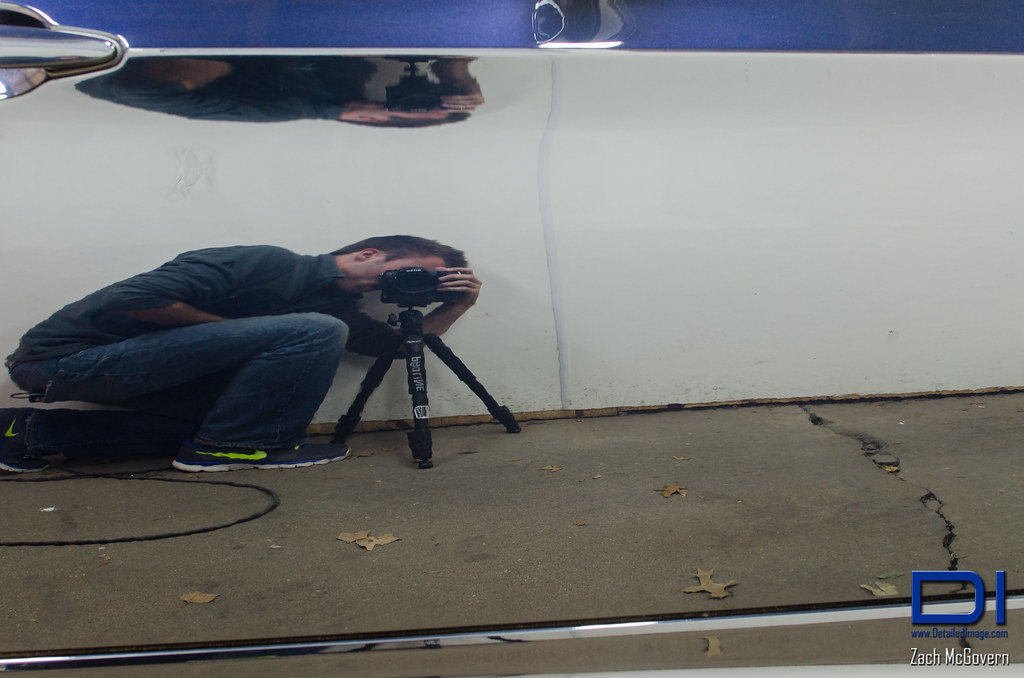
You’ll notice that the panel is now free of any residual product after quickly and easily leveling the remaining high spots.
15451341041_3362614394_b.jpg


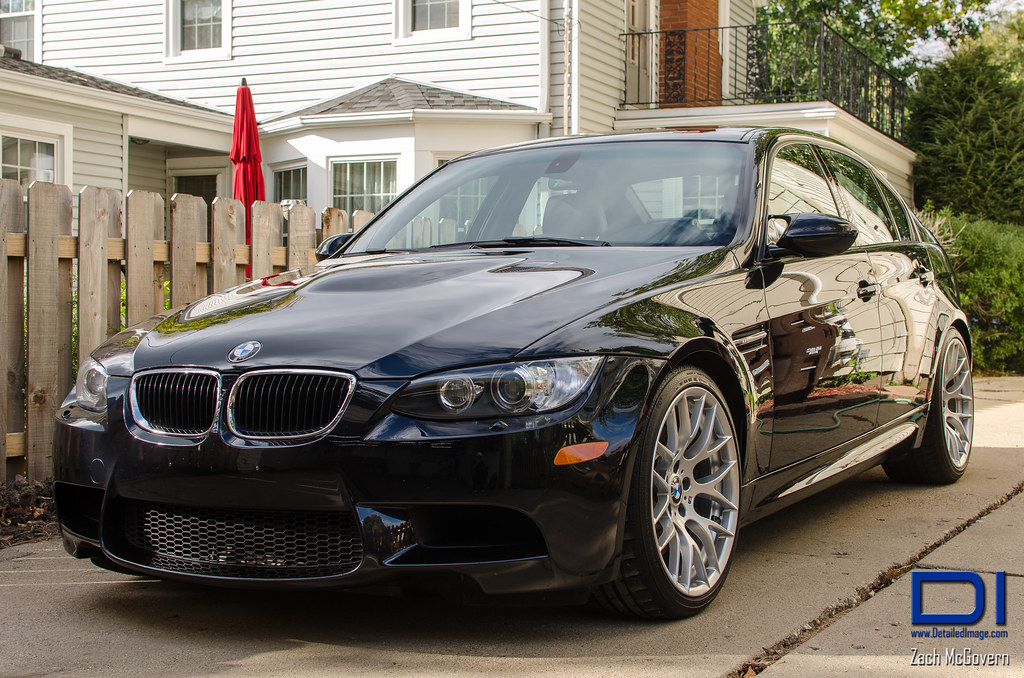
This application process was repeated until the entire car had been coated. I used approximately 5cc of product on this vehicle, applying generously, therefore there should be enough product to coat even a large vehicle in the 10cc syringe. Afterwards, the paint was very glossy and had a nice slick feeling to it. I think you’ll agree this car looks great!

15454489495_bb17d240f1_b.jpg


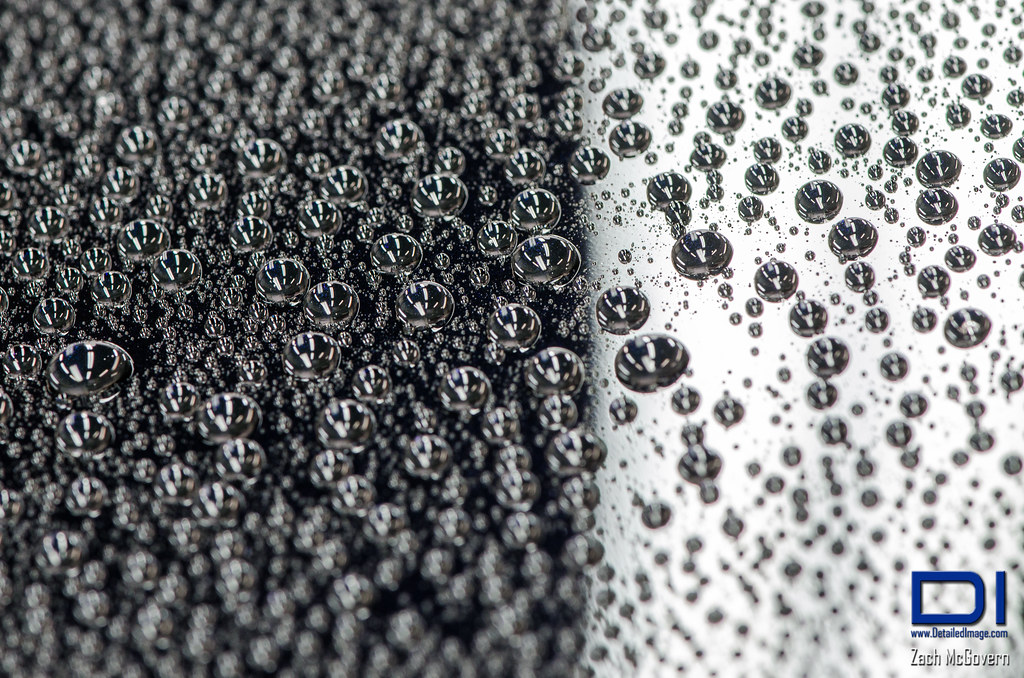
The coating was left to cure for 24 hours, prior to spraying some water on the surface to capture this excellent beading shot. Obviously I do not have any true indication of durability at this point, however Optimum claims a 2 year life for this new Gloss Coat, which will offer great protection and ease of maintenance throughout this lifetime.
15454488265_a73499f3ea_b.jpg


My first impressions of this product are mostly positive as I feel Optimum has succeeded in improving several characteristics of their consumer based coating. Gloss Coat is very easy to use, looks great, and has a nice slick feeling, but my only concern at this point is the relatively high price. There are many consumer coatings that are available at lower price points and provide you with similar durability claims, great gloss, and more volume of product per bottle. Certainly everyone will value these characteristics differently, so only you can decide if this product may be the best choice for you. Ultimately, Gloss Coat should be another great option for the car owner who is seeking an easy to use paint coating to protect their vehicle from the environment.
 
Last edited:
Back
Top