BoostJunki3
Needs A Turbo
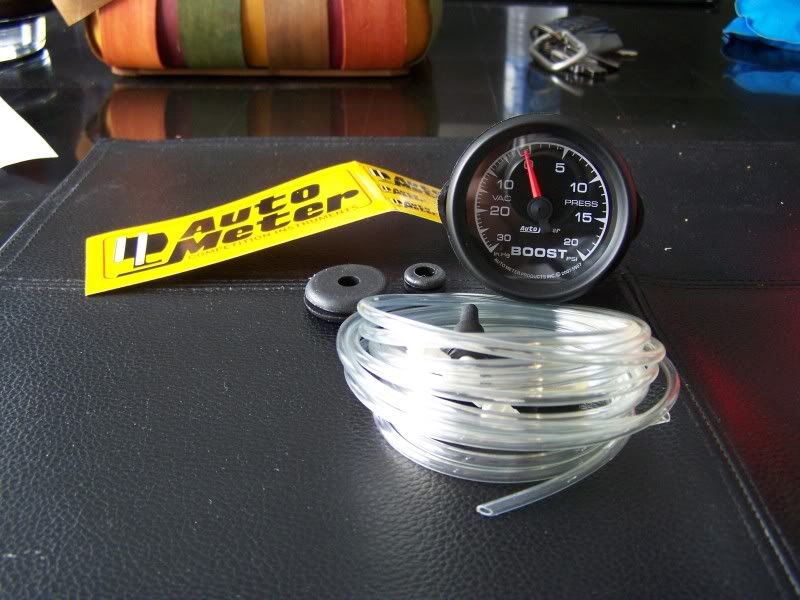
hey guys got my new Autometer ES series boost gauge today .... very nice unit. I figured since i see so many posts named BOOST GAUGE HELP i would make a mini write up...
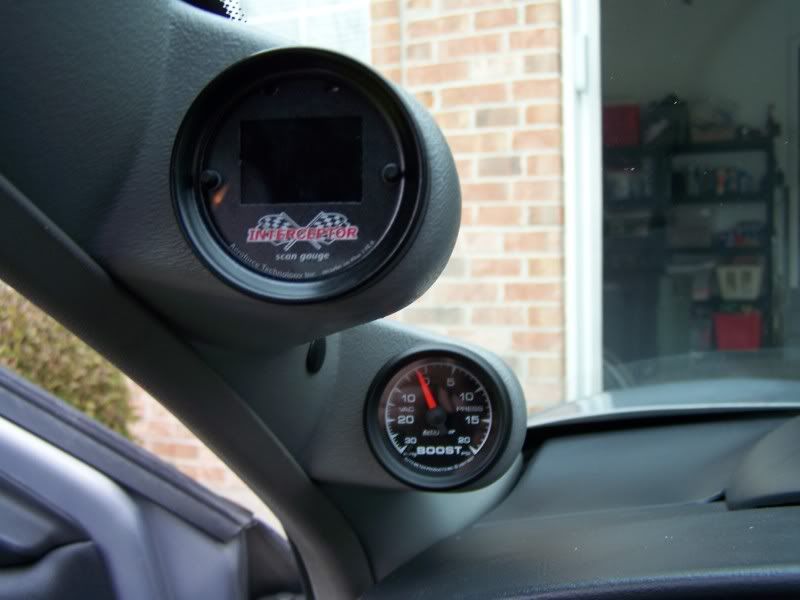
well heres the gauge....this gauge is LED back lit so no ring of light around the edge, it lights up just like stock cluster and matches it perfectly")
First thing i did was make a custom grommet for the pass thru....i took a regular piece of rubber vac line that had a hole the same size as the nylon line for the gauge. then i found a grommet with the inside diameter the same as the rubber vac line and cut that in half. and made this, as you can see the nylon line fits perfectly into my grommet for a good firewall seal.
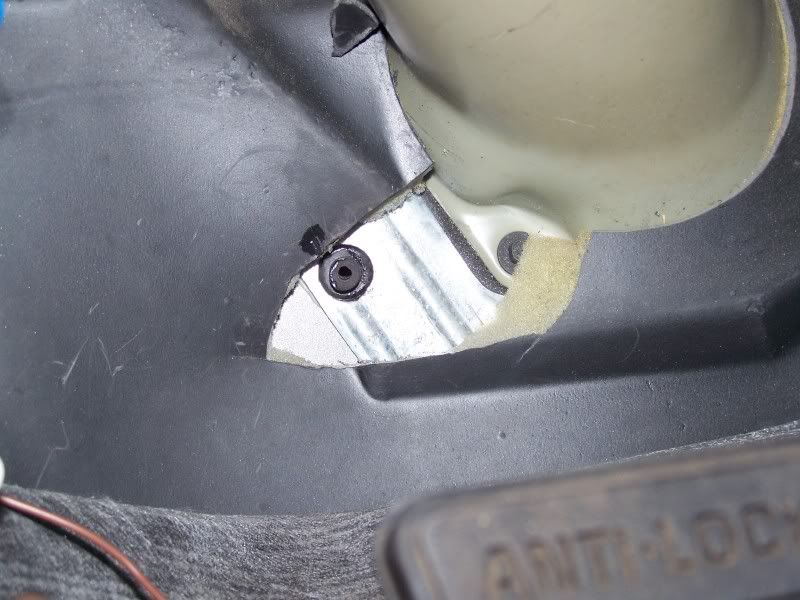
Next you have to make a hole in the firewall with a drill i picked a spot next to where the steering column is on the firewall....you can pick your own location or use this one JUST BE CAREFUL AND KNOW WHERE YOU ARE DRILLING IS FREE OF ANYTHING YOU CAN HIT....then i placed my grommet in the hole long side in first and super glued it there so it seals and wont come out...
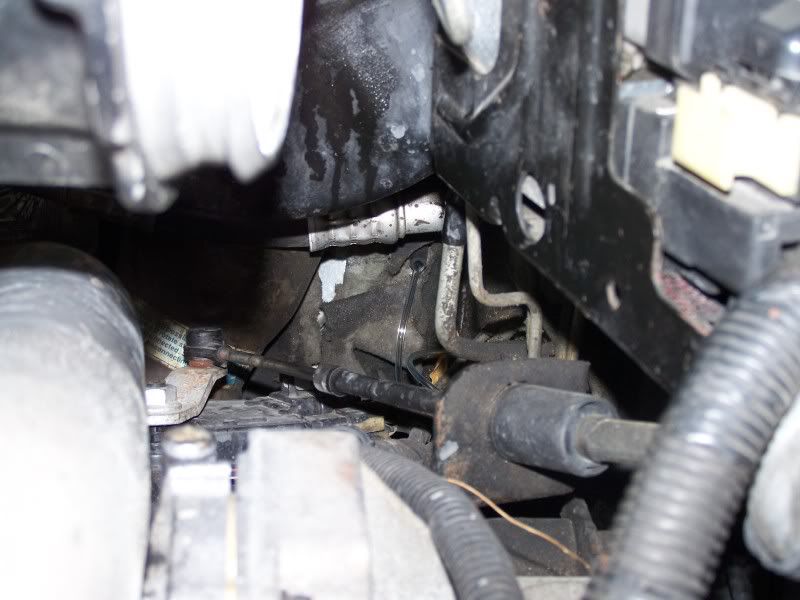
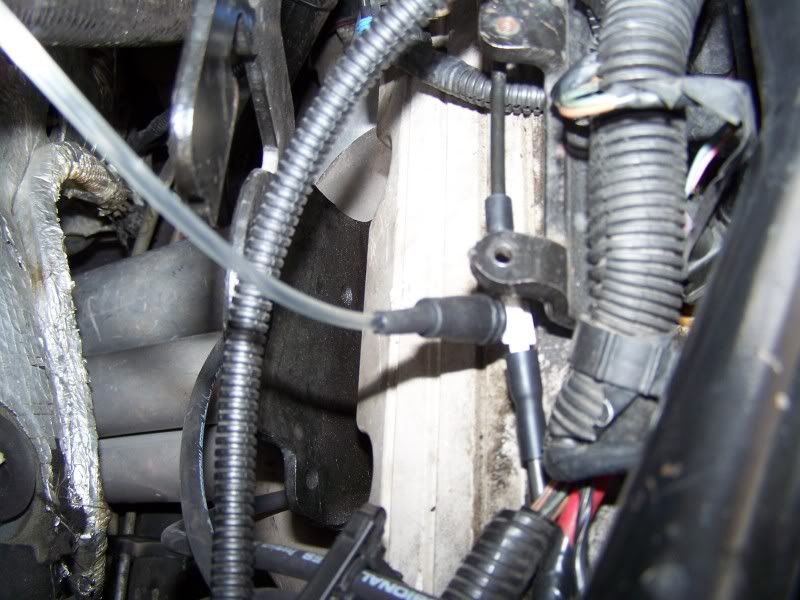
Now you can place your line through the grommet it will pop out right under the brake booster like shown below
Now what i did next is not completely necessary but i did it anyway i took the other half of that grommet we cut earlier and slid it down the line and popped in on the rubber line exactly the way it is on the interior side.
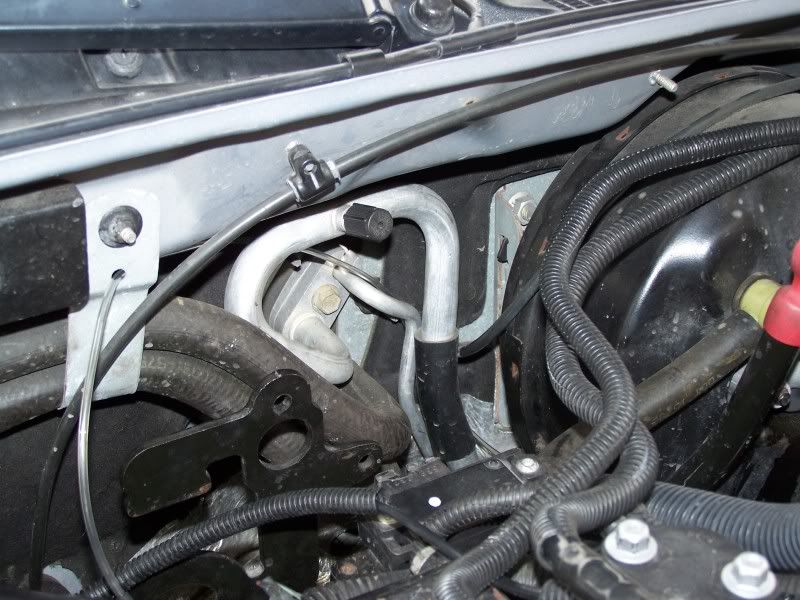
Next route your line up near the map sensor ran mine along the brake booster behind the ac lines and though a hole on the heater core hose supports.
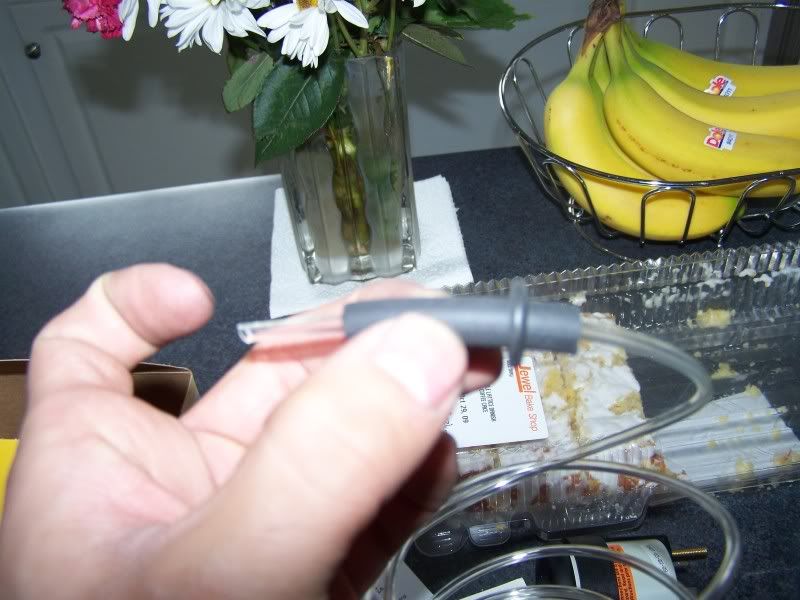
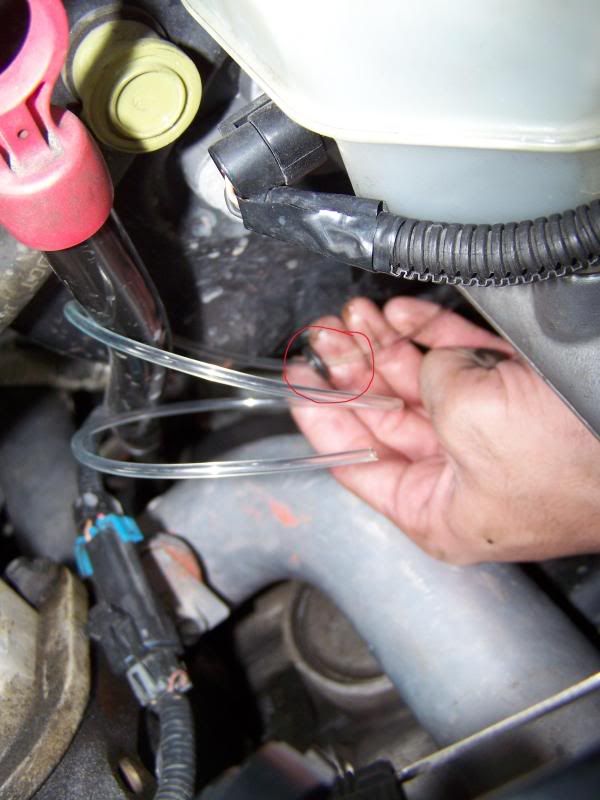
Next we gotta tap the MAP sensor vac line, I cut about and inch out of the line like so..

Then just connect all the rubber lines to the nylon line from the car and the two sides of the cut you made. The plastic T that came with my gauge, if yours didnt you can always make one from the vaccum acc. section in an autoparts store.
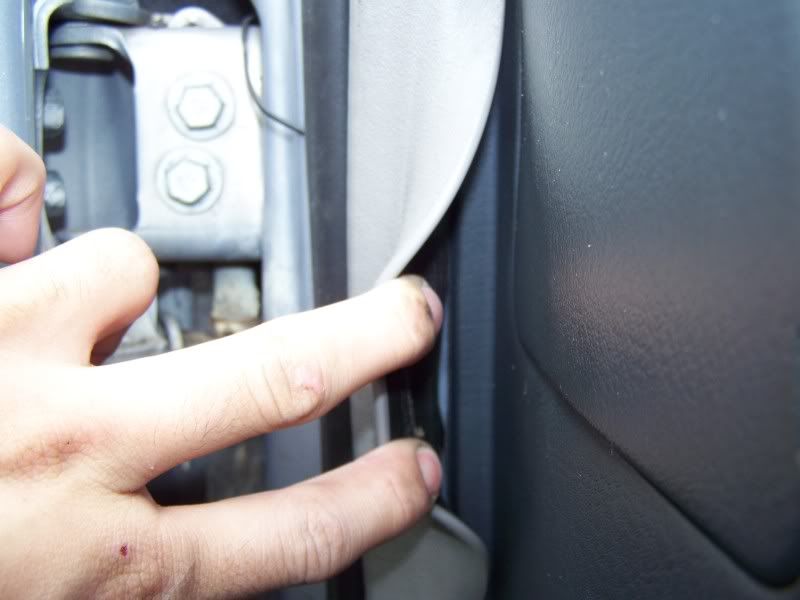
Now all that left to do is run the line from in the car to where your gauge is....i have a pillar pod so if you do also you can tuck the line behind the door stripping and behind the dash liek shown below. (excuse the monstrosity of wires under my dash its from a 2 hour self alarm install, it works flawlessly and you never see that will the kick cover on :th_thumbsup-wink
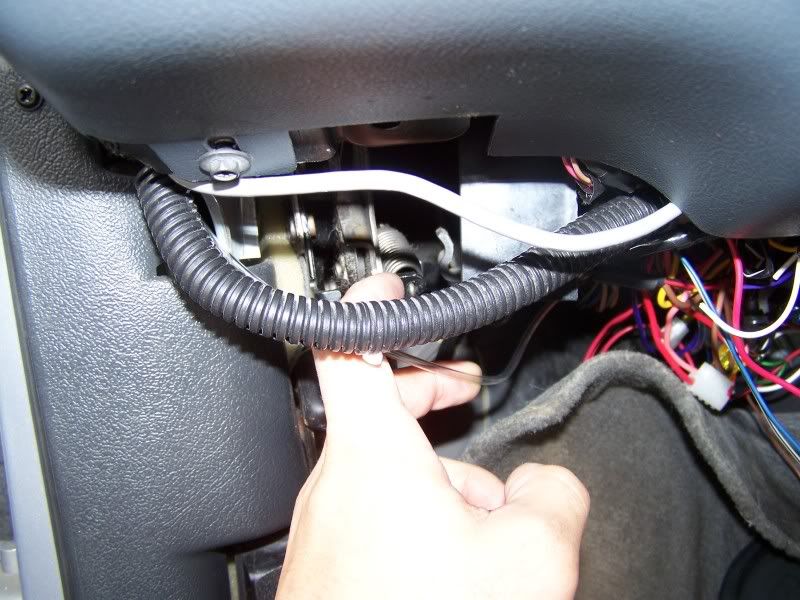
You can push the wires/lines for your gauge behind the actual dash piece under the stripping, you can see the space in the pic below. (LOL yes that is a noob routed wire coming from under the hood on the left side of the stripping...i was lazy it goes to my siren for the alarm )
)
Now all that would be left is wiring power to your gauge if its lit and connecting the line to the gauge but im not gonna go over that as some gauges are diff than others and most come with instruction on how to do this part...this was intended to show everyone how to make a firewall pass thru for your gauges when the lines arent long enough to use the passenger floor grommet.
Now enjoy your success and labor
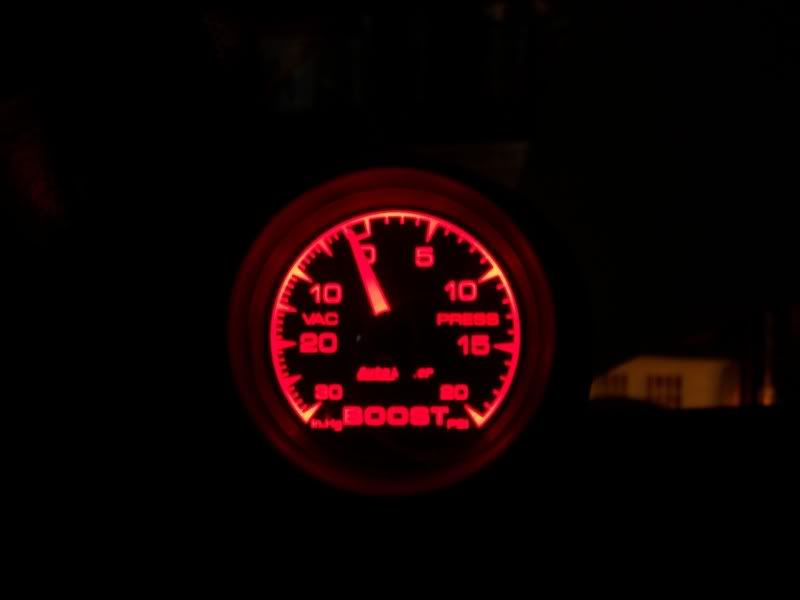
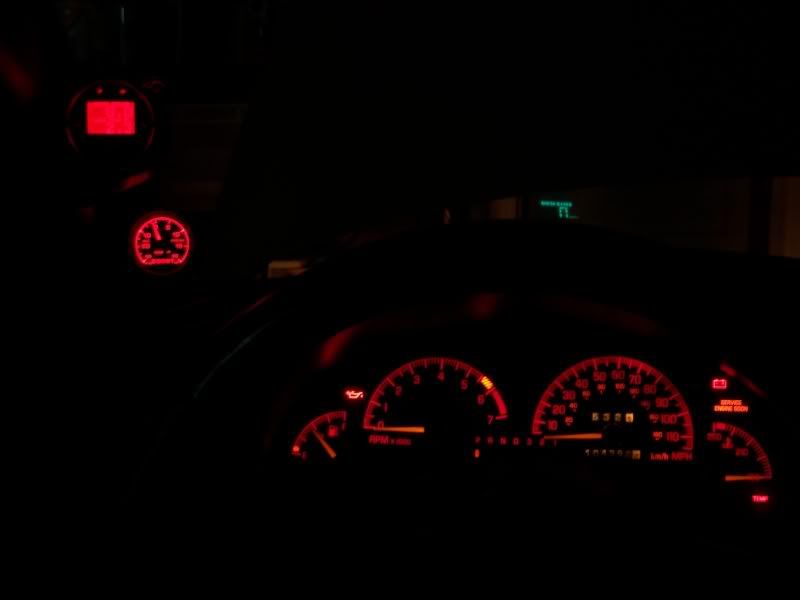
here are some lit up shots.....looks amazing this gauge come LED red back lit only so no buying bulbs with covers and it matches great....
well heres the gauge....this gauge is LED back lit so no ring of light around the edge, it lights up just like stock cluster and matches it perfectly
First thing i did was make a custom grommet for the pass thru....i took a regular piece of rubber vac line that had a hole the same size as the nylon line for the gauge. then i found a grommet with the inside diameter the same as the rubber vac line and cut that in half. and made this, as you can see the nylon line fits perfectly into my grommet for a good firewall seal.
Next you have to make a hole in the firewall with a drill i picked a spot next to where the steering column is on the firewall....you can pick your own location or use this one JUST BE CAREFUL AND KNOW WHERE YOU ARE DRILLING IS FREE OF ANYTHING YOU CAN HIT....then i placed my grommet in the hole long side in first and super glued it there so it seals and wont come out...
Now you can place your line through the grommet it will pop out right under the brake booster like shown below
Now what i did next is not completely necessary but i did it anyway i took the other half of that grommet we cut earlier and slid it down the line and popped in on the rubber line exactly the way it is on the interior side.
Next route your line up near the map sensor ran mine along the brake booster behind the ac lines and though a hole on the heater core hose supports.
Next we gotta tap the MAP sensor vac line, I cut about and inch out of the line like so..
Then just connect all the rubber lines to the nylon line from the car and the two sides of the cut you made. The plastic T that came with my gauge, if yours didnt you can always make one from the vaccum acc. section in an autoparts store.
Now all that left to do is run the line from in the car to where your gauge is....i have a pillar pod so if you do also you can tuck the line behind the door stripping and behind the dash liek shown below. (excuse the monstrosity of wires under my dash its from a 2 hour self alarm install, it works flawlessly and you never see that will the kick cover on :th_thumbsup-wink
You can push the wires/lines for your gauge behind the actual dash piece under the stripping, you can see the space in the pic below. (LOL yes that is a noob routed wire coming from under the hood on the left side of the stripping...i was lazy it goes to my siren for the alarm
)
Now all that would be left is wiring power to your gauge if its lit and connecting the line to the gauge but im not gonna go over that as some gauges are diff than others and most come with instruction on how to do this part...this was intended to show everyone how to make a firewall pass thru for your gauges when the lines arent long enough to use the passenger floor grommet.
Now enjoy your success and labor
here are some lit up shots.....looks amazing this gauge come LED red back lit only so no buying bulbs with covers and it matches great....
Last edited: