BillBoost37
New member
This mod is relatively easy. Preparation is key for a quick, painless install.
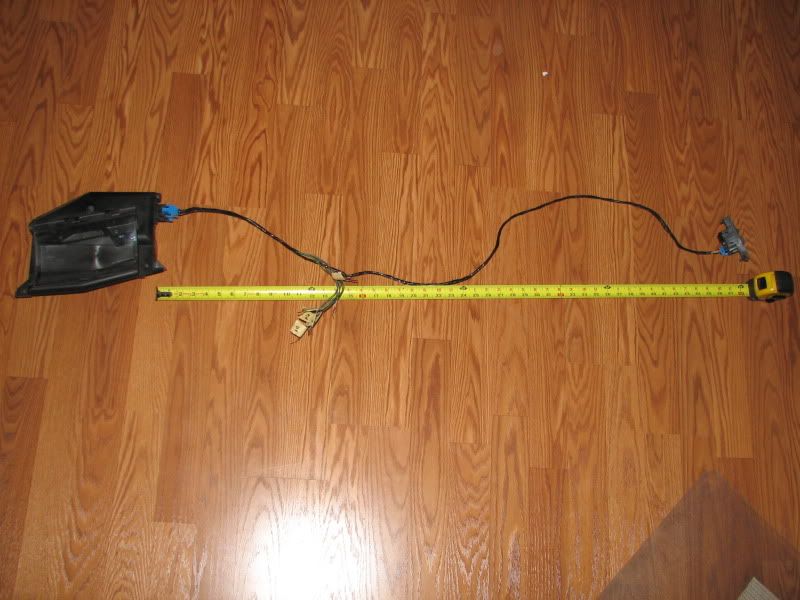
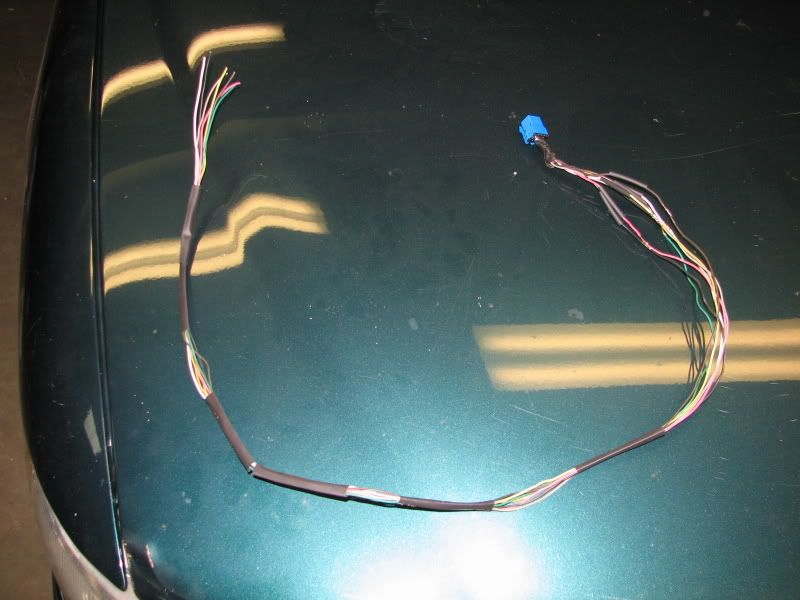
Once you have a HUD prep the wiring by extending the wiring between the HUD and the HUD switch by about two-three feet. This two feet assumes you will be placing the control switch where the Regal ashtray is located. Leave the wires that will hook to the cluster sticking out of the harness about 14" from the HUD. Label them for the cluster pin they will be hooked into.

Wiring information (HUD unit, 1997-2003 ONLY)
Cluster ---HUD Connector
NA---------A1 BRN on HUD switch - Output
NA --------A2 BRN Charge indicator
NA --------A3 TAN Oil pressure indicator
NA --------A4 DK GRN Coolant temp indicator
NA --------A5 DK GRN Entertainment and comfort serial data communications
NA---------A6 WHT to HUD switch C - dimmer signal,
B10 -------A7 DK GRN VSS
A1 --------A8 BLK Ground
NA-------- B1 YEL to HUD switch E - Mirror motor UP
NA--------B2 BRN to HUD switch H - Mirror motor DOWN
A6 --------B3 LT BLU E/M switch, grounded=metric
NA -------B4 DK GRN/WHT Low fuel indicator
B7* -------B5 LT GRN High-beam indicator
NA -------B6 Blank
A10 ------B7 LT BLU Left turn signal
A11 ------B8 DK BLU Right turn signal
* This requires a relay to flip the signal.
Pull both door gaskets by the A pillar trim pieces. Then pull the A pillar pieces. Remove the dash bezel and cluster.
Reinstall the A pillars. The GP trim panel does not lock into the A pillars like the Regal panel does. Reinstall the door gaskets.
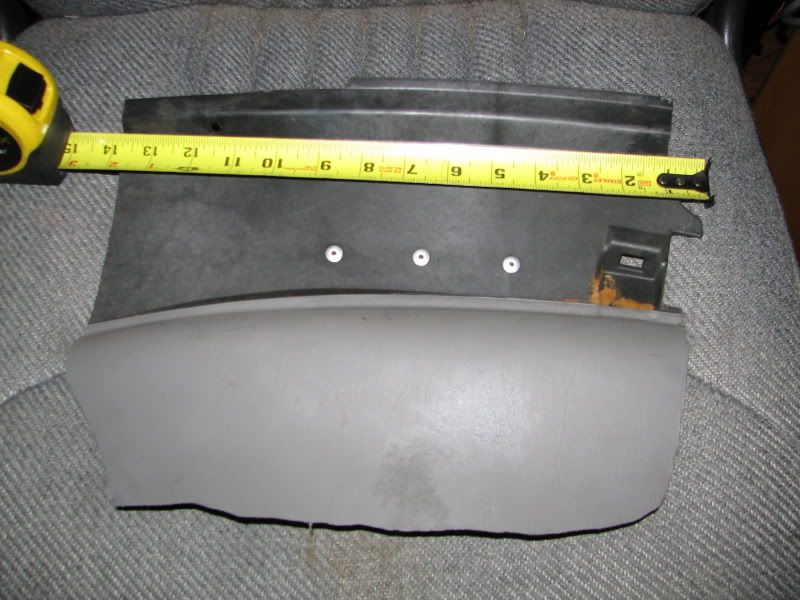
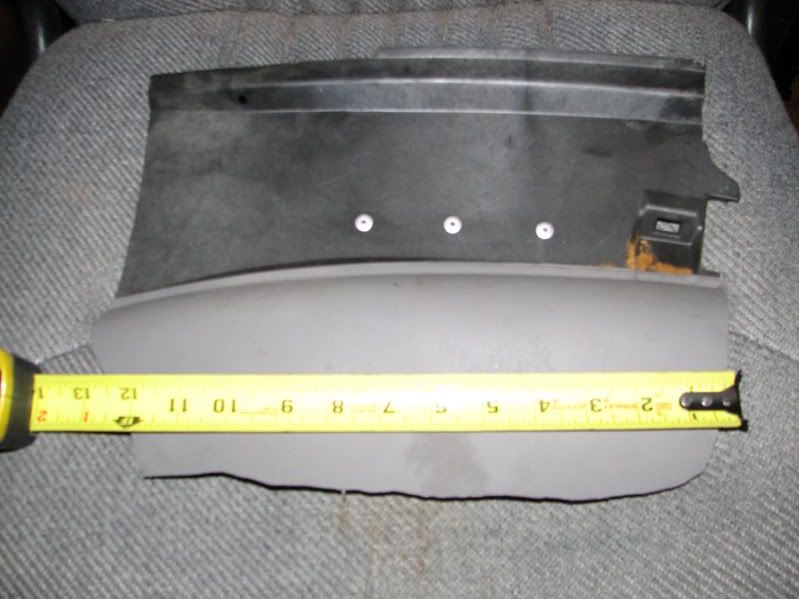
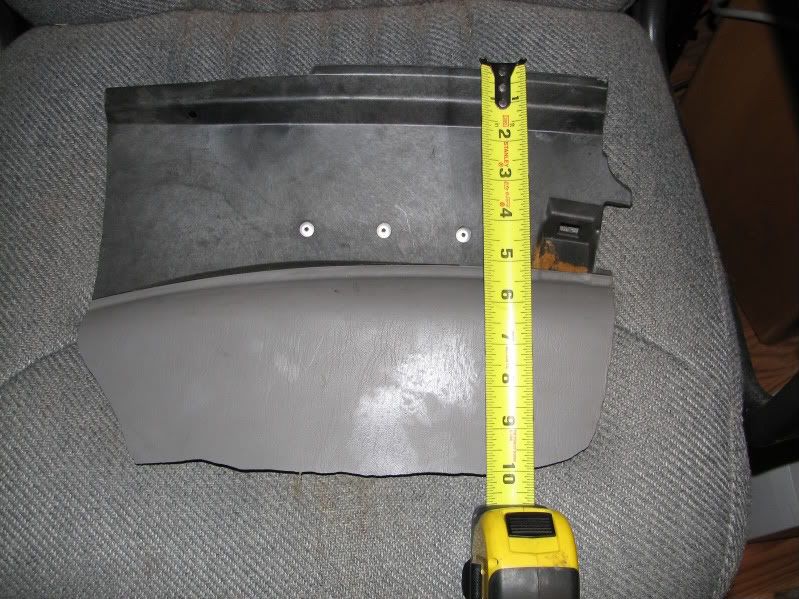
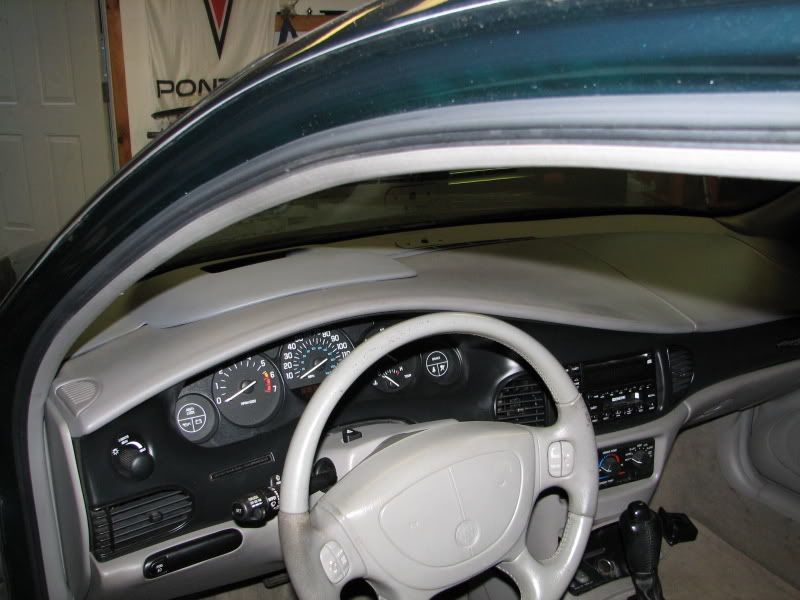
Measure the spot for the HUD using the pictures for reference. Sit your HUD trim panel on the dash to get an idea of how everything fits together.
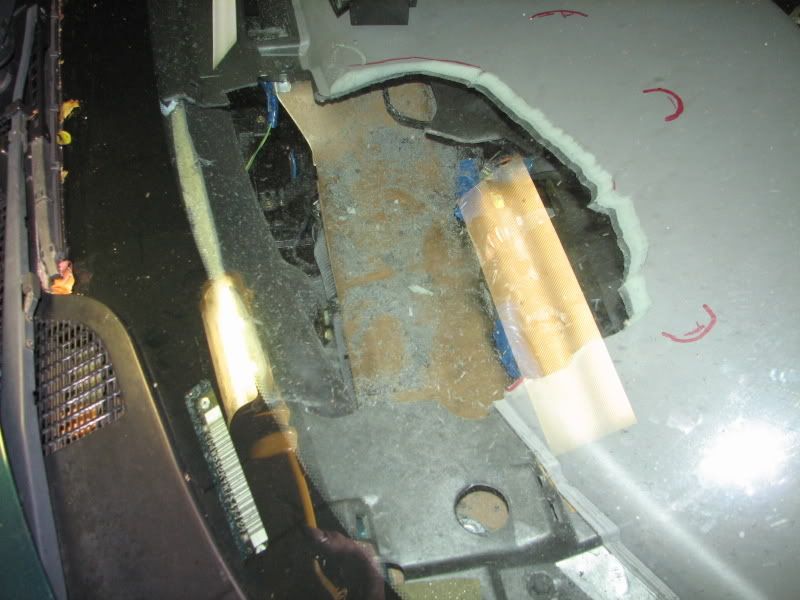
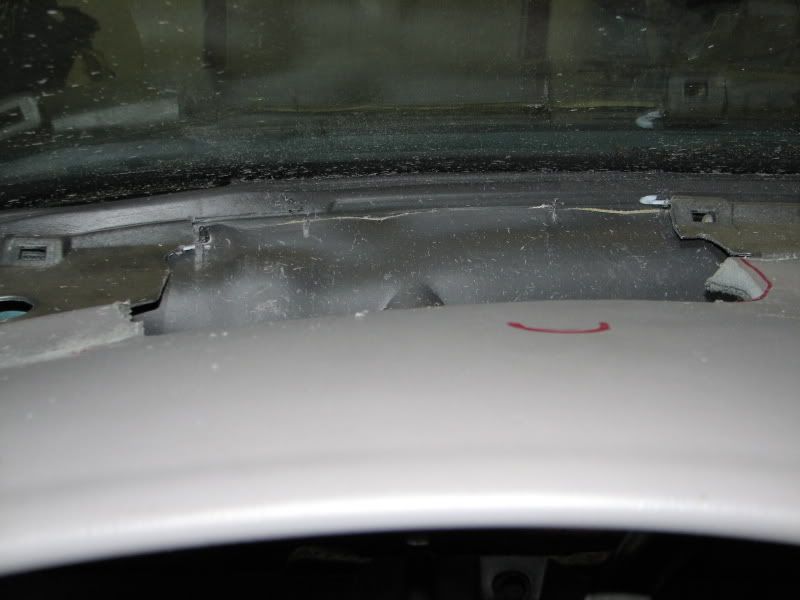
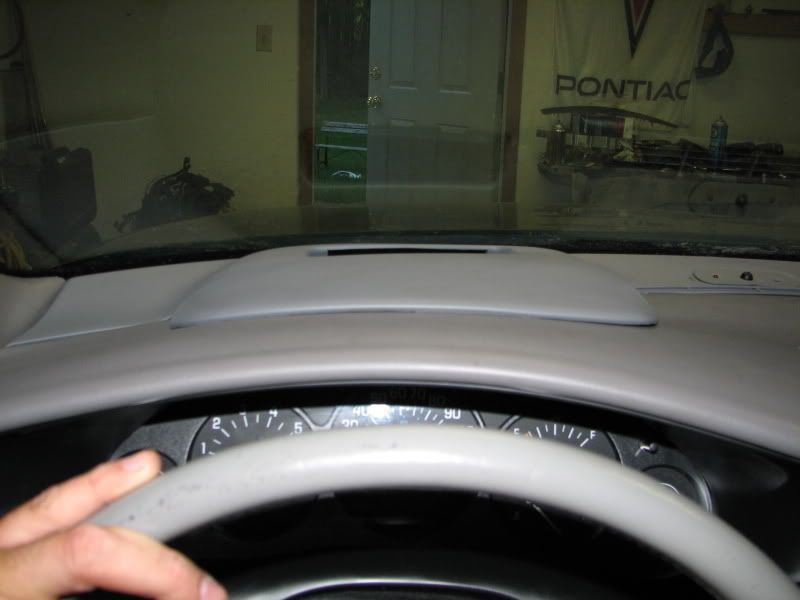
The clips to hold down will be cut in at a later time. The dash should remain whole under them at this point. Here we see the hole cut and the red marks are where the clips would be located
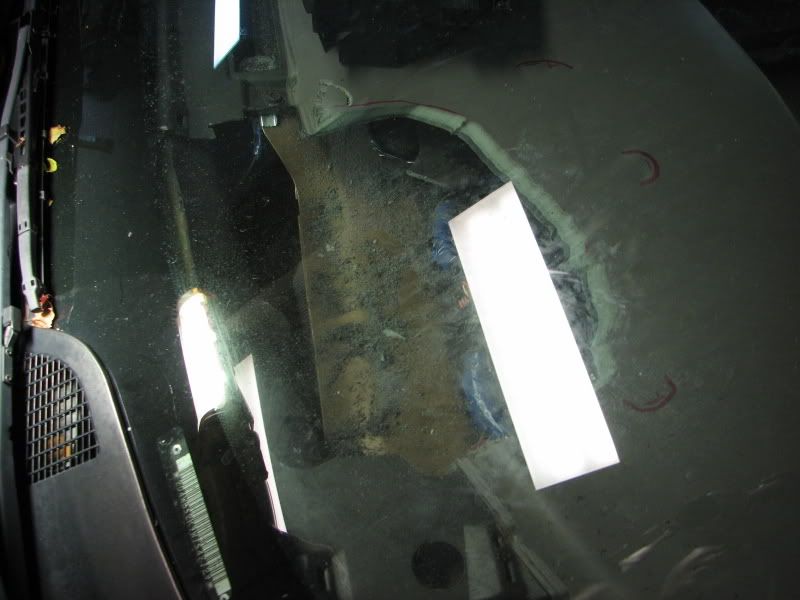
I find that a dremel with flex shaft and a rotozip bit give you the ability to work in the tight space and cut right up to the window. It requires a good grip and steady hands, but works great for the application. Keep your shop vac handy, plastic gets everywhere.

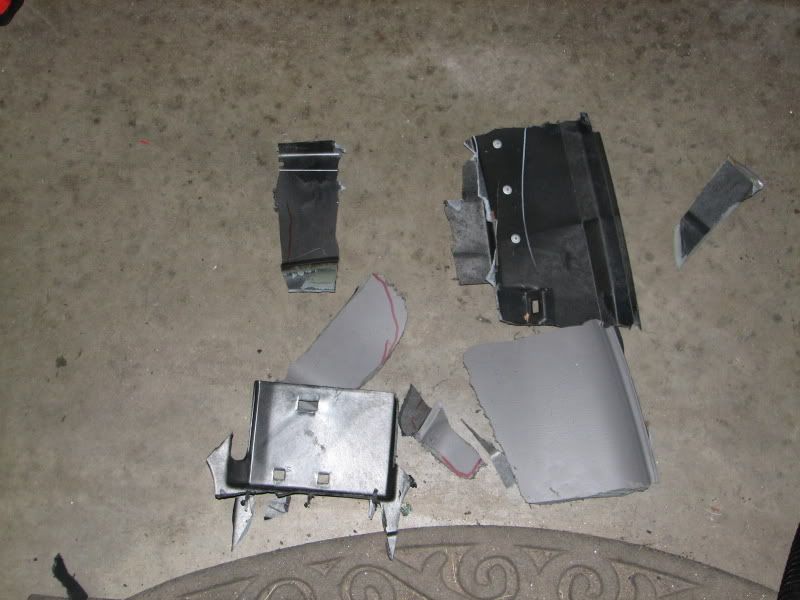
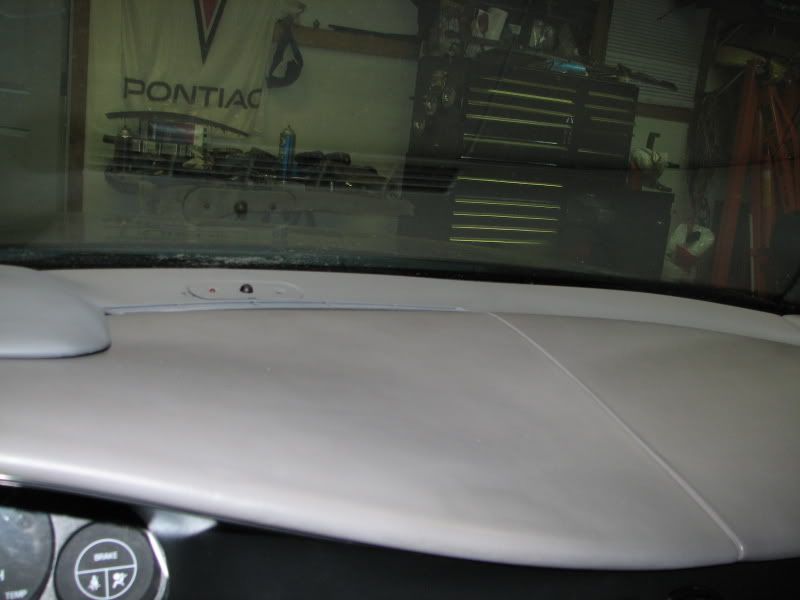
Once the dash is cut there is one piece underneath that will need to be broken to get the dash piece out. The rivets holding it in can be seen in this picture. This pic was when I didn't have the measurements to cut by, hence the many dash pieces.
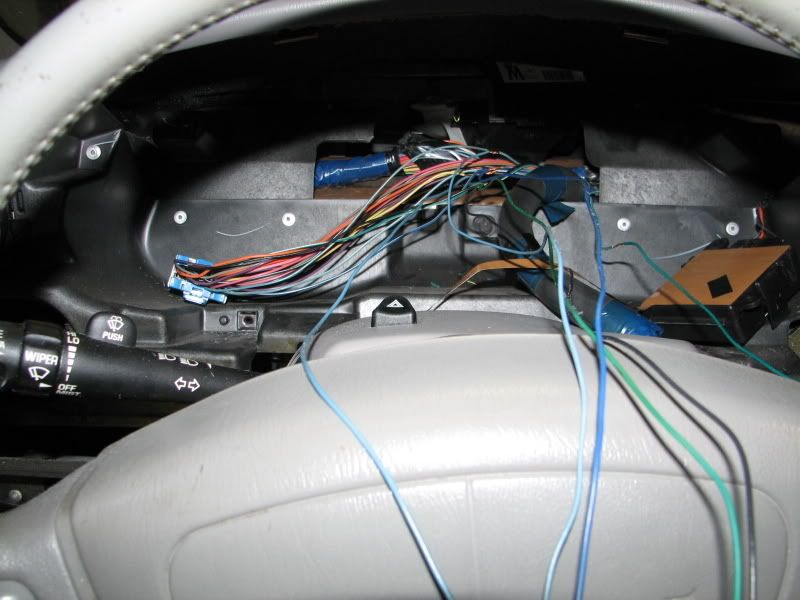
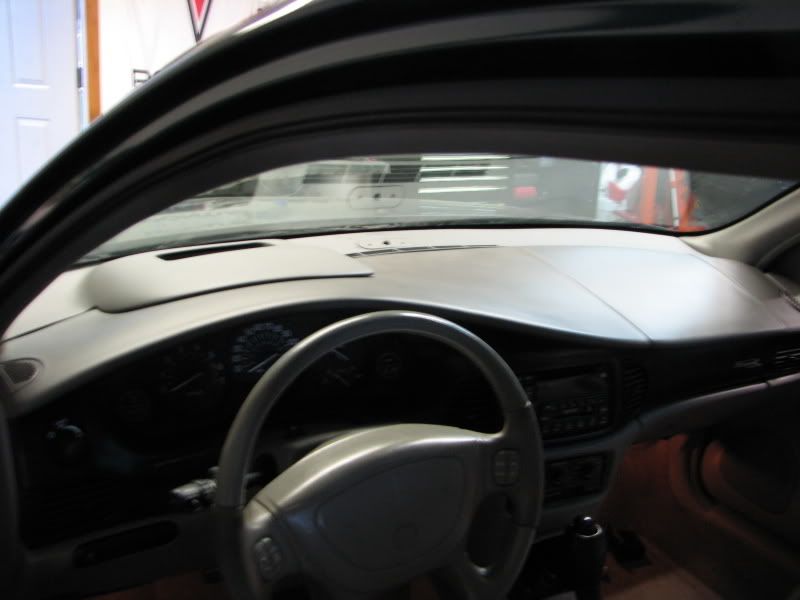
Looking over the steering wheel where the cluster would usually sit.
From inside
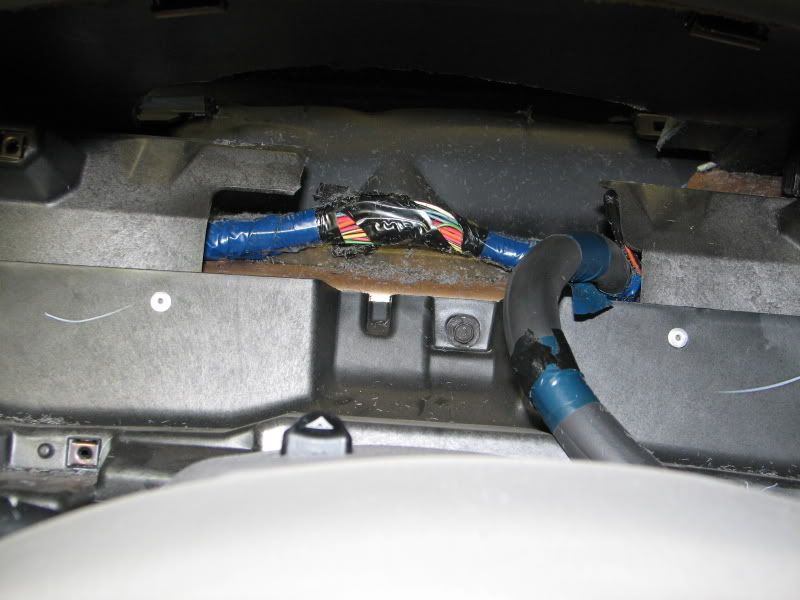
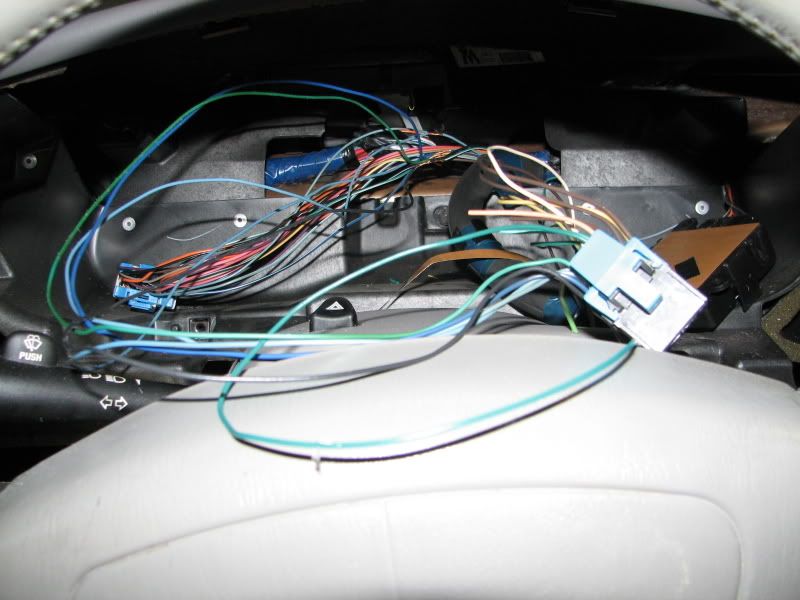
Matched up the wires from the HUD to the cluster connector. Removed some coating from each of the necessary wires and soldered. This is actually an organized rats nest.")
Test fit the HUD into the hole. There is a clip on the bottom of the HUD that can have a groove cut into the dash plastic for it to hold in place. After that I add one screw on the back right and back left into the firewall plastic where the HUD originally screwed into the GTP. These three points hold it well.
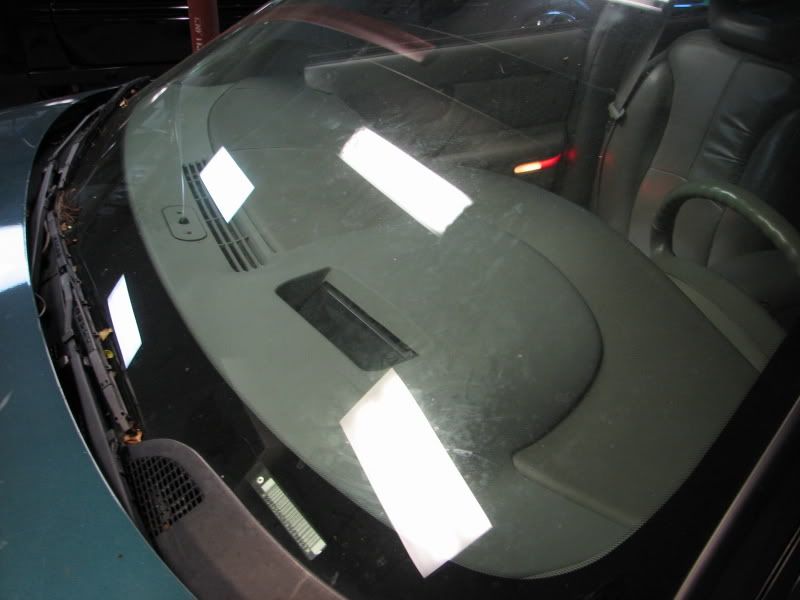
I painted the trim panel and sat it in place on this car, other cars I have not painted it and the match to the dash panel is good. It doesn't look out of place. Needed to cut the dash between the defroster vent and windshield where the solar sensor and photocell would be located. I used a rotozip bit in the flex shaft of a dremel for easy access in the tigher locations like this one. Also cut the holes where the clips would hold in three locations around the actual hud. Placement of where to cut is a little tricky. I started by determining where they would sit, marked them and used a razor blade to cut the dash in those three spots. Then marked where the actual clips would go and used the rotozip bit to make a small groove for them to hook into. The grooves should be about the size of the one in the dash piece that you cut out for the HUD hole.
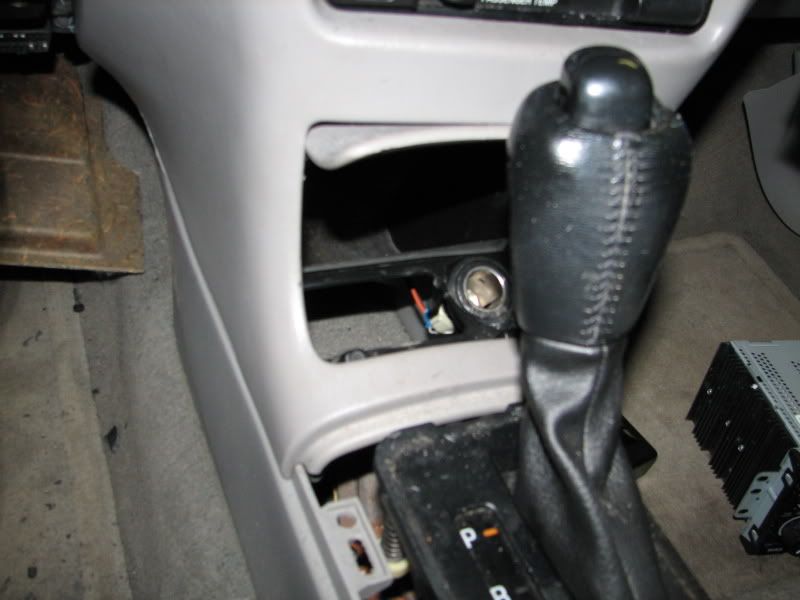
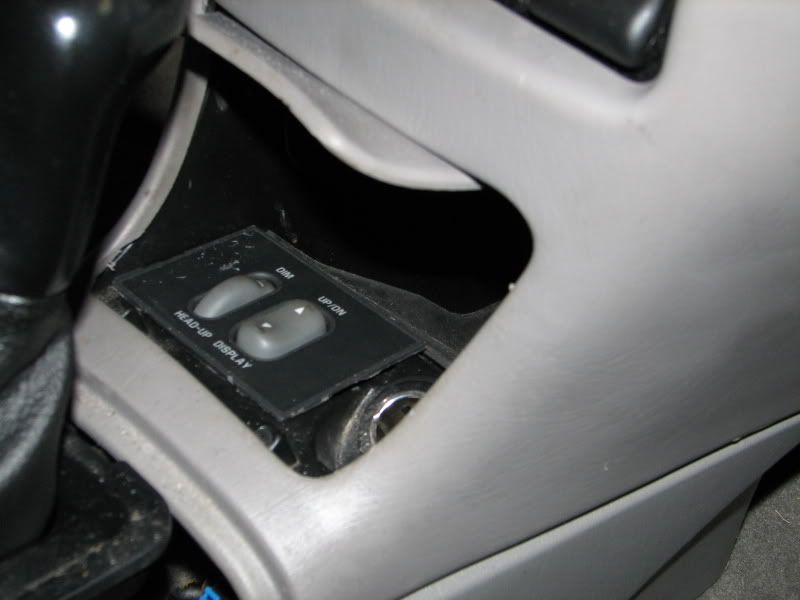
Pull the ashtray out and used a dremel cutting wheel to remove the excess around the hud switch, leaving only the necessary area to hold the switch to the plate and make the plate a flat surface. This allows it to sit nearly flush in the ashtray hole. Also needed to drum sand about 1/8-1/4" larger on the back edge of the ashtray hole for the switch controls to fit.


Put the cluster back in and the remainder of the car back together and enjoy.
Piggyback projects to this are fixing a dim cluster DIC/ODO and fixing a dim HVAC head unit. Both are relatively quick and easy to do with the dash already off the car.
Once you have a HUD prep the wiring by extending the wiring between the HUD and the HUD switch by about two-three feet. This two feet assumes you will be placing the control switch where the Regal ashtray is located. Leave the wires that will hook to the cluster sticking out of the harness about 14" from the HUD. Label them for the cluster pin they will be hooked into.
Wiring information (HUD unit, 1997-2003 ONLY)
Cluster ---HUD Connector
NA---------A1 BRN on HUD switch - Output
NA --------A2 BRN Charge indicator
NA --------A3 TAN Oil pressure indicator
NA --------A4 DK GRN Coolant temp indicator
NA --------A5 DK GRN Entertainment and comfort serial data communications
NA---------A6 WHT to HUD switch C - dimmer signal,
B10 -------A7 DK GRN VSS
A1 --------A8 BLK Ground
NA-------- B1 YEL to HUD switch E - Mirror motor UP
NA--------B2 BRN to HUD switch H - Mirror motor DOWN
A6 --------B3 LT BLU E/M switch, grounded=metric
NA -------B4 DK GRN/WHT Low fuel indicator
B7* -------B5 LT GRN High-beam indicator
NA -------B6 Blank
A10 ------B7 LT BLU Left turn signal
A11 ------B8 DK BLU Right turn signal
* This requires a relay to flip the signal.
Pull both door gaskets by the A pillar trim pieces. Then pull the A pillar pieces. Remove the dash bezel and cluster.
Reinstall the A pillars. The GP trim panel does not lock into the A pillars like the Regal panel does. Reinstall the door gaskets.
Measure the spot for the HUD using the pictures for reference. Sit your HUD trim panel on the dash to get an idea of how everything fits together.
The clips to hold down will be cut in at a later time. The dash should remain whole under them at this point. Here we see the hole cut and the red marks are where the clips would be located
I find that a dremel with flex shaft and a rotozip bit give you the ability to work in the tight space and cut right up to the window. It requires a good grip and steady hands, but works great for the application. Keep your shop vac handy, plastic gets everywhere.
Once the dash is cut there is one piece underneath that will need to be broken to get the dash piece out. The rivets holding it in can be seen in this picture. This pic was when I didn't have the measurements to cut by, hence the many dash pieces.
Looking over the steering wheel where the cluster would usually sit.
From inside
Matched up the wires from the HUD to the cluster connector. Removed some coating from each of the necessary wires and soldered. This is actually an organized rats nest.
Test fit the HUD into the hole. There is a clip on the bottom of the HUD that can have a groove cut into the dash plastic for it to hold in place. After that I add one screw on the back right and back left into the firewall plastic where the HUD originally screwed into the GTP. These three points hold it well.
I painted the trim panel and sat it in place on this car, other cars I have not painted it and the match to the dash panel is good. It doesn't look out of place. Needed to cut the dash between the defroster vent and windshield where the solar sensor and photocell would be located. I used a rotozip bit in the flex shaft of a dremel for easy access in the tigher locations like this one. Also cut the holes where the clips would hold in three locations around the actual hud. Placement of where to cut is a little tricky. I started by determining where they would sit, marked them and used a razor blade to cut the dash in those three spots. Then marked where the actual clips would go and used the rotozip bit to make a small groove for them to hook into. The grooves should be about the size of the one in the dash piece that you cut out for the HUD hole.
Pull the ashtray out and used a dremel cutting wheel to remove the excess around the hud switch, leaving only the necessary area to hold the switch to the plate and make the plate a flat surface. This allows it to sit nearly flush in the ashtray hole. Also needed to drum sand about 1/8-1/4" larger on the back edge of the ashtray hole for the switch controls to fit.
Put the cluster back in and the remainder of the car back together and enjoy.
Piggyback projects to this are fixing a dim cluster DIC/ODO and fixing a dim HVAC head unit. Both are relatively quick and easy to do with the dash already off the car.