• The site migration is complete! Hopefully everything transferred properly from the multiple decades old software we were using before. If you notice any issues please let me know, thanks! Also, I'm still working on things like chatbox, etc so hopefully those will be working in the next week or two.

De-rib, De-door ding, and shaved trunk lock and new paint.

shavedGPGT

New member
well hello there. new to this forum so thought i would say hi. its pretty late and im not tired. so i figued what else to do then start a new topic. lol. well no pictures yet. 25* outside. burrr. haha. but tomorrow around 3 pics should be up. i've De-ribbed, took off the door ding protectors, and shaved the trunk lock. im preping her for paint as we speak. should be done with that for tomrrow. thenn is ready for prime and base :D. and i know this is a tease till tomrrow but calm down it will be soon as possible. but thanks and let me know what ya think!!:th_peaceout:


UPDATE!!!! 11/23/08

:D in the progress!
DSCN0795.jpg

DSCN0796.jpg

DSCN0797.jpg

DSCN0802.jpg

DSCN0804.jpg


and my dirty engine, will be cleaning very soon.
DSCN0801.jpg

DSCN0799.jpg

DSCN0800.jpg


getting her ready for 04 leather GP seats, and painted dash :D
DSCN0806.jpg

DSCN0807.jpg

DSCN0808.jpg


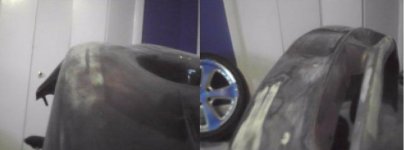
my 18's painting the inside black. :D
in the progress too
DSCN0803.jpg
 
Last edited:


This thread sucks with out pictures! Major let down...I was expecting some.

Post some up...make me feel better, and you can redeem yourself. :th_thumbsup-wink::th_laugh-lol3:


~F~


okay so i cant find my dang blame digital camera but here are some crappy photo cam pics of the front bumper. more tomrrow!
 

Attachments

  • de rib.jpg
    de rib.jpg
    24 KB · Views: 32
  • dfe rib to.jpg
    dfe rib to.jpg
    10.5 KB · Views: 20
lol yess i am :D front and back bumpers are both de-ribbed and the door ding protectors are off. the trunk lock is shaved and the SD spoiler is going on tomorrow :D

Next upgrades are.

1. SD hood.
2 Projectors with hid's
3 new fogs with hid's
4. new struts and SSC springs.
5. and last but not least. ZZP M90 :D


mods so far. ZZP 2.5 DP, zzp PCM, FWI, PLOG, 180stat, and some other odd and ends. but not bad. god this thing is breaking my wallet. but i love it. lol
 
So how does one go about 'de-ribbing' the bumpers?

Sand the bumper down where the ribs are. Use a fiberglass body filler to fill in the ribs, sand down, use spot putty where needed and whala. You can also you any flexible bumper filler. As long as it allows flex, youre set. Dont wanna use just any body filler.


Cool, I got a guy that is willing to do some paint work for me for free as long as I do the prep work and Ive been thinking a little about doing this.
 
black98GT is right. it has to be able to flex. if not it will end up cracking. it does take a little time though. be very patient do not get into a rush. start with 150 grit and scuff the f**k out of your finish. then i went to 320. apply, wait, sand with 150 and then 320, check for any dips, fill again, wait, sand, cheack and repeat untill finished. lol
 
black98GT is right. it has to be able to flex. if not it will end up cracking. it does take a little time though. be very patient do not get into a rush. start with 150 grit and scuff the f**k out of your finish. then i went to 320. apply, wait, sand with 150 and then 320, check for any dips, fill again, wait, sand, cheack and repeat untill finished. lol

No need to go down to 150 on a plastic bumper...that 320 or even 400 would be more than adequate. :th_thumbsup-wink:
 
Ya, you just want to break the surface shine, and make it dull in easy to understand terms. As long as you clean it well before you goop on the filler, it will bond more than a-ok.

You can use a few different name brands, these will be available from any local auto paint supply store. SEM - Flexible Bumper Repair and Dura Mix (3M bought them so not sure what the current name is.

In General...get you some FLEXIBLE plastic bumper repair stuff...sand your bumper in the area of the ribs, goop it on, and sand it smooth. It might take about 3 coats to get it perfect. Then prep, primer, paint, clear coat, done.

~F~


Nice coming along nicely. I was going to ask if you used a guide coat as a step while block sanding. But the last couple pictures answered that for me.
How big were the holes that held the door moldings? I am thinking about that when and if I do a complete paint job.
 
there were about the size of a pea, not very big, but i welded over them and then grinded them down and then bondoed. . there always held on with adheisive, so just do like you did to de-badge, and then welded the holes, bondo and then sand sand sand. lol its goin in from prime and paint today :D
 
Back
Top