ItHurtz
Active member
New hinges $300, pins $30, yup new pins.
Lets get down to business.
Lets start off with the pins. 1 package= one door, 2 packages means 2 doors. Notice your part number at the top
 Untitled by smetters20, on Flickr
 Untitled by smetters20, on Flickr
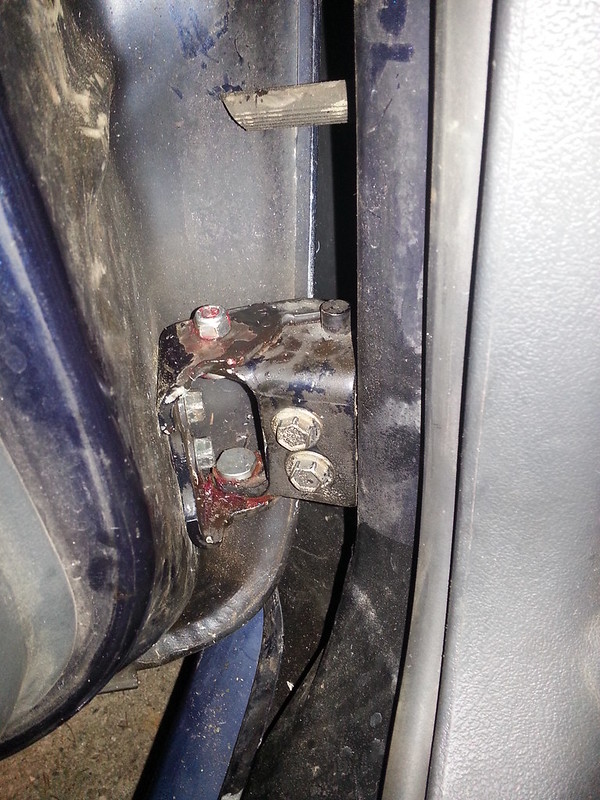
Before door. Notice pins aka the only thing that dont look like bolt heads. 2 per hinge/4 per door
 Untitled by smetters20, on Flickr
 Untitled by smetters20, on Flickr
Unplug wire harness prior to door removal
 Untitled by smetters20, on Flickr
The plug is inside the body not the door keep pulling it comes out further
 Untitled by smetters20, on Flickr
Yay
 Untitled by smetters20, on Flickr
Kid you not the instructions on how to take it off are on the plug. Squeeze and flip the white lever over and it will come apart
 Untitled by smetters20, on Flickr
 Untitled by smetters20, on Flickr
13mm for door bolts, and no I used a air ratchet")
 Untitled by smetters20, on Flickr
 Untitled by smetters20, on Flickr
 Untitled by smetters20, on Flickr
Better look at the hinges with door gone
 Untitled by smetters20, on Flickr
 Untitled by smetters20, on Flickr
I actually took the ENTIRE hinge off, door first then car. While looking at the hinges I realized there was absolutely NO need for this. 2 bolts right there dead center looking at you are all that need to be removed. I wasnt sure hence why I took it off first. But the 2 bolts can be removed leaving this behind on the body
 Untitled by smetters20, on Flickr
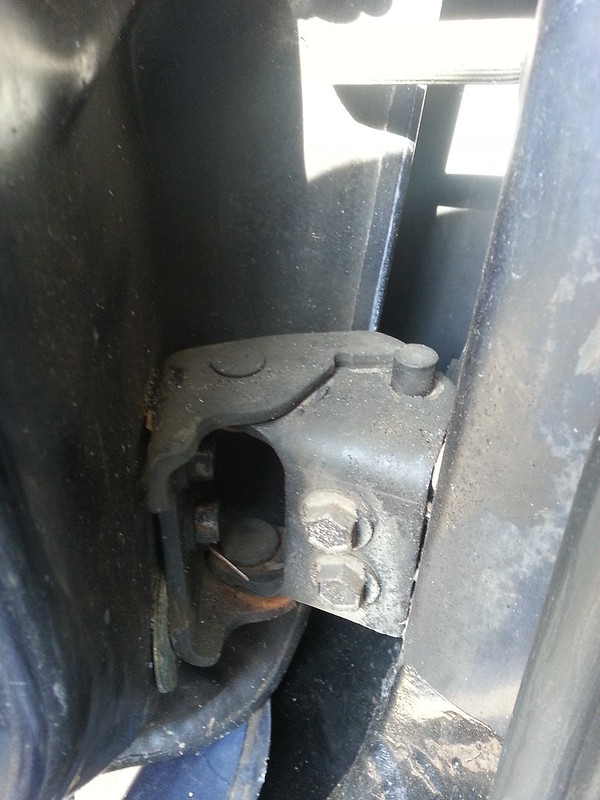
Hinges off with ^^^ bracket still on body
 Untitled by smetters20, on Flickr
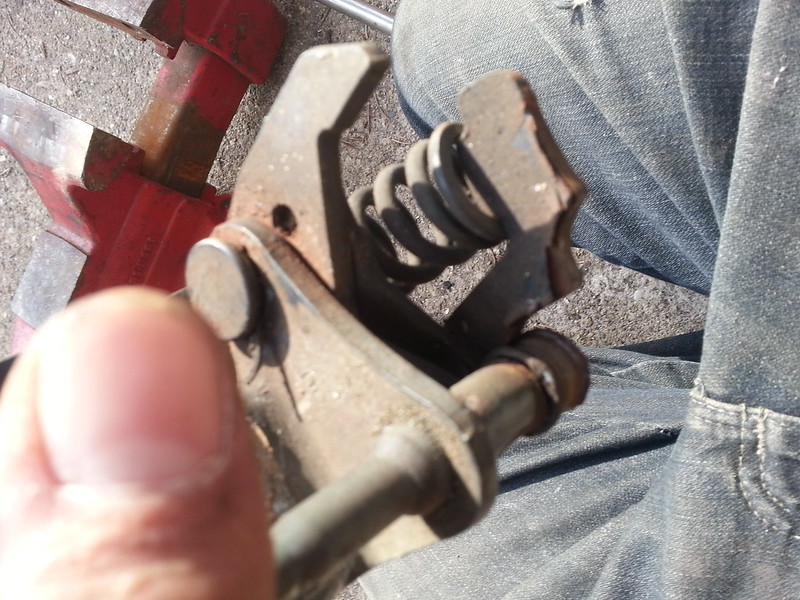
Pay attention to the spring its under pressure and must be taken out before you can pop the old hinges out. I stuck half of it in a vice, compressed a bit and set the spring aside, pops in easily later with another slight compress.
 Untitled by smetters20, on Flickr
 Untitled by smetters20, on Flickr
Now I read somewhere where a guy said oh put a x and punch it through.... ok
 Untitled by smetters20, on Flickr
Dont waste your time with a X. I punched the hell out of it and did nothing. Grind that old rivet thingy gone
 Untitled by smetters20, on Flickr
Wap with a hammer and punch
 Untitled by smetters20, on Flickr
Walla easy as pie, twice per hinge and now your ready for the new pin!
 Untitled by smetters20, on Flickr
Lets get down to business.
Lets start off with the pins. 1 package= one door, 2 packages means 2 doors. Notice your part number at the top
Untitled by smetters20, on FlickrUntitled by smetters20, on FlickrBefore door. Notice pins aka the only thing that dont look like bolt heads. 2 per hinge/4 per door
Untitled by smetters20, on FlickrUntitled by smetters20, on FlickrUnplug wire harness prior to door removal
Untitled by smetters20, on FlickrThe plug is inside the body not the door keep pulling it comes out further
Untitled by smetters20, on FlickrYay
Untitled by smetters20, on FlickrKid you not the instructions on how to take it off are on the plug. Squeeze and flip the white lever over and it will come apart
Untitled by smetters20, on FlickrUntitled by smetters20, on Flickr13mm for door bolts, and no I used a air ratchet
Untitled by smetters20, on FlickrUntitled by smetters20, on FlickrUntitled by smetters20, on FlickrBetter look at the hinges with door gone
Untitled by smetters20, on FlickrUntitled by smetters20, on FlickrI actually took the ENTIRE hinge off, door first then car. While looking at the hinges I realized there was absolutely NO need for this. 2 bolts right there dead center looking at you are all that need to be removed. I wasnt sure hence why I took it off first. But the 2 bolts can be removed leaving this behind on the body
Untitled by smetters20, on FlickrHinges off with ^^^ bracket still on body
Untitled by smetters20, on FlickrPay attention to the spring its under pressure and must be taken out before you can pop the old hinges out. I stuck half of it in a vice, compressed a bit and set the spring aside, pops in easily later with another slight compress.
Untitled by smetters20, on FlickrUntitled by smetters20, on FlickrNow I read somewhere where a guy said oh put a x and punch it through.... ok
Untitled by smetters20, on FlickrDont waste your time with a X. I punched the hell out of it and did nothing. Grind that old rivet thingy gone
Untitled by smetters20, on FlickrWap with a hammer and punch
Untitled by smetters20, on FlickrWalla easy as pie, twice per hinge and now your ready for the new pin!
Untitled by smetters20, on Flickr