GR8racingfool
New member
Figured I would show you all how to save yourself some money, and lot of money preventing a service tech. to come out and do this, or to come out when its too late and you have to have parts replaced.
Your out side AC unit sits out in the weather 24/7/365 and needs some attention at least once a year to keep things happy. This write up will show you a simple service that will help it run cooler, and better, and save you a lot of money down the road in the long run. This will also allow the compressor to not work as hard cooling down the refrigerant so the unit lasts a lot longer by keeping up on the maintenance.
Granted, not all outside units will look the same, but the service from one to the other is similar.
Lets begin with turning UP or OFF the unit.
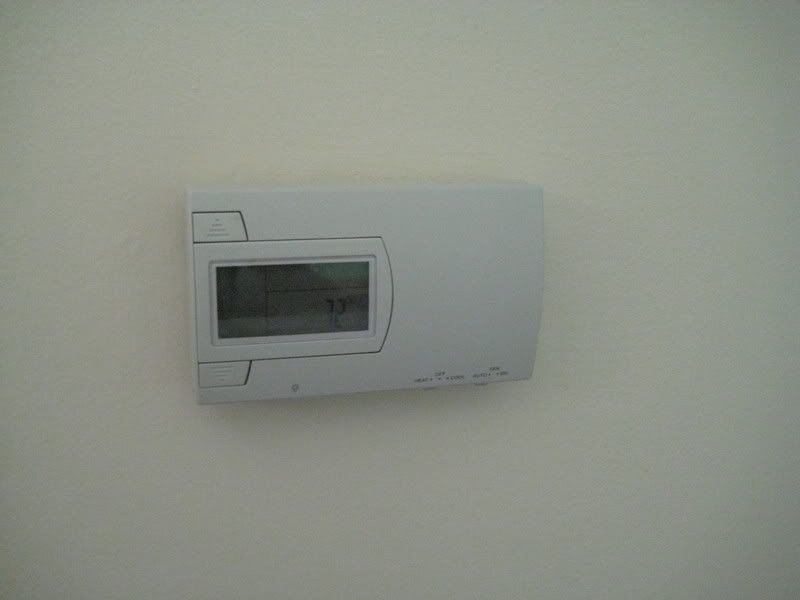
Turn it up, HEATING, so it wont come on, or off will work fine if you have that setting too. You can also flip the breaker to the unit if you so like, inside, or outside depending on your set up.
Next, at your outside unit:
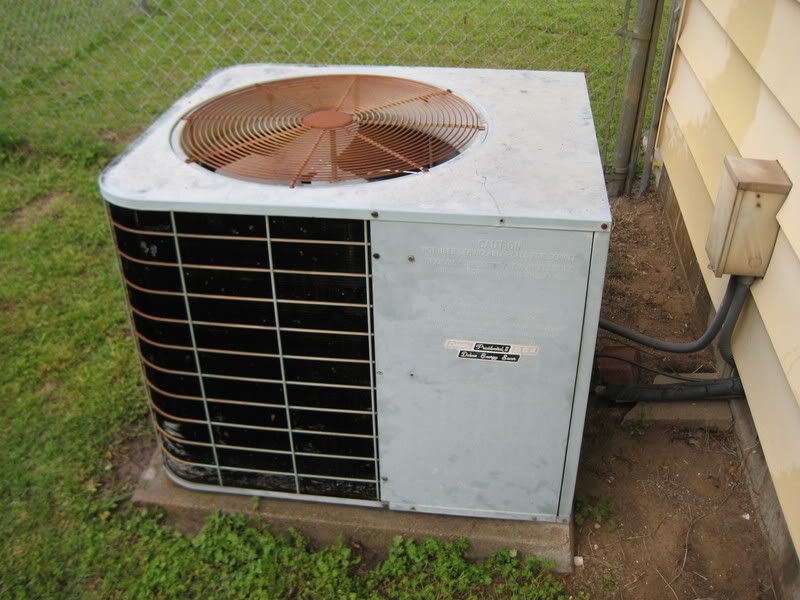
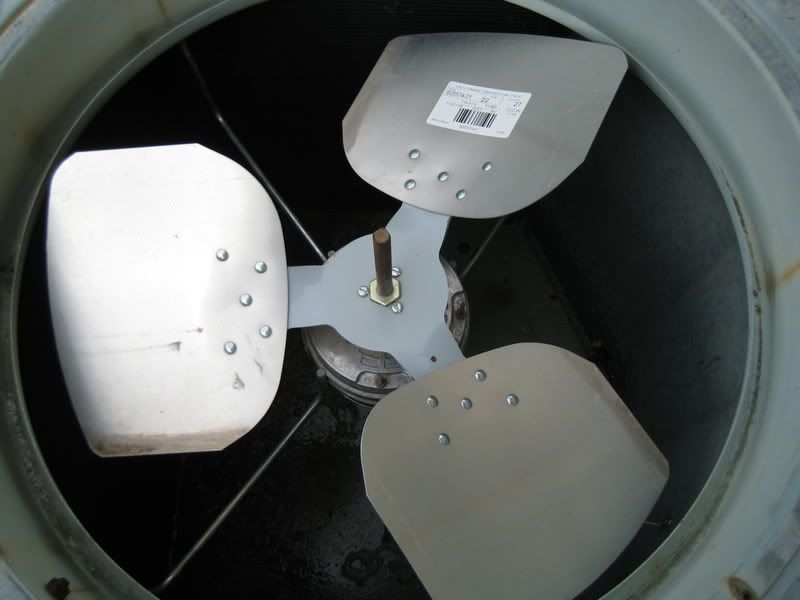
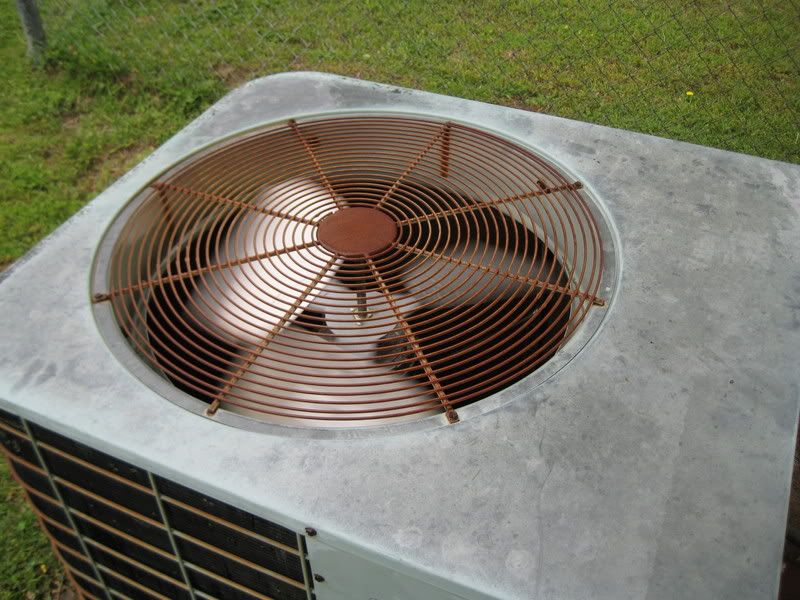
You will need to remove the fan cover from the top, or side or how ever yours is attached.
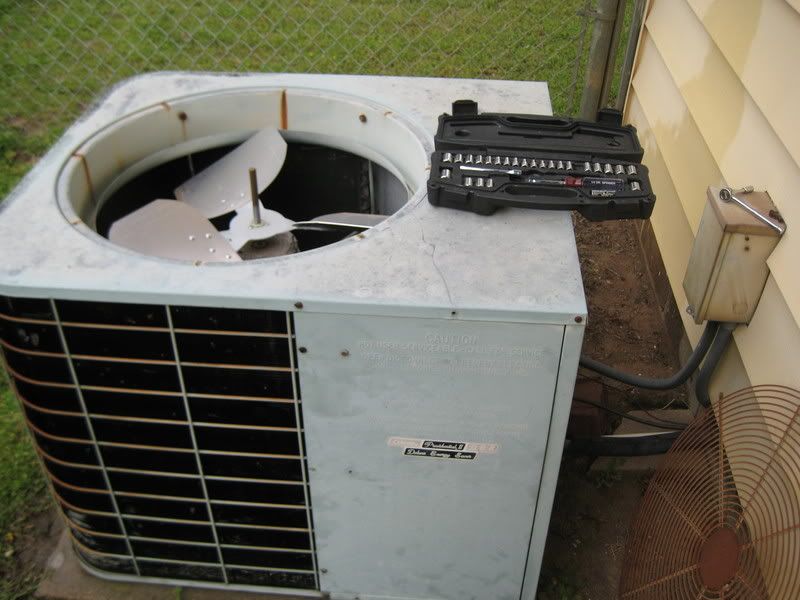
I like to start from the top, and work my way to the bottom on an upright unit like the one I have. I start by cleaning all the water drains from dirt, and debris with the hose, and my hands making sure water flows through these just fine.
Next, from inside:
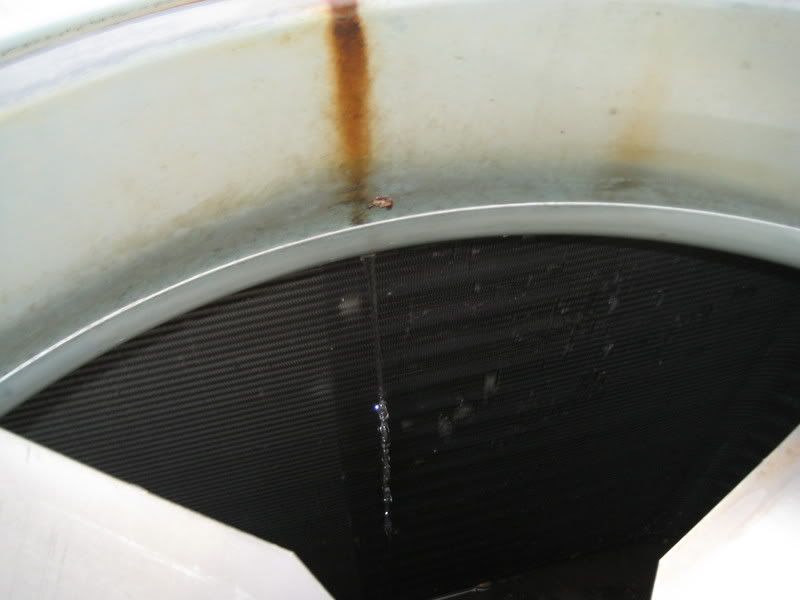
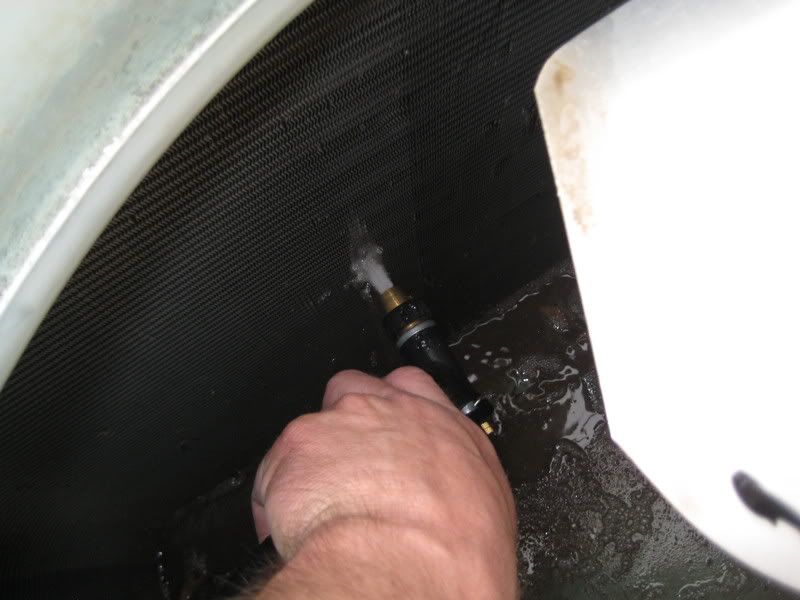
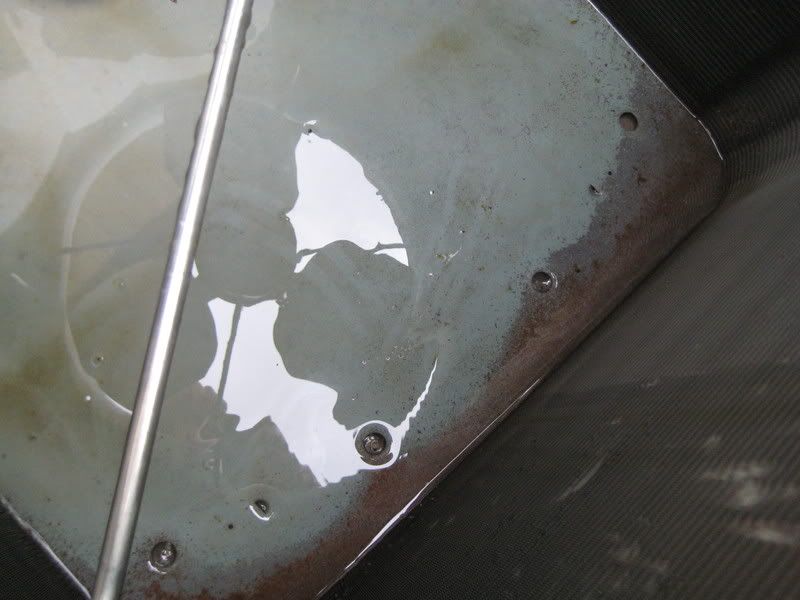
You want to take your garden hose, with a spray nozzle, and spray the coils out with water pressure, from the INSIDE to the OUTSIDE being very careful not to dent, or bend the fins on the coils. If you do, they can be straightened easily, but at least try to keep the nozzle away from them if you can.
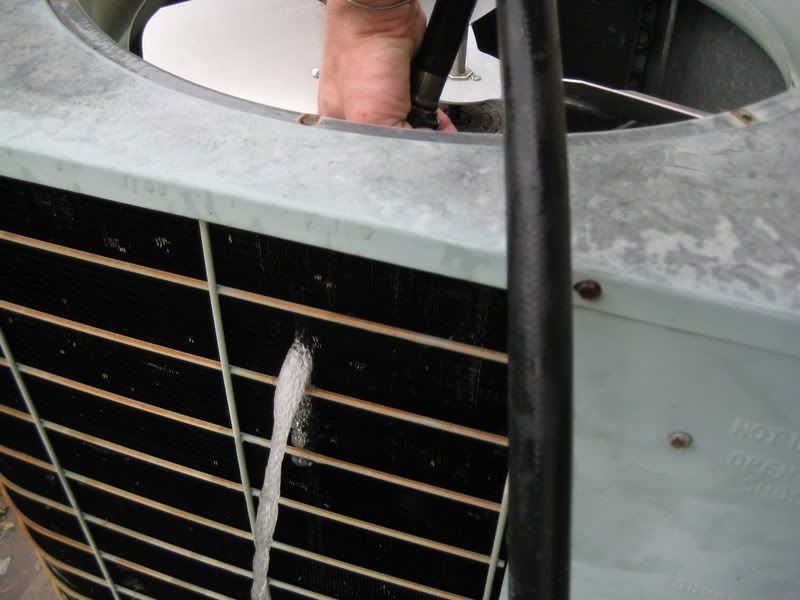
It is very important, that you wash them out from this way, cause if you do it from the outside to the inside you will only be pushing the blockage(s) deeper inside the coils causing a air restriction. You want to do the entire coil all the way around and working your way from the top, to the bottom, and paying special attention to the water coming out, you want to to be clean/clear like so,
before you move on.
If the outside of the coils looks bad, from build up such as dog hair, or debris like cotton from a near by cotton wood tree, then you can either wipe them clean with a brush, going from the top to the bottom, or you can use the hose washing from the top to the bottom and being careful not to wash anything INTO the coils the best you can. If you do, no problem, just repeat washing them out from the inside out, and you will wash out what ever went in.
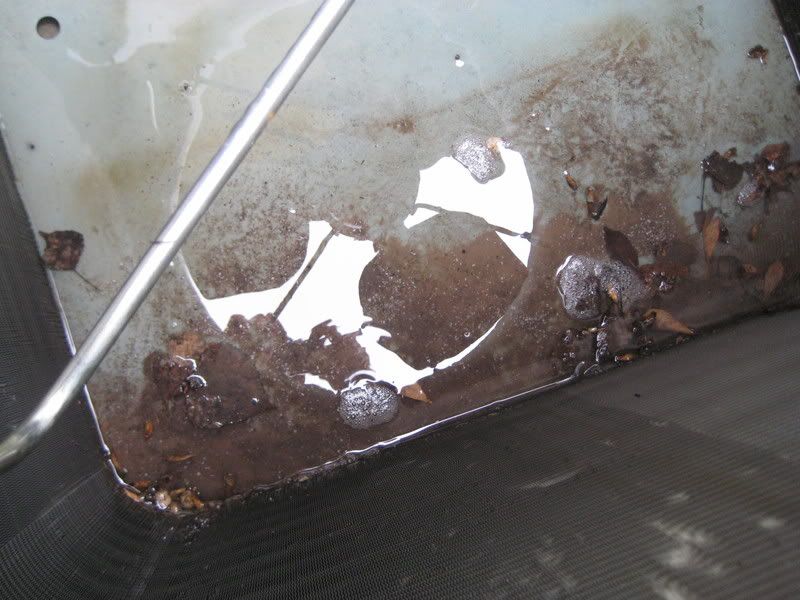
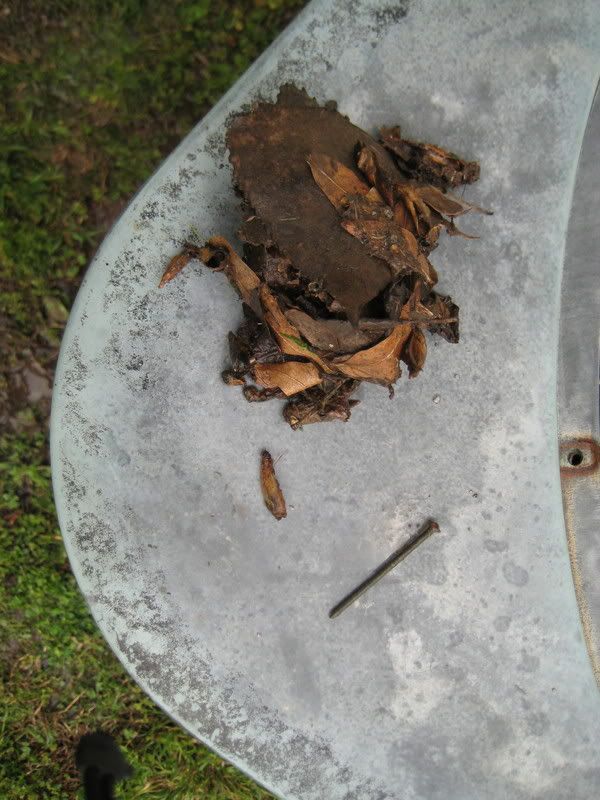
Next, you will most likely have all kinds of stuff in the bottom, leaves, dirt, foreign material...which is now mud, and blocking your drain holes.
You want to scoop out all the big chunks by hand
and then give the bottom a really good washing out. I like to make sure the drains are clean and clear by putting the nozzle right in them and giving them a good blasting out.
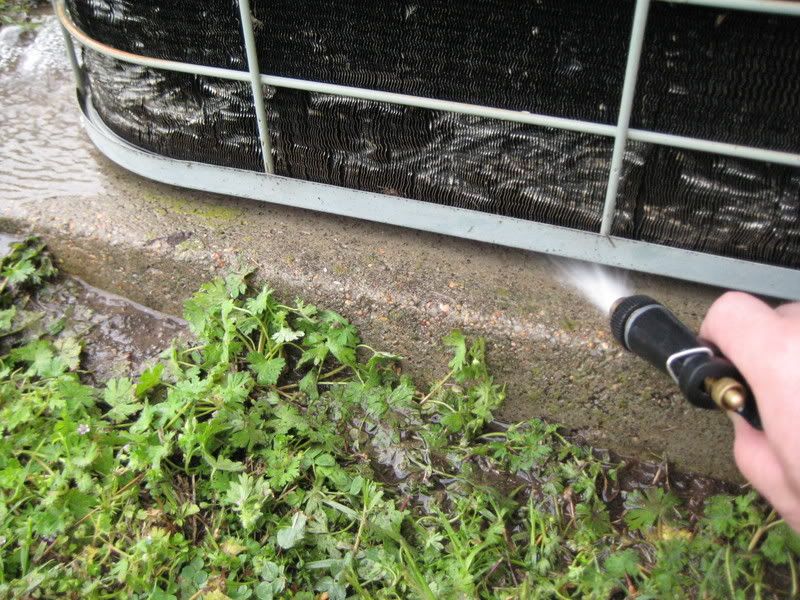
I also like to wash UNDER the unit its self to wash out anything that might have blown under it, and could block the drains again.
If you notice the outside coils on my unit towards the bottom are pretty smashed up from the previous home owner getting too close with the weed eater. These can be straightened, and should be straightened to make sure as much air can pass through the coils. I will usually use a very thin screw driver, or my pocket knife but you have to be careful never to jamb the screw driver into the coils. You hear a hiss sound, your screwed, and your outside unit is now scrap metal!!! You can also buy a coil "rake" as some are called. Its a 1, 2, 3+ sided fin straightener that will straighten the fins as you rake it across them. Pictured like this:

They come with many different sizes on the tool cause there are many different sizes of fins. More air flow the better. You can also use this same coil rake on your car too!
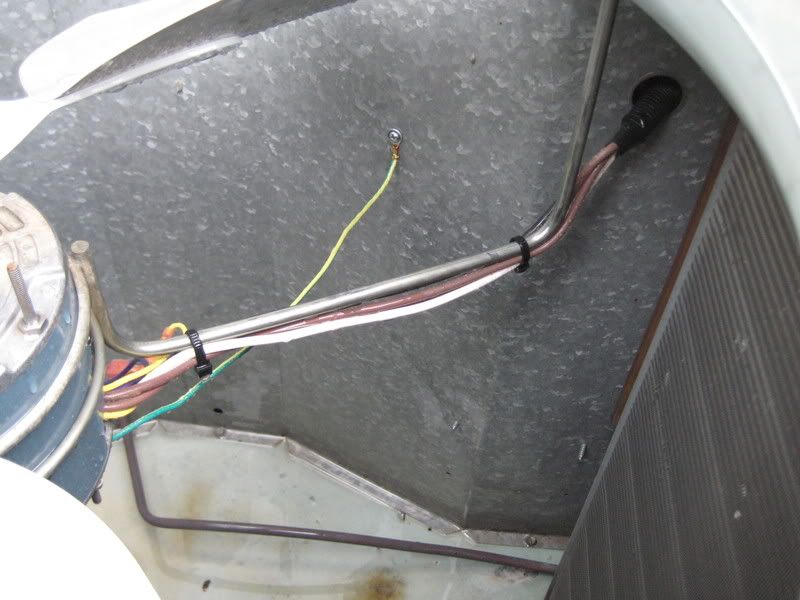
Next up, a quick safety inspection before you close it up. Make sure any and all wires that are loose are neatly and tightly tied up to keep them away from moving parts. The year before last my fan motor went out, and I had to replace it, and the blade because it was rusted on, so my work is still holding together good.
Next is a drying run, to get water off and out of anything that should not have water on it. Put the out side fan cover back on, bolt or screw it back on, and turn the power on, or turn the temperature down inside to turn on the AC unit and you want to let it run for a few minutes, like 5 minutes or so.
After its been running for a while, you can check to see how well its working by checking the line set.
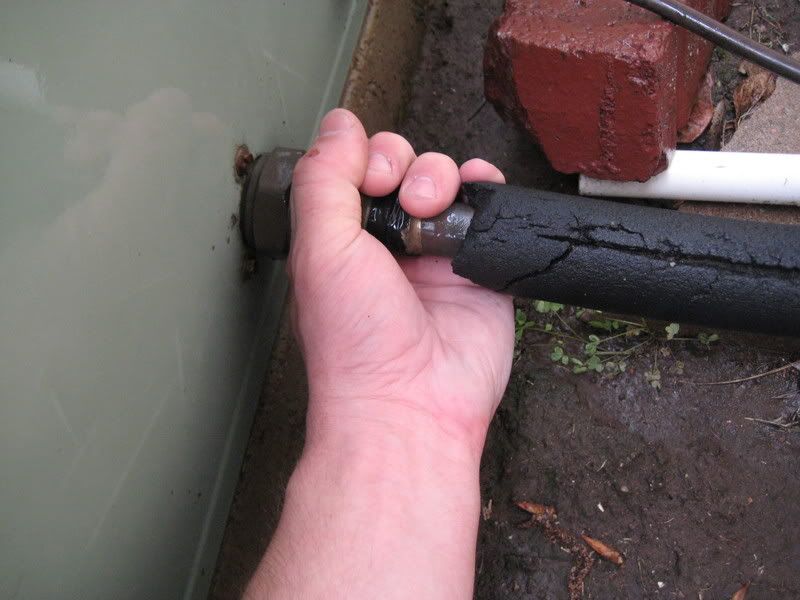
Check the high side, which is the smaller of the two lines leaving the unit:
It should be warm to hot to the touch.
Next check the low side, the larger of the two, and this one should be nice and cold, and depending on how humid it is out, wet.
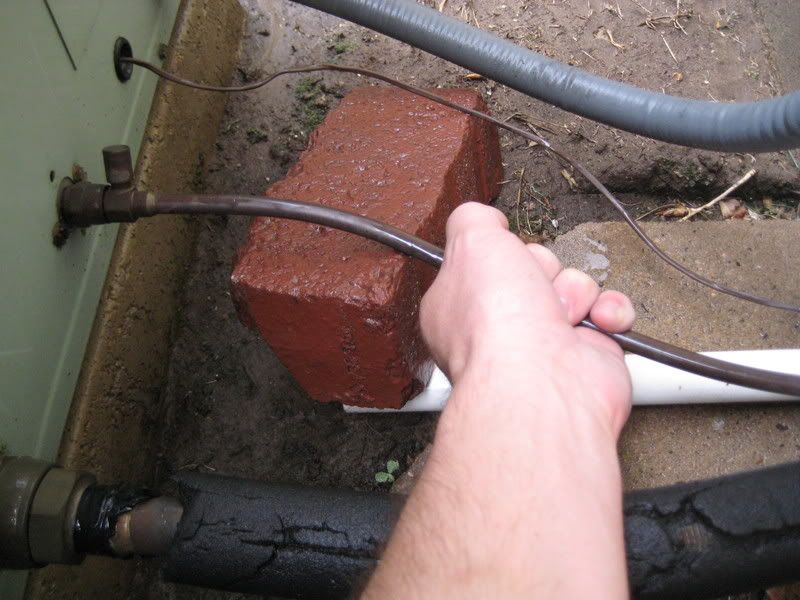
Nows a good time to check the condition of the insulation of the low line thats exposed outside the house. This will dry rot or get eaten by dogs, or used as a scratching post for cats sometimes. Mine is getting close to needing replaced, but by then, I will have upgraded to a new outside and inside units all together. Its not important that its cracked or getting dry rotted, as long as some of its there, thats ok. But if its worse than mine, you might want to get new, and replace it.
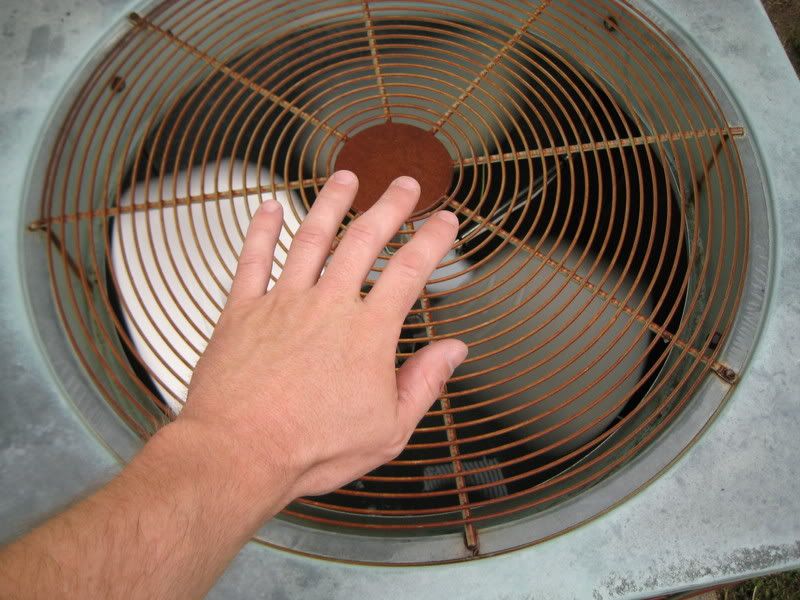
Last thing out side is checking the fan and its output. For my model, it will pull the air from the outside edges around the coils and bring it in and out the top. So, i should have some pretty good air moving up and out and I should have good suction from the sides. To test the outside air coming in, put a piece of paper on the coils, and it should suck to the coils indicating good air flow. You can use your hand on the top, and feel the air coming out:
You can carry this further on into the house, by changing your air filters, and checking/flushing out the drain line for the condenser. This drain line is usually PVC pipe, and should have a "T" fitting somewhere on it with a clean out screw on it. I like to wash it out with some bleach to flush, clean and clear anything that might be in there, or growing in there, such as mold. My drain drains out side the house behind the unit, and many might have it drain inside their house to a near by floor drain, the bleach wont hurt anything regardless, so just smell for the smell of it near the drain so you know that its flushed and working properly.
Congrats, job well done. You have saved your self anywhere from $150.00 to $200.00 doing this service yourself.
~F~
Your out side AC unit sits out in the weather 24/7/365 and needs some attention at least once a year to keep things happy. This write up will show you a simple service that will help it run cooler, and better, and save you a lot of money down the road in the long run. This will also allow the compressor to not work as hard cooling down the refrigerant so the unit lasts a lot longer by keeping up on the maintenance.
Granted, not all outside units will look the same, but the service from one to the other is similar.
Lets begin with turning UP or OFF the unit.
Turn it up, HEATING, so it wont come on, or off will work fine if you have that setting too. You can also flip the breaker to the unit if you so like, inside, or outside depending on your set up.
Next, at your outside unit:
You will need to remove the fan cover from the top, or side or how ever yours is attached.
I like to start from the top, and work my way to the bottom on an upright unit like the one I have. I start by cleaning all the water drains from dirt, and debris with the hose, and my hands making sure water flows through these just fine.
Next, from inside:
You want to take your garden hose, with a spray nozzle, and spray the coils out with water pressure, from the INSIDE to the OUTSIDE being very careful not to dent, or bend the fins on the coils. If you do, they can be straightened easily, but at least try to keep the nozzle away from them if you can.
It is very important, that you wash them out from this way, cause if you do it from the outside to the inside you will only be pushing the blockage(s) deeper inside the coils causing a air restriction. You want to do the entire coil all the way around and working your way from the top, to the bottom, and paying special attention to the water coming out, you want to to be clean/clear like so,
before you move on.
If the outside of the coils looks bad, from build up such as dog hair, or debris like cotton from a near by cotton wood tree, then you can either wipe them clean with a brush, going from the top to the bottom, or you can use the hose washing from the top to the bottom and being careful not to wash anything INTO the coils the best you can. If you do, no problem, just repeat washing them out from the inside out, and you will wash out what ever went in.
Next, you will most likely have all kinds of stuff in the bottom, leaves, dirt, foreign material...which is now mud, and blocking your drain holes.
You want to scoop out all the big chunks by hand
and then give the bottom a really good washing out. I like to make sure the drains are clean and clear by putting the nozzle right in them and giving them a good blasting out.
I also like to wash UNDER the unit its self to wash out anything that might have blown under it, and could block the drains again.
If you notice the outside coils on my unit towards the bottom are pretty smashed up from the previous home owner getting too close with the weed eater. These can be straightened, and should be straightened to make sure as much air can pass through the coils. I will usually use a very thin screw driver, or my pocket knife but you have to be careful never to jamb the screw driver into the coils. You hear a hiss sound, your screwed, and your outside unit is now scrap metal!!! You can also buy a coil "rake" as some are called. Its a 1, 2, 3+ sided fin straightener that will straighten the fins as you rake it across them. Pictured like this:
They come with many different sizes on the tool cause there are many different sizes of fins. More air flow the better. You can also use this same coil rake on your car too!
Next up, a quick safety inspection before you close it up. Make sure any and all wires that are loose are neatly and tightly tied up to keep them away from moving parts. The year before last my fan motor went out, and I had to replace it, and the blade because it was rusted on, so my work is still holding together good.
Next is a drying run, to get water off and out of anything that should not have water on it. Put the out side fan cover back on, bolt or screw it back on, and turn the power on, or turn the temperature down inside to turn on the AC unit and you want to let it run for a few minutes, like 5 minutes or so.
After its been running for a while, you can check to see how well its working by checking the line set.
Check the high side, which is the smaller of the two lines leaving the unit:
It should be warm to hot to the touch.
Next check the low side, the larger of the two, and this one should be nice and cold, and depending on how humid it is out, wet.
Nows a good time to check the condition of the insulation of the low line thats exposed outside the house. This will dry rot or get eaten by dogs, or used as a scratching post for cats sometimes. Mine is getting close to needing replaced, but by then, I will have upgraded to a new outside and inside units all together. Its not important that its cracked or getting dry rotted, as long as some of its there, thats ok. But if its worse than mine, you might want to get new, and replace it.
Last thing out side is checking the fan and its output. For my model, it will pull the air from the outside edges around the coils and bring it in and out the top. So, i should have some pretty good air moving up and out and I should have good suction from the sides. To test the outside air coming in, put a piece of paper on the coils, and it should suck to the coils indicating good air flow. You can use your hand on the top, and feel the air coming out:
You can carry this further on into the house, by changing your air filters, and checking/flushing out the drain line for the condenser. This drain line is usually PVC pipe, and should have a "T" fitting somewhere on it with a clean out screw on it. I like to wash it out with some bleach to flush, clean and clear anything that might be in there, or growing in there, such as mold. My drain drains out side the house behind the unit, and many might have it drain inside their house to a near by floor drain, the bleach wont hurt anything regardless, so just smell for the smell of it near the drain so you know that its flushed and working properly.
Congrats, job well done. You have saved your self anywhere from $150.00 to $200.00 doing this service yourself.
~F~
