using kirkey brackets directly to the tube chassis.
adjustable with a few wrenches with the way i have the backrest support setup
|
|

using kirkey brackets directly to the tube chassis.
adjustable with a few wrenches with the way i have the backrest support setup


yeah but the main reason is that we can index the hole pattern so that we can change axle centerline height by 1/8" increments to make em straight under power no matter what height the chassis/knuckle gets set to.
plus since daves got the right idea with that rear mount i got the measurements for the rear trans boss and i guess ill start playing with making a rear trans plate since the rear trans girdle will tie into the boss as well as the right diff plate and thedrivers side channel plate mounting ear and the sprocket support plate sandwiched to it.
probably overkill but its the rear trans and we dont have a PS rack to deal with while we are making sure everything fits.
fun part is the front mount plates clearing the rack but at most i figure ill have to switch to .25" adjustments. which is probably fine since the front is likely to cycle through its suspension travel far more than the rear with the traction bars out back.


I didn't see what Dave did with the rear mount. But isn't the Olds an H body cradle that did have a rear trans mount?


not a whole lot to tell/show.
our car has gotten pushed back due to a couple others that were in line before us. most work to this point has been parts and sorting out some of the engineering challenges.
current work is the trans/motor plates, after that will be focusing on the aluminum front radiator support and airdam

roughed out the axle centerline adjustable rear trans mounts. the rear trans has plenty of room so i went and did a nice handy design with a large finely adjustable range of travel...as well as ease of adjusting.
loosen 3 slot bolts, adjust the jack screw (in green) and the trans goes up or down. additional holes on the trans and chassis side mountings, allow for rough adjustment above or below the fine adjustment range.
unfortunately the front trans is a far tighter package with the steering rack so the front axle centerline adjustment brackets will only be adjustable in ~ 3/16ths inch steps via bolt holes for the most compact design....which means adjustments/changes require a floor jack at the rear of the pan gasket to change the elevation...im shooting around a different jack screw design but with limited space it may not be practical over the KISS solution.
it will be cut from 3/8 and 1/4" 4027 alum plate.
darned compromises *sigh*
been working on the forward engine/trans mounting plates.... figured on a design for the rear powetrain with a low mount swinging alternator where the ac compressor usually goes....drop the weght down and get it out of view since its the only accessory the rear engine drives....and since the motor looks far sweeter from the trunk opening without the ugly alternator/wires.
looks like we settled on the dual horizontal bolt GM truck alternator. easy to get high output and easy parts store availability.
and so here's the billet alternator mount that will bolt to the block plate
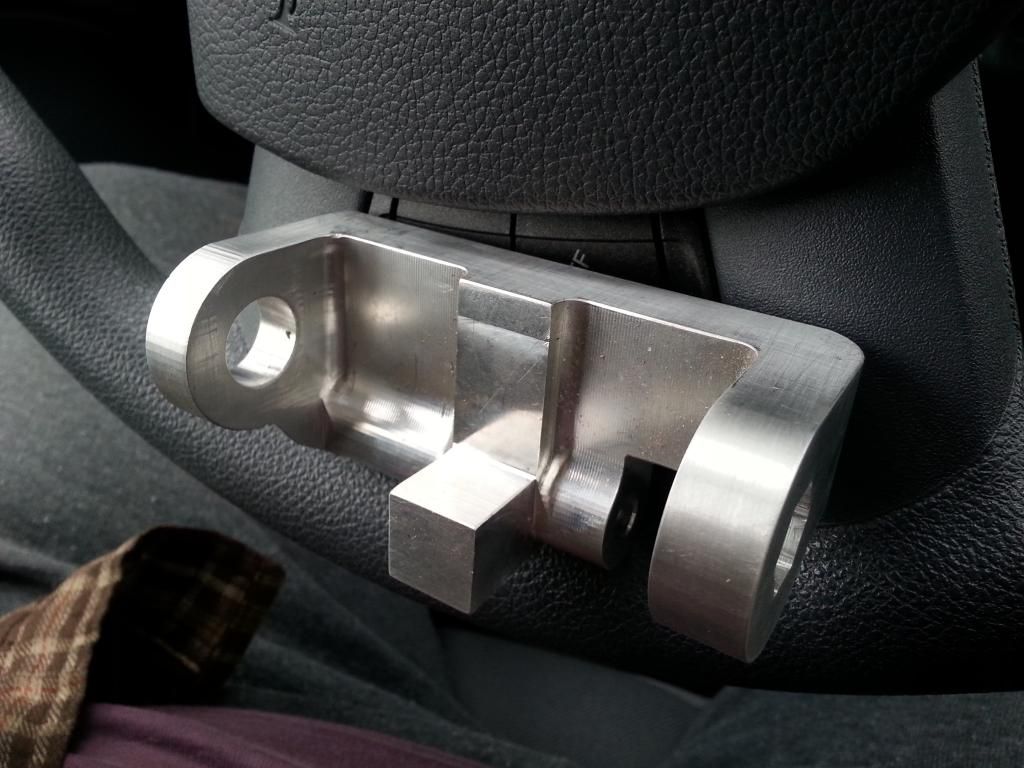


finished up a few things on the adjustable rear trans mounting brackets (the 1/4" plates sandwich the chassis bracket in the previous posts pic, missing in this pic), fixed the diff brace hole location.
drew and cut the drivers side front plates, only a hair off on two holes and clearance around two points on the side cover brace.
this year the drag/performance expo brought back the swap meet...bunch of us ran down to st charles to dig through the deals...certainly found some....
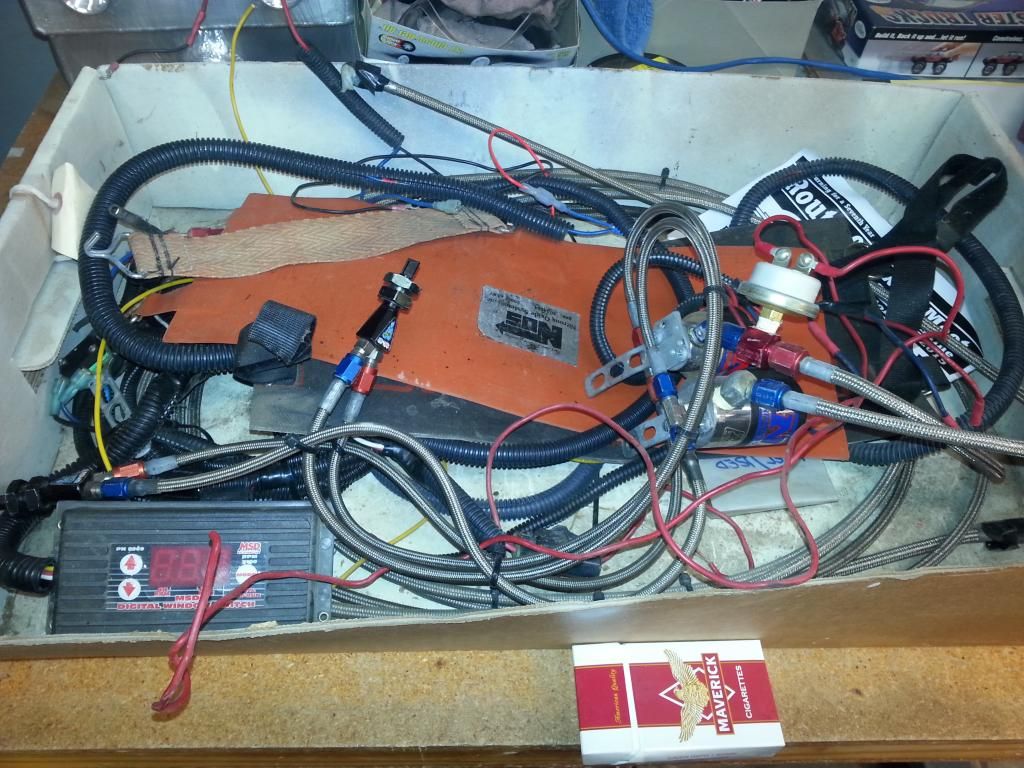
painless 12 ckt fuse panel...this with our 8 ckt race setup from painless should take care of the primary/chassis systems and the two sub systems (engines/trans')
this means we can finally ditch the 4 different fuse boxes and unnecessary OEM crap lol
and since we didnt find any nice fuel pumps or other goodies...we blew a few bucks on a nice dual fogger setup...and an in seat bottle mount for the kirkey...just pop off the cover and slide it in. gonna need two big bottles
for what we paid its like we bought the digital window box and foggers and got everything else for free.
its not like we needed it...but shoot, they didnt wanna lug it back home and we had cash burning holes in our pockets lol

ok well a bit of an update.
about all we can use are the joints and the bearings. but due to that whole "clean sheet" design thing we can keep some stuff and we're gonna try and make a crapload of lemonade from the lemons we've been given.
for sale soon will be
4 front ZZP/AGX 350lb coilovers with lower ear plates that allow for 1.25" of vertical drop (n relation to knuckle bolts) and a sharper KPI (if desired) to clear wider rubber.
4 dorman cast steel knuckles with custom extra thick bearing spacers with ear for brake cooling duct mounting.
4 12" F body rotors
4 lower ball joint monoball pins and spacers for 3/4 rod ends. this allows you to lower the roll center 3/4" to help regain negative camber gain on a lowered car.
2 steering monoball pins and spacers (for 5/8 rod ends) to correct bump steer fer all dat lowerin'
4 "stuffable" upper coilover monoball c/c plates, with coilover hat bushings and built in bump stop bushing shelf (for use with ES or Koni snubbers), comes with chromoly chassis plates. these plates require cutting the OE strut bucket hole towards the engine and welding to the top of the oem bucket to allow for full adjustment.
stuffable means that you can put the strut adjusters 1/8" below your hood and end up with a nearly OEM front front suspension compression and geometry on a car lowered nearly 2"
but it apparently wont work for a 3.5" ride height with 28" tires under our low ass front fenders
so since only 1-2" of compression or a 6+" ride height aren't wanted...its custom knuckle time.
looking at a modular setup. stacking plates above and below to allow for the different connections. all of it packaged to fit into the far more expansive (and cheap!) options available to those who can use 15" rims.
caliper bracket ears located inward to use the early 10.9" 2nd gen rotors, probably gonna shave em down in dia too for a hair more clearance at the F body caliper stiffening ribs to the 15" barrels.
i know i wont get the geometry perfect, ive got a rough idea of what it needs, but thats why ive gone with the stackable ear design. i can always change the knuckle ear out to try something new. this may be needed up front...more than a few times.
thankfully the rear is quite a bit simpler since its a simpler A/H arm without that whole pesky "turning" thing.
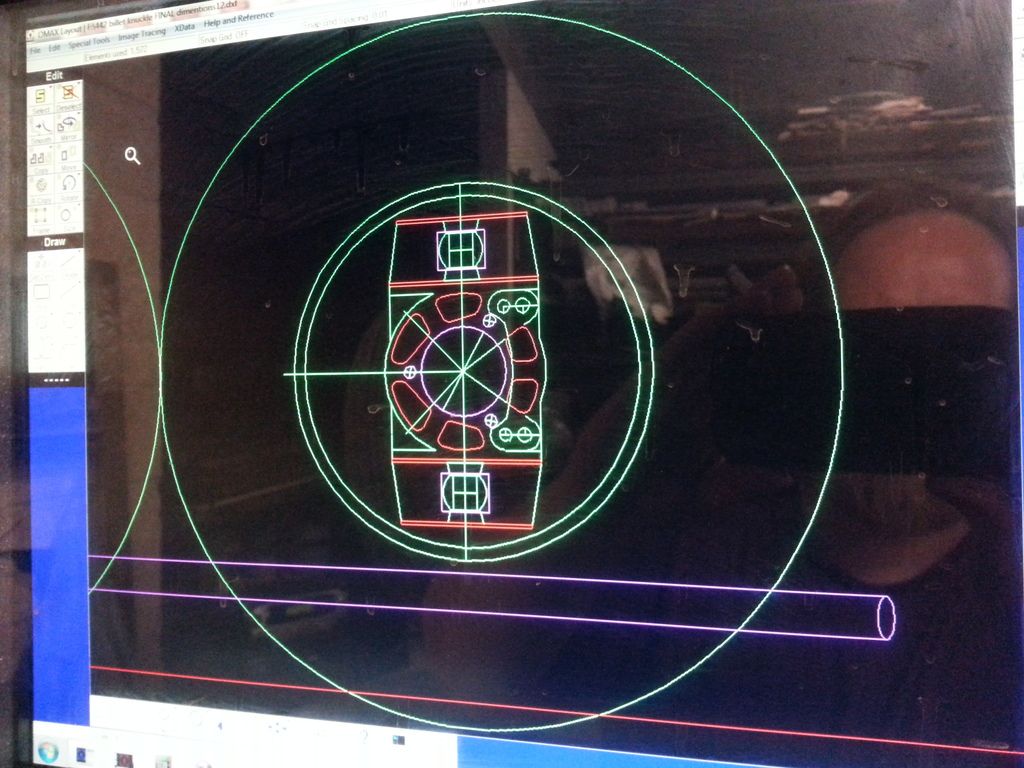
im on the fence about making this from 2d parts or to see about billet.....in still working on it. a rough draft as it were
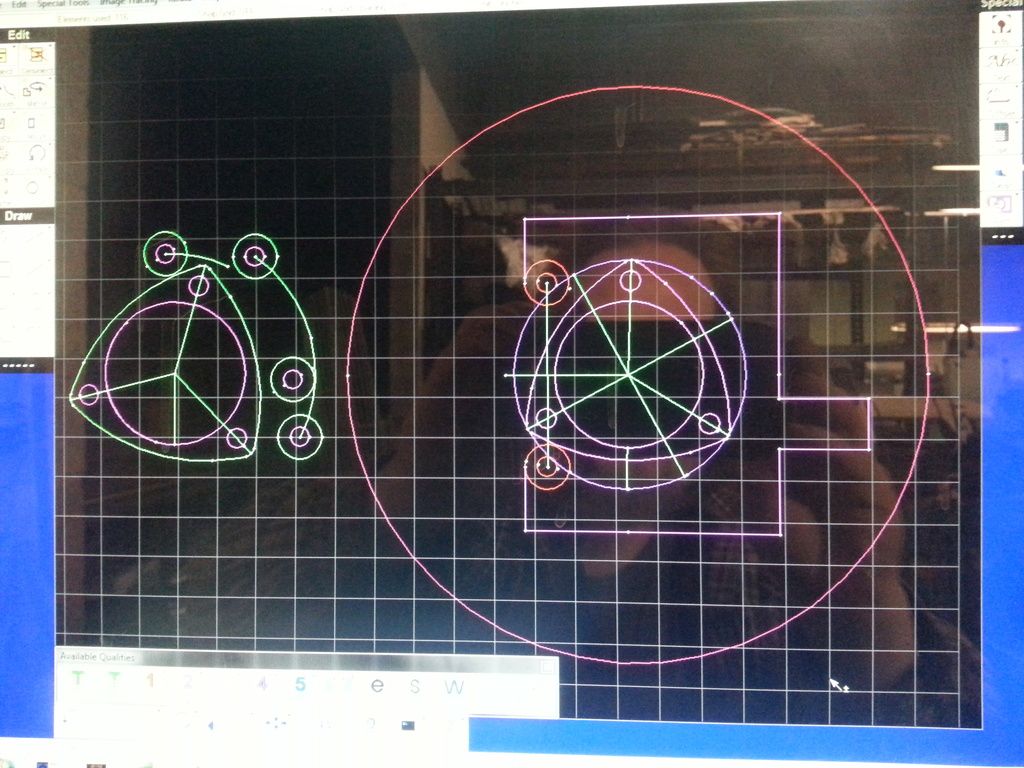

i took some pics of the test mockup.
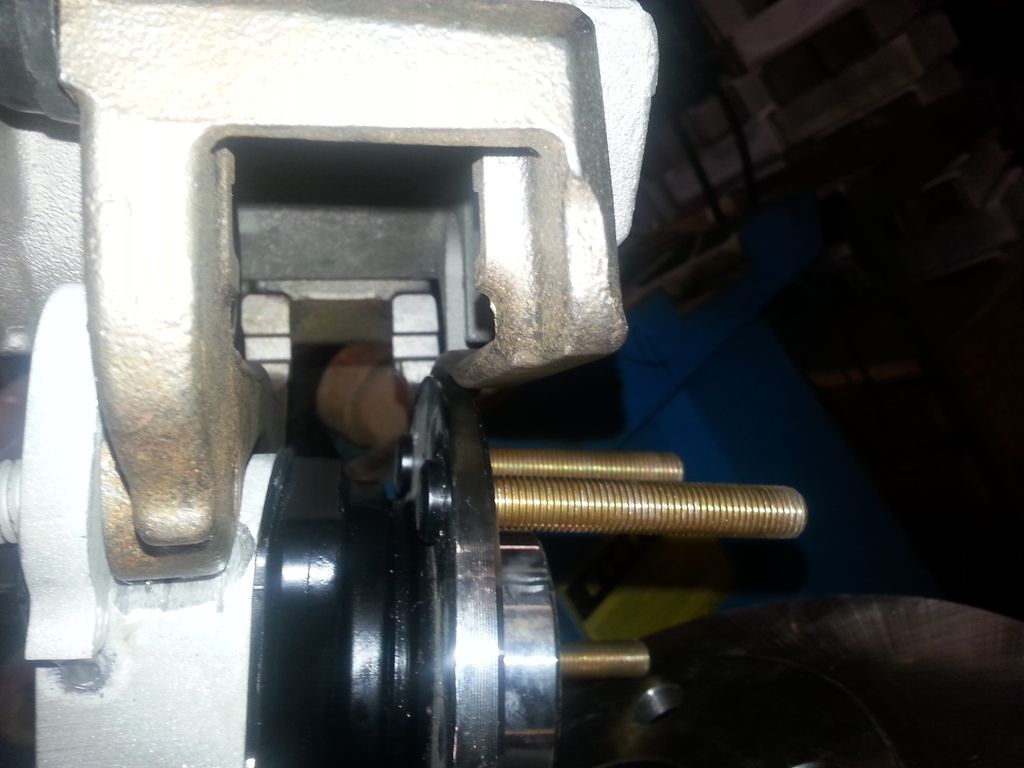
the 11" position will get the 12mm holes of the oem F body brackets. the brackets clear the bearing bolts just fine, plenty of room, but the smaller dia bolts have a smaller head so we'd have a bit more room. only a short section of the bearing support needs clearance and with the 12mm oem brackets id feel better about grinding about .080 off the bracket so that the billet aluminum doesnt need to be machined into the bearing bolt bores for clearance id like that wall to be at least .020 thick.
the 12"" ears and holes just barely clear the caliper but a little adjustment to the shape of the ear gives plenty of room for the caliper travel in the 11" position.
you can see how on top of each other the bolts are.
and now we come to the only headache, which isnt really a huge headache.
the caliper/pad mounting bracket has a bridge across the outboard pad ears. this hits the rotor/bearing hat in the 11" position.
the good news is that the bracket looks to be cast steel and while the bridge hits, the pad and the caliper clear by miles. so the easy solution is to cut out the old bridge and weld in a new one across the face.
so all we need is a few pad brackets from the junkyard and we'll have our solution.
it looks like i can make the bridge quite tall, to the point of being able to cut an olds rocket emblem and 442 into em fer some bling
so aside from modifying the bridge the 15" clearing F body brakes are a go, so the knuckles getting it and we can work on the brackets after the knuckles are shipped off.
with better cooling airflow for the smaller 11" rotor as well as the dual piston aluminum F body calipers i believe we wont have any braking issues trying to slow down on the top end and we'll shave a crapload of cost at each corner with the cheaper 15" rims and rubber.

now this aint cheap, but we're getting a helluva deal. our current Fbody brakes are retained, using ears far stronger than the newer vette uprights, we can build the car and run it on 12" rotorswith all the 16" rims/tires that we have, as well as easy larger vette style upgrades.
in the future though we'll need 4 corner slicks, and the ability to use the F body brakeswith the smaller 11" rotor will let us use the 15x10-16" wide mustang fitment rims and much cheaper and plentiful selection of 28x15" slicks.
swap rotor, rebolt bracket and you just swapped from 1/4 mile drag brakes/slicks to 1/2 mile/street brakes/rims tireswith no brake bleeding.
knuckle has through hub air supply for rotor cooling, max area at 11" and a fair bit more at the 12" rotors1" larger dia air entry. surely directional vane rotors would be ideal but this is easily ducted cool air, and is a huge improvement over the oem knuckle with the smaller 11" rotor
the layout also makes easy mounting of any required driveshaftsafety loops that we may be mandated to run inthe future.
huge upside is the knuckle is modular for 4 identical units to fit each corner of the car.
the modular adjustable upper and lower sections allow for the rear to use an A/H arm design to get rid of the need for a toe bar/tie rod, as well as an upper/lower A arm up front.... it will also allow for changes in the ball joint positioning for suspension geometry or upgrades.
this lets us use the massive monoballs for the upper and lower front A arms since the lower is carrying the cars weight, and oversized shank (7/8ths) 3/4 rod ends at the outside of the rear (x3) while all four inboard joints at each end are the double adjustable 3/4 rod ends. this lets us use almost all of our current joints and parts but requires a few additional parts.
the modular design also allows up to move the steering racklower in the chassis and move the steering arm lower for a nice bumpsteerfree frontend.
with the range built in to the arms as well as the chassis/knuckle, we can adjust track width and all points of alignment to fit whatever rims/tires we come across while being able to fine tune the front and rear suspension for good streetability or track manners.
using conventional strange double adjustable coiloversends up cheaper than the damn zzp agx stuff by a hair. the plus side is that the removable rear powertrain now only needs two casters as we can roll it out from under the car on the edges of the rotors or with some cheap 15" montana rims without tires.
cliffs: im about to pick off 7 birds with one expensive stone
Last edited by Turbocharged400sbc; 04-12-2015 at 12:36 PM.

any easy way to adapt this smaller setup to the stock knuckles on my caged car? i have a set of 15 inch set of slicks and skinnies and the car currently has grand am front brakes. worth switching? tires on those rims currently are 26×10x15.

if you had billet knuckles you could.
only way I could see fitting the 12" dual piston alum F body calipers with a 15" rim on a stock knuckle would be a custom pad/caliper bracket that would solve the bridge clearance issue and move the bolt locations towards the caliper .5" to fit the 11" rotor.
for me its easy to toss in everything and the kitchen sink...fer you...not so much
so far its looking to be about 1k each knuckle in material and machining. so if your looking to go full retard I can make 2 more, you could have a strut ear made for the top while using the monoball lower or go with the upper/lower A arm like the BFTGT and we are stuck with thankfully we wont be stuck with the ****ty geometry of using the stock knuckle with A arms


soooo basically keep the grand am setup on the best pads and rotors i can find and hope i have enough road to slow down? i cant wait to see how the suspension of this thing looks with the 2 engine and transmissions too!!

You could run the oem early gtp brakes with the iron calipers

| « Previous Thread | Next Thread » |