Get the 5" backing plate and use 5.5" pads. You'll be using mostly orange pads for correction and white to polish.. Yellow is for serious oxidation and more then likely you won't ever need to use that.

|
|


Get the 5" backing plate and use 5.5" pads. You'll be using mostly orange pads for correction and white to polish.. Yellow is for serious oxidation and more then likely you won't ever need to use that.


Alright, I'm on auto geek right now just reading up, I was gonna grab a 5 inch backing plate most likely then run 5.5s. Orange is looking like scratch n defect removal. Yellow was saying it's the deepest cut, so I'm hoping it doesn't need those, I don't think it does. Should I grab a red or black or any for applying wax? I'll get 2 orange, 2 white, then 2 more of idk? With 5 inch backing plate.
Well you want to take the least aggressive method when it comes to removing defects and orange will knock just about anything out now you don't want to completely kill the clear coat that's why I avoid yellow especially on a DD. I would grab at least 3 orange pads, 2 white pads and if you like a black for apply wax etc . Personally I always wax by hand so I never really used the black pads that I had.
Gotcha bro, thanks

Are you planning to wax by hand or by machine? If you want to do it by machine then I would go 2 orange, 3 white, 1 black. If you are going to do it by hand then I would go 3 orange and 3 white. You will be using the white ones more often. Try a test spot with a white pad and ultimate polish first. If you need more correction then go with the orange and ultimate compound.
4" pads also come in handy for those smaller areas such as the pillars and in between the front of the sunroof. You will also need the backing plate for that. I actaully use the 4" black pad to apply wax on larger panels.
Thanks guz, I ended up getting 3 orange, 2 white n one gray. I won't know what to use n how I want to do it until I actually try it n what I feel comfortable with. But that's a good idea, I'll go ahead with white first and then orange if need be. Most biggest problem I'd say are swirl marks, they're everywhere. Lol. Not too many scratches, but there are some here n there.Originally Posted by The Guz

I finally routed a hose around my house since I only have a spicket in the back, then washed, n buffed the front end of the car. The temperature went down n didn't wanna do the rest with it colder out. Also cleaned the rims n shined the tires up. I used an orange pad n some Meguiars compound. Made it look a lot better than the untouched areas, still some swirls tho. Just some quick pics.
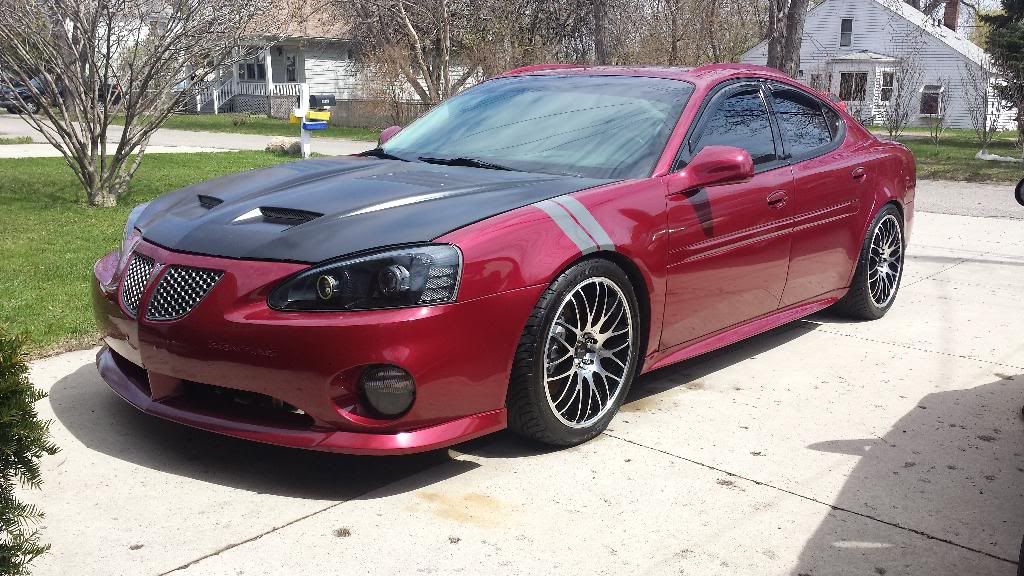
Looks good. Those deeper swirls will need more work. Try a few more passes with UC. Speed 5 with moderate pressure and slow arm speed is what you want. You may have to go to a more aggressive compound like M105. These cars can have hard clear coat so that could also be another issue you are running into.
So I got some new climate control knobs. Flows with the chrome inside a lot better. Also got some new battery terminals, mine were always loose fitting n could pop off real easily. Didn't know if it was messing with anything. I like em, just would have been easier with a philips or strait bolts instead of different size Allen head for each.
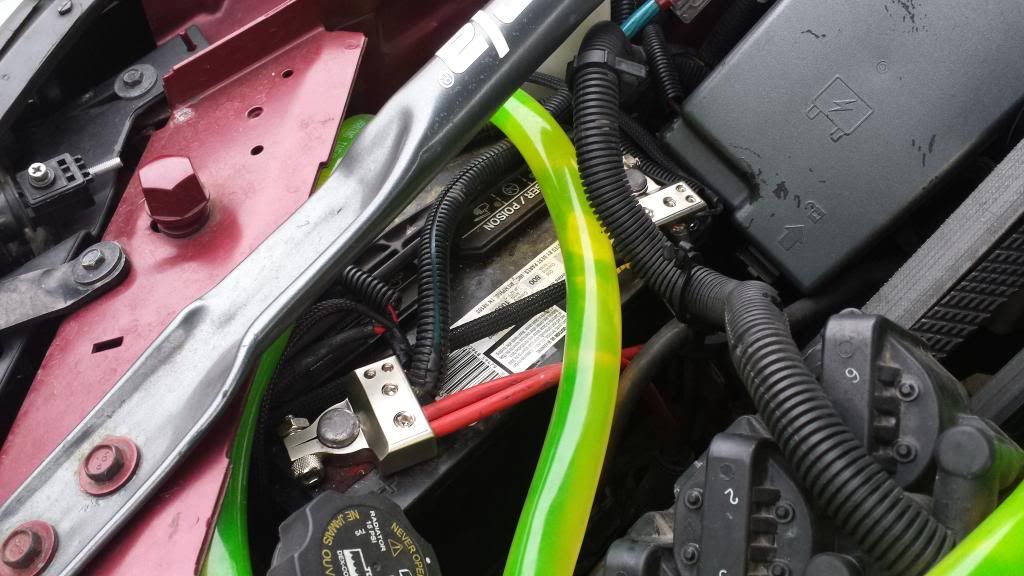

I used to have those battery terminals on my truck's battery, but when I went to dual batteries I soldered everything. They worked okay, just corroded the wired connection (not post) pretty quickly. I'd at least check them every other oil change or so just to make sure they don't get too bad.
 GMPP, Votland, Addco
Will do man, thanks for the heads up. I just needed something with more options as far as wiring connections. If they have problems I'll just get some ordinary ones.
If you know how to solder, that's the way to go. With these big wires, a propane torch (the smaller the better) works. I put a towel down over the batteries\car\such, then tin foil over that so the solder didn't melt through anything. Towel was also to protect the batteries from the foil....tinfoil directly on top of car battery...what could go wrong? Hold a copper connector with vice grips, heat the connector, and fill with solder back at your bench, so you don't have to have a propane torch under your hood that long. You will have to tin the wire under the hood, then just heat up the solder filled connector, and put the tined wire into the liquid solder in the connect. These terminals: http://www.oreillyauto.com/site/c/de...tery+terminals
Here's the general idea I've ended up with, no problems so far, through 2 summers:
Not the best picture, but you get the idea.
GMPP, Votland, Addco
Def need to learn how to. I will be experimenting soon with doing it just to know and learn it all. I hate crimping n all that bs. Also, it will prepare me for a wire tuck if I ever get comfortable enough with it. Thanks
Overlooking your "add on's" and focusing on those warn heater buttons ~_~
You are just a glass is half empty kind of guy, aren't ya? You need a hug?
GMPP, Votland, Addco
Lmao yup booba, hey at least I have dual digitals red😅😅
Touché

Where did you get those knobs?
The new knobs look good. The rest of the buttons have seen better days. Time for some replacements.
Don't want to pay 65 bucks for something that still works because it's chipping. I've contemplated just covering em with black paint, or if I could have stickers cut out n made for them lol.
| « Previous Thread | Next Thread » |
| Tags for this Thread |
| Bookmarks |
Bookmarks |


