Might be able to help you a little bit tomorrow after I get my lowering springs on. I'm in Cove till Monday, but the rear struts take me forever to get out because of my bad back lol.
|
|

Might be able to help you a little bit tomorrow after I get my lowering springs on. I'm in Cove till Monday, but the rear struts take me forever to get out because of my bad back lol.

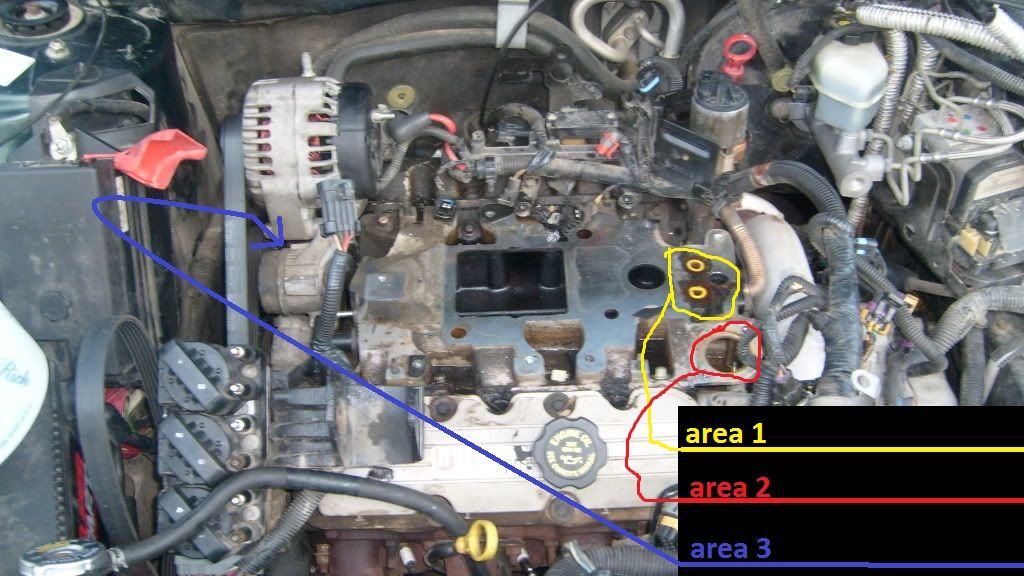
far right, is the t-stat gasket, I think (hard to tell from pictures) look at area 2, in my picture i made for you, thats where it goes.
the 2 orange go on the top side of the lower intake, (and they probably came with the supercharger gasket also) (probably in yellow) the intake will have a little lip where you can put them. look at area 1 of my picture they are the two little yellow circles
the only other thing i can think of is the heater bracket on your 98 (and 97 cars) might have some rubber o-rings where the 99+ cars have a plastic elbow. your bottom one is metal, and a better design if you ask me. refer to area 3, (the alt bracket)


Thanks that diagram will help.... Mike bad ass bro, I wanna so your gtp in person once your done putting on the lowering springs on

those two orange ones are way too big for the lim coolant passages between the blower and the lim.
They are the correct size for the coolant elbows.
The blue plug looking piece is the seal for the L36 MAP sensor.
The largest black o ring most probably fits on the rear vac fitting on the L36 UIMs.
The smaller black o ring fits on the PCV or the L67 vac tree.
If they don't slide in easily, put some grease on the bore that you're trying to slide them in.
Is it REALLY that difficult to look at the places where you have o rings and just see if any fit there?
Last edited by matt5112; 10-05-2012 at 10:40 AM.

It's not hard, lol I looked all over last night and sizes were just wrong for anything I could find last night add alcohol and game over lol also my garage looks like a war zone now and I don't feel like cleaning it.

Anerobic sealer is what you want for the snout.
Nothing else.
Because the oil eats through the RTV.
Every.
Time.
Otherwise, this could be the worst drunk purchase of your life, congrats LOL.

A couple of quick questions lol I almost have this car reassembled hurray me, but having a few issues for starters there is a t-pipe that goes on the fuel rail one side goes under the sc cone to the rear or the engine the other side goes where?
I don't see any it could go that it can reach. Also there is a wire connector that comes out of the tubes that house the wires for the fuel injectors where is the other side of it lol
and hopefully lastly (don't know what any of these things are called but here we go anyways)
okay just like the bolt that holds on the engine cover but is it suppost to be a super tight fit? I can't seem to get it back on properly, any ideas?

I forgot 97-98 blowers had the stupid vac tree.
But here is the vac diagram for the car hope it helps. I don't know what that plug is for.
Idk if this helps any but here is a pic of my harness and that is plugged into something going to the front of the engine.

Last edited by Slick2500; 10-06-2012 at 04:25 PM.

Sweet thanks for the diagram... Lol found another wire harness with no match.... Ugh

Let me go see if I can find where it goes ill take a pic.

That would be great, other than what I mentioned before the car is almost ready to run again lol

I dont know where that plug goes either.

Icm/cps/ckps harness.

He got it running after I went over so he could look at my car to see where things go haha, although it is making a hissing noise. He took it for a test drive with me following just in case, it ran good. No DTC's, I put a scan tool on it. It has full boost as per the factory gauge. Makes me want to knock the LIM out on my car, but instead I installed lowering springs. Also hooked him up with a newer right corner housing.

First of all I want to thank MIKE and my neighbors for giving me a hand. Everything is back together and running strong
if that doesn't work then
http://i1145.photobucket.com/albums/...ps242de36b.mp4 hopefully this does

And don't worry Mike we will knock yours out as soon as we can. Also want to say thanks to everyone who posted diagrams and gave helpful advice. This is the most intensive repair I have attempted my self

You did good bro for never having owned this platform before. You saw how I did the springs so it should be easy for you after doing the LIM.
Here is Shane's motor complete right before firing it up.
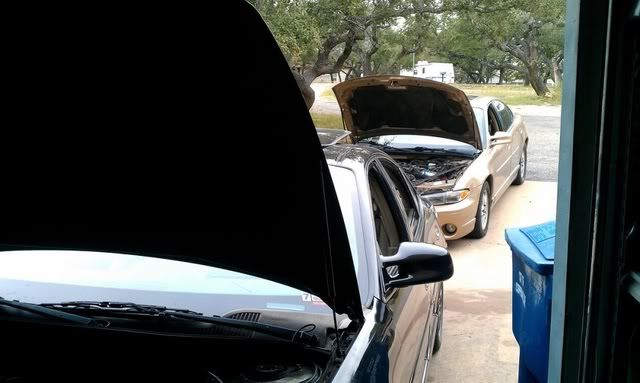
Also a common site, hoods up on GTP's Lulz...


I just wanted post 100 to be of good things.... Car is running strong, I am happy and drunk will paint do some more maintince to include a proper waxing lmao and put some better sized tires on it but taking a day off or 2 will update when it's time to dive back in, prolly soon loving this car again.... Also I can not say it enough thank you everyone for your help
| « Previous Thread | Next Thread » |
| Tags for this Thread |