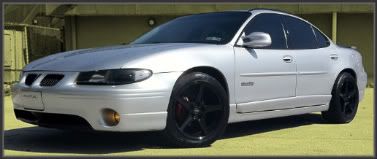
Interior LED Mod (Nov-2009)
So far everyone has been pretty impressed with the LED mod, so I thought I would share. The installation is easy, although there were some challenges involved. I have an 08GP, but I’m confident this write up will cover the all the 04+GPs. I know that many people do this type mod, but no one ever seems to take the time to do a write up on it.And that is my main purpose in doing this.
Tools you will need:
Small screwdrivers (2)
Needle nose pliers
Lint free cloth
Parts needed:
Red LEDs (4)
UV LEDs (2)
*these LEDS replace the stock 2825 light bulbs
I used the following LEDs from superbrightleds.com, but most 194 type LEDs should work.
Step1: Remove the Light Covers
For the dome light, use two small screw drivers to remove the light cover. At the push-button side of the light cover, wedge the screwdrivers in between the cover and the housing. Now gently pry down to remove the light cover.
For the passenger lights, use one screw driver to remove the light cover. At the push-button side of the light cover, wedge the screwdriver in between the cover and the housing, pushing the internal clip towards the center. After pushing the clip in far enough to clear the internal latch, pry the light cover down until it clears the housing. After the cover is free, completely remove it by pulling it out of the pivot clip.
Step 2: Remove the Reflectors
I found the light bulbs very hard to remove with out first removing the reflectors. For the dome (map) light reflectors use both hands and push back two of the three clips with your thumbs and pop the reflector out with yours fingers.
For the passenger light reflector, push the reflector away from the clip and pop it out. Also, be aware the other end has a tab that will bend a little.
Step 3: Remove the Light Bulbs
This step is easy with the reflectors removed, simply pull the bulbs straight out with yours hands. The footwell lights have no covers so you can finish them off right now, I installed a UV LED in both sides.
Step 4: Install the Dome Light LEDs
Gently push the LEDs straight into the holders, I used red LEDs here. These holders are angled slightly, while installing one of the LEDs the holder actually popped out of place. If this happens to you, just grab on to the popped out holder with the pliers and pull it back into place, then try installing the LED again. After both LEDs are installed test them. If an LED doesn’t work, try removing it. Check the leads, and re-install. If the LEDs do work, clean up then re-install the reflectors and light covers.
Step 5: Install the Passenger Light LEDs
Re-install the reflectors, then gently push in the LEDs. Test the LEDs, then re-install the light covers. Please note these reflectors need to be installed before the LEDs.
Step 6: Get a Cold Refreshing Beverage
You are now done. The lights are a little weird at first but they grow on you fast. The red LEDs I used seem just right, they put out enough light to read by and so not bright they are distracting. The UV LEDs I used in the footwells are functional, but could have been a little brighter. This is probably more due to the frequency of the light rather that the LED output. For only 20 bucks and half hour of time, I‘m more than pleased. Enjoy.


