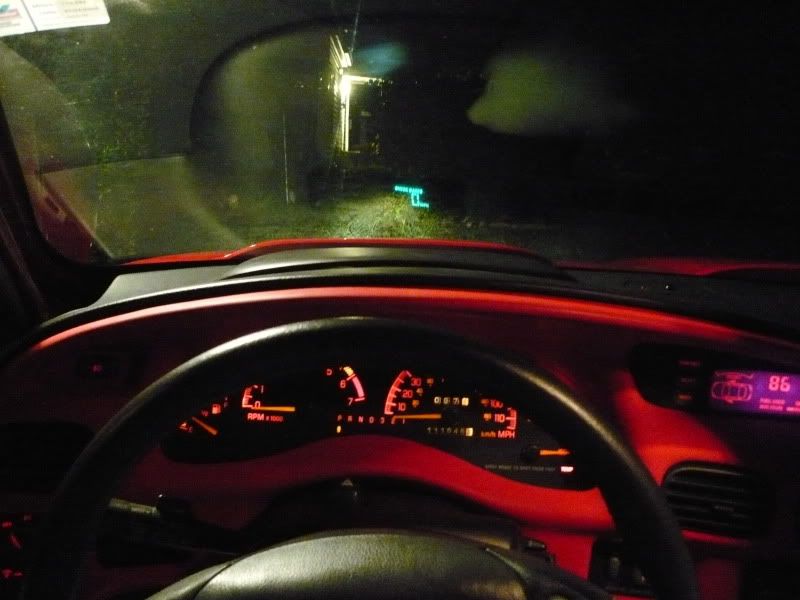
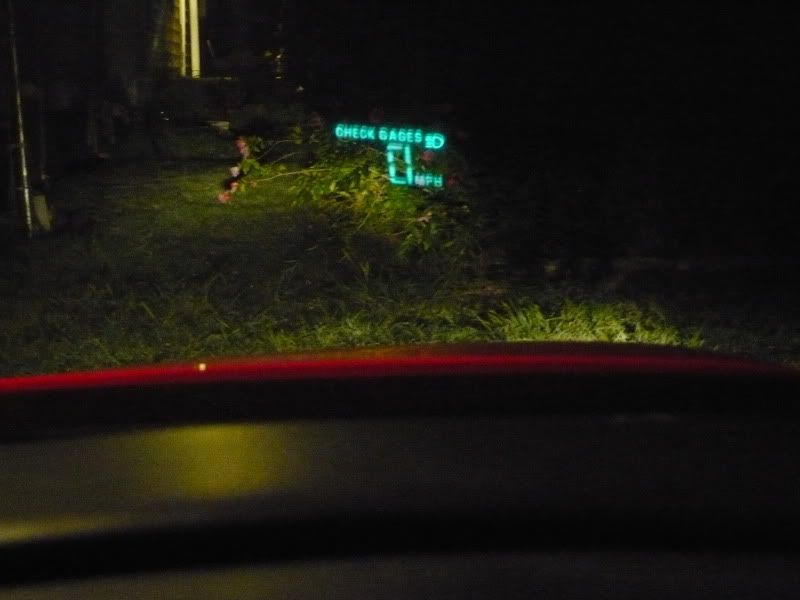
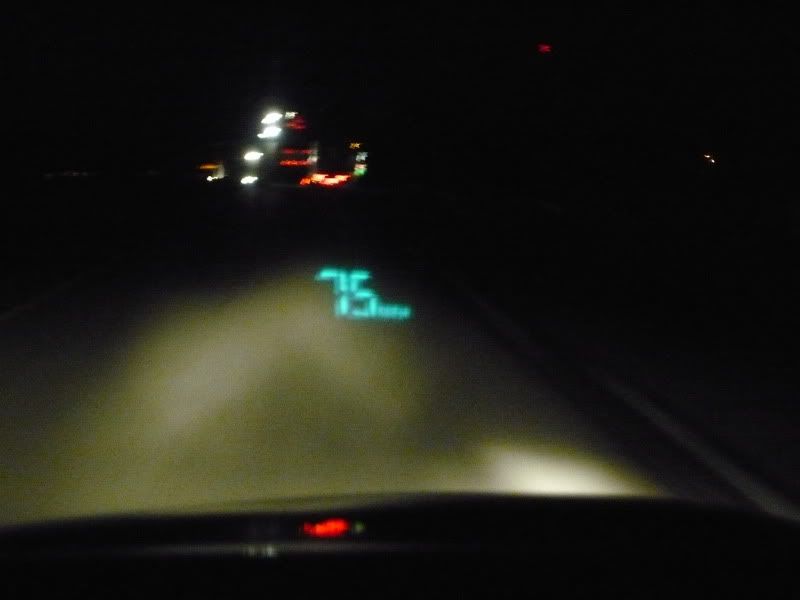
Thread: GEMINI'S much sought after 97-03 hud install write-up (w pics)

Results 1 to 18 of 18
  1. #1 GEMINI'S much sought after 97-03 hud install write-up (w pics) 
    SE Level Member GEMINIokc's Avatar
    Join Date
    Dec 2008
    Location
    n side
    Posts
    87
    Thanks (Received)
    0
    Likes (Received)
    0
    Dislikes (Received)
    0
    Welcome to my WRITE-UP for 97-03 HUD Fabrication.

    I would like to start by saying that I am in no way an expert at HUD installation and do not claim to be. Anything you do to your vehicle is at your own risk, as it was for me!! Also I would like to acknowledge and give credit to some people who's initial research and HOW-TO's... that helped me accomplish this:
    Pete0403 on Clubgp for his informational write-up, and 02BlueGT here on grandprixforums.net who PM'd me with this extensive advice: lol, jk

    "There are several how to's spread around, but mine was pretty much, get HUD, HUD switch, and dash bezel (plastic cover)
    cut dash apart, insert HUD, connect harness(connectors were already there in my car)
    Put bezel over... and done"


    THANK YOU BOTH


    And before i get a thousand Questions......,(Although I am in the Hip Hop scene, and culture as a DJ.... No I am not a BLOOD or representing myself as one, just because i have a RED bandanna on my rear-view mirror... It is purely for decoration!!!!!

    I.E. if I had a Black car/ black bandanna, White car/ white bandanna.....ect, I think you get the point!!

    One last thing. I wanted this in my car since finding out what they were, and thought it was the coolest thing since sliced bread. However i have noticed that this can b a huge distraction, as it is in your center line of sight!! I found it very pleasing that the control switch had a dimming adjustment on it! It takes a while at first to get used to it, but once you do it becomes second nature.


    After learning that some of our cars had this kicka$$ feature, i wanted to find out what i could do to possibly have this available to me, since my 99 gt did not originally come equipped with it. Then i purchased my 99 GTP and it wasn't equipped with it either

    So after digging around the internet for information on the subject, and compiling all that i could, I found out that not only was it possible, but with the right supplies, a few tools, and some patience..... I could have it too!
    The only big problem for me in doing this, is every write-up i found, either the pics were 2 small or they didn't work! So i decided when i finally did this to my car i was going to take lots of pics, for everyone to have as a guide for their installs!

    Also I was fortunate enough that the factory plugs were already pre-installed for a HUD in my 99 GTP, so mine was plug-and-play. Some are not, and you have to wire them to work. I am not going to get into that with this write-up, but if you need that info, it is located as a sticky here on grandprixforums.net in the HOW TO section.

    You can find HUD's all over the internet priced from $100-$200!! I lucked out, and was able to pick mine up with Dash Trim Piece for $44!! It sat in my studio for about a mo. simply because i was nervous to cut my dash. Once i finally got the nerve to do it, I realized it wasn't as bad or hard as I thought! Plus once you are finished and installed it is totally worth it!!!!

    here's a list of Tools you will need:
    1. phillips screwdriver
    2. flathead screwdriver
    3. white chalk
    4. dremel
    5. and if u don't have one of these,

    or something similar i wouldn't attempt this, cause this is a pretty messy project!


    SUPPLIES:
    1. Heads-up Display (HUD)
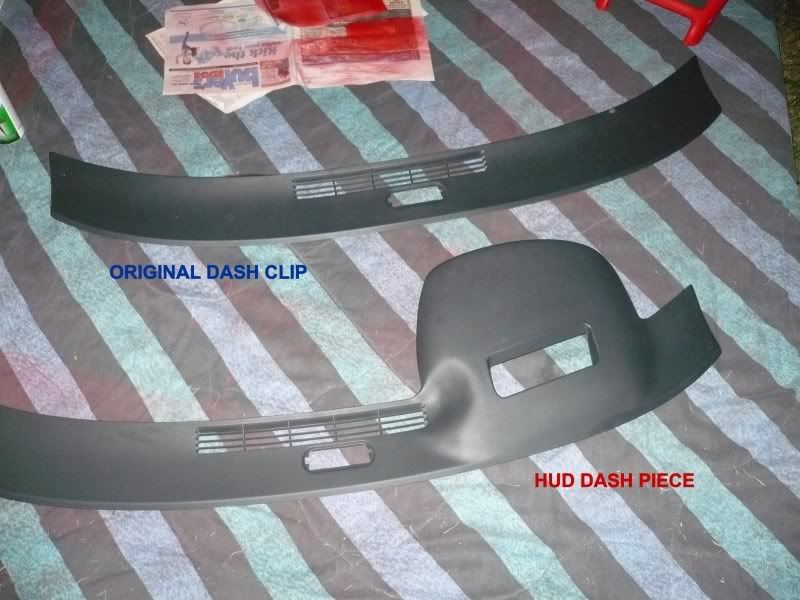
    2. HUD dash piece
    3. HUD control switch
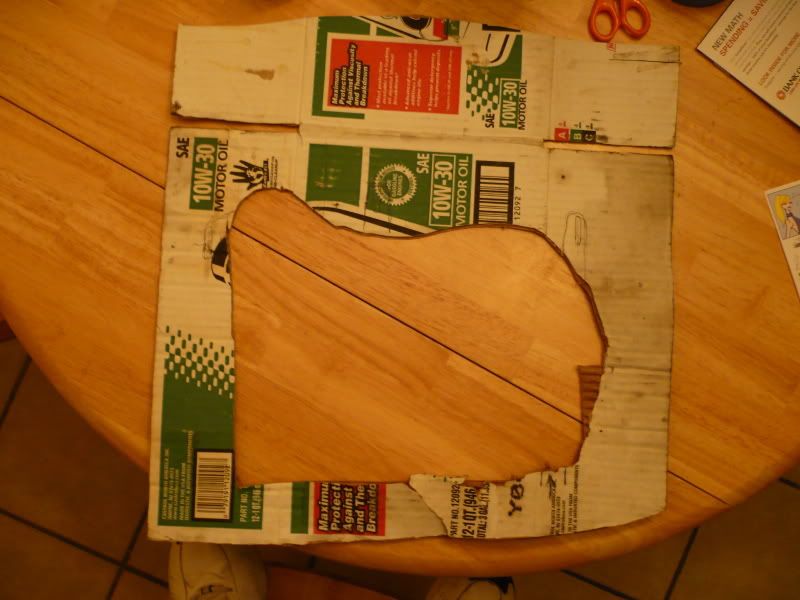
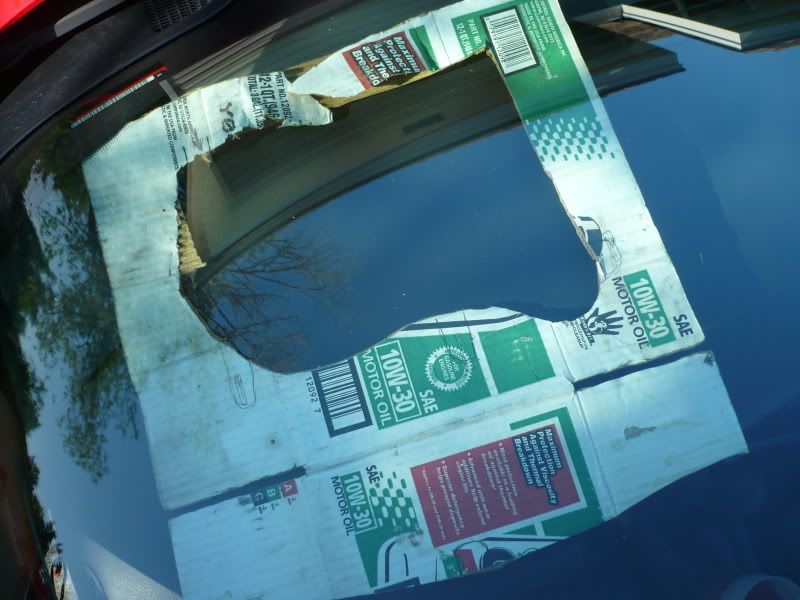
    4. If applicable, a HUD Template.... i made mine from cardboard laying around the junkyard, nothing pretty but did the trick,I'm pretty sure you do not have to have this, but it helps!


    Also some things in here, i did not take pics of...becuase i figure if you didn't know what, or where the dash trim panel was, or how to cut with a dremel, then you should probably not be doing this!!

    So without further a-do lets get started.......


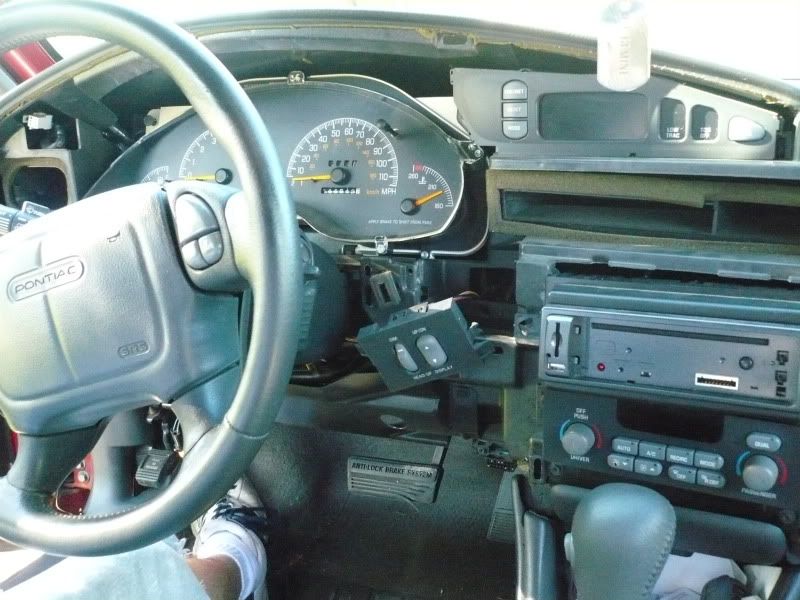
    First thing you will want to do is pull the Dash Trim Panel off the front of the dash, I like to start at the far left, because the fog lamp switch is located there, and u will need to disconnect this. All you have to do is slip a flathead screwdriver into the clips and it pops out. Then just pull the rest of the panel carefully all the way around until you hear the clips pop out of the dash, and then work it off. once you do this, this is what it will look like


    Make sure you keep up with all screws, clips, ect..cause you will need them to put everything back together in the end.

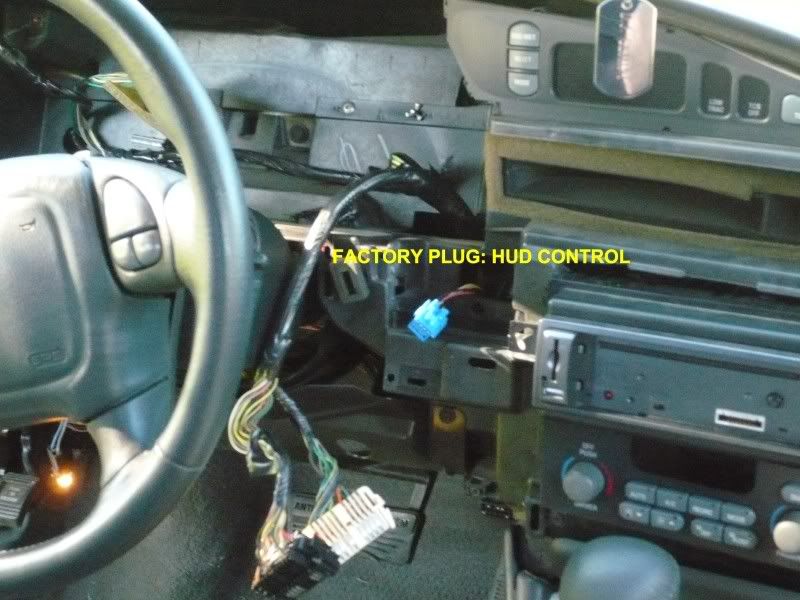
    Once you have the Dash Trim Panel off, you will want to locate the 2 factory plugs in the dash for the HUD

    These 2 plugs are used to control/recieve the HUD pisplay


    1.


    2.


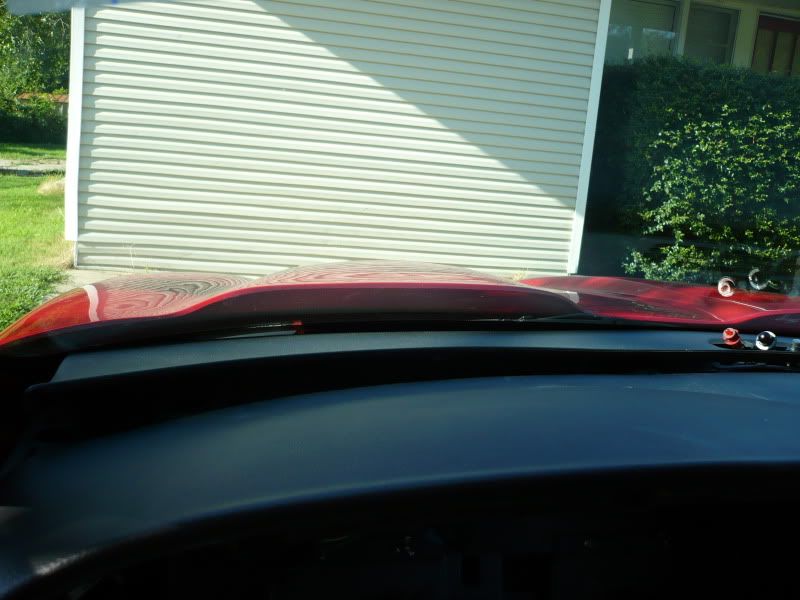
    Next, you are going to remove the top dash insert panel from the top of the dash, next to the windshield. I started at the left and carefully pried up the panel with my flat-head screwdriver, working slowly across the car till it was completely released from the dash
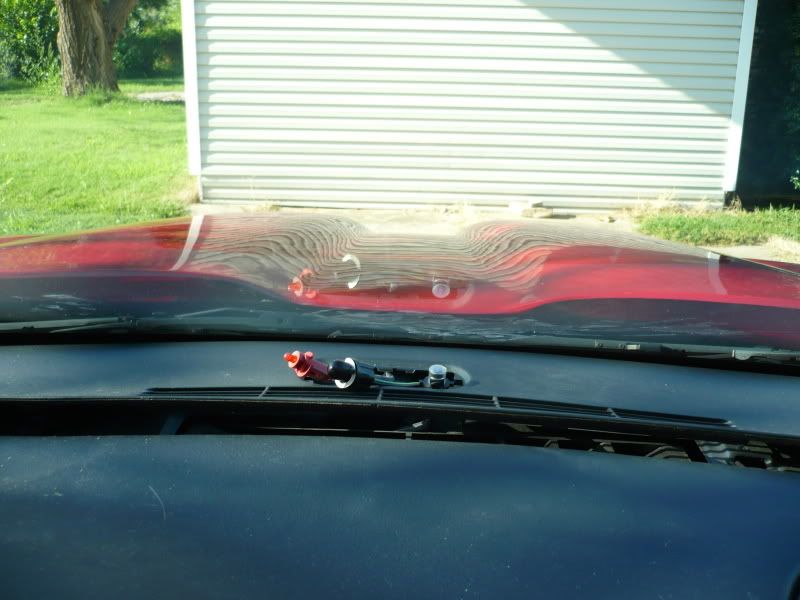


    Last edited by GEMINIokc; 09-03-2009 at 03:40 AM.
    UPDATED MODS....GreenBastard HP powertune, CAI, BlueGTP91 Engine bay detail, Finished painted Dash,Hogans Performance DP, Flow Master 40's, Still Missing driver side badge 4 weight reduction.... More Mods Coming Soon!!
    Reply With Quote  
     

  2. #2 Re: GEMINI'S much sought after 97-03 hud install write-up (w pics) 
    SE Level Member GEMINIokc's Avatar
    Join Date
    Dec 2008
    Location
    n side
    Posts
    87
    Thanks (Received)
    0
    Likes (Received)
    0
    Dislikes (Received)
    0
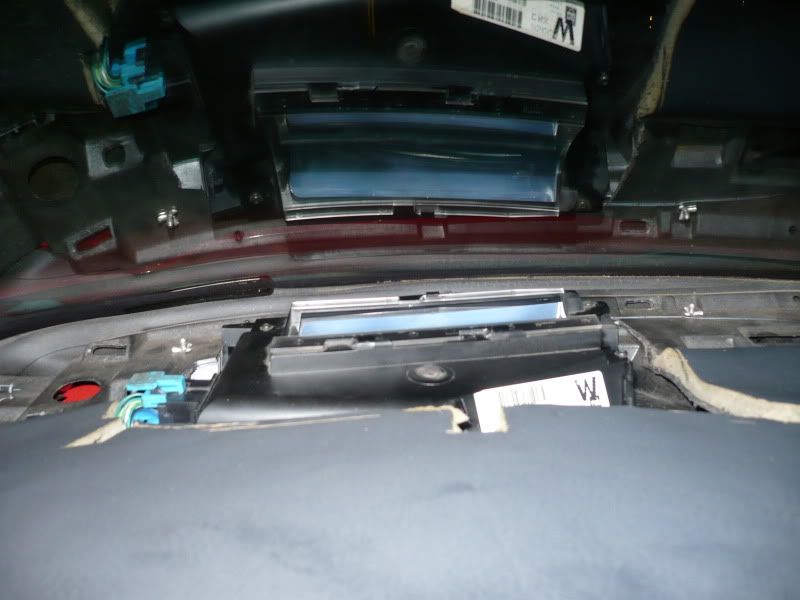
    Now that the top dash panel is out of the way, you can see where part of the HUD will rest, once in the dash. Not sure if you will have it or
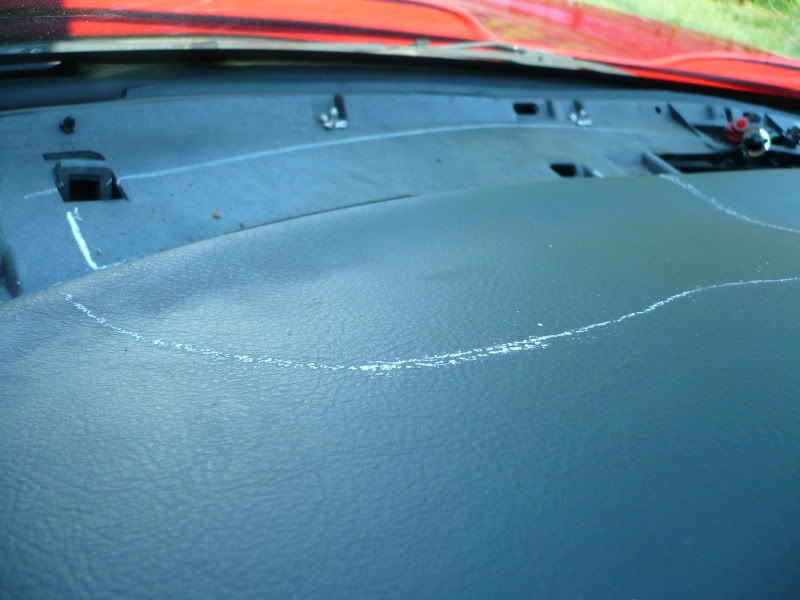
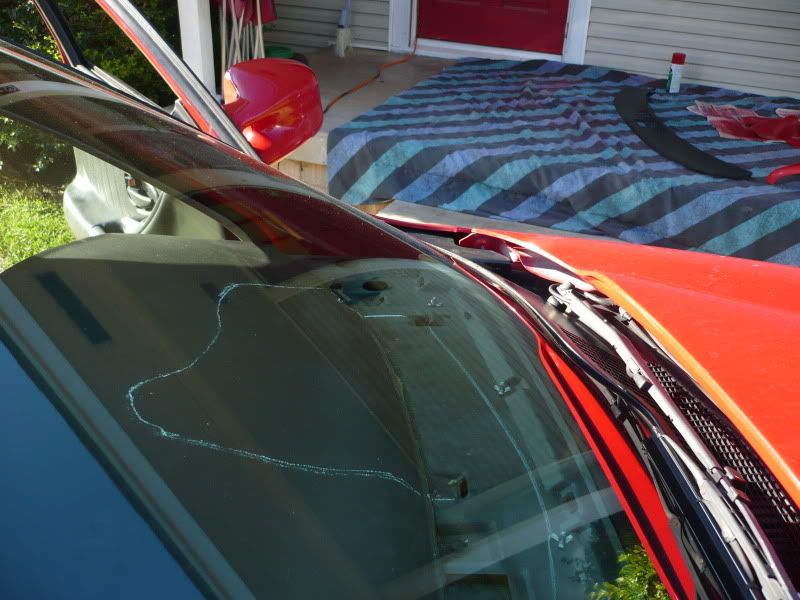
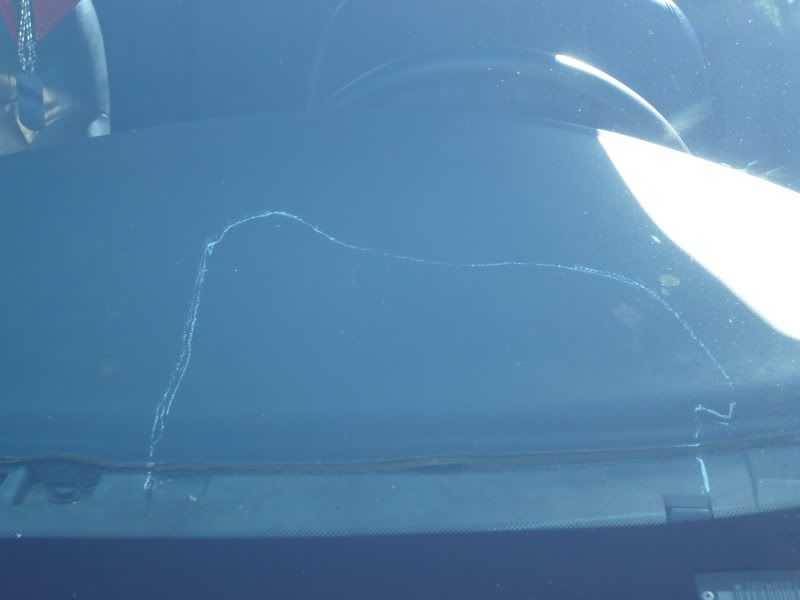
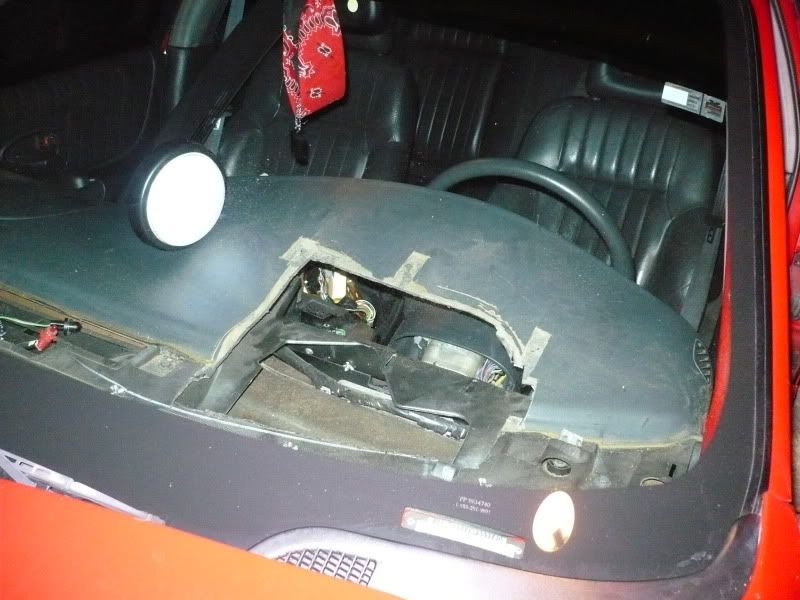
    Not but I noticed that there were already some lines drawn on the dash for approximately where the HUD was to be installed if equipped at the factory. Here you will get out your chalk and draw on your dash where you would like to cut. Again if you have a template this will help a lot, if not, use your HUD trim panel, and then cut inside that area.


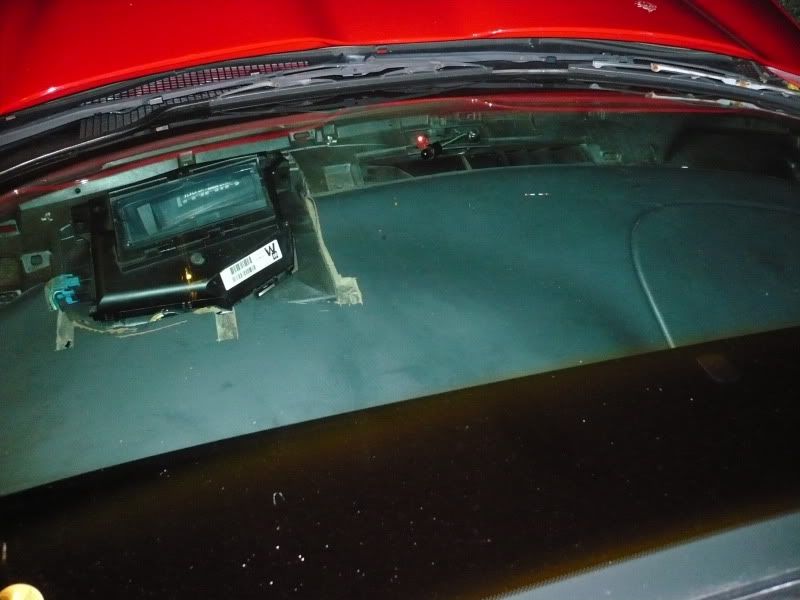
    Also you will want to take your Phillips screwdriver and take out your gauge cluster from the front of the dash, it is only held in by 2 screws. There are also 2 sets of wires plugged into the back of the cluster. You can either release them from it, or just set it off to the side out of the way! I opt for taking it completely out. This will give you a more accurate view of where your cuts are, from beneath the dash, once you start cutting in to it.

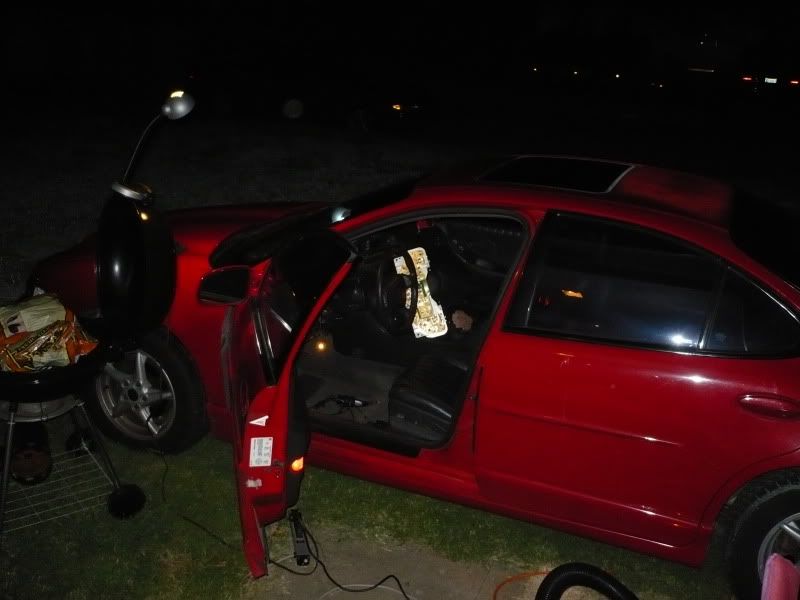
    Well from the time I started this project till this point it started getting dark, and I have no garage, so I had to get creative.....Southern Modding at its best!!
    ........

    Now that you have everything set.... IT IS TIME TO CUT THE DASH!!!

    TAKE A DEEP BREATH AND BEGIN! ...............................................

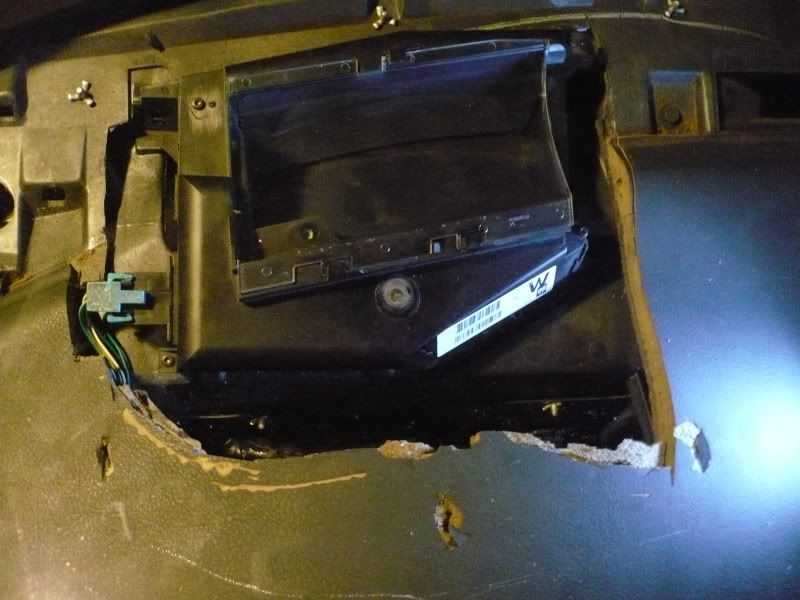
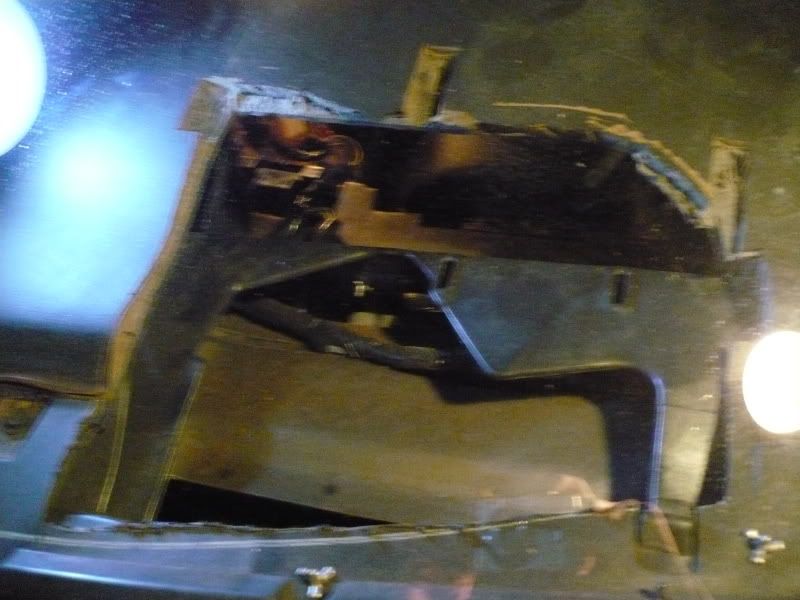
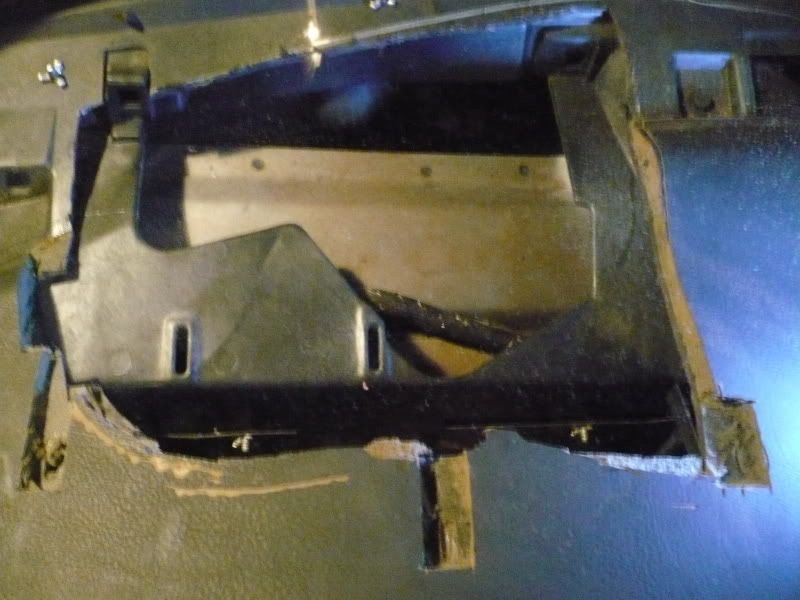
    There is no certian right way to do this, other than keep your cutting wheel as straight a possible, and start towards the center of your outline. (Also something I figured out halfway through was to work on just cutting the cushion of the dash first, rip that out of the way, so you can see the plastic shell underneath it. Then just followed the outline inside until the desired area is cut out! ). You will also notice there are three tab holes in the plastic shell. You can see these inside the dash! Carefully take a knife or something skinny and sharp, while pressing down on the dash from the top, poke through the tab holes from underneath!


    Once you know where your tabs are located in the dash, you will want to cut the cushion out from around the tab holes, so that the HUD will sit firmly, and flush with the rest of the dash! You will now have three holes from top to bottom for your HUD dash cover to lock its tabs into.
    At this point you will def want to vacuum out all the debris from inside the hole you cut and inside the dash cluster, leaving you with a clean working area!!


    You can now let out a deep sigh of relief, at this point the worst part is over!!

    Now that your dash is cut, you are ready to install and plug up the HUD.

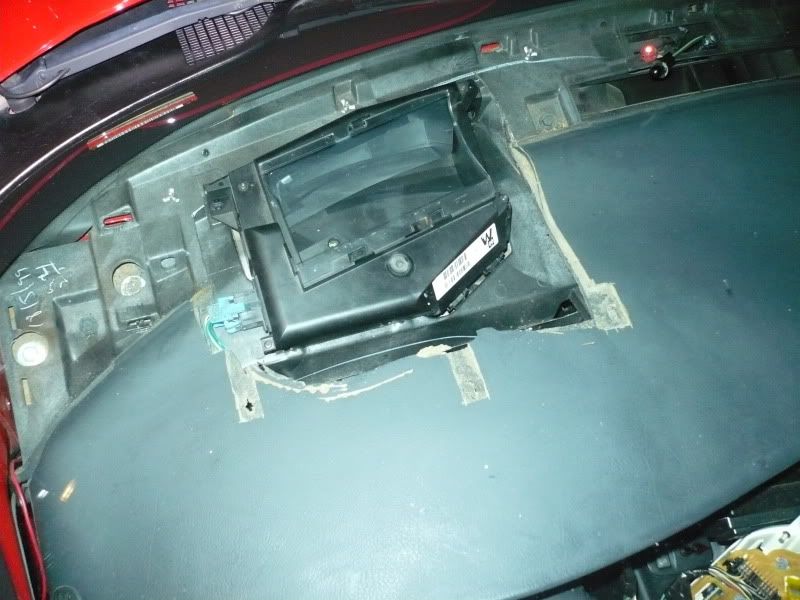
    First, take the HUD and place it in the hole. Grab your HUD RECIEVER plug, and plug it into its side! Making sure your connections are firm and secure, position the HUD into the 2 tabs underneath itself, and lock them into place! Your HUD is now in place to perform correctly!
    Last edited by GEMINIokc; 09-03-2009 at 03:35 AM.
    UPDATED MODS....GreenBastard HP powertune, CAI, BlueGTP91 Engine bay detail, Finished painted Dash,Hogans Performance DP, Flow Master 40's, Still Missing driver side badge 4 weight reduction.... More Mods Coming Soon!!
    Reply With Quote  
     

  3. #3 Re: GEMINI'S much sought after 97-03 hud install write-up (w pics) 
    SE Level Member GEMINIokc's Avatar
    Join Date
    Dec 2008
    Location
    n side
    Posts
    87
    Thanks (Received)
    0
    Likes (Received)
    0
    Dislikes (Received)
    0
    Second, take yor HUD CONTROL PLUG, and plug it into the CONTROL SWITCH in the dash.


    Then turn it on to make sure everything is working properly.

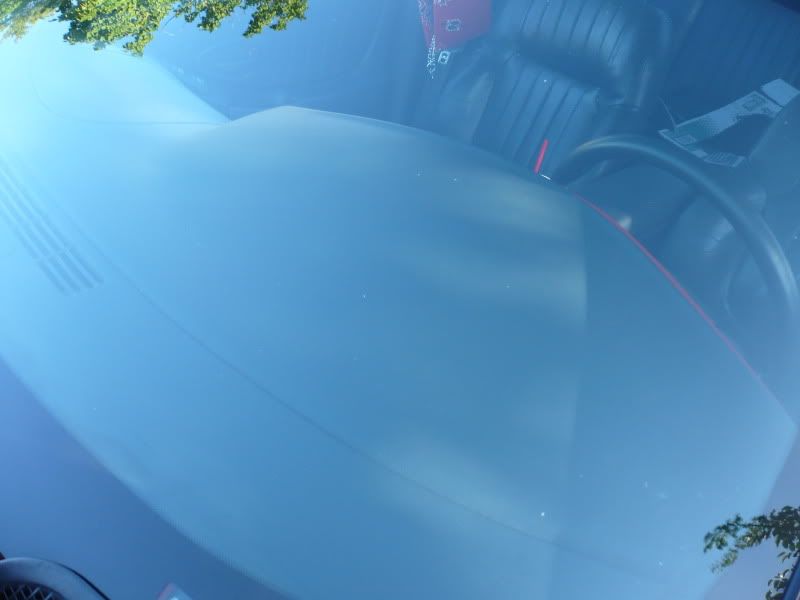
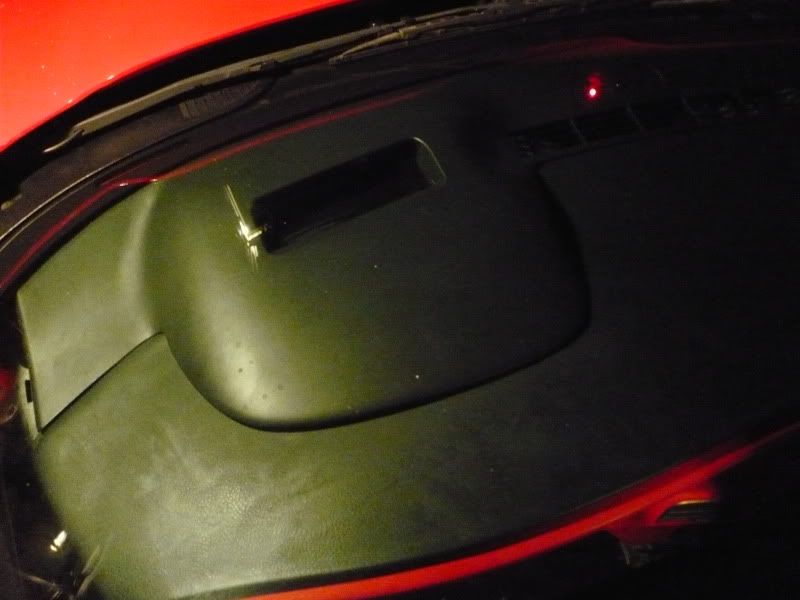
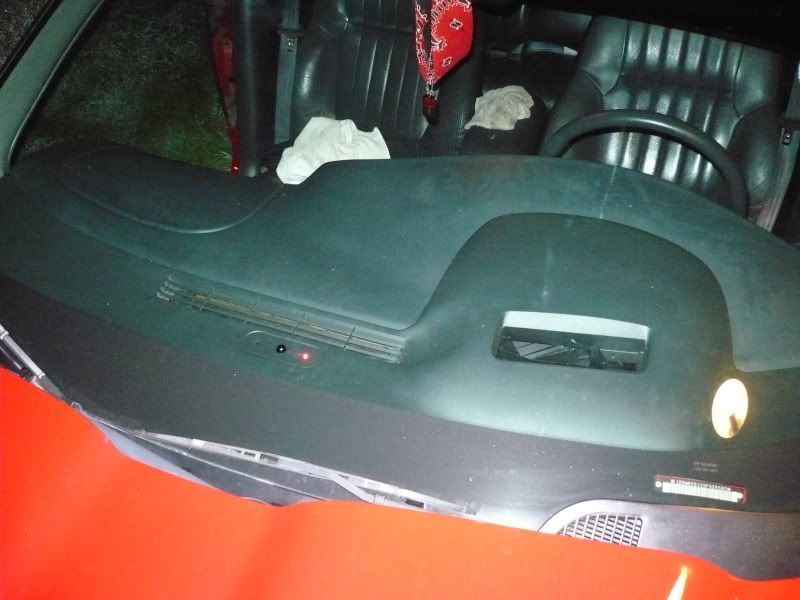
    Once you are satisfied that everything is operating efficiently, you will be ready to put on the HUD dash piece. Simply slide it down into place according to where the tabs are located. Don't forget to pull the blinking security light, and other wires through the piece. Then secure the HUD dash piece back into place by locking the tabs back into the dash!!

    Replace your trim, and dash panels back to where they belong

    Once you have completed this, pat yourself on the back!! You have successfully installed your very own HEADS-UP DISPLAY


    Last but not least, take it for a spin, and enjoy the fruits of your labor


    If you have any questions that i may not have answered or suggestions to something i may have missed, please feel free to contact me through PM here or on Myspace ...search email djgeminiokc@yahoo.com

    More HOW TO'S COMING SOON........
    Last edited by GEMINIokc; 09-03-2009 at 03:33 AM.
    UPDATED MODS....GreenBastard HP powertune, CAI, BlueGTP91 Engine bay detail, Finished painted Dash,Hogans Performance DP, Flow Master 40's, Still Missing driver side badge 4 weight reduction.... More Mods Coming Soon!!
    Reply With Quote  
     

  4. #4 Re: GEMINI'S much sought after 97-03 hud install write-up (w pics) 
    GTP Level Member bonerjamz03's Avatar
    Join Date
    Apr 2009
    Location
    Upper Darby, PA
    Posts
    565
    Thanks (Received)
    0
    Likes (Received)
    4
    Dislikes (Received)
    0
    good job
    Reply With Quote  
     

  5. #5 Re: GEMINI'S much sought after 97-03 hud install write-up (w pics) 
    GTP Level Member SuperSport's Avatar
    Join Date
    May 2009
    Location
    Michigan
    Posts
    1,100
    Thanks (Received)
    0
    Likes (Received)
    0
    Dislikes (Received)
    0
    Looks great! Too bad my 01 does not have the 2 plugs behind the dash to do this as easily as you did...
    2001 Grand Prix GT Coupe
    Comp G Wheels - SS Corners - Infinity Sound - Tint - Digital DIC Swap - 893 Fogs

    Reply With Quote  
     

  6. #6 Re: GEMINI'S much sought after 97-03 hud install write-up (w pics) 
    GT Level Member Swash's Avatar
    Join Date
    Dec 2007
    Location
    Excelsior Springs, MO
    Posts
    448
    Thanks (Received)
    0
    Likes (Received)
    0
    Dislikes (Received)
    0
    Nice write up!

    -Swash
    I'm sorry, I can't hear you over the sound of how awesome I am...
    2004 IBM/Black/A4 GTO -- 1 of 273 - and the slowest
    2002 Galaxy Silver GTP - a few mods - sold
    Reply With Quote  
     

  7. #7 Re: GEMINI'S much sought after 97-03 hud install write-up (w pics) 
    Turbo is the way to go. BillBoost37's Avatar
    Join Date
    Jul 2009
    Location
    W Spfld
    Posts
    26,815
    Thanks (Received)
    53
    Likes (Received)
    90
    Dislikes (Received)
    1
    I've dropped 5 or so of these into Regals. Found that cutting is very easy with a rotozip cutting bit for wood/plastic inserted into a dremel tool with flexhose end. It gives you great flexiilbility to move in the confined space.

    If you don't have the wiring, add it..it's only 8-12 wires that you can tap into right at the cluster connector.
    I drink..so consider that when reading my posts.

    2010 Audi A6 Dual IC's
    Reply With Quote  
     

  8. #8 Re: GEMINI'S much sought after 97-03 hud install write-up (w pics) 
    GTP Level Member SuperSport's Avatar
    Join Date
    May 2009
    Location
    Michigan
    Posts
    1,100
    Thanks (Received)
    0
    Likes (Received)
    0
    Dislikes (Received)
    0
    Quote Originally Posted by BillBoost37 View Post
    If you don't have the wiring, add it..it's only 8-12 wires that you can tap into right at the cluster connector.
    Hmmmmm. I imagined the HUD would be more of a PITA to do than the Digital DIC, so I did the DIC and its 20 wires to splice! It sounds much better than I thought. I may consider it!
    2001 Grand Prix GT Coupe
    Comp G Wheels - SS Corners - Infinity Sound - Tint - Digital DIC Swap - 893 Fogs

    Reply With Quote  
     

  9. #9 Re: GEMINI'S much sought after 97-03 hud install write-up (w pics) 
    SE Level Member GEMINIokc's Avatar
    Join Date
    Dec 2008
    Location
    n side
    Posts
    87
    Thanks (Received)
    0
    Likes (Received)
    0
    Dislikes (Received)
    0
    Quote Originally Posted by BillBoost37 View Post
    I've dropped 5 or so of these into Regals. Found that cutting is very easy with a rotozip cutting bit for wood/plastic inserted into a dremel tool with flexhose end. It gives you great flexiilbility to move in the confined space.

    If you don't have the wiring, add it..it's only 8-12 wires that you can tap into right at the cluster connector.
    Yeah the whole time i was cutting in the odd spaces i kept thinking that there had to be an easier way to do this! Wished mine had come with a flex hose, I can see how that would have def made things easier!! Thanks for the info bill!!
    UPDATED MODS....GreenBastard HP powertune, CAI, BlueGTP91 Engine bay detail, Finished painted Dash,Hogans Performance DP, Flow Master 40's, Still Missing driver side badge 4 weight reduction.... More Mods Coming Soon!!
    Reply With Quote  
     

  10. #10 Re: GEMINI'S much sought after 97-03 hud install write-up (w pics) 
    SE Level Member FRESCOLIO's Avatar
    Join Date
    Jun 2009
    Location
    CHICAGO
    Posts
    56
    Thanks (Received)
    0
    Likes (Received)
    0
    Dislikes (Received)
    0
    Informative. Um.......Thanks
    Reply With Quote  
     

  11. #11 Re: GEMINI'S much sought after 97-03 hud install write-up (w pics) 
    Donating Users silverstreak's Avatar
    Join Date
    Jul 2009
    Location
    in a house
    Posts
    558
    Thanks (Received)
    0
    Likes (Received)
    0
    Dislikes (Received)
    0
    Nice write up. I did this today on my 2003. I was told and also read that GM started using 2 different harnesses in 2000. Much to my delight my 03 had the plugs. This saved me lots of time and hassle. I guess its just hit and miss.
    Reply With Quote  
     

  12. #12 Re: GEMINI'S much sought after 97-03 hud install write-up (w pics) 
    GTX Level Member 03GTPLE's Avatar
    Join Date
    Aug 2009
    Location
    Tyler, TX
    Posts
    604
    Thanks (Received)
    0
    Likes (Received)
    0
    Dislikes (Received)
    0
    I did this on my 2003 (a long time ago, closer to when these were actually written) and it was easy to do with Gemini's instructions and pics. Still have no problems after nearly a year with it installed! (I used a 90* die grinder with a carbide bit ...yeah, overkill, but very fast )
    Last edited by 03GTPLE; 09-06-2010 at 10:34 PM.
    2003 White Grand Prix GTP Limited Edition
    - 3.4 pulley, tune by Boostd1/CLINT@AIR, Short Ram Intake, PLOG, 3" ZZP Downpipe, AL 104's, 180* t-stat, Impala STB & 12" cross drilled/slotted/zinc washed rotors, DDM HID's, and put in a heads up display for now...
    Reply With Quote  
     

  13. #13 Re: GEMINI'S much sought after 97-03 hud install write-up (w pics) 
    SE Level Member
    Join Date
    Mar 2011
    Location
    Syracuse
    Posts
    1
    Thanks (Received)
    0
    Likes (Received)
    0
    Dislikes (Received)
    0
    I agree this is a kickaxx option. When my son told me his GTP had this I was like..."A what....oh no way that is so freakin' cool!.....Now....how to put one in my '93 Supercoupe.
    Reply With Quote  
     

  14. #14 Re: GEMINI'S much sought after 97-03 hud install write-up (w pics) 
    SE Level Member
    Join Date
    Sep 2010
    Location
    trenton, on
    Posts
    22
    Thanks (Received)
    0
    Likes (Received)
    0
    Dislikes (Received)
    0
    Gemini,
    Awesome job!! Don't think i would have had the nerve to attemp this mod!! I was wondering if you were having any distortion or out of focus problems with the image projected on the windshield? There is a hud specific windshield for this application but have no idea how much it would cost, unless you salvaged one cheep from a wreck.
    Again, awesome job.
    Cheers,
    John Paul
    Reply With Quote  
     

  15. #15 Re: GEMINI'S much sought after 97-03 hud install write-up (w pics) 
    GT Level Member fisher580's Avatar
    Join Date
    Jan 2012
    Location
    Dyersville, Iowa
    Posts
    189
    Thanks (Received)
    0
    Likes (Received)
    0
    Dislikes (Received)
    0
    Quote Originally Posted by johnpstuart View Post
    Gemini,
    Awesome job!! Don't think i would have had the nerve to attemp this mod!! I was wondering if you were having any distortion or out of focus problems with the image projected on the windshield? There is a hud specific windshield for this application but have no idea how much it would cost, unless you salvaged one cheep from a wreck.
    Again, awesome job.
    Cheers,
    John Paul
    iirc their around $6-800ish, but I do know there redicuosly more than the non-hud ones
    2001 Grand Prix GTP Coupe - Black-SOLD
    -SOLD
    2006 Grand Prix GXP - That Purplish dark red color
    -FWI, DiabloSport Trinity, and Trans. Cooler - - 6.8 @ 208 mph LOL
    Reply With Quote  
     

  16. #16 Re: GEMINI'S much sought after 97-03 hud install write-up (w pics) 
    GT Level Member Kilroy's Avatar
    Join Date
    Mar 2013
    Location
    Manitoba, Canada
    Posts
    440
    Thanks (Received)
    0
    Likes (Received)
    0
    Dislikes (Received)
    0
    I priced out a hud enabled windshield here in Canada at Speedy Autoglass, and buddy said it was about $800.00.
    Reply With Quote  
     

  17. #17 Re: GEMINI'S much sought after 97-03 hud install write-up (w pics) 
    SE Level Member GEMINIokc's Avatar
    Join Date
    Dec 2008
    Location
    n side
    Posts
    87
    Thanks (Received)
    0
    Likes (Received)
    0
    Dislikes (Received)
    0
    Sorry guys took me a min to respond, havent been on in a while. But to answer ur question john....very little, hazziness if i wld even consider it that. I wld say more somewhat of a ghost like image, but it never bothered me and worked very well...i too heard about the HUD specific windshield that was supposed to b so much better, but honestly i have had both now and can barely tell a difference...myself. I really dont see the need to buy one if you have a good HUD and proper connections than you should be golden.
    UPDATED MODS....GreenBastard HP powertune, CAI, BlueGTP91 Engine bay detail, Finished painted Dash,Hogans Performance DP, Flow Master 40's, Still Missing driver side badge 4 weight reduction.... More Mods Coming Soon!!
    Reply With Quote  
     

  18. #18 Re: GEMINI'S much sought after 97-03 hud install write-up (w pics) 
    SE Level Member
    Join Date
    Dec 2018
    Location
    MI
    Posts
    2
    Thanks (Received)
    0
    Likes (Received)
    0
    Dislikes (Received)
    0
    I just installed a HUD in my 05 GT............the post helped a great deal. I only had on small connector under the dash for the hud unit. Only problem I ended up with is the HUD plastic dash piece doesnt quite sit flush on the vinyl part but some window foam sealer fills in the gap just fine and the HUD performs beautifully
    Reply With Quote  
     

Similar Threads

  1. rear window regulator/motor install write up
    By ExpyGator in forum General Tech Discussion
    Replies: 7
    Last Post: 11-17-2009, 12:52 PM
  2. ZZP FMHE install and pics?
    By bbptech in forum 3.8L V6 Supercharged (L67)(L32)
    Replies: 5
    Last Post: 08-02-2009, 02:59 AM
  3. Intercooler install pics & help?
    By qball98 in forum 3.8L V6 Supercharged (L67)(L32)
    Replies: 10
    Last Post: 07-29-2009, 01:06 AM
  4. Finished Gen V Install Pics
    By Street Wolf in forum General Tech Discussion
    Replies: 7
    Last Post: 07-20-2008, 07:33 PM
  5. 'Partial' Gen V Install Pics
    By Street Wolf in forum General Tech Discussion
    Replies: 9
    Last Post: 07-14-2008, 10:47 PM
Tags for this Thread

View Tag Cloud

Bookmarks
Bookmarks
Posting Permissions
  • You may not post new threads
  • You may not post replies
  • You may not post attachments
  • You may not edit your posts
  •