Thread: IAT Turbo Antilag Writeup (work in progress.)

Results 1 to 5 of 5
  1. #1 IAT Turbo Antilag Writeup (work in progress.) 
    Regal GS Level Member BoostedPontiac's Avatar
    Join Date
    Apr 2014
    Location
    South Haven, MI
    Posts
    1,140
    Thanks (Received)
    0
    Likes (Received)
    2
    Dislikes (Received)
    0
    Now ill start by saying that i'm still testing the tune and making timing changes so it actually works like an antilag but, here's how i set it up.

    Things You'll Need
    DHP or HPT
    (I used DHP)

    Tiny Tuner:
    Because you'll have to make some changes that DHP doesn't have options for. Note: No longer needed.

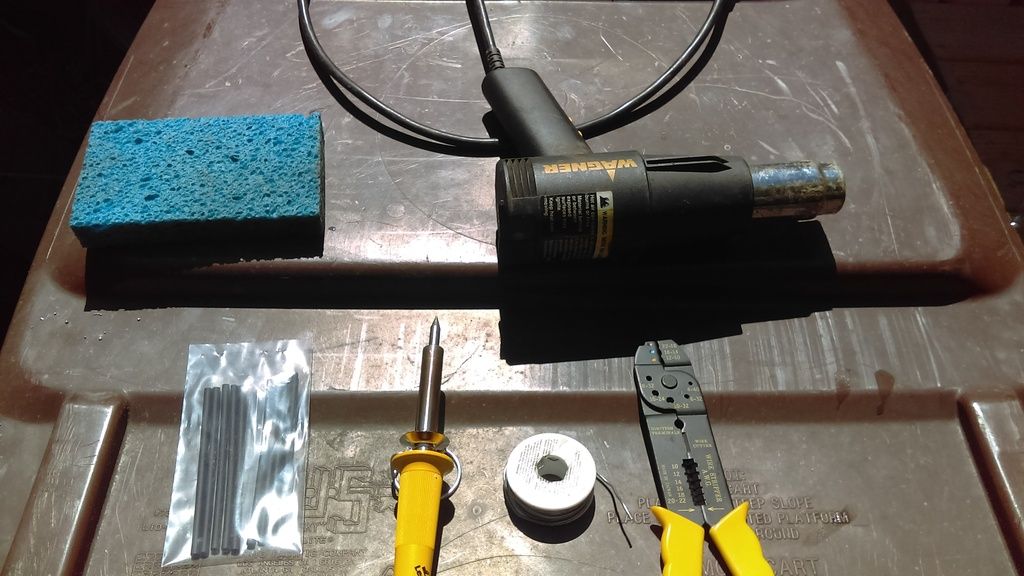
    Wire, Wire Cutters/Stripper, Heat Shrink, and Soldering Equipment
    I used maybe 2 lengths of 8' of 18 gauge wire. I also have just a basic 40w soldering iron, a spool of electric solder, generic wire cutters/stripper, a damp sponge to clean the soldering iron, and a heat gun to shrink the heat shrink.

    A Drill and Drill Bits:
    This is to mount the switch in your choice of area.

    A Closed Momentary Switch:
    Meaning that the circuit operates normal when the switch isn't pressed.
    This whole project has taken me about an hour to get everything wired in. Tuning it is a bit easier though.

    Step 1: Wiring/ Mounting the Switch.
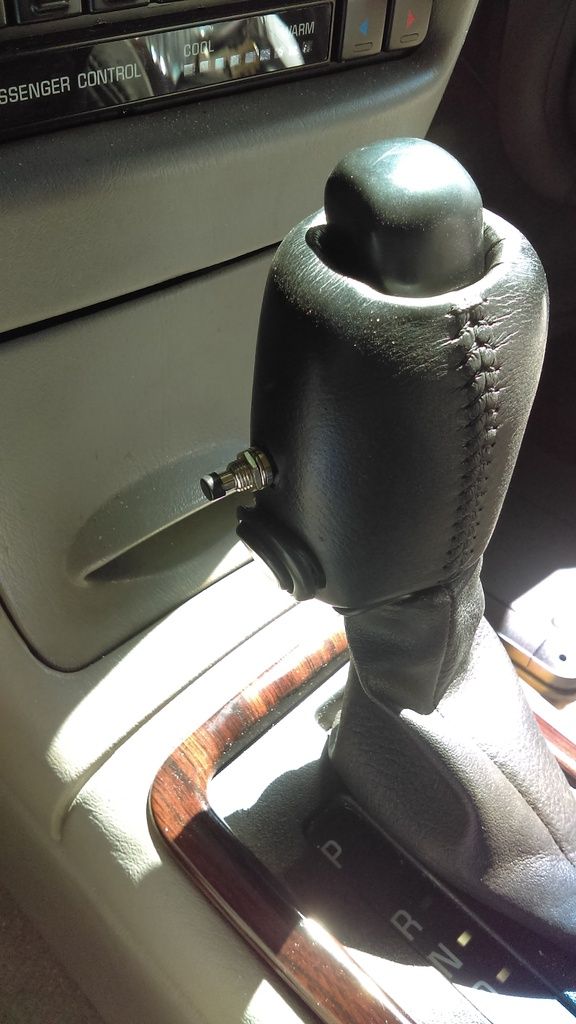
    I Started out by drilling a hole in the shift knob, and drilling a hole in the elongated bottom part to run the wires. I would put it in a spot that is easy to reach. I then routed the wires through the bottom of the center console and out of the passenger side port in the fire wall.

    Link to the wire routing write up: http://www.clubgp.com/cgi-asp/mods.asp?modid=2

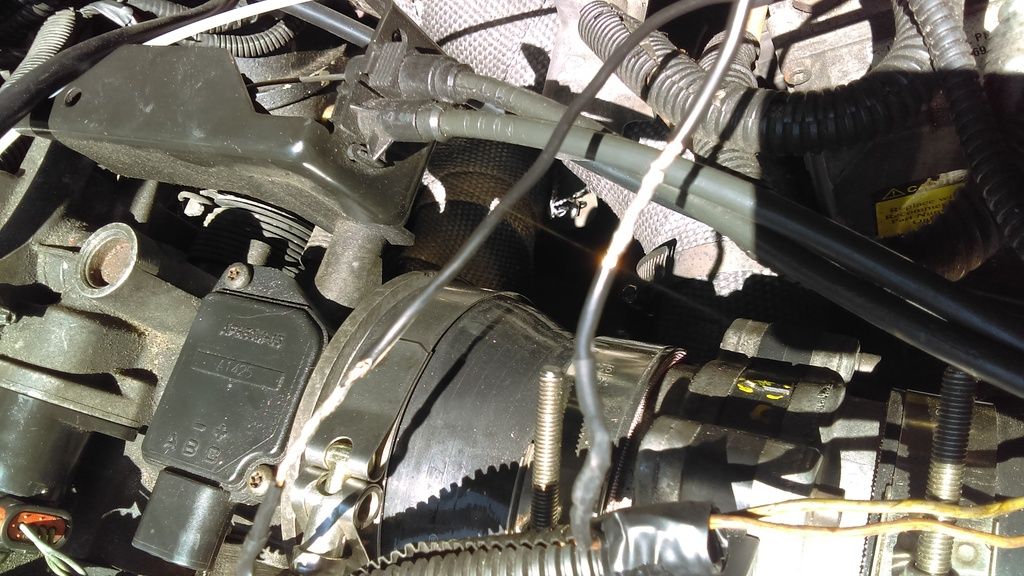
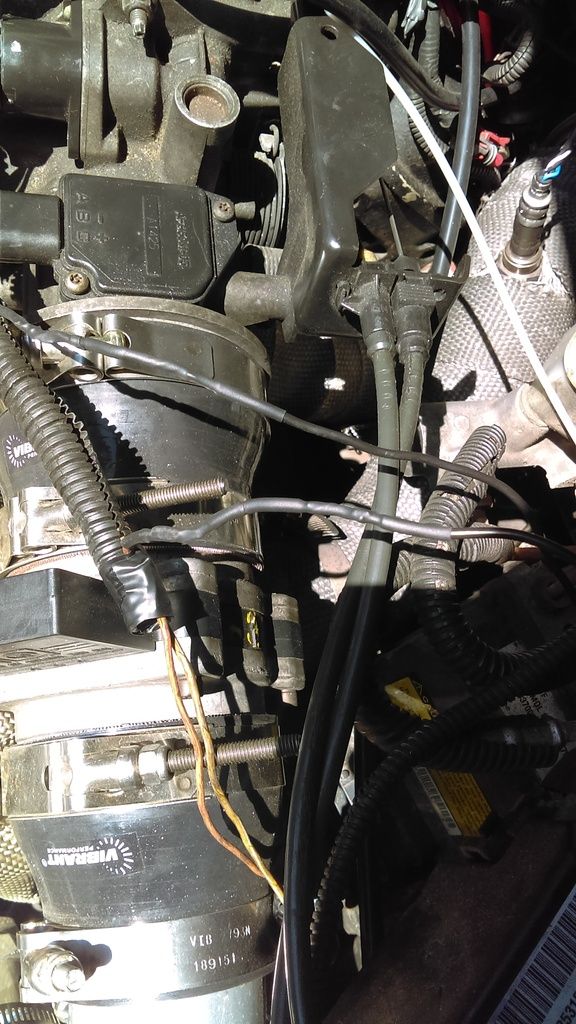
    Step 2: Soldering the switch wires to the IAT.

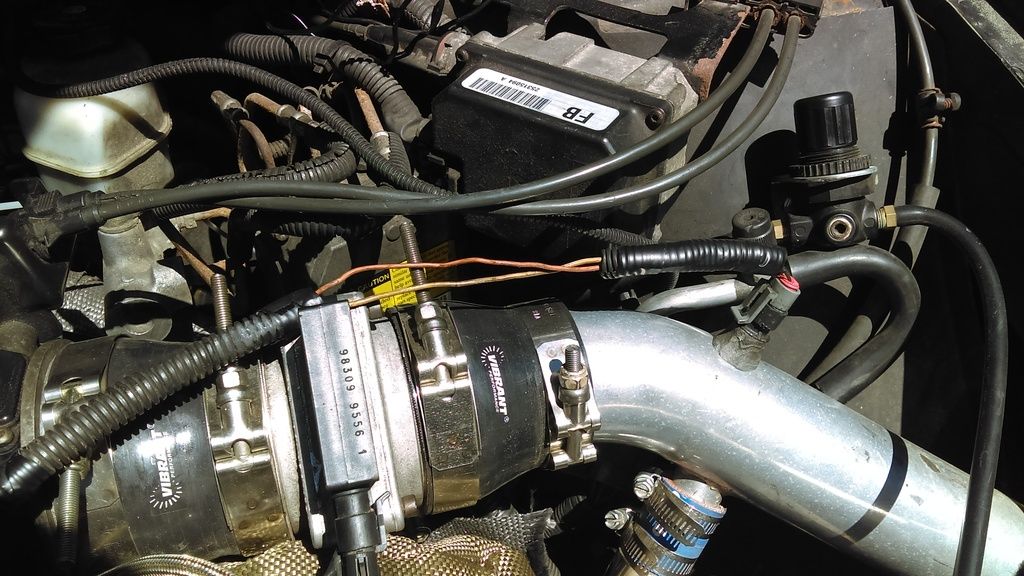
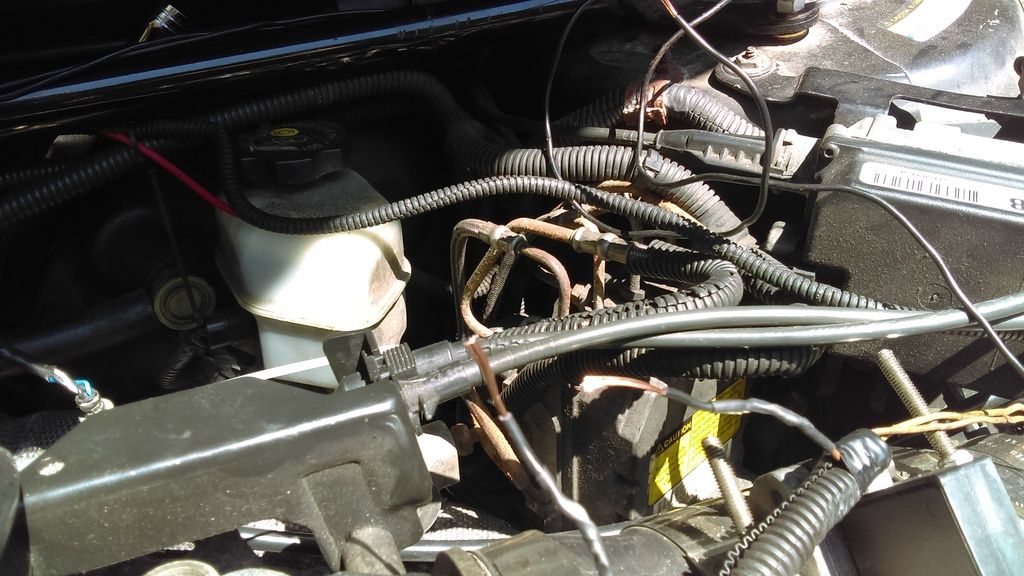
    I ran the wire up and around the firewall, being careful to avoid exhaust and spinning/moving parts. I then chose the orange wire to slice in to. It is important that you only splice into one wire, not both. I then cut some heat shrink, put it on the wire. After that i stripped the wires and got them ready to splice.

    Step 3: Tuning.

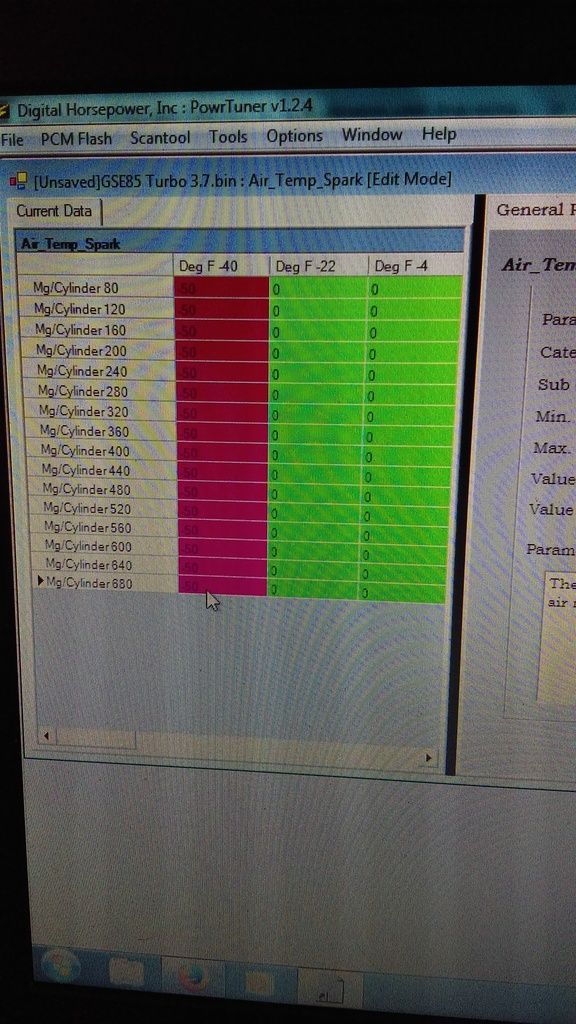
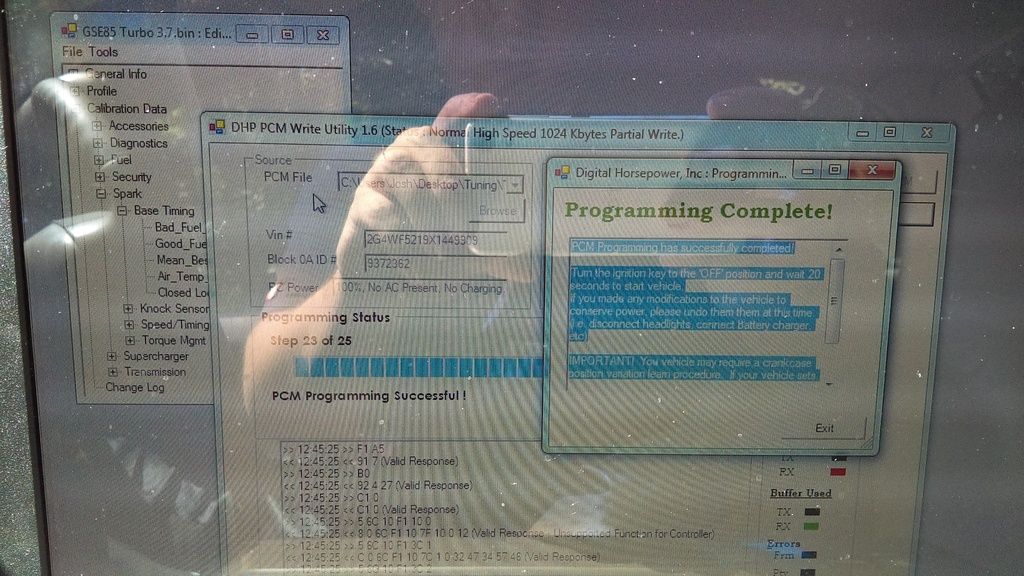
    Now you go into your bin file and go to Spark>Base Timing>Air Temp Spark. make the full -40 table read -50 and save.

    Note:
    The minimum allowable spark advance does not need to be modded at all.


    Here is a video of the IAT Switch in action (with the car off.)


    Good Luck.
    Ill update when i find a number that works on the min spark advance allowed table.
    Last edited by BoostedPontiac; 08-03-2016 at 11:48 AM.
    98' GP coupe NIC Pacesetters, E85, FSIC, 2.6, heads, blah
    11.82 @ 118.4 with a 1.8 60ft
    Retired: 99' Regal GS Turbo 11.428 @ 122.61 1.7 60ft.
    Retired: 99 GTP top swap nic setup. 13.37@106
    Reply With Quote  
     

  2. #2 Re: IAT Turbo Antilag Writeup (work in progress.) 
    Regal GS Level Member BoostedPontiac's Avatar
    Join Date
    Apr 2014
    Location
    South Haven, MI
    Posts
    1,140
    Thanks (Received)
    0
    Likes (Received)
    2
    Dislikes (Received)
    0
    The End Goal:
    98' GP coupe NIC Pacesetters, E85, FSIC, 2.6, heads, blah
    11.82 @ 118.4 with a 1.8 60ft
    Retired: 99' Regal GS Turbo 11.428 @ 122.61 1.7 60ft.
    Retired: 99 GTP top swap nic setup. 13.37@106
    Reply With Quote  
     

  3. #3 Re: IAT Turbo Antilag Writeup (work in progress.) 
    GTP Level Member
    Join Date
    Jan 2015
    Location
    Lincoln, NE
    Posts
    513
    Thanks (Received)
    0
    Likes (Received)
    0
    Dislikes (Received)
    0
    Whos video is this and do you have confirmation this is the process they used? I ask because i am very curious. Also when i did mine i found that just faulting the curcuit open with a normally closed switch did not work. I had to add 2 resistor paths one interrupted with a switch to get 2 different resistances through the curcuit or it got angry.

    EDIT: i did not realize you retained the sensor. so nevermind on the second part of that. however, i am very curious if you get it working this way please let me know what settings you use. i will definately duplicate on my own setup. thanks.

    that video sounds like it has a 2 step limiter of some sort
    Last edited by NebTurboST5; 08-02-2016 at 06:08 PM.
    - 2001 Grand Prix XGT -- 11.21@124MPH
    - 2010 Chevy 2500HD LTZ -- Car hauler
    - 2011 BMW 328i Xdrive -- Wife's Daily
    - 2014 Ford F250 crew cab -- 6.2 liters of ford fail
    Reply With Quote  
     

  4. #4 Re: IAT Turbo Antilag Writeup (work in progress.) 
    Regal GS Level Member BoostedPontiac's Avatar
    Join Date
    Apr 2014
    Location
    South Haven, MI
    Posts
    1,140
    Thanks (Received)
    0
    Likes (Received)
    2
    Dislikes (Received)
    0
    Ok, i made a discovery. You dont need to modify the minimum spark advance tables at all so that step is being removed.
    98' GP coupe NIC Pacesetters, E85, FSIC, 2.6, heads, blah
    11.82 @ 118.4 with a 1.8 60ft
    Retired: 99' Regal GS Turbo 11.428 @ 122.61 1.7 60ft.
    Retired: 99 GTP top swap nic setup. 13.37@106
    Reply With Quote  
     

  5. #5 Re: IAT Turbo Antilag Writeup (work in progress.) 
    GTP Level Member 231FUN's Avatar
    Join Date
    Dec 2011
    Location
    Ontario,Canada
    Posts
    861
    Thanks (Received)
    0
    Likes (Received)
    0
    Dislikes (Received)
    0
    Any update on this?
    Looks like you tested with key on engine off your car, you test this on your car with engine running yet?
    Reply With Quote  
     

Similar Threads

  1. My gtp...work in progress
    By Lcsowheeler in forum Members Rides
    Replies: 10
    Last Post: 11-03-2015, 10:59 AM
  2. My 2008: Work in Progress!
    By FriboRage in forum Members Rides
    Replies: 11
    Last Post: 04-17-2012, 08:33 PM
  3. Mech's WIP (Work in Progress)
    By mechguy in forum Members Rides
    Replies: 13
    Last Post: 08-14-2011, 03:56 PM
  4. WriteUp: Modify Strut to work with Coilovers.
    By pontiackid in forum Brakes/Suspension/Chassis
    Replies: 0
    Last Post: 04-29-2009, 02:02 PM
  5. work in progress
    By Chleby in forum Audio, Security & Visual Electronics
    Replies: 5
    Last Post: 04-12-2008, 07:29 PM
Bookmarks
Bookmarks
Posting Permissions
  • You may not post new threads
  • You may not post replies
  • You may not post attachments
  • You may not edit your posts
  •