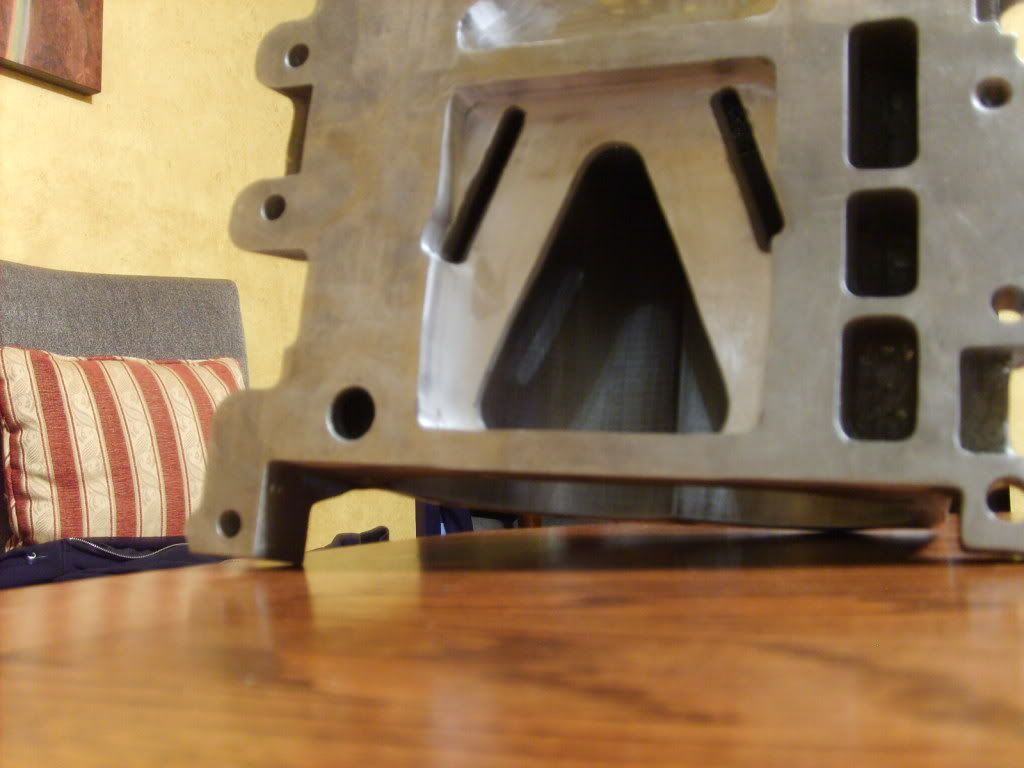
Here's a blower casing i just finished for a guy. Working on his inlet right now. Inlet work to 75mm. Gotta blend and smooth.
Heres the pics:

|
|

Here's a blower casing i just finished for a guy. Working on his inlet right now. Inlet work to 75mm. Gotta blend and smooth.
Heres the pics:


what about the bridge thing?

Is it just me or does the outlet taper towards the bottom of the pic or front of the case?
Are you free handing these with a router or using a jig?
What is the point of smoothing behind the H bar if your not going to cut it out?

Mat5112: With this case, the guy didnt want the h-bridge removed.
Felonygtp: I think maybe your just trippin. lol. everything is straight. Its done with a router and no jig yet. everything is smooth. But behind the h-bridge, i was just board. not like its going to ruin the performance at all.


Maybe I am tripping. lol. It looks smooth, lets see the inlet, I'm interested now.
When are you going to start polishing the outside of cases.

I dont know man it looks to me like it does taper. Can you take a pic of the caliper readings from top to bottom?

where exactly are u guys talking?


It could be that the blower isn't sitting level but it looks narrower at the bottom in the first and second pics. I'm not trying to piss in your corn flakes, It looks like you worked hard on the job you've done but it looks kinda messed up. Maybe take some better pics with the case laying flat on the floor instead of standing up. Get some pics of the inlet.

unfortunetly i didnt get pics of the inlet on this one. Ill have pics later tonight of the one i just finished for JBrownGTP. And ya i see what your saying but no it isnt. Its straight all the way across. Its the reflection from the flash that makes it look that way. Sorry the pics werent the best. Couldnt stop shaking. How does it look messed up?


So i will have pics of another persons blower(JbrownGTP) posted up in a few hours and also mine again. Went ahead and worked on the outlet some more and looks great. On mine the router got the best of me at the bottom of the "V" where the snout bolts to.


This is JbownGTP's supercharger. The inlet was opened up to 78mm. The outlet was just a basic port i guess u could say. And then painted black. Still gotta pop the needle bearings out yet. Here are the pics:
Here's my Gen V again. Did more work to it to better the way it looks. Figures id do that since someone says its a hackjob. Also started polishing it again. Stripped the paint off. Got a little over my head on the whole polishing supercharger thing. My fingers are killing me from all the sanding. lol.
Let me know what u guys think. And just to let u guys know and im not looking for any pity here just letting u guys know what i got to work with here. But anyways i do all this work by myself with one arm. My right arm is paralyzed completely from a bad motocross racing accident. Happened in 2004 when i was 13years old. Again not looking for pity from anyone.
Last edited by bbptech; 12-14-2009 at 02:22 AM.


Not bad man, later pics are lookin pretty good


thank u much man. Gettin better and better as i go. Learning new things as well. Just gotta keep em comin. lol


Looks like you have it down pretty good. Looks good how much are you going to charge to pollish SC?

ive decided to not do the whole polishing thing. Its so hard and a pain. lol.


haha. hey man i just got to far ahead of myself.


Oh i feel ya I just knw how much of a pain it is to do and its messy and time consuming
Im triing to figure out a fool proof method and all the right tools to do it


Fool proof method = send it to reptile.

Or Farns or Josh VandenBerg from ClubGP. Im sendin mine to Josh

| « Previous Thread | Next Thread » |
| Tags for this Thread |