Was just curious, but can you change the colour of the display in the stock GM head unit like you can in the DIC?
|
|

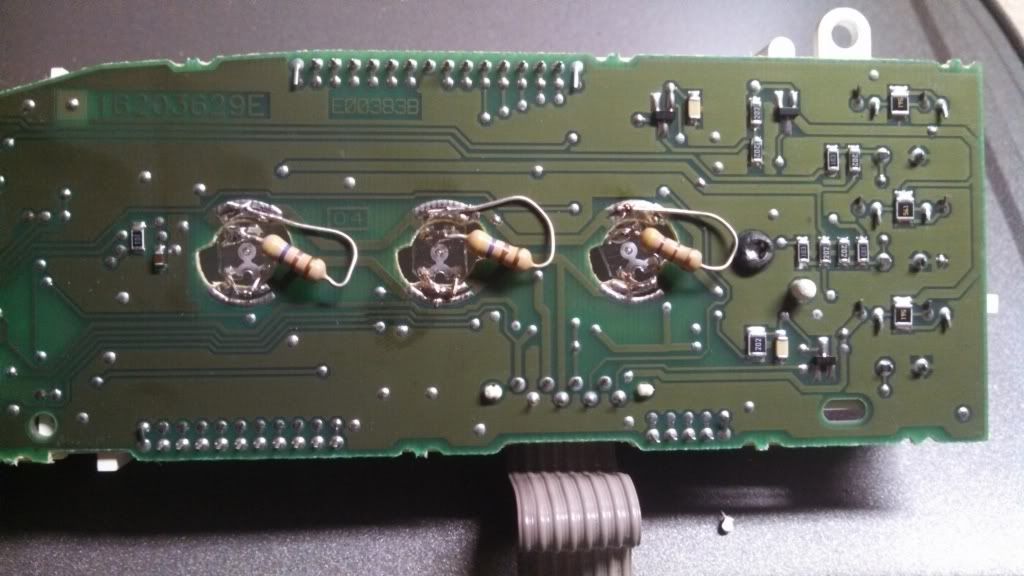
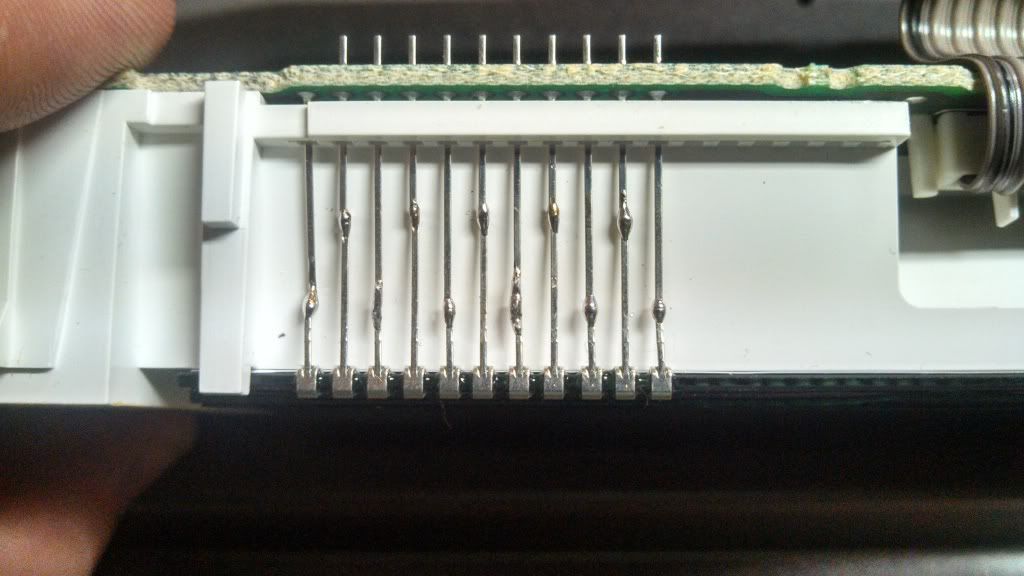
It's exactly the same process. It'll be a few days before I gather the motivation to test for polarity, but I tore into the HU and I am confident this is an easy mid. However, while I'm at it, the buttons are going to be another story.
Sent from my DROID RAZR HD using Tapatalk


Can you please explain how in the hell you got it to blue?!

It's exactly the same process and parts required to do the DIC if you've done that. The contact closest to the screen in negative
Sent from my DROID RAZR HD using Tapatalk


Never done a DIC? Please explain if you have the time? Haha

Both XD I'm not fantastic with these electrical acronyms.

Are you any good with a soldering iron? If you aren't that confident, there are many YouTube instructional videos demonstrating the process. I'll see if I can locate the write-up for the Drive Information Center and post the link. If you can handle that, the Head Unit will be a synch. ...or you could send me your DIC and I could rig it up for a nominal fee. (I've done 6 of them) In my opinion, the DIC is much more of a worth while upgrade than the HU.
Sent from my DROID RAZR HD using Tapatalk


Idk about the DIC, I think I would leave that as is for the moment, I'm just looking for easy and cheap custom touches. If it isn't an inconvenience, that link would help a lot.

I don't mean to thread jack, but the original question has been answered so i don't feel too bad doing this.
There are 36 connections to be soldered in the DIC.
Parts required:
Radio Shack p/n: 276-0023 (3 required)
3 470 Ohm 1/2 A resistors; also handy at the rat shack.
Disassemble the DIC ....
I didn't plan on redoing a write-up so I don't have much for pictures. Just tear it apart and take a look at the pictures.

You will find a red film behind the display screen. Peel it off and use it as a template to cut a new light diffuser. I used an Avery weatherproof shipping label stuck to a ziplock bag. I had the labels handy for labeling my homemade wine. I'm sure there are other suitable alternatives.
Once that is taken care of, reassemble and use your soldering skills to secure everything back together. I make sure to test all of my connections for continuity.
Sent from my DROID RAZR HD using Tapatalk


Just start testing your radio apart and you'll see where the light is located. Use the pictures I posted above. You will only need one LED and one resistor, again, the ones I mentioned above.
Sent from my DROID RAZR HD using Tapatalk


The face of the HU is held on by plastic tabs. Just push in on the tabs and pull out on the plastic. Work your way around the perimeter of the face. You should be able to see how it comes apart from there. There are 6 small hex head screws that need to be removed once the face is separated from the metal case. I don't have a precision socket driver set so I used a needle nose pliers and that seemed to work alright.
There will be a separate circuit board for the display. This board is just clipped on the the reflector bowl. You will see what I mean once you get in there. You must unclip this board from the larger board. Twist out the factory bulb and holder. This might require a pliers.
From there, solder in your LED and resistor. I also used a piece of small diameter solid wire to get a better position with the LED. See the above pictures.
Leave the red film in the factory position until you are satisfied with the position of the LED just as a precaution the protect the display.
Sent from my DROID RAZR HD using Tapatalk


Ok, cool. I'll keep you updated on progress, and I'll try to get to this this week!

I'm tempted to use this same idea to replace all the LEDs behind the climate control cluster.I don't know about 97-03, but the 04+ constantly burn out. Maybe it's just broken solder joints since it's been so cold. Not sure if I should experiment with LEDs though or just use stock incandecant bulbs.
| « Previous Thread | Next Thread » |
| Tags for this Thread |