A few threads have had questions pertaining to the proper order of install for the associated parts with the differential. These steps apply to 98+ 4T60E/4T65E transmissions though 97 and earlier models are the same with the exception of the snap ring on the output shaft where it goes into the diff is a different style. These are assembly pics starting with the parts removed showing the order things go together and in which direction though I did add a pic of where to use a chisel in the center of the diff for removal. Enjoy!
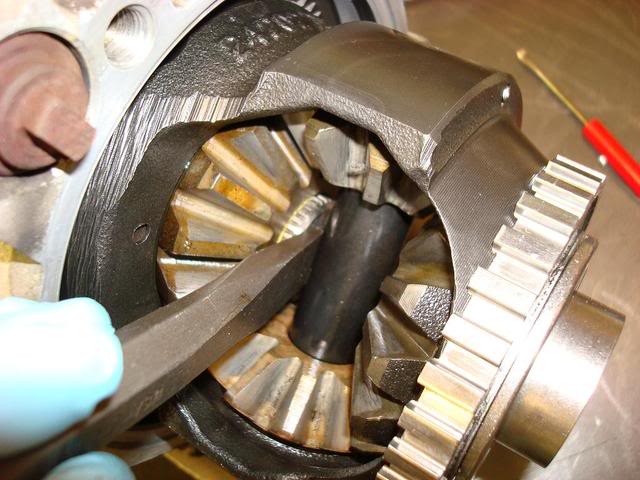
Pic#1 - Here is a pic for disassembly reference for 98+ models. You will need to use a wedge shaped chisel and a hammer to crack it lose. This is required to unseat the snapring on the end to allow the diff to pull/slide off of the output shaft.
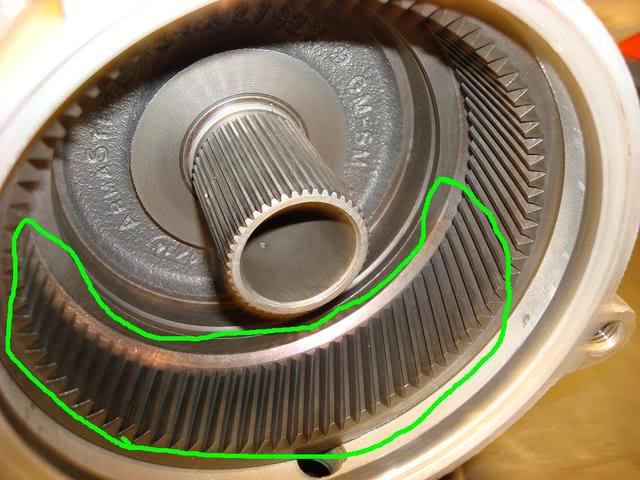
Pic#2 - This is a pic of the internal ring gear for the final drive/differential and the teeth MUST be in excellent condition!!! NO chips or nicks allowed here as damage to a new diff will occur!
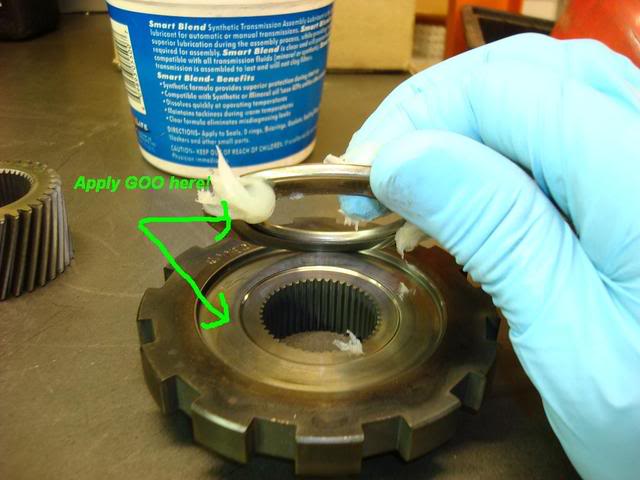
Pic#3 - IMPORTANT STEP!!! DO NOT SKIP!!! You MUST put some type of assembly lube on the bearing to hold it to the park gear. If the bearing falls out of place OR you didn't take this gear out and don't know the bearing fell and try to bolt the diff housing back down it can BREAK because it is sticking out too far and the weak aluminum ears for the bolt holes on the housing will snap off! Make sure you put the bearing on the gear in the correct direction, larger-outer side surface goes towards park gear, smaller-inner race goes against internal ring gear-trans side!
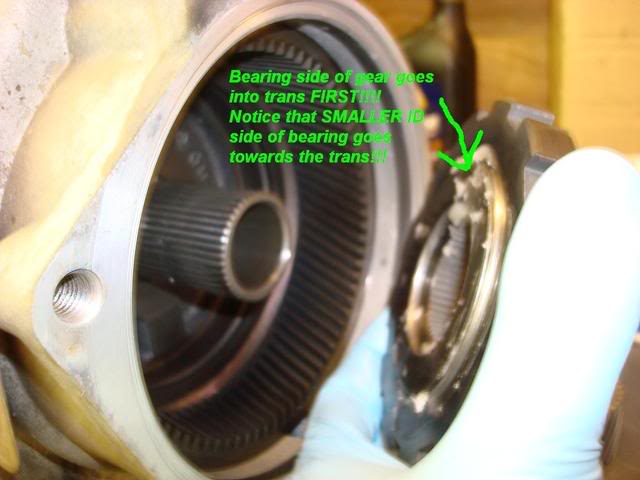
Pic#4 - Proper direction for park gear to be installed into trans
Pic#5 - View of installed park gear
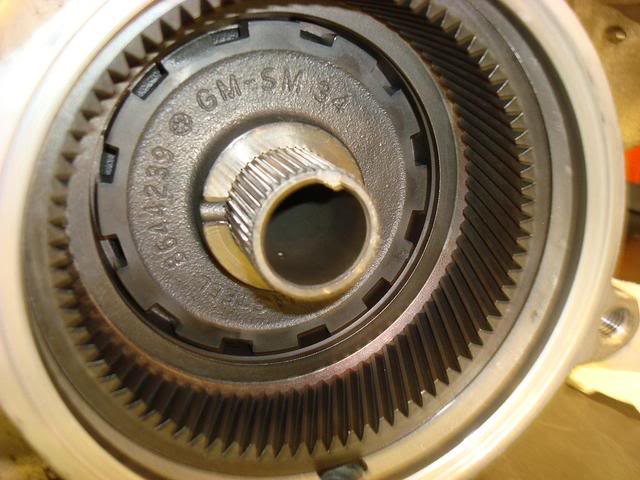
Pic#6 - Proper install direction for final drive sun gear. Recessed end goes TOWARDS transmission against park gear!
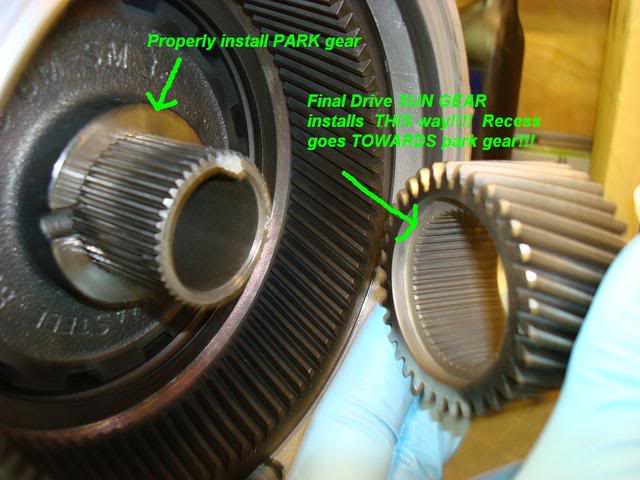
Pic#7 - View of installed sun gear
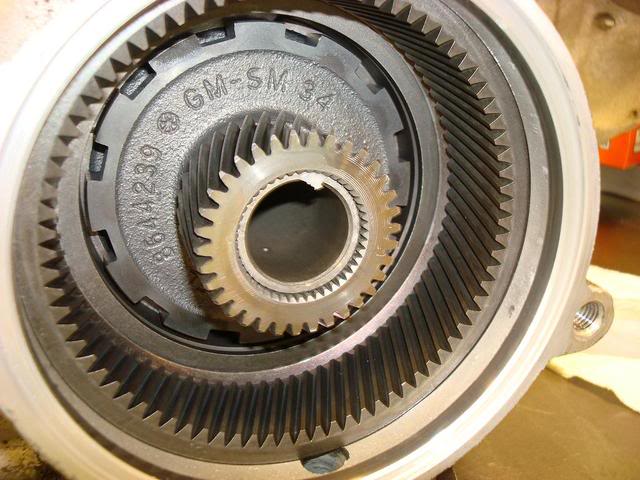
Pic#8 - Correct DRIVERS side output shaft install
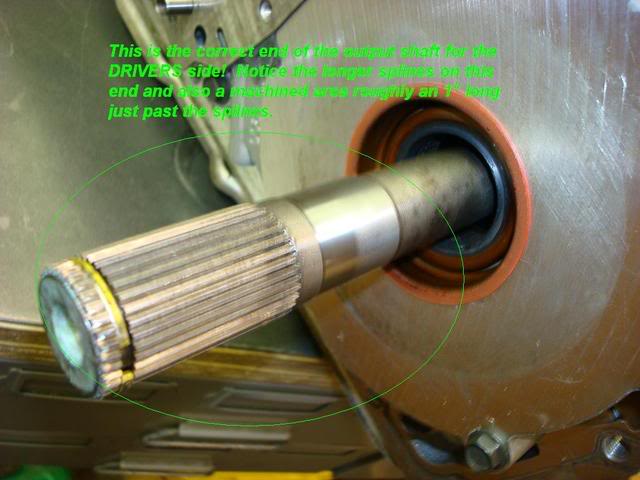
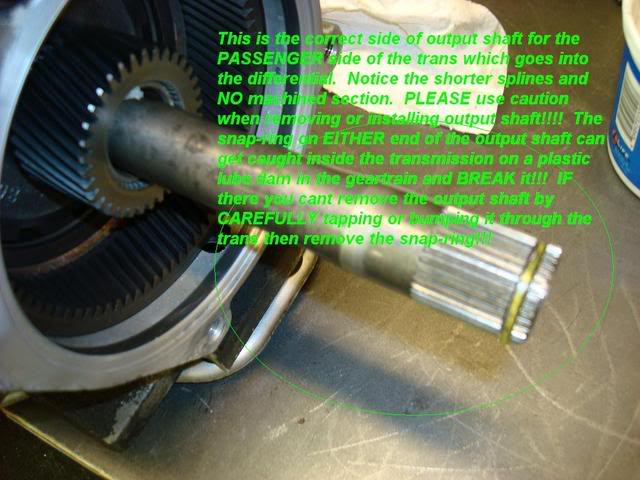
Pic#9 - Correct PASSENGER side output shaft install
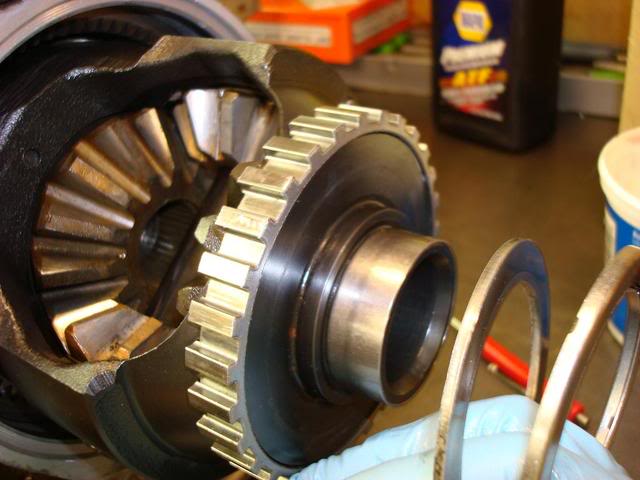
Pic#10 - Diff installed into transmission. Sometimes this can take a little wiggling and spinning to get it seating all the way as the gears all need to line up properly for it to fall into place. Notice the order on the housing end of the diff.... Shim first, then bearing with the ID of the bearing towards the differential
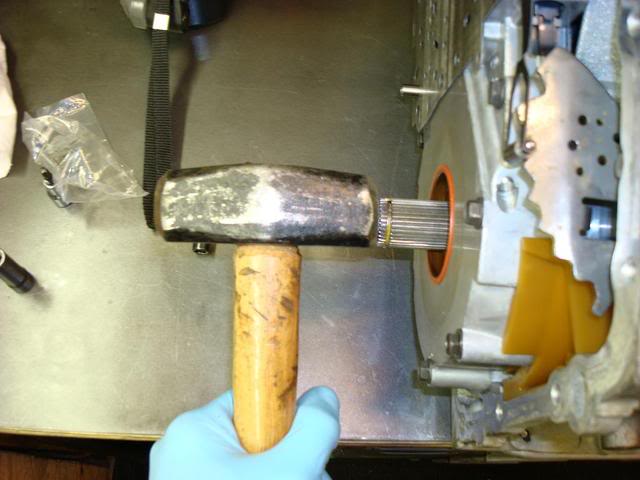
Pic#11 - Use a hammer to give the output shaft a good sharp tap to seat it into the diff (98+ models only!) If you are doing this IN the car then you will need to hold the drivers side CV tightly into the trans and tap the diff into the shaft while keeping the gears lined up. This is sorta hard to explain without pics or without you laying under the car to understand what I am referring to and I dont have pics of that in this thread.
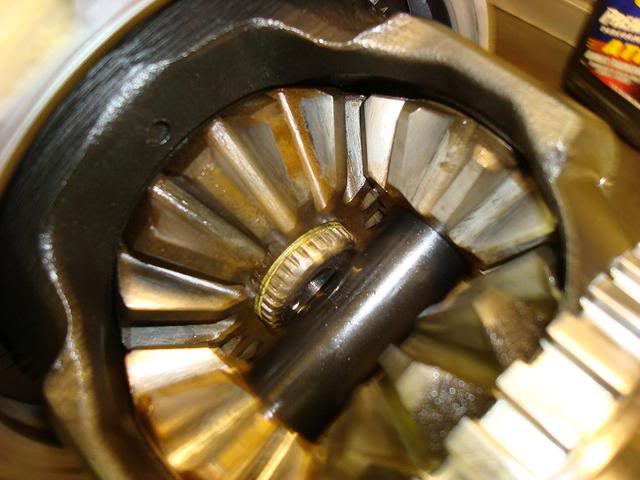
Pic#12 - View of properly seated output shaft in the differential. Notice the snap ring is visible sticking roughly half way out of the gear.
At this point you are ready to put the diff cover/ housing back on the tail end of the transmission and if doing this in the car you are ready to reassemble all other parts on the outside of the trans. I hope these pics and info help out! If anyone has any questions or want me to add more to this please let me know
Dave


