Thread: How-To Retro-fit 04-08 Headlights

Page 1 of 4 123 ... LastLast
Results 1 to 20 of 74
  1. #1 How-To Retro-fit 04-08 Headlights 
    #Billsnamechangessuck MrPoopyButthole's Avatar
    Join Date
    Jul 2009
    Location
    127.0.0.1
    Posts
    15,112
    Thanks (Received)
    1
    Likes (Received)
    0
    Dislikes (Received)
    0
    Retrofit for 04-08

    I am writing this how to has a guide to help others who want to retrofit, this is one way to do it and there are many other ways to do it. I don't like lining up the lights to use bolts and what not so I choose to use JB stick weld. This is a proven way to work for our lights.

    What you need:
    -Headlights (Ebay aftermarkets are only $86)
    -Morimoto D2s or H1 projectors (TRS)
    -Shrouds with inner ring clip (TRS)
    -Dremel with assortment of bits
    -90mm Rubber caps (TRS)
    -Waterproof Silicon (Lowes)
    -Rubber butyl (TRS)
    -Screwdrivers
    -Gloves
    -Black paint (anypaint is fine)
    -2 sticks of JB weld

    Remove the Rubber seal around the headlight, remove all bulbs and wires
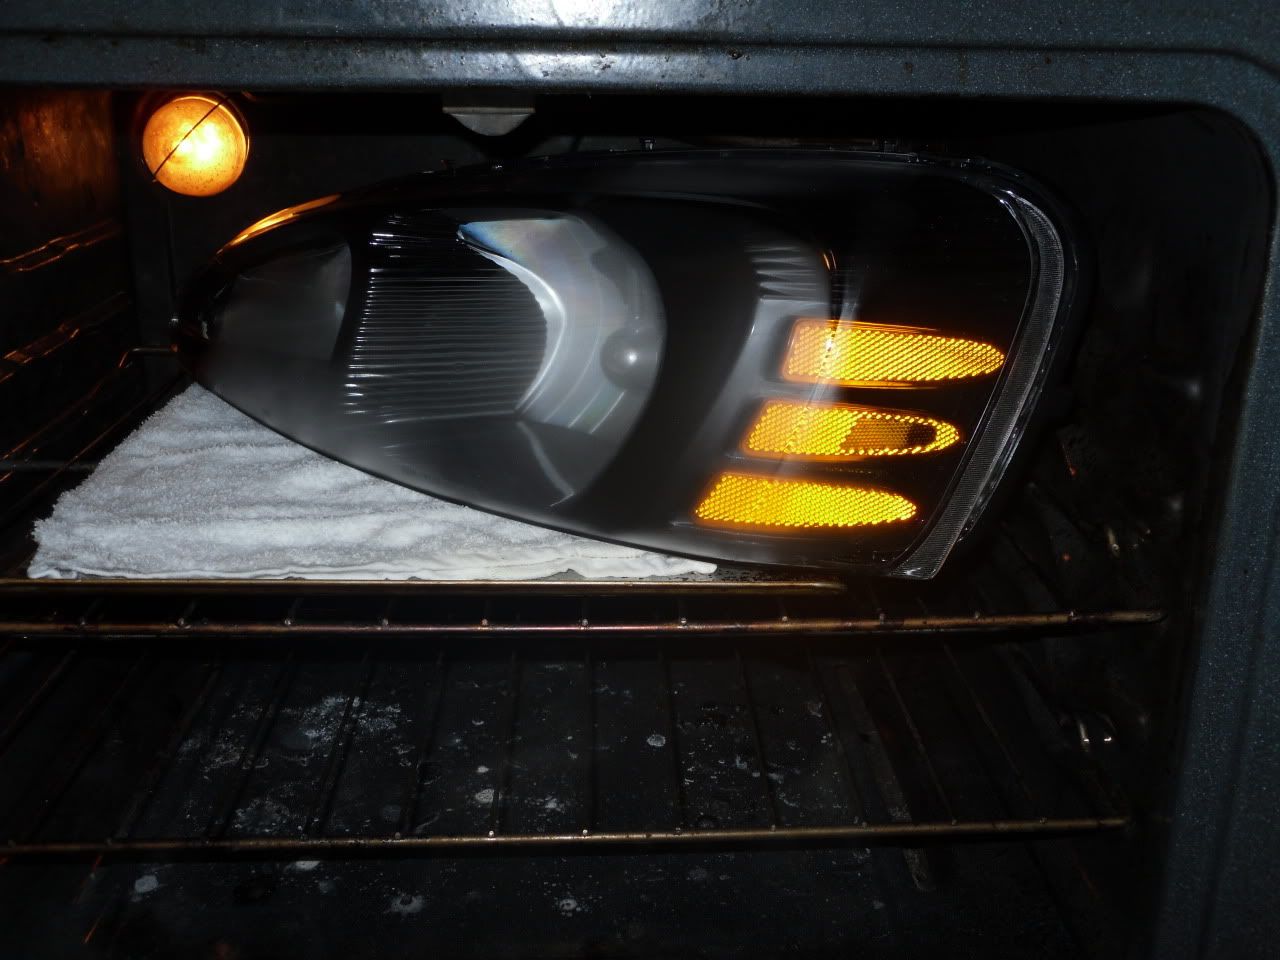
    Stick it in the Oven and bake some headlights for dinner (15-20 mins at 220* should do it)


    Once its done use gloves to remove from the Oven it will be hot!

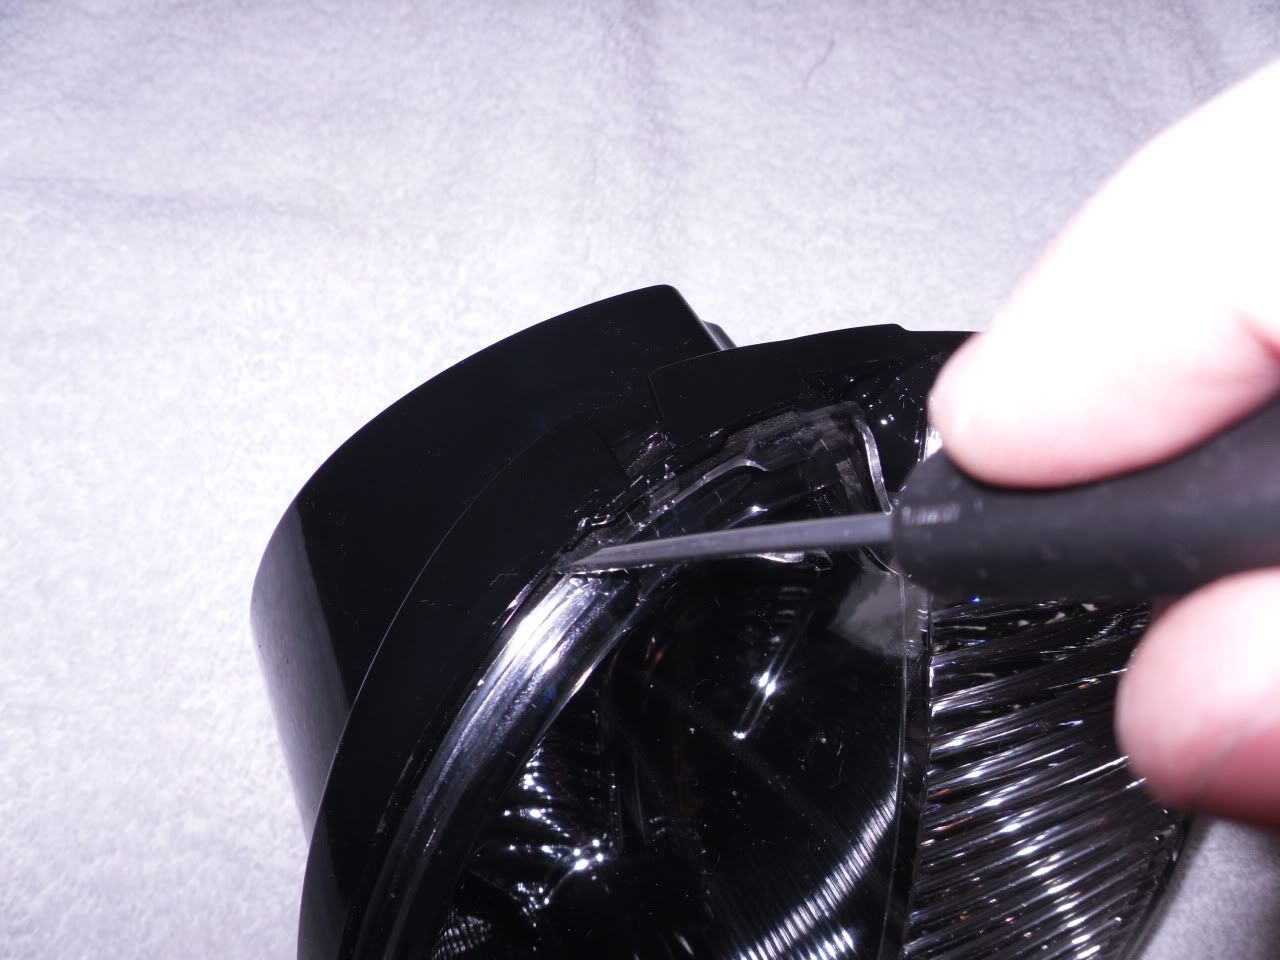
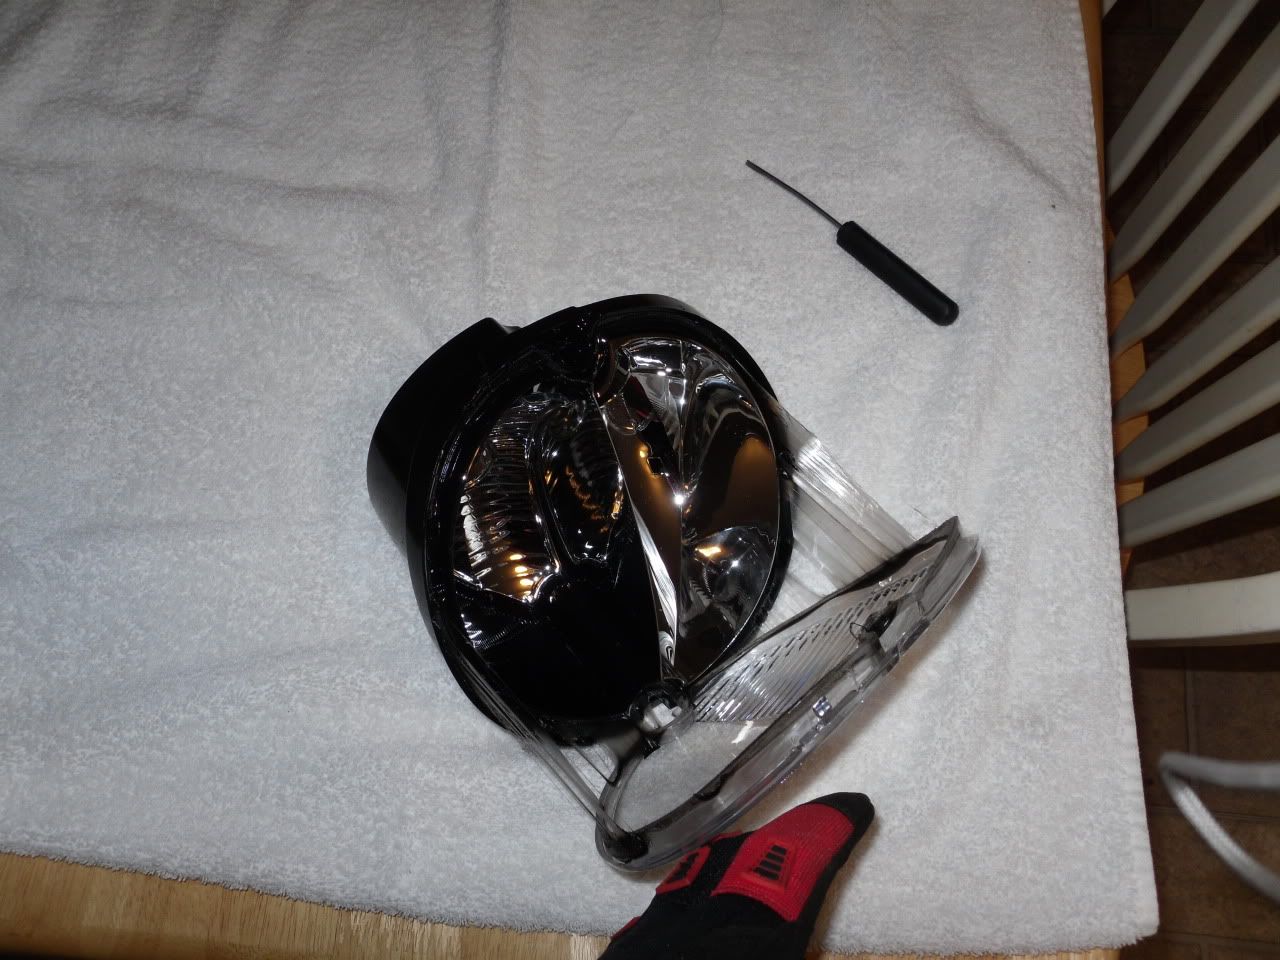
    Lay headlight on towel on table, use flathead screwdriver and work a tab and get behind the lens, I work from the point of the light (high beam corner) and just work back, eventually with gloved hands you will be able to just pry apart with a bit of force. Use a knife to cut stringy glue to try and keep it from getting everywhere.
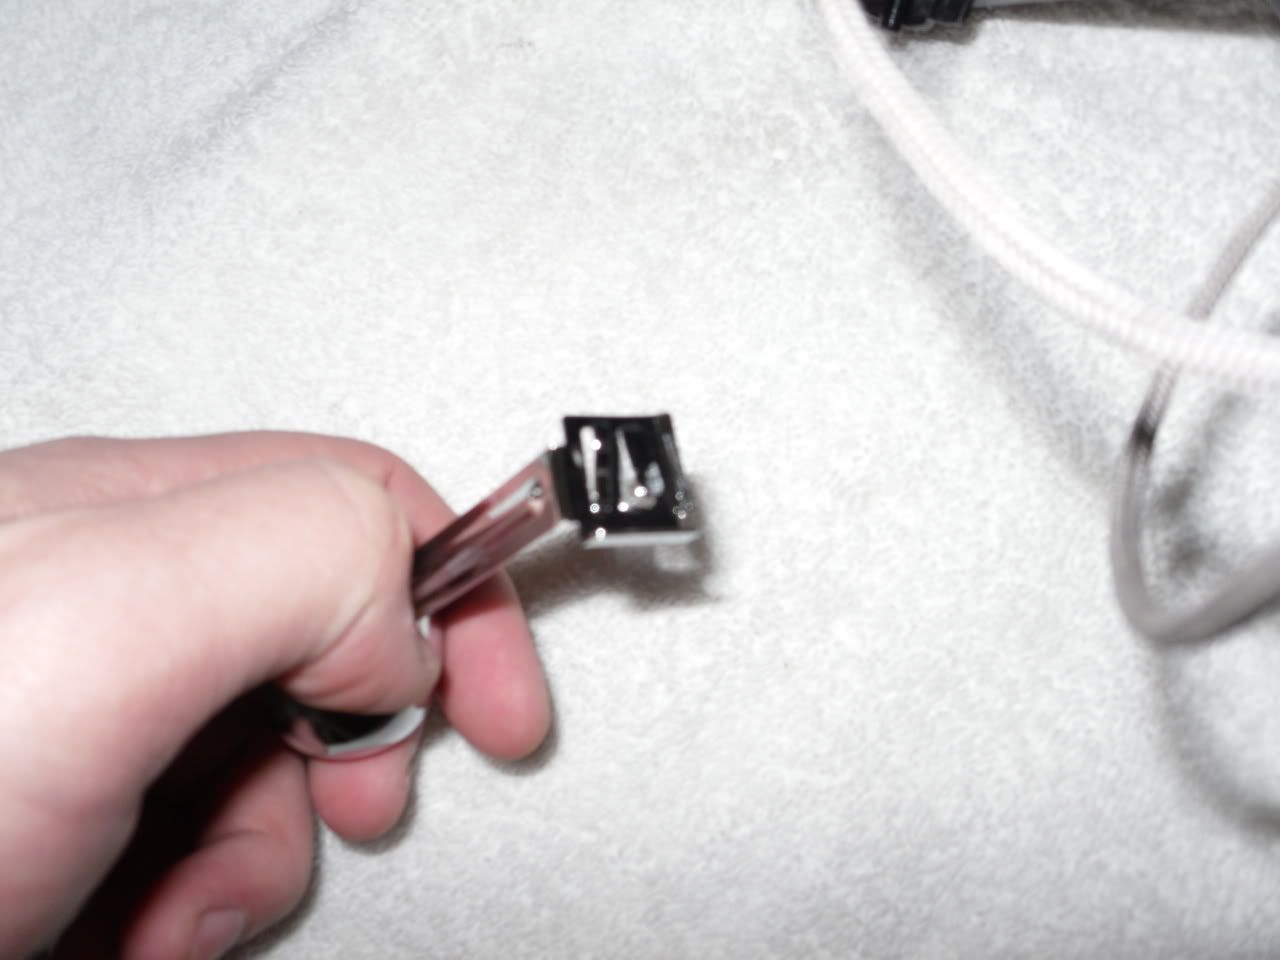
    (using foglight for example sorry, Headlight I can crack in about 30 seconds so I could really grab a picture)


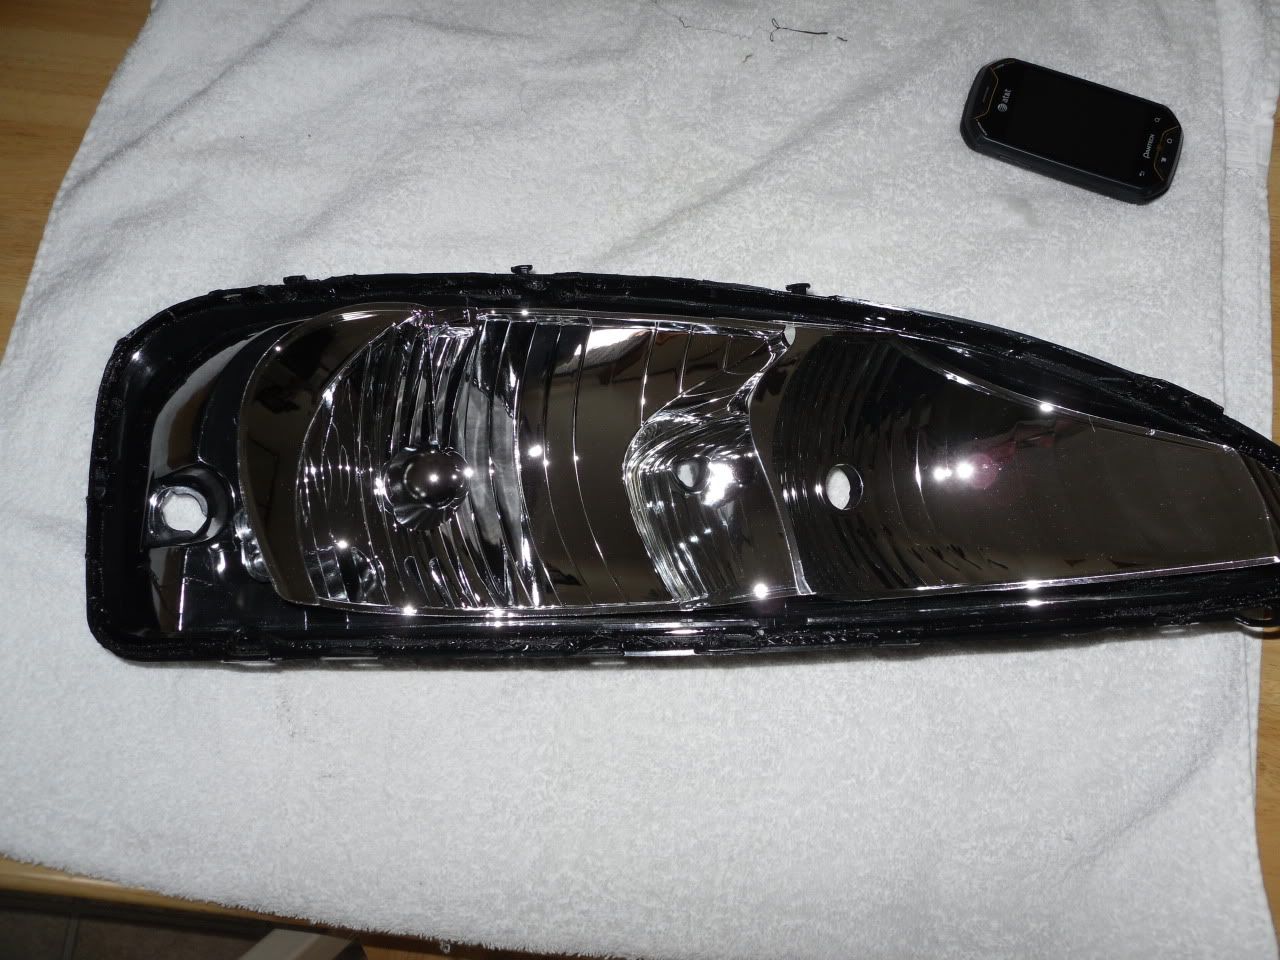
    Seperate everything, base of headlight, inner plastic and outer lens. Try not to stick your fingers on the inside of the lens, its a pain to clean later.


    On a towel lay the headlight out and remove the reflector shield


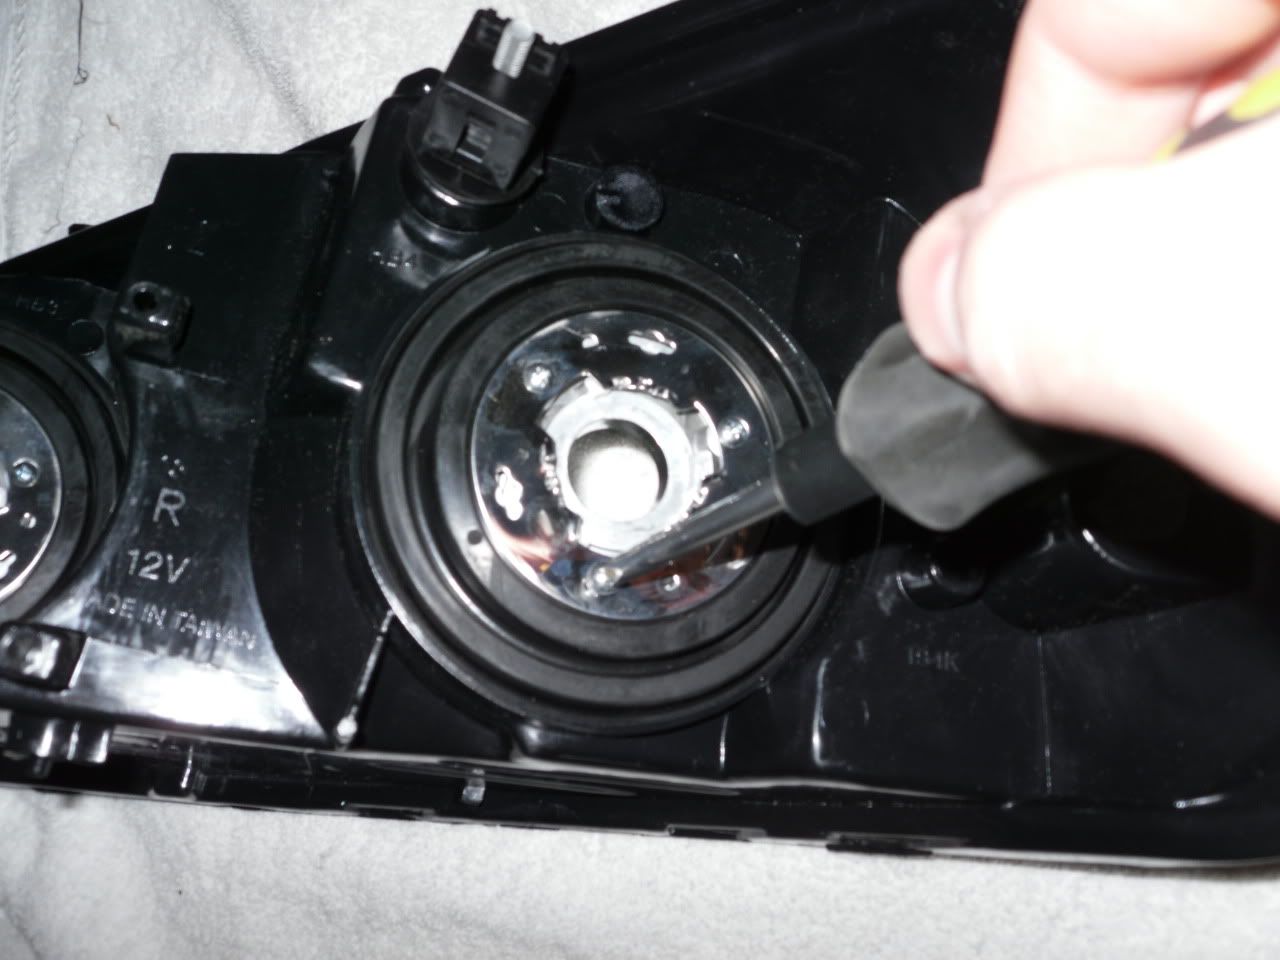
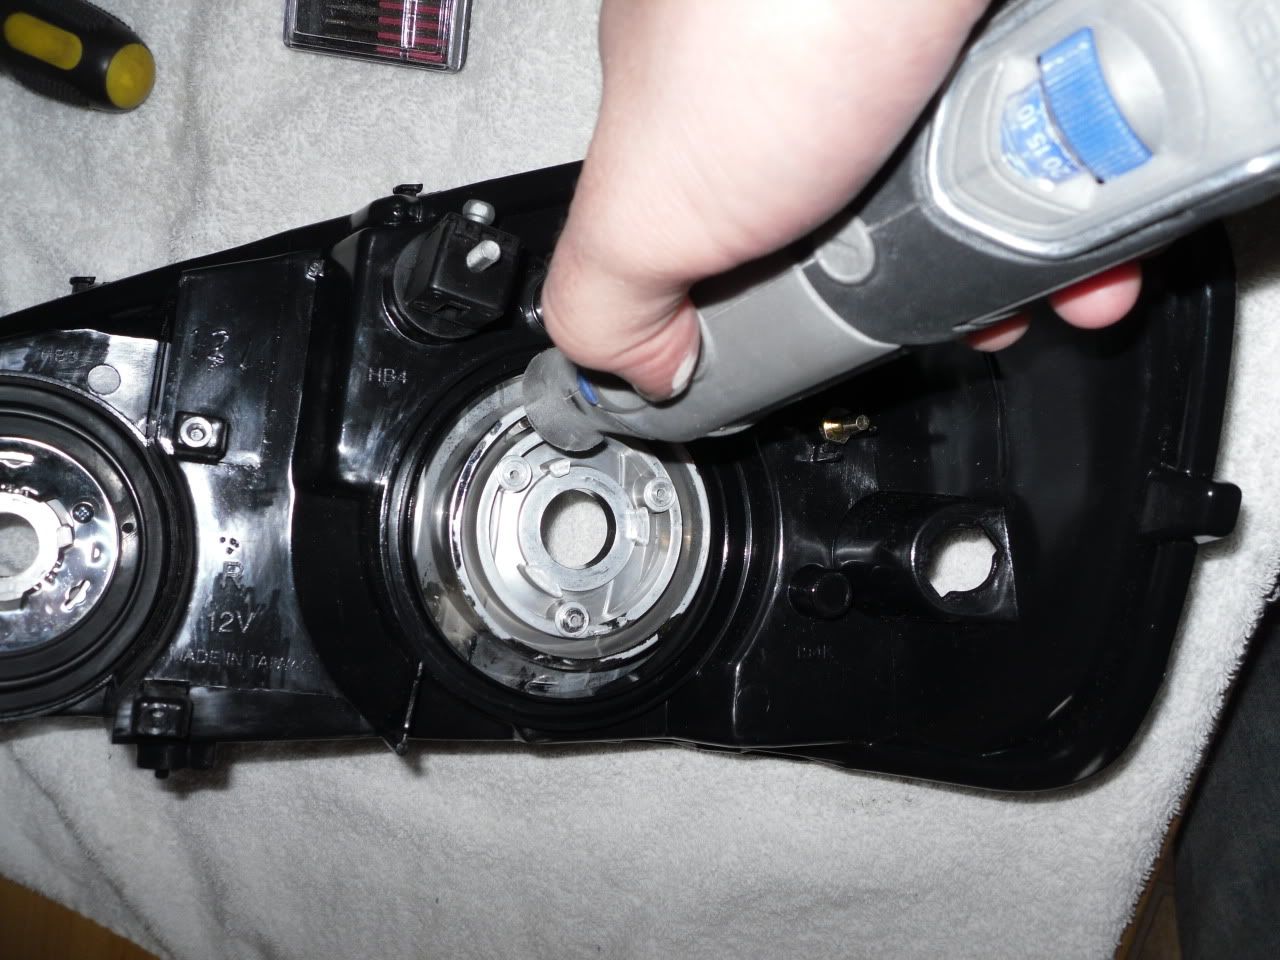
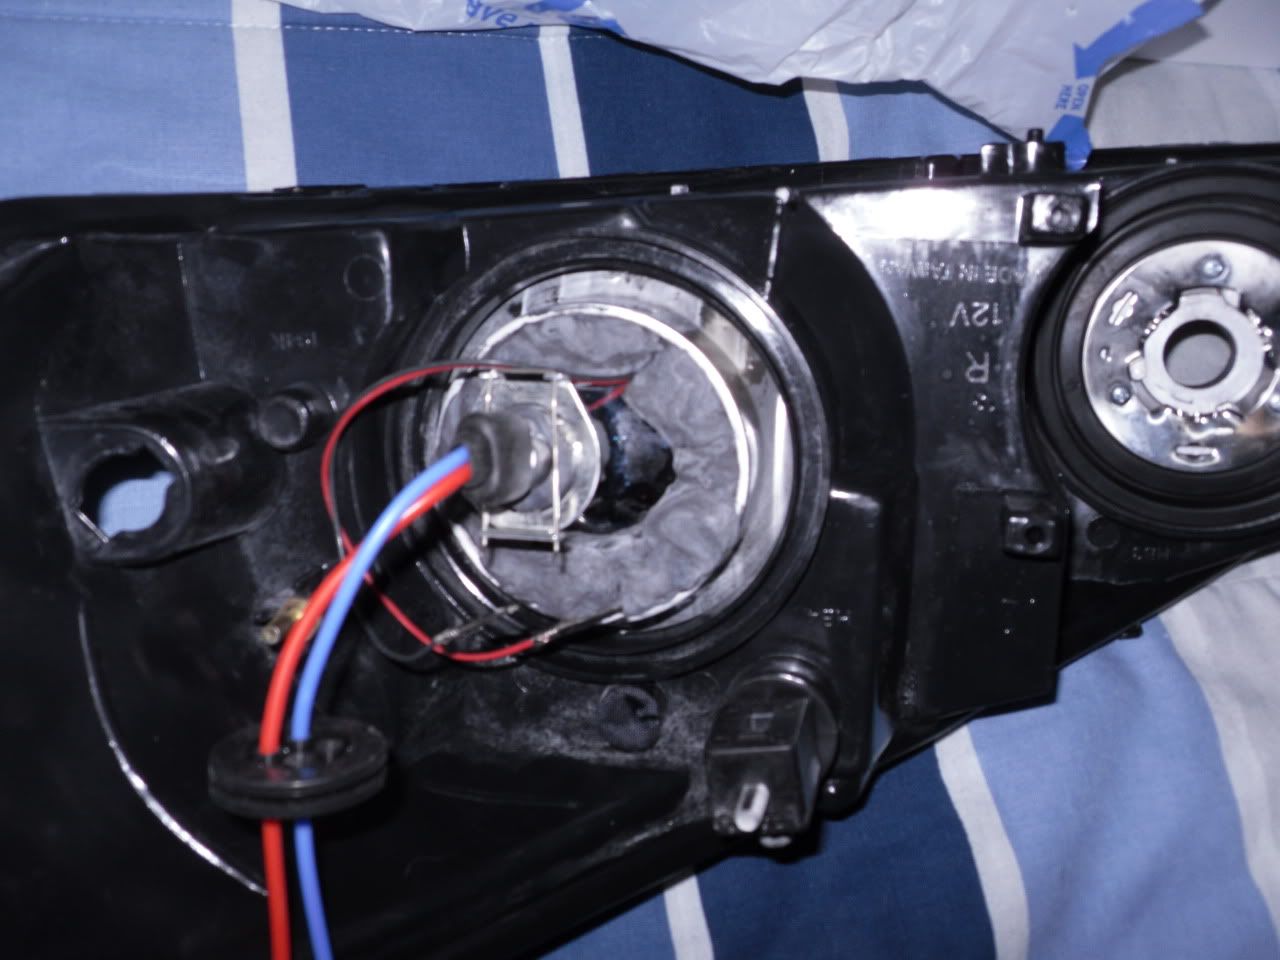
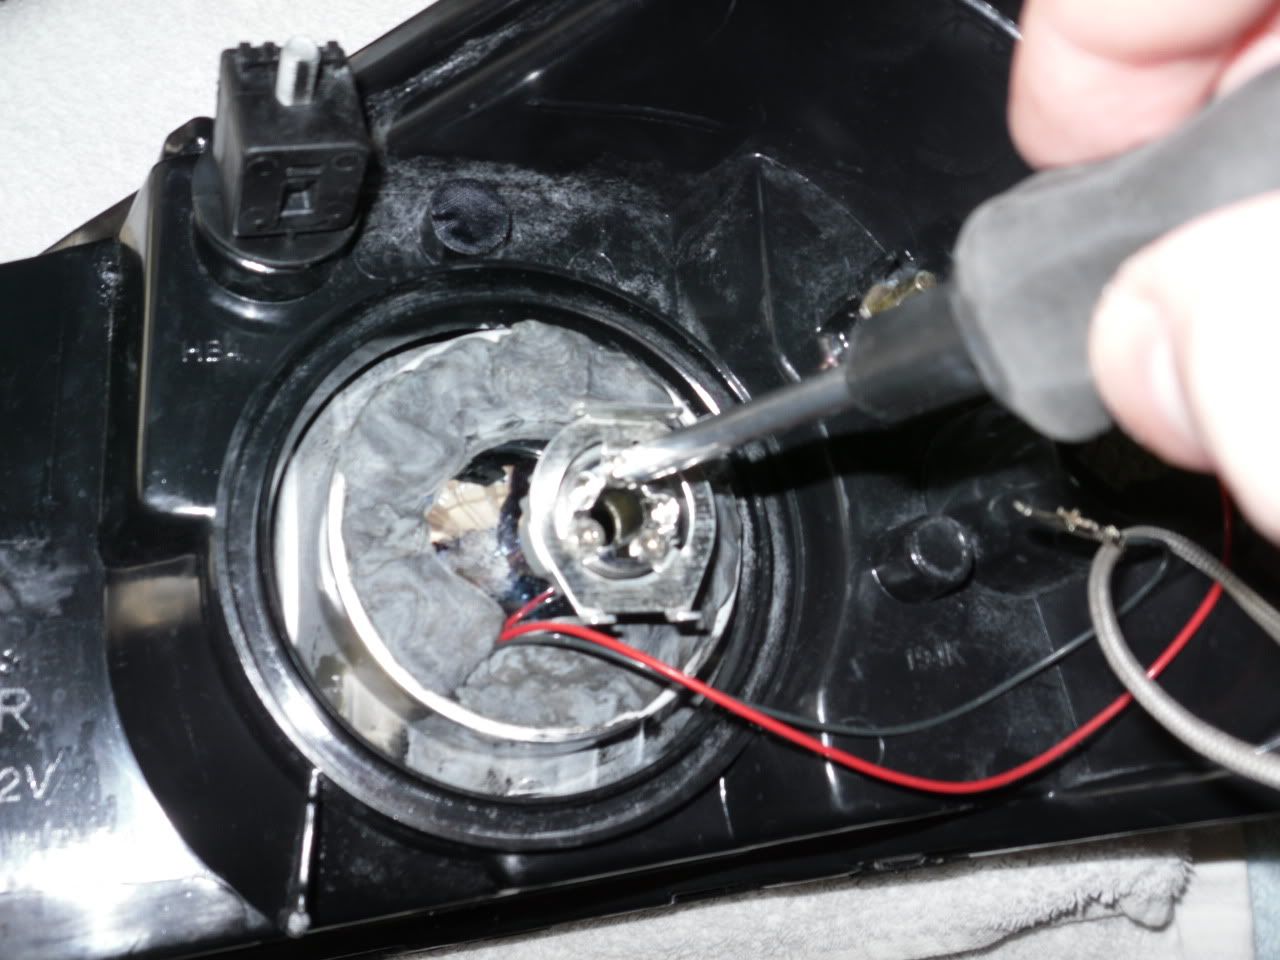
    In the back remove the screws and rubber gasket


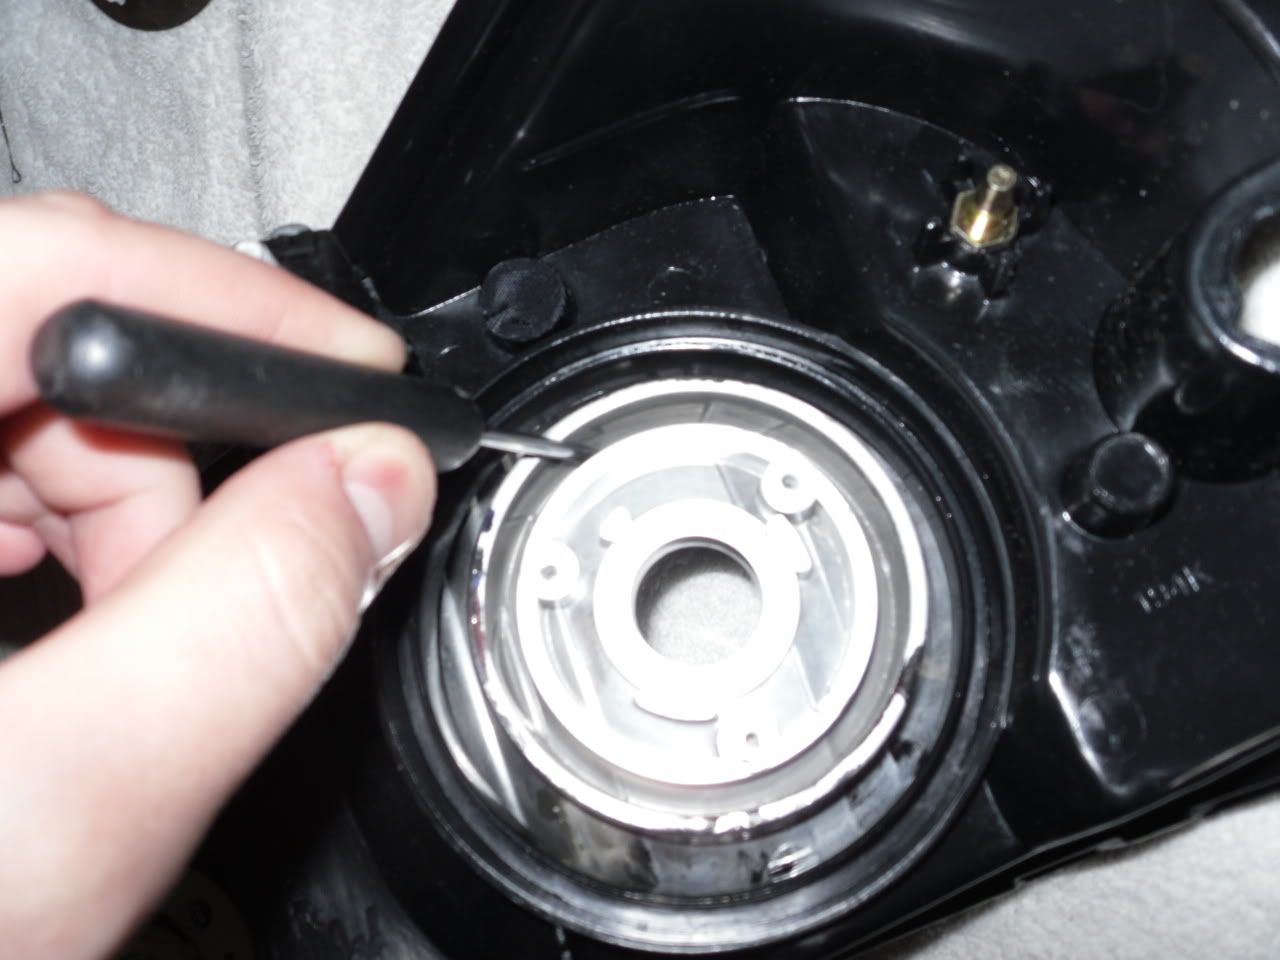
    This ring I'm point at is where we cut to make room.


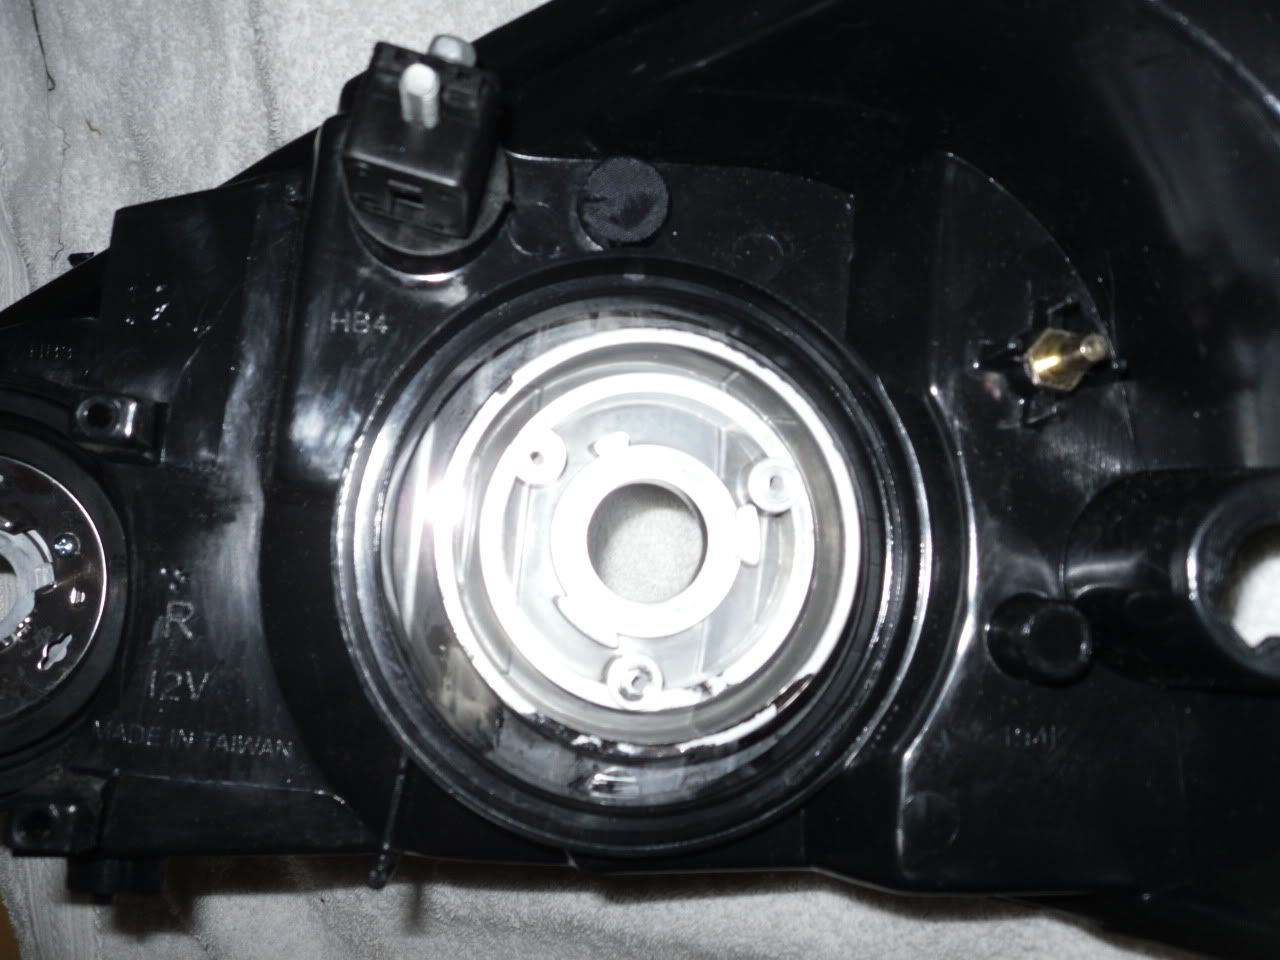
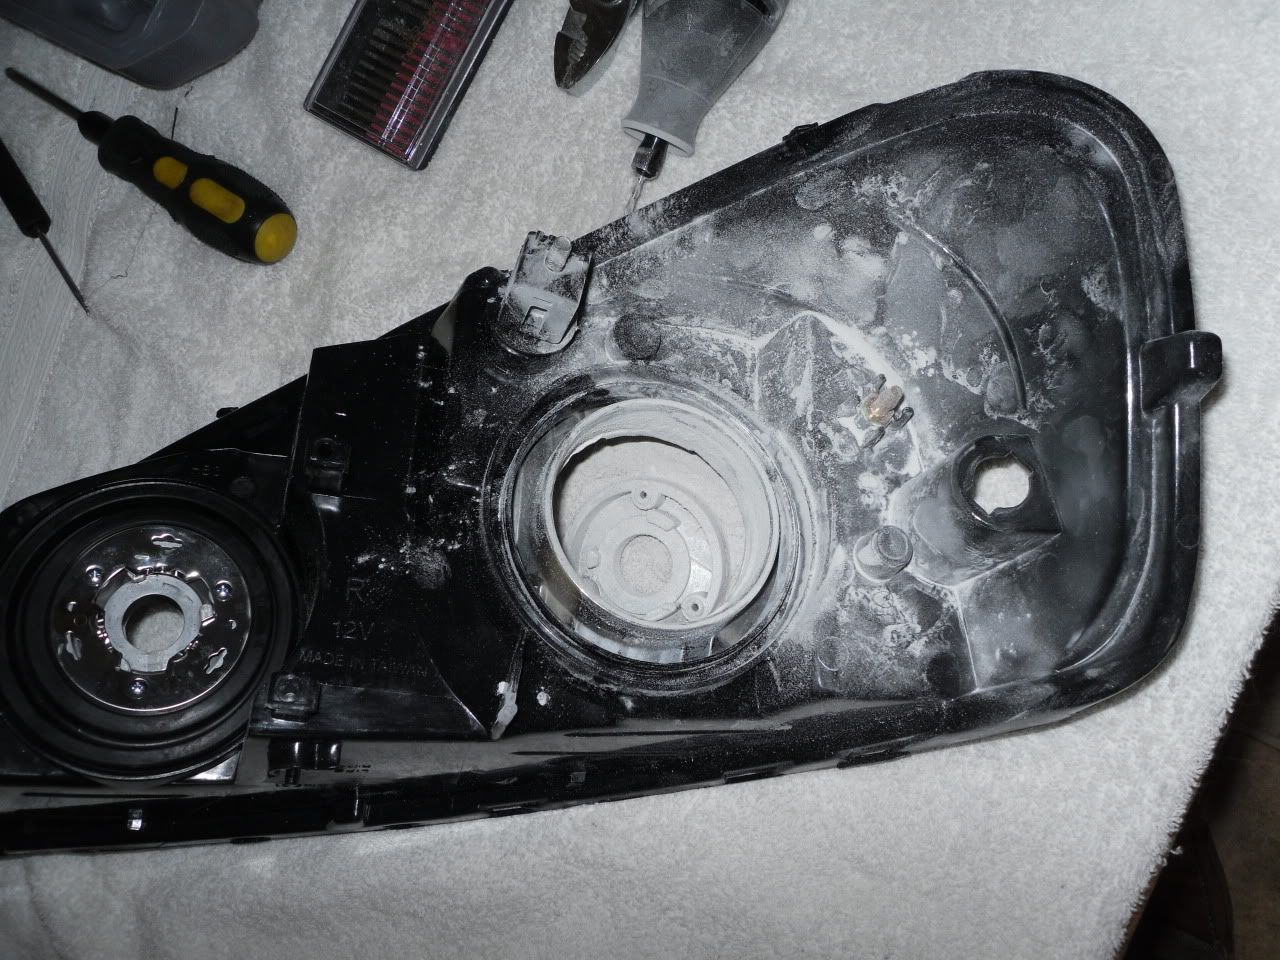
    It gets really dusty and messy that is why the towel is good, when you are down you can just shake it out.


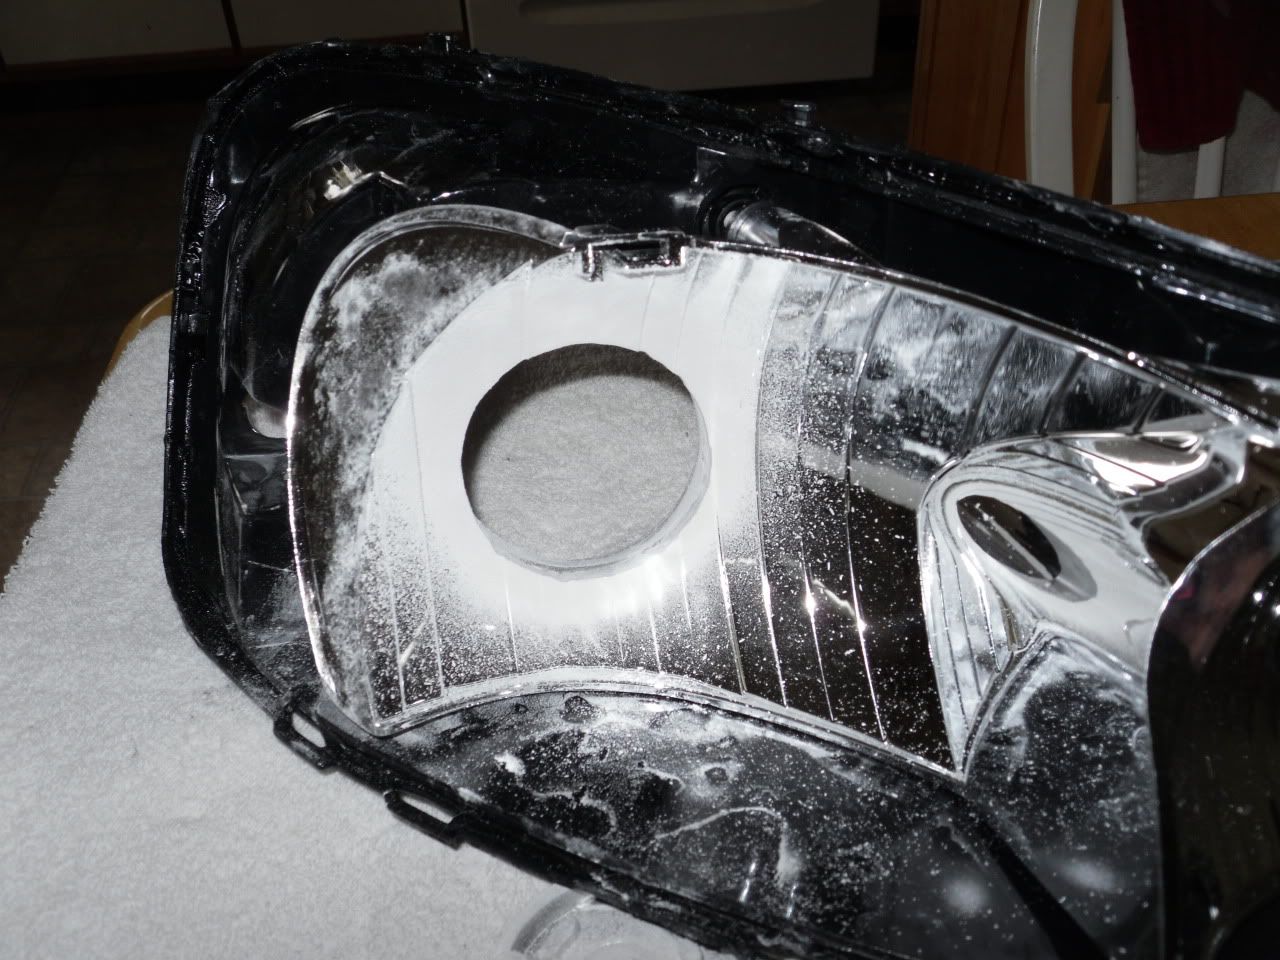
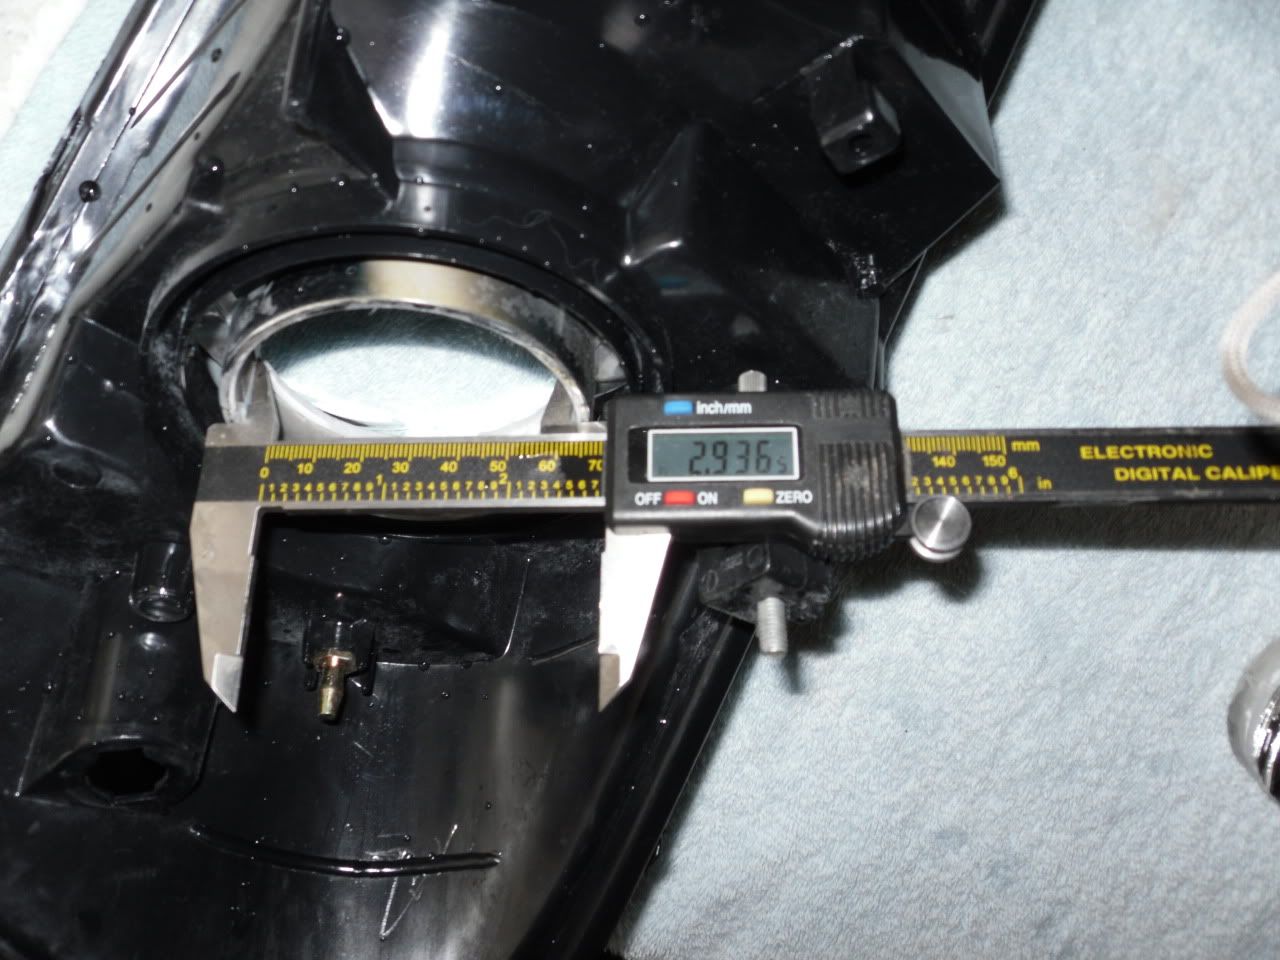
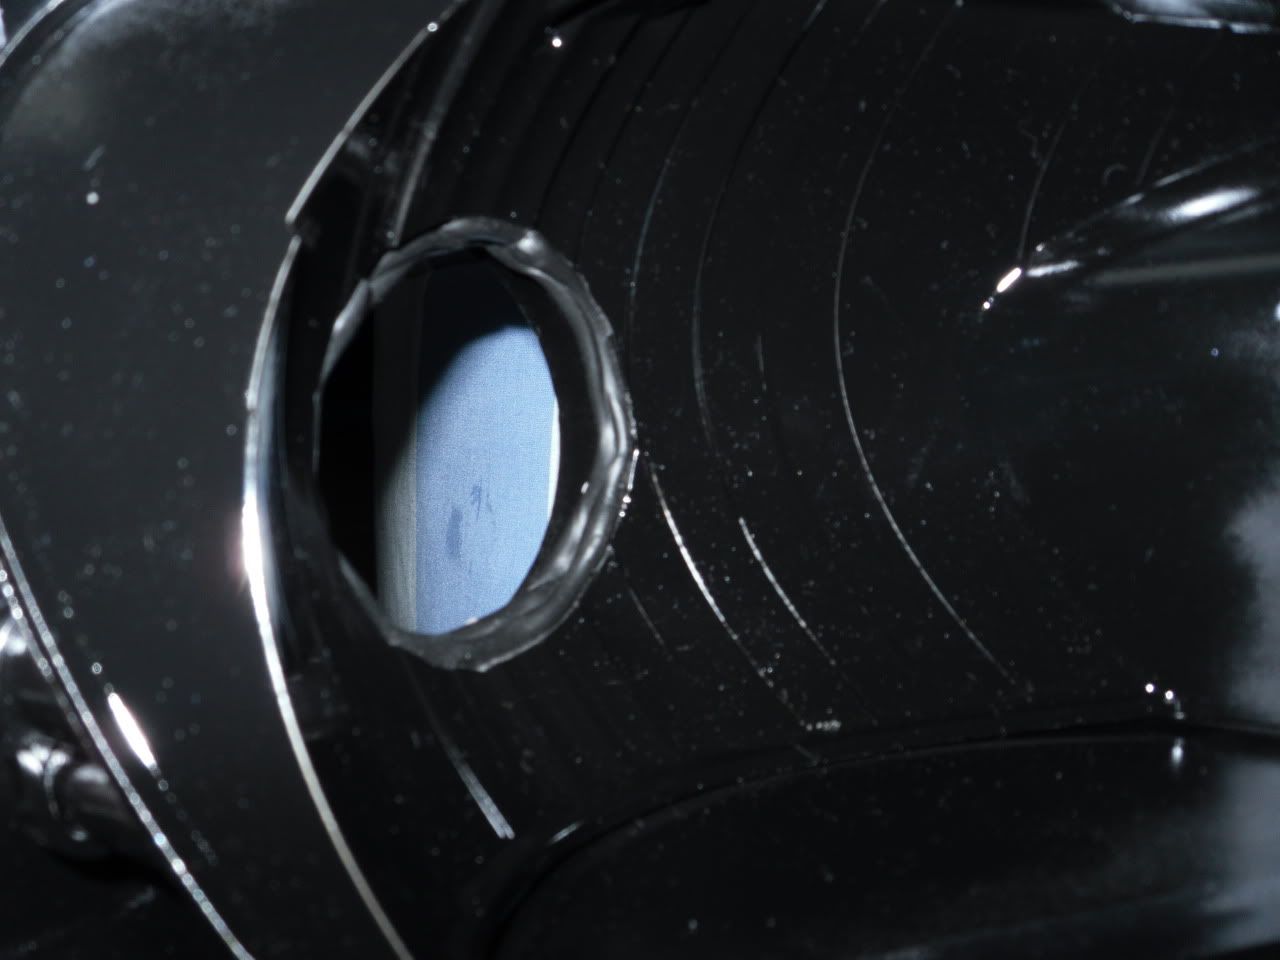
    This is how big the hole comes out to be


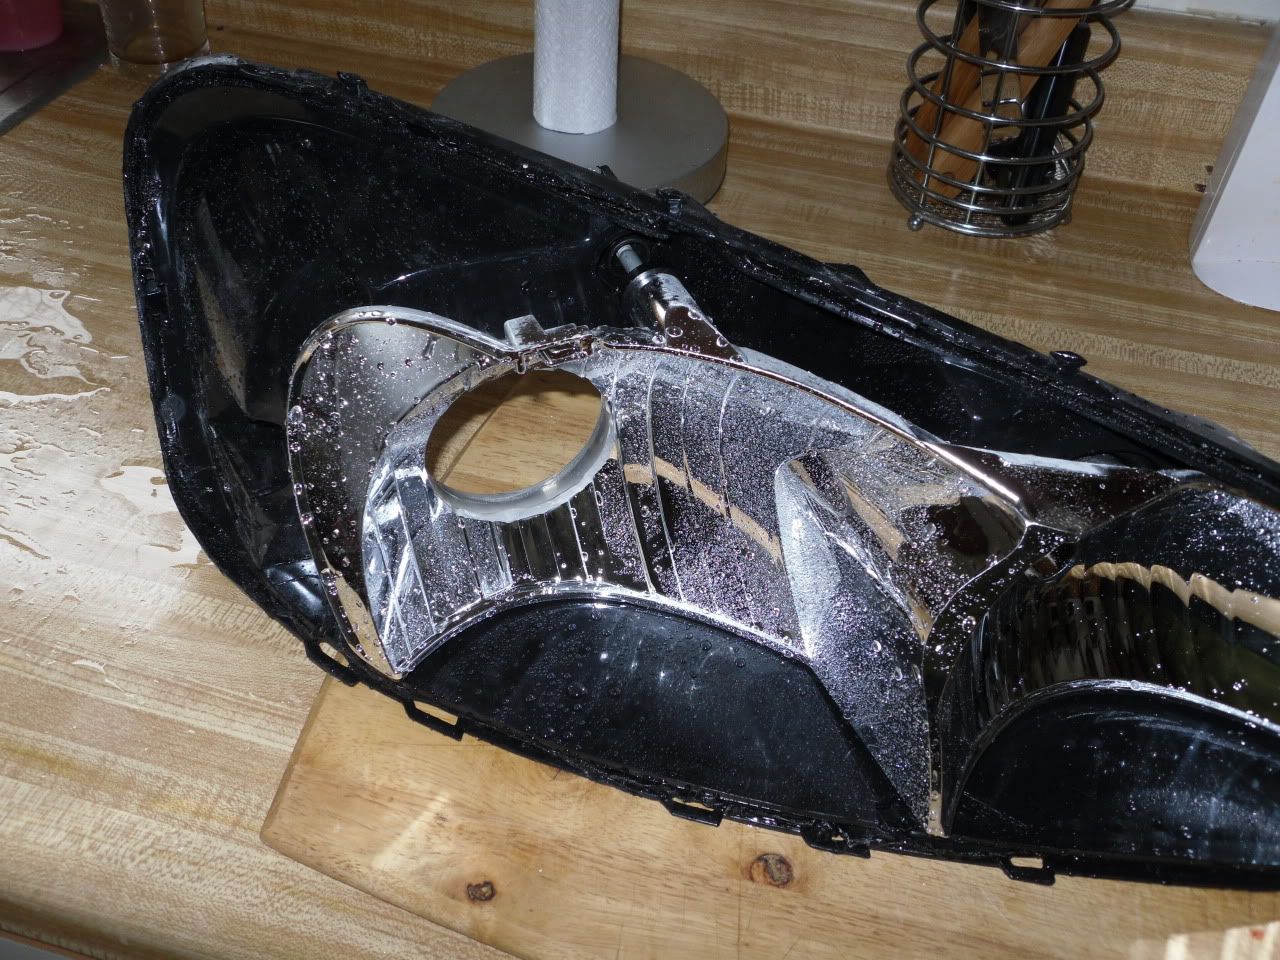
    Now we need to clean it up, I actually stick it in the sink and wash it and then blow it dry, you want to get all of the water out and make it as perfectly dry as possible. If you have to, let it sit out over night and air dry.


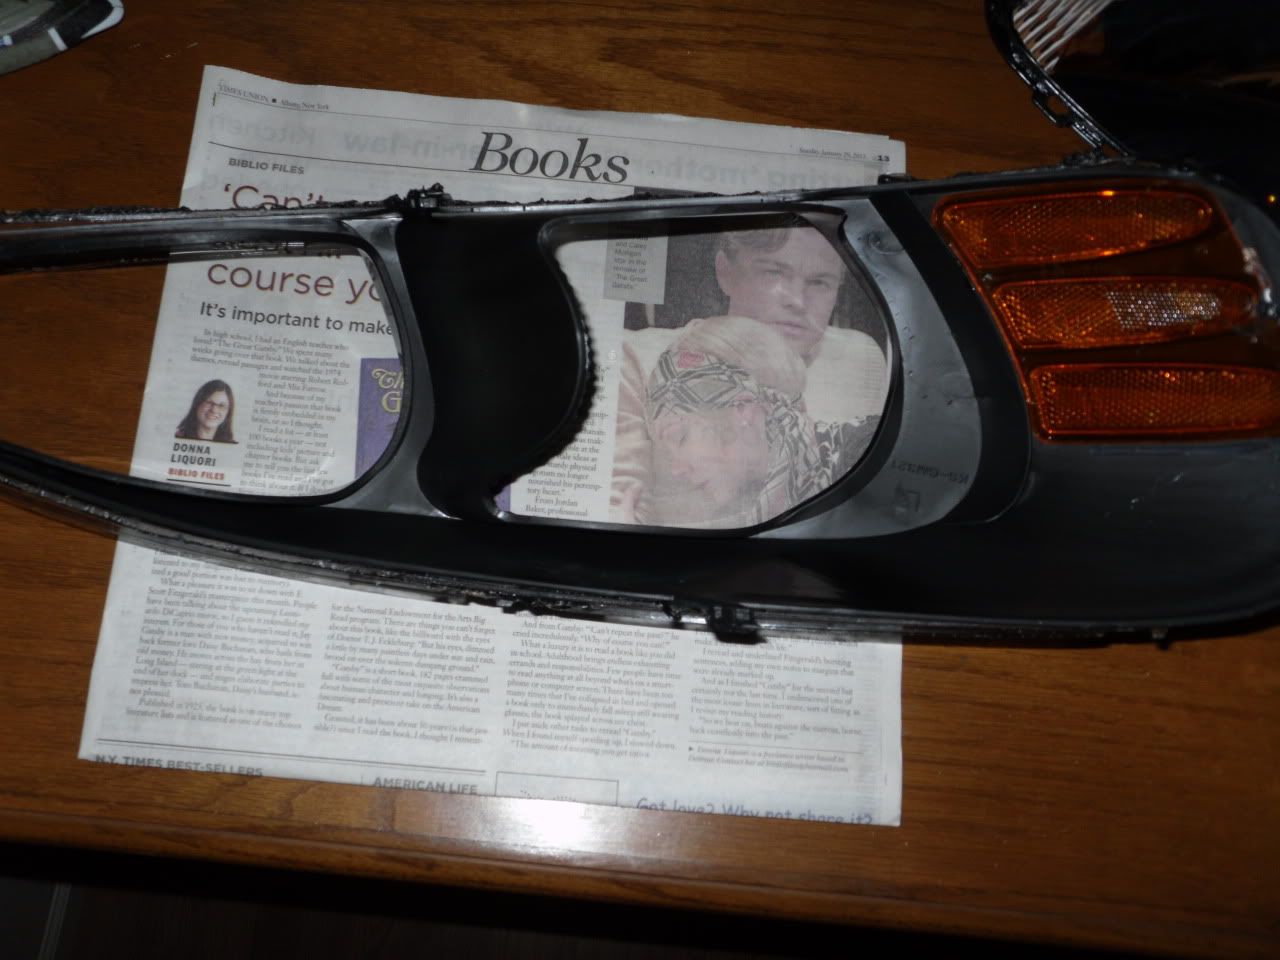
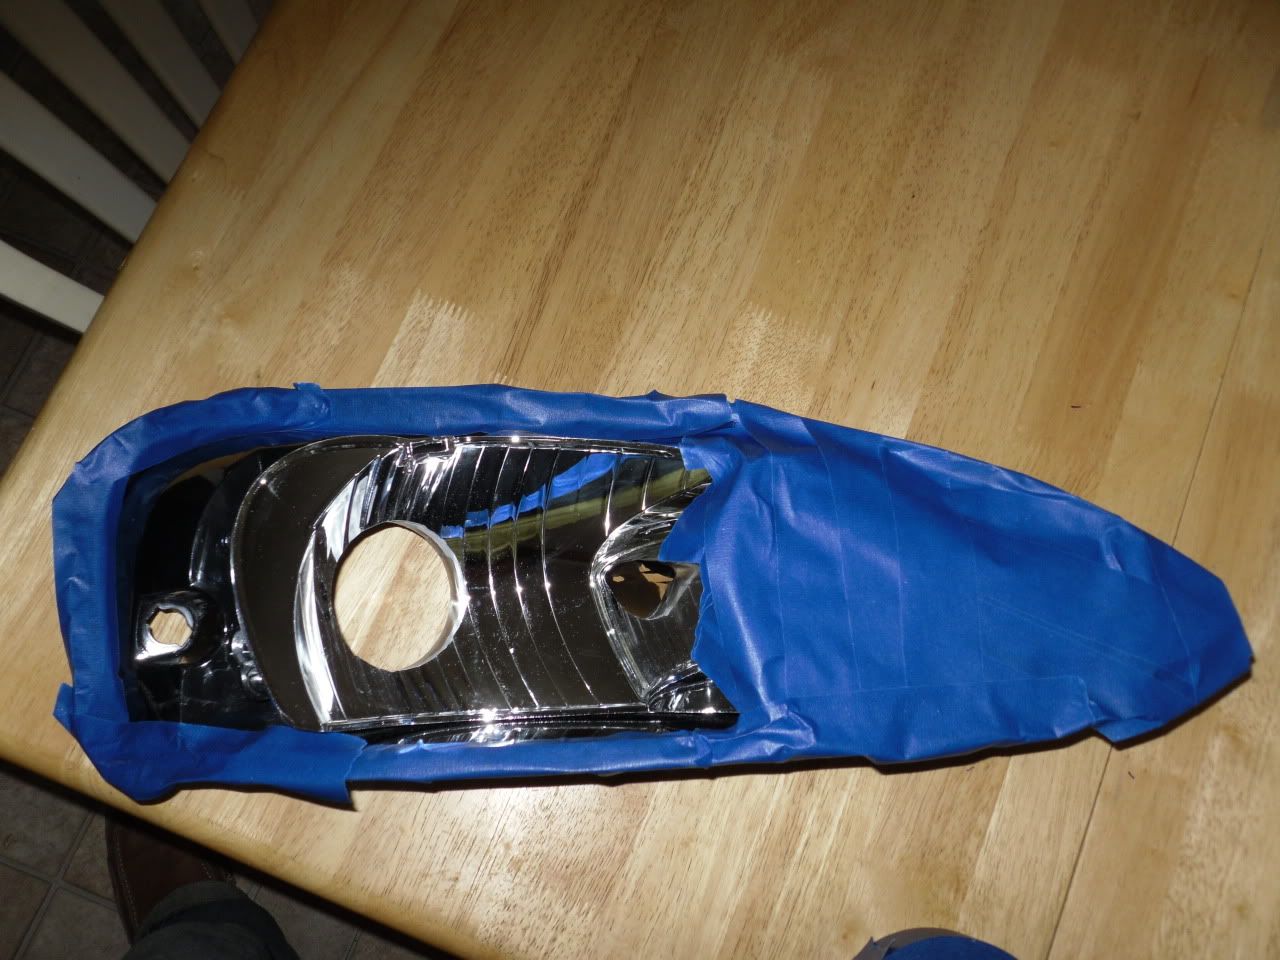
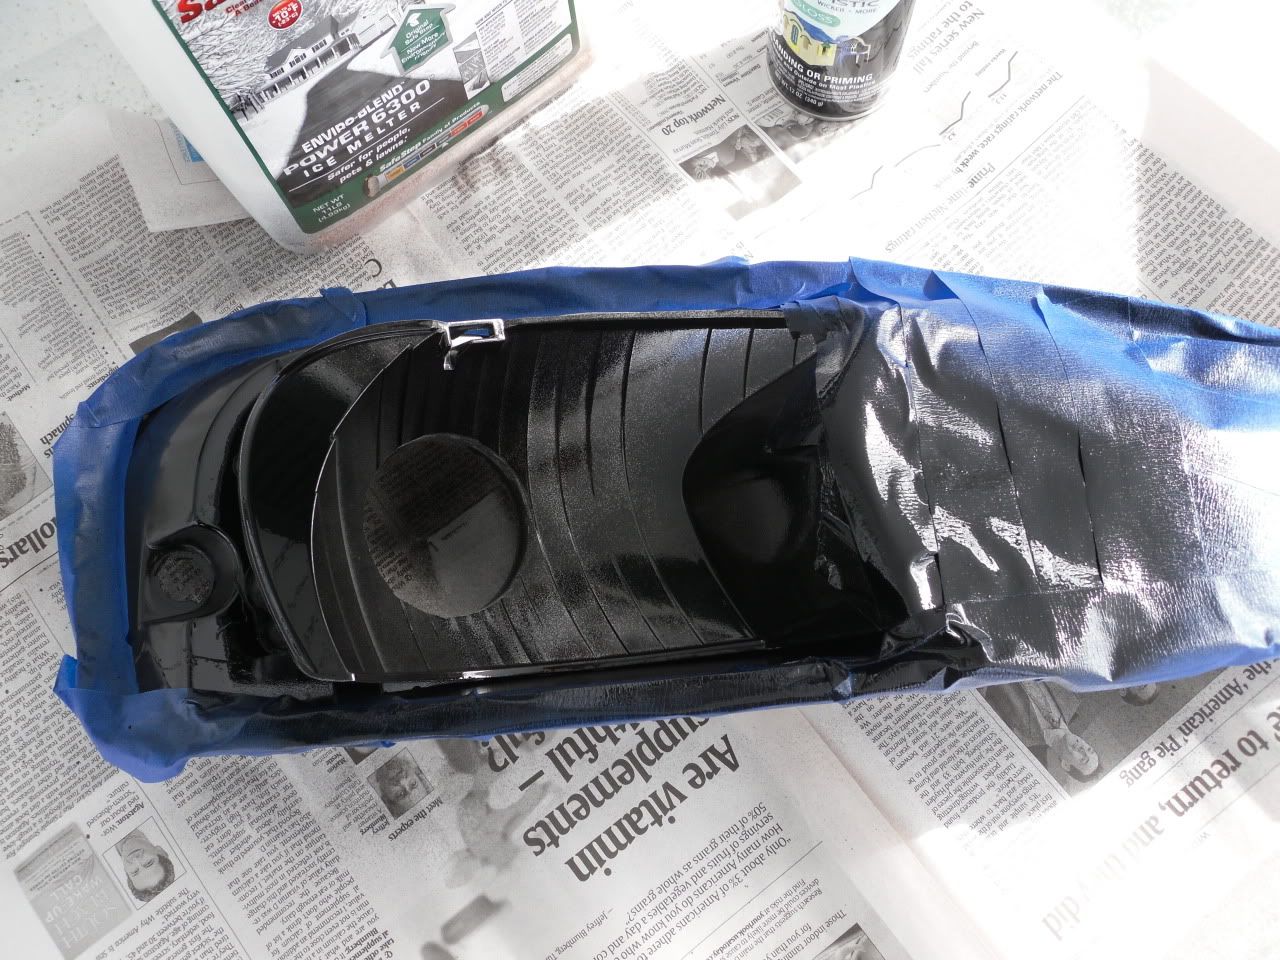
    Next, this is why we paint, I like to use black because it hides my mistakes well and I do make a few from time to time. Guys can leave the chrome backing if you want but you need to find a alternative to mounting. I tape off the seals area and the high beam area


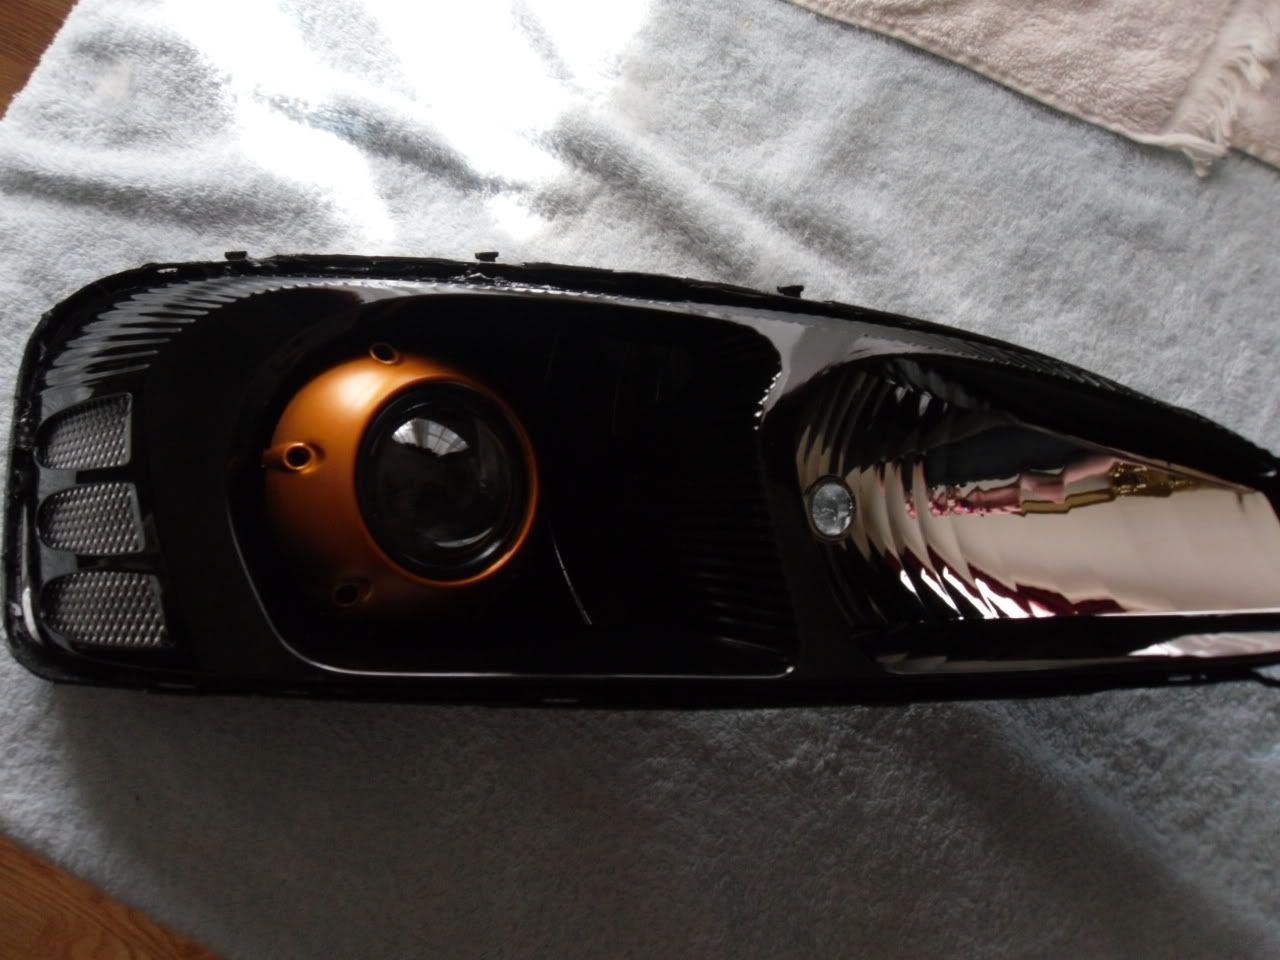
    Painted


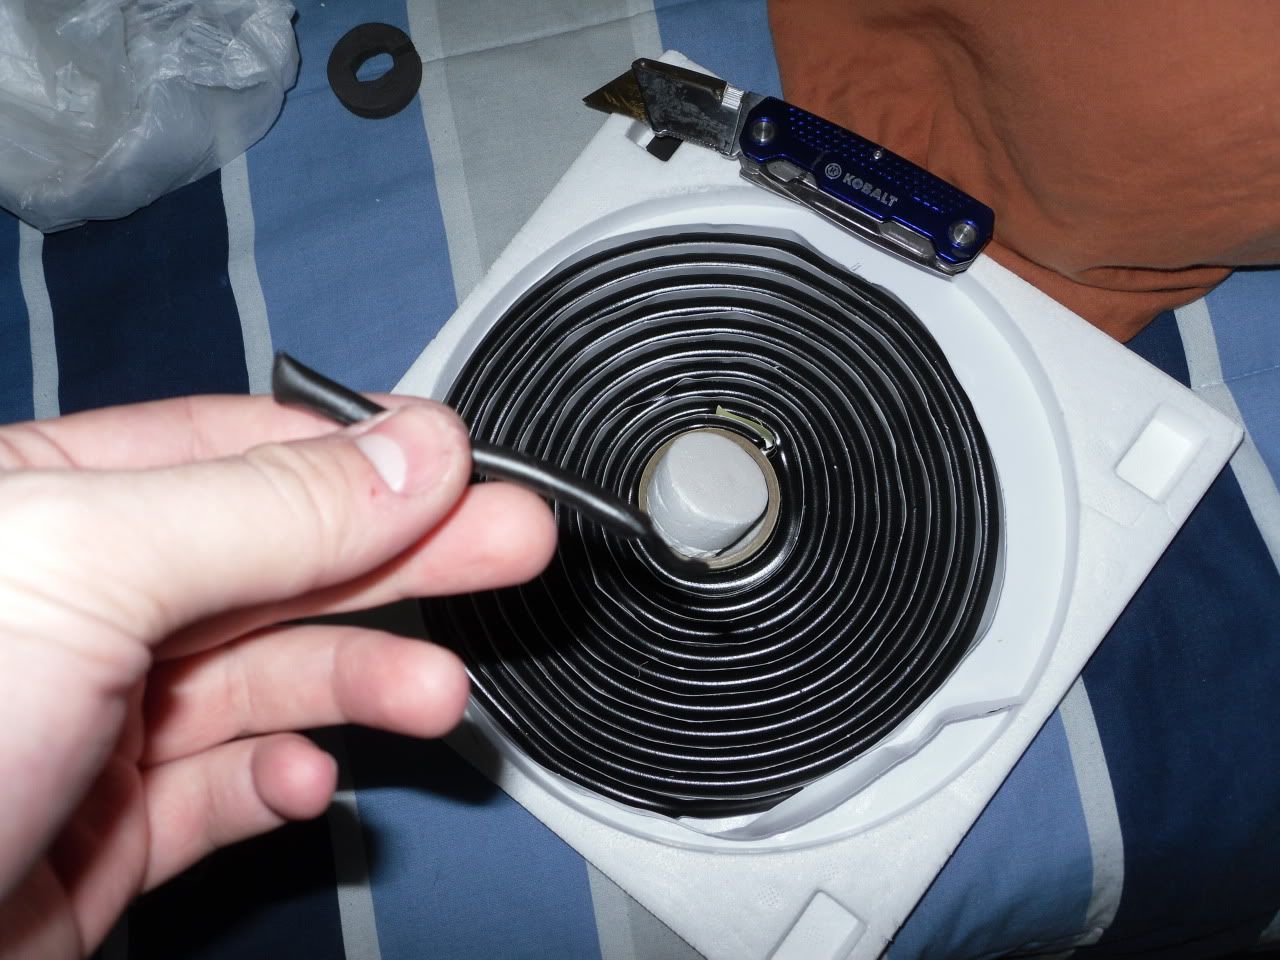
    I use this rubber butyl stuff to help hold the projector while I aim it and line it up on the car, it works pretty good, so I put in the hole we make all the way around. Roll it with your fingers to make it thinner, little goes a long way. Helps seal as well.


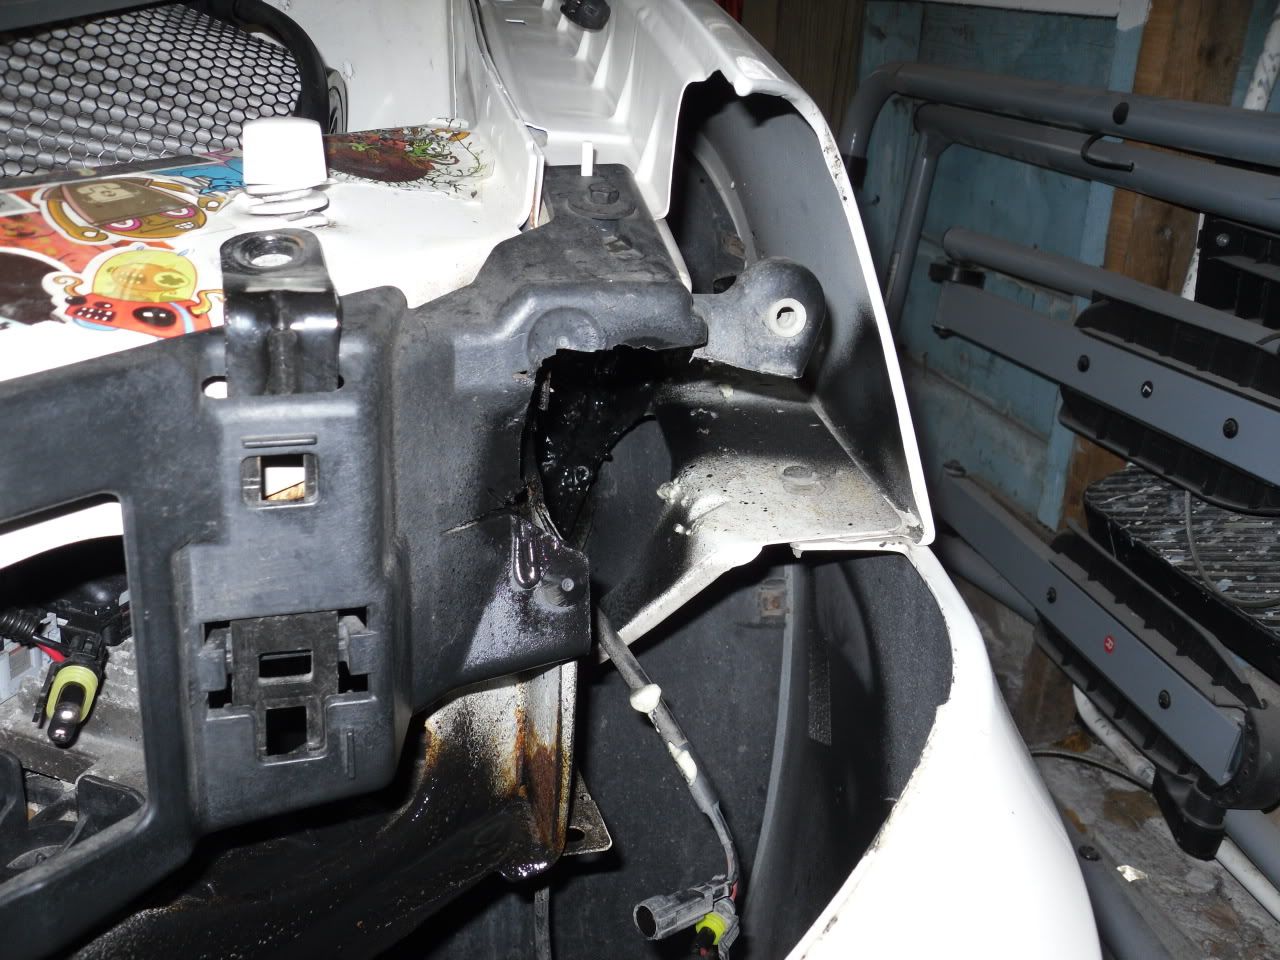
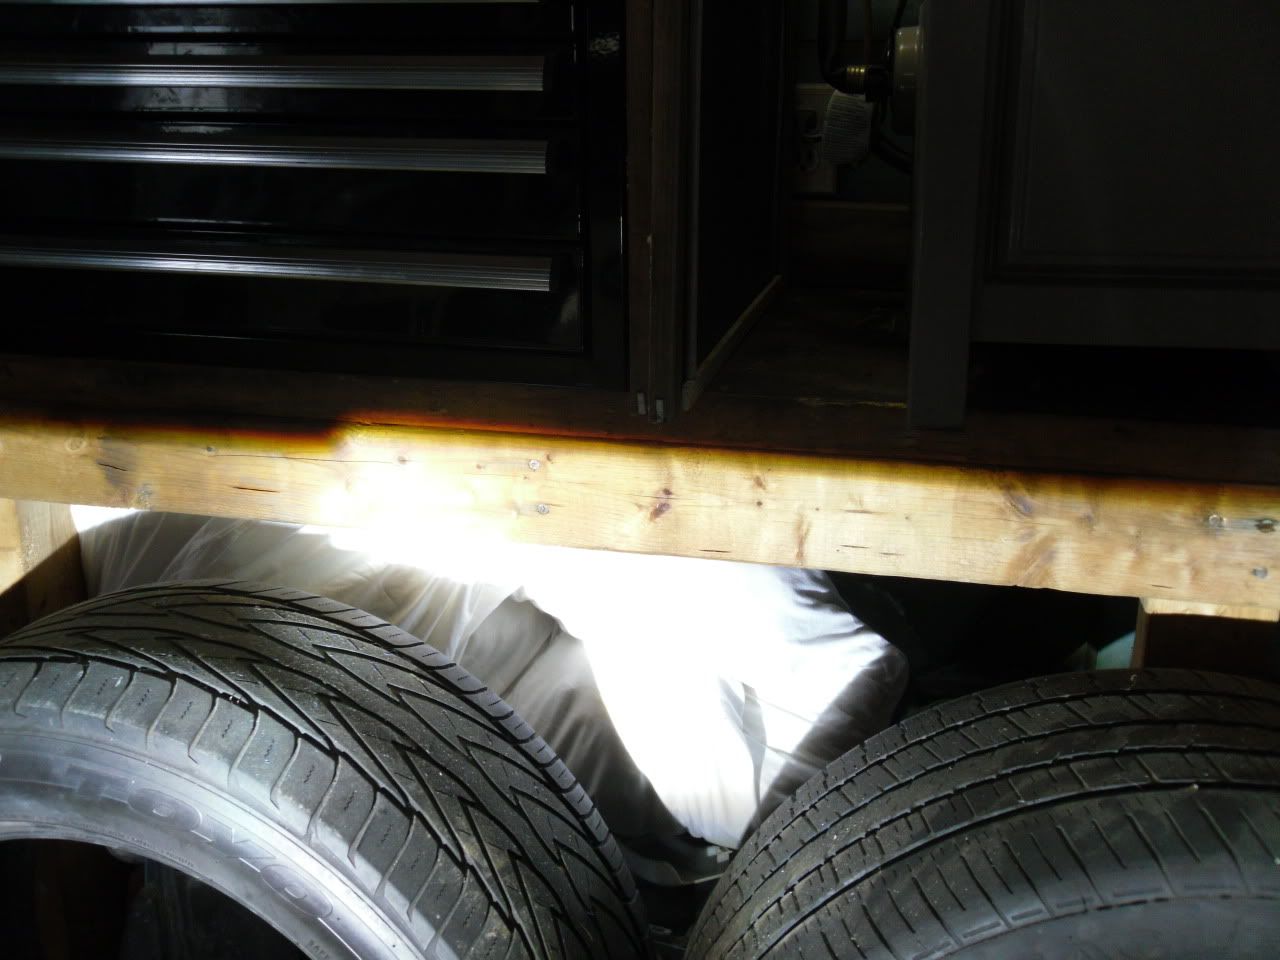
    Out at the car we are ready to test fit the light with projector to make it have a straight line, eyeballing it here, I do pretty good, my garage is wook planks so the lines are perfectly straight across. But before we test don't do what I did here and cut the **** out of the black plastic behind the light, I regret it to this day. I only have this much cut out because I used much larger projectors back in the day and needed lots of room to work. I suggest a 2" hole saw here and just drill it out.


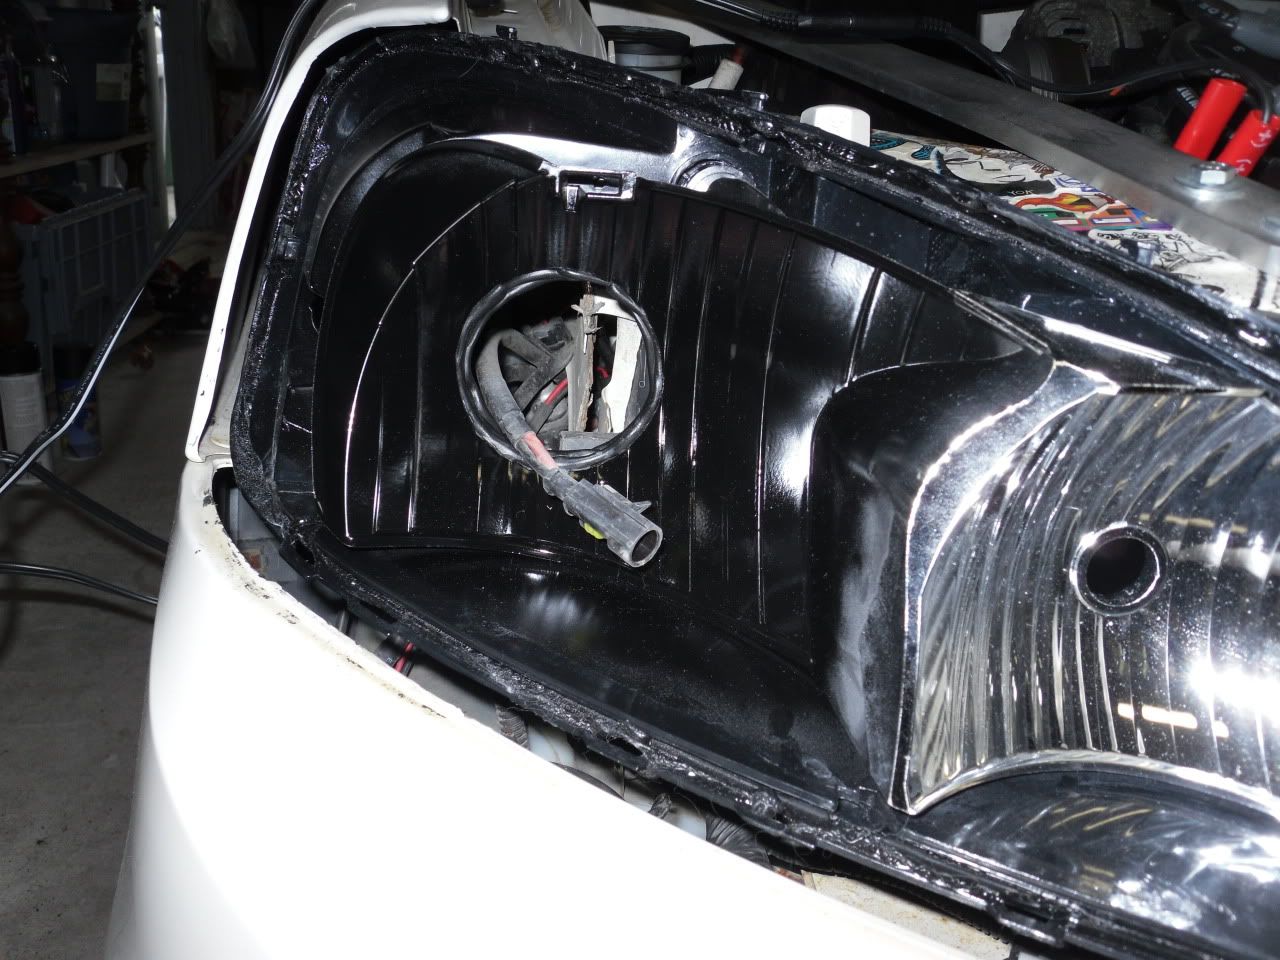
    Mount blank headlight on car


    Fit projector through the hole with all the wires and then turn the lights on


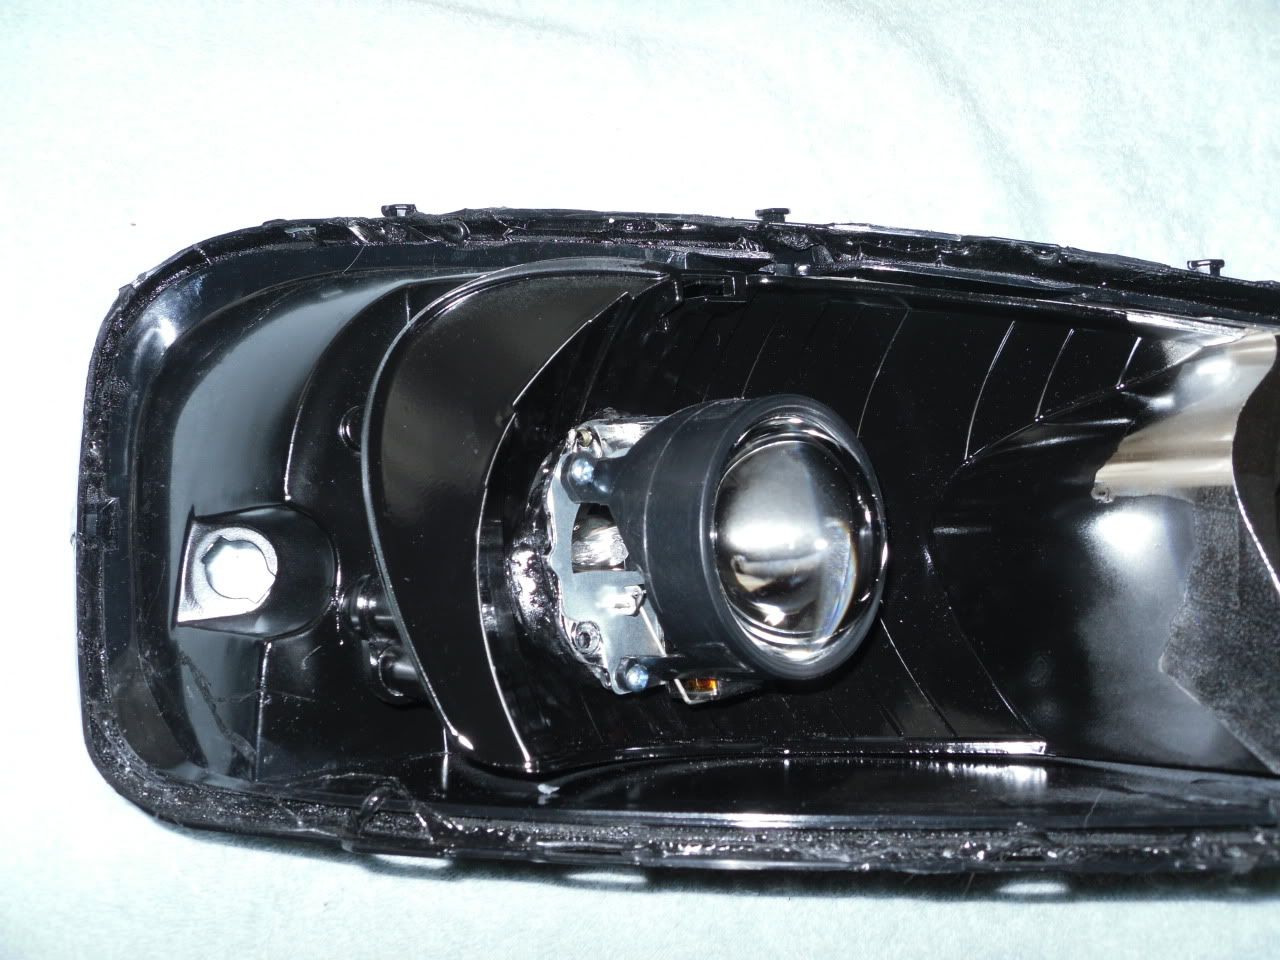
    Use about a 1/4 of the stick of JB weld and take pieces around the projector while you hold it, it won't set right away so you got a little time. I do top, bottom and one side. Aim projector a little lower, once its put all back together it will aim it up higher (you do have adjustability just not huge window for it). Turn the lights off and let it cool and JB weld will set. Now you have a straight cut off line.


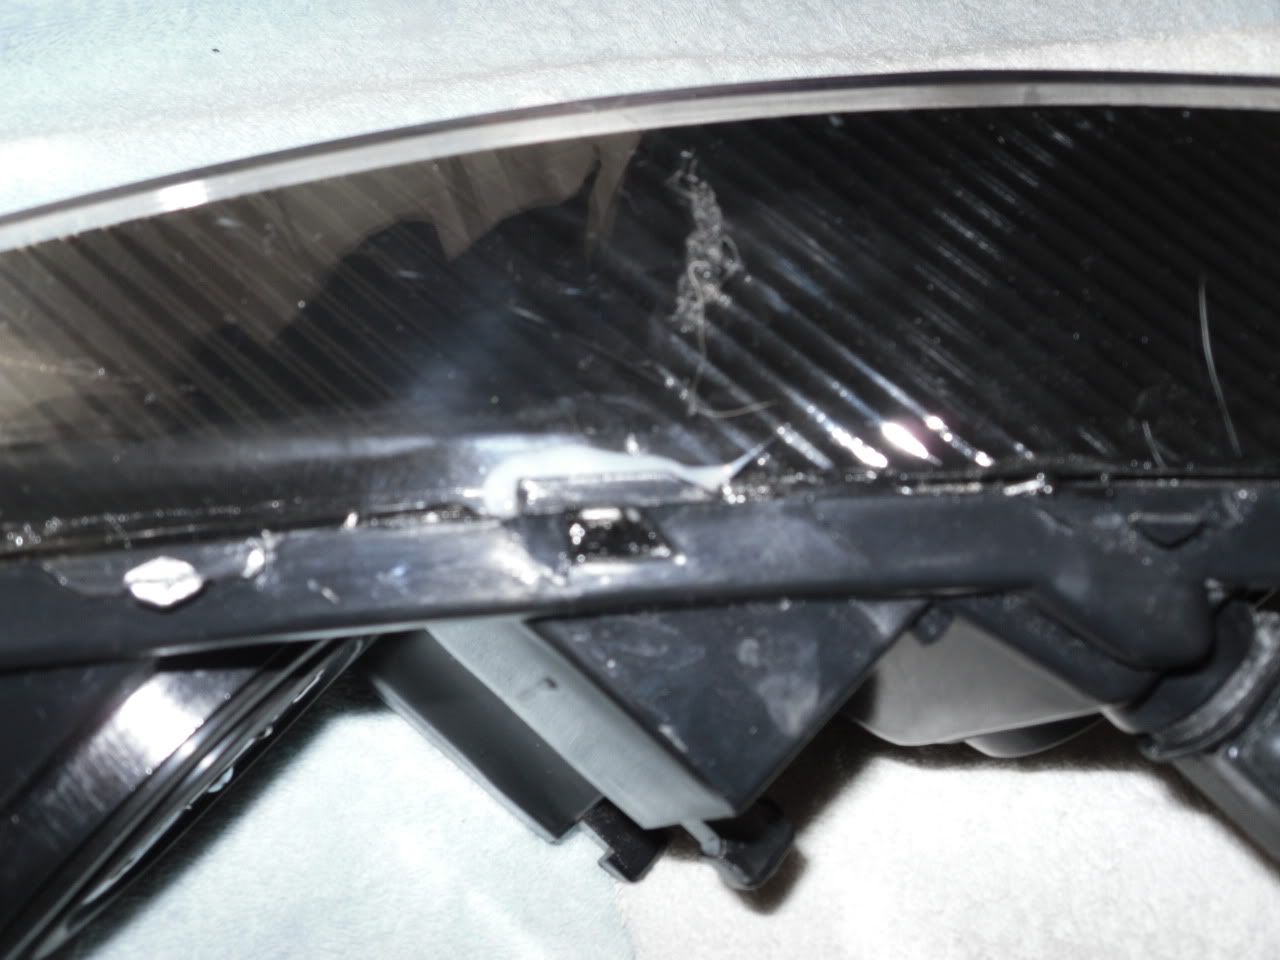
    Okay, its set, I take a bit of black paint at this point and paint the jb weld on the front, helps to hide it incase it is visible at any point in time.
    Cry havoc and let slip the dogs of war.
    2004 Saab 9-5 Aero - WAHSAABI - Way too much power/Koni FSD & Hirsch Springs/Big Sways - DD/AutoX'r
    2007 Ford F-150 Lariat - 5.4L V8 - Bill secretly likes it
    2015 Mitsubishi Outlander Sport SE - Wifey Mobile
    Reply With Quote  
     

  2. #2 Re: How-To Retro-fit 04-08 Headlights 
    #Billsnamechangessuck MrPoopyButthole's Avatar
    Join Date
    Jul 2009
    Location
    127.0.0.1
    Posts
    15,112
    Thanks (Received)
    1
    Likes (Received)
    0
    Dislikes (Received)
    0
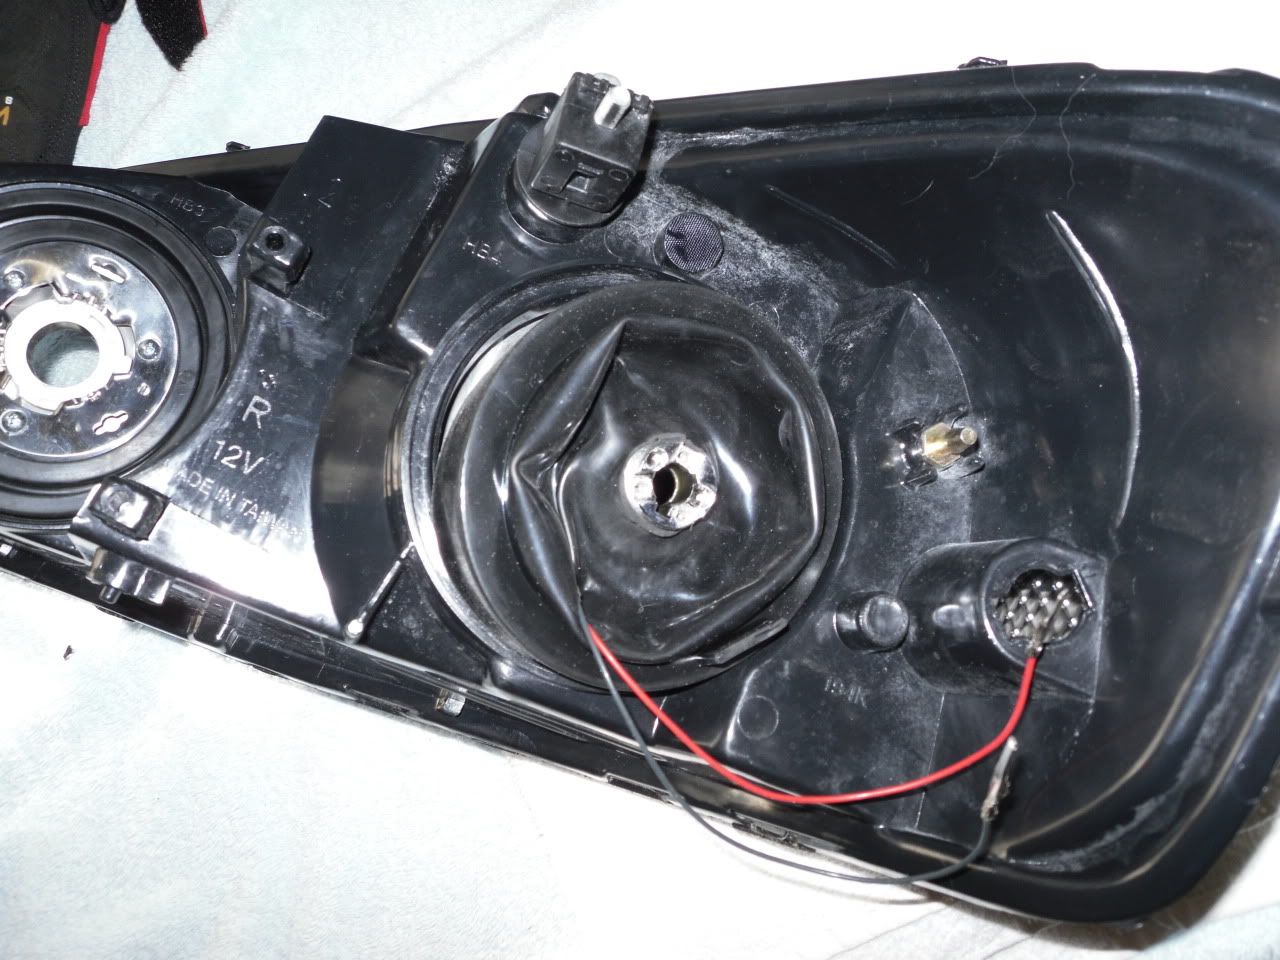
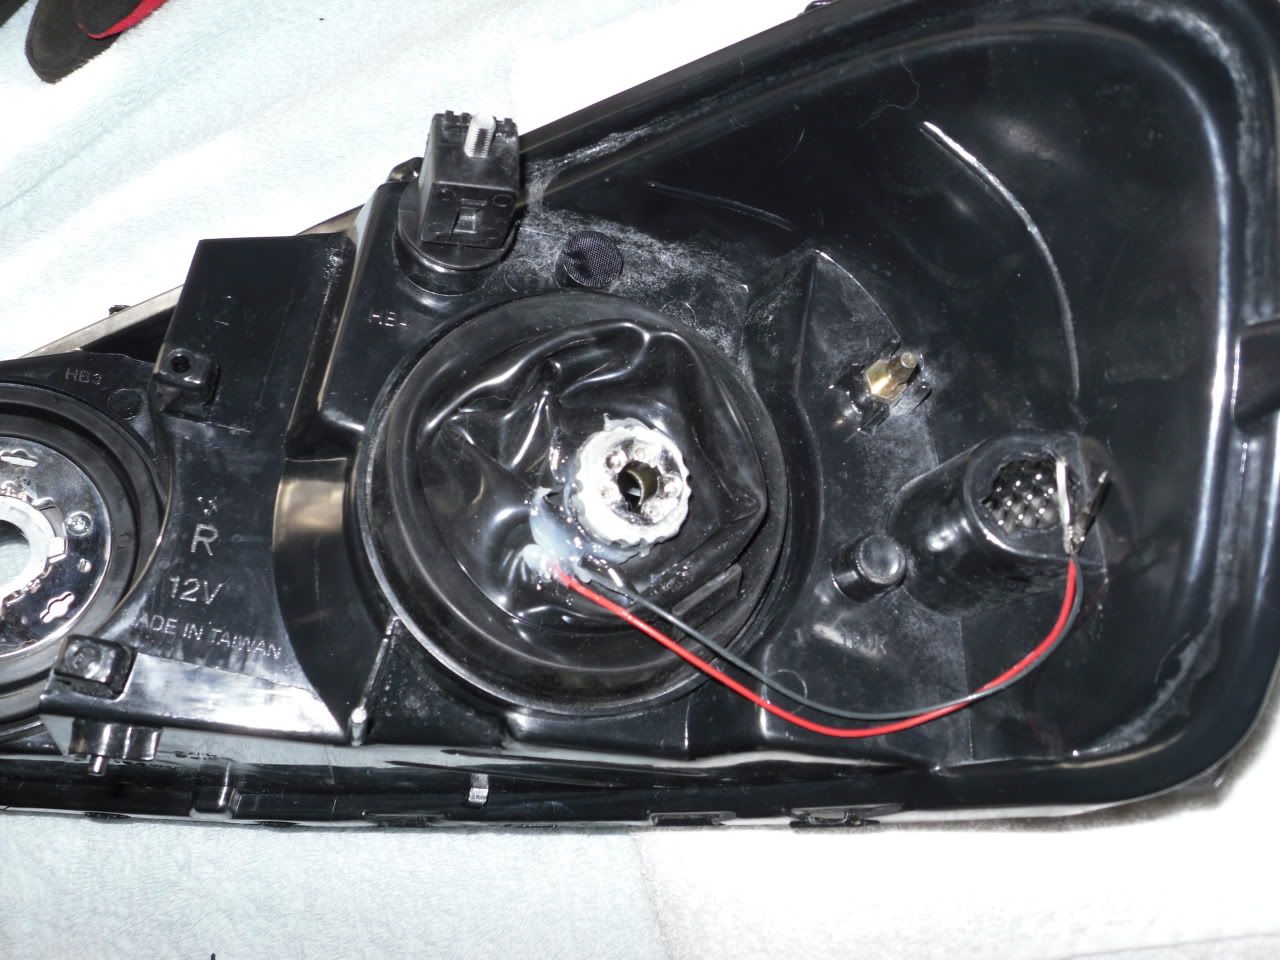
    Use the rest of the JB weld and fix it to the back part of the light, you can leave a gap for more wires if your wiring more stuff, I didn't have a need for it so I filled everything in.


    Let everything set before moving on, should take a few hours to become fully set, or let it sit overnight.

    Use the Rubber butyl stuff at this point and work it out real thing and run it on the base with projector in the channel where the lens inserts, this will help the seal.

    Put the shroud on and then the plastic piece that divides the sections


    Time to put the clear lens on and bake again for 15-20 mins, use gloves and set it on the towel and work the lens in until you get all the clips in place and it seems to have sealed. Let the light cool on the window for a while, your headlight should be cool to the touch again in about 30 mins, during that time there might be condensation, its no big deal, it will dry out. I only got a little bit on one headlight.

    On the back with the projector for H1s pop the screws out for the bracet to hold the bulb in. We are going to fit the 90mm rubber cap.


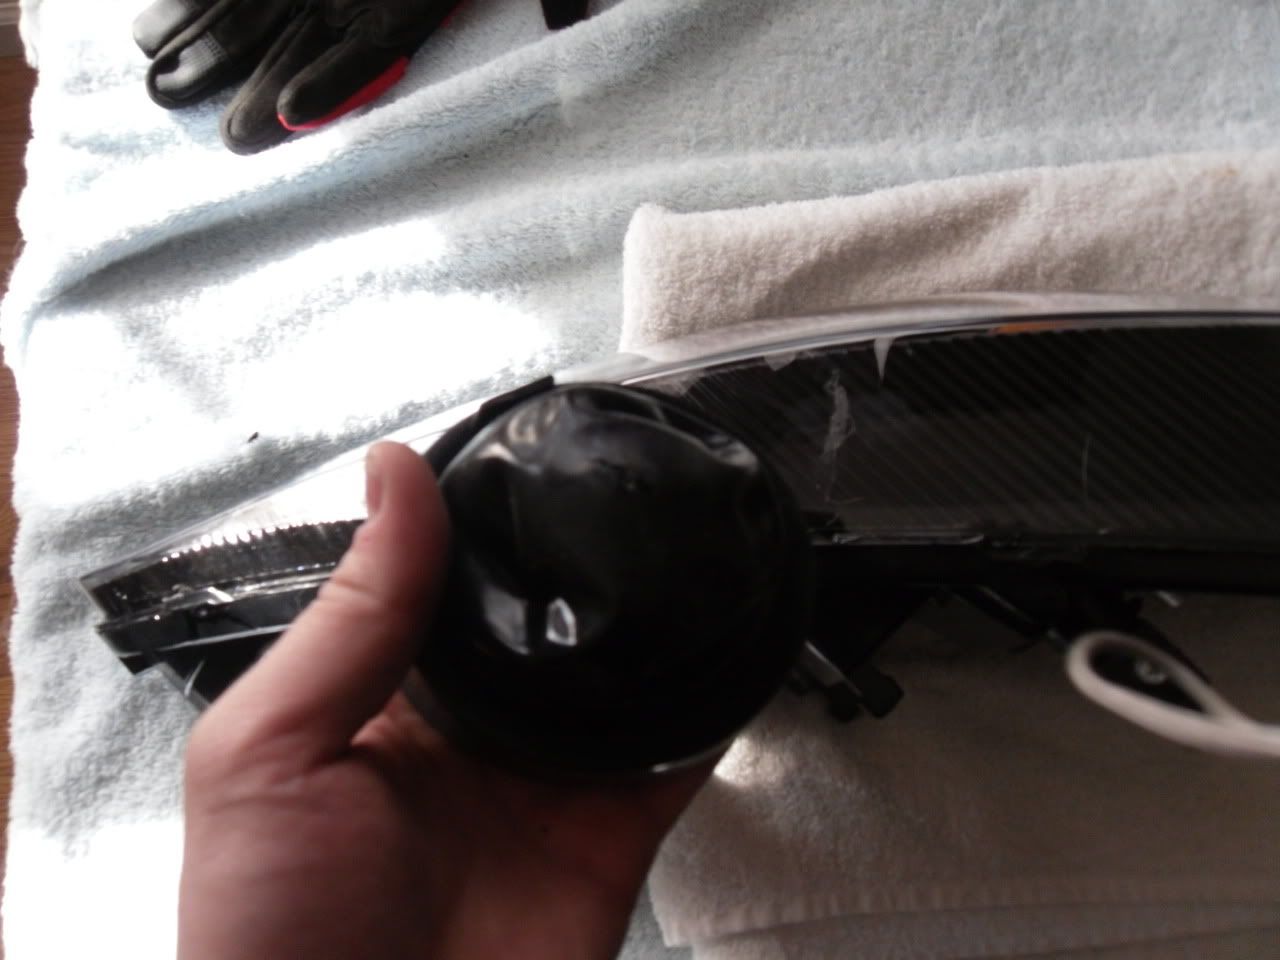
    Here is the rubber cap with a small slit in it, we want to cut the smallest amount into it so it is tight when we fit it on the back of the projector.


    Fitting the cap can be tight but it can be done and provides a great seal to the back of the light, I poked a small hole for the high beam wires. Use the silicon around the projector slit and hole for wires, tighten the nut down on the threads on the back of the projector.


    I use a little silicon in some of the clip areas as well for extra safety


    Install on the car and aim!

    ENJOY!

    If you have a different way to mount projectors please post your how-to, I am only doing mine really for show purposes at this point since that is the only time this car sees the road now a days, but the output is just wonderful. I love it.

    Cry havoc and let slip the dogs of war.
    2004 Saab 9-5 Aero - WAHSAABI - Way too much power/Koni FSD & Hirsch Springs/Big Sways - DD/AutoX'r
    2007 Ford F-150 Lariat - 5.4L V8 - Bill secretly likes it
    2015 Mitsubishi Outlander Sport SE - Wifey Mobile
    Reply With Quote  
     

  3. #3 Re: How-To Retro-fit 04-08 Headlights 
    Donating User Odi's Avatar
    Join Date
    Jul 2009
    Location
    Chicago South Suburbs
    Posts
    5,928
    Thanks (Received)
    0
    Likes (Received)
    1
    Dislikes (Received)
    0
    Props for this long and painfully awesome write-up. It almost makes up for the trannies. Almost.


    Now, if someone could do one for 97-03...
    2001 GT Special Edition - 208k miles, junkyard status. Part out in progress.
    2015 Mazda Mazda3 S Touring - 39000 miles, bone stock.
    Questions regarding LED's, headlights, HID's, taillights and more!? Click here.
    Reply With Quote  
     

  4. #4 Re: How-To Retro-fit 04-08 Headlights 
    GT Level Member MRANGRYGTP's Avatar
    Join Date
    Feb 2012
    Location
    Niagara, Ontario, Canada
    Posts
    275
    Thanks (Received)
    0
    Likes (Received)
    0
    Dislikes (Received)
    0
    Well done Dave... your butyl tape trick will help me immensly when I go to aim my cutt offs this time arround.

    For those of you that havent done this yet, Dave has done a really good job removing the mystery from the 04 plus headlight retro.

    If you have any degree of skill with tools, simply gather up the parts and go!
    2009 Holden Commodore SSV Redline Replica - 2009 BMW 328I M Sport - 1992 GTA Trans Am - Traded: 2004 GTP COMP G "Regenesis"
    Reply With Quote  
     

  5. #5 Re: How-To Retro-fit 04-08 Headlights 
    Fuel For The Soul RegorHtims's Avatar
    Join Date
    Sep 2010
    Location
    Missouri
    Posts
    1,469
    Thanks (Received)
    0
    Likes (Received)
    0
    Dislikes (Received)
    0
    I waited to do my driver side headlight until you had made a write up lol. This one will be much better than the passenger side..
    SMGPFC Member #7.5
    05 GTP Sold, Still Missed 02 GTP Coupe Sold 06 GXP Intake, Hayden trans cooler
    Reply With Quote  
     

  6. #6 Re: How-To Retro-fit 04-08 Headlights 
    GrandPrix Junkie NegativeOne13's Avatar
    Join Date
    Aug 2009
    Location
    Kansas
    Posts
    3,306
    Thanks (Received)
    0
    Likes (Received)
    0
    Dislikes (Received)
    0
    Very nice Dave! You did a good job at sealing them up. I never knew about the rubber caps, but I might get a couple and place them on the backside of mine. I did the good ole' washer trick when I did mine, and used the stock rubber seal on the back. I think that one could get a lot better seal with the rubber caps.

    And smile it's Blacktooth Grin!
    Reply With Quote  
     

  7. #7 Re: How-To Retro-fit 04-08 Headlights 
    GrandPrix Junkie NegativeOne13's Avatar
    Join Date
    Aug 2009
    Location
    Kansas
    Posts
    3,306
    Thanks (Received)
    0
    Likes (Received)
    0
    Dislikes (Received)
    0
    One thing you should add is the proper height at x feet back.

    And smile it's Blacktooth Grin!
    Reply With Quote  
     

  8. #8 Re: How-To Retro-fit 04-08 Headlights 
    Sunroof S/C'es air 2 face E IN v Y's Avatar
    Join Date
    Jun 2011
    Location
    I’m a space bound rocketship and your hearts the moon.
    Posts
    2,103
    Thanks (Received)
    0
    Likes (Received)
    0
    Dislikes (Received)
    0
    OMG Drunkie delivers!
    I will try this... my next mod.
    Reply With Quote  
     

  9. #9 Re: How-To Retro-fit 04-08 Headlights 
    The Mod Monkey Mad Monkey's Avatar
    Join Date
    Jun 2009
    Location
    London Ont, Canada
    Posts
    10,703
    Thanks (Received)
    0
    Likes (Received)
    0
    Dislikes (Received)
    0
    Thread bookmarked !
    Reply With Quote  
     

  10. #10 Re: How-To Retro-fit 04-08 Headlights 
    GT Level Member MRANGRYGTP's Avatar
    Join Date
    Feb 2012
    Location
    Niagara, Ontario, Canada
    Posts
    275
    Thanks (Received)
    0
    Likes (Received)
    0
    Dislikes (Received)
    0
    I think Dave has done a good job of showing how simple this mod really is. Takes a little guts to stick the light in the oven. Make sure you put the light on a cookie sheet and make sure the towel is wet...

    And the point about using a hole saw on the back bracket on the car is a good one... That's what I did...
    2009 Holden Commodore SSV Redline Replica - 2009 BMW 328I M Sport - 1992 GTA Trans Am - Traded: 2004 GTP COMP G "Regenesis"
    Reply With Quote  
     

  11. #11 Re: How-To Retro-fit 04-08 Headlights 
    GXP Level Member z3r0's Avatar
    Join Date
    May 2010
    Location
    Bunnell, FL
    Posts
    2,228
    Thanks (Received)
    0
    Likes (Received)
    0
    Dislikes (Received)
    0
    the towel need to be wet?

    oh well

    did it dry with the ram headlights no problem

    Quote Originally Posted by TLSheff View Post
    I'm a Sex Offender
    Reply With Quote  
     

  12. #12 Re: How-To Retro-fit 04-08 Headlights 
    GrandPrix Junkie SeanGTP's Avatar
    Join Date
    Nov 2008
    Location
    Waterloo, Iowa
    Posts
    4,168
    Thanks (Received)
    0
    Likes (Received)
    0
    Dislikes (Received)
    0
    Looks an awful lot like a certain 98 GTP's headlights.... :P
    Reply With Quote  
     

  13. #13 Re: How-To Retro-fit 04-08 Headlights 
    Sunroof S/C'es air 2 face E IN v Y's Avatar
    Join Date
    Jun 2011
    Location
    I’m a space bound rocketship and your hearts the moon.
    Posts
    2,103
    Thanks (Received)
    0
    Likes (Received)
    0
    Dislikes (Received)
    0
    Drunkie, I recently (today) acquired some stuff for a retro fit.
    I already see im gonna need some help... be on standby for the next few weeks. lol
    Reply With Quote  
     

  14. #14 Re: How-To Retro-fit 04-08 Headlights 
    Turbo is the way to go. Fivefingerdeathpunch's Avatar
    Join Date
    Sep 2009
    Location
    Rogers, MN
    Posts
    21,022
    Thanks (Received)
    21
    Likes (Received)
    45
    Dislikes (Received)
    0
    We cant help losers.

    SMGPFC Member #1
    Reply With Quote  
     

  15. #15 Re: How-To Retro-fit 04-08 Headlights 
    Sunroof S/C'es air 2 face E IN v Y's Avatar
    Join Date
    Jun 2011
    Location
    I’m a space bound rocketship and your hearts the moon.
    Posts
    2,103
    Thanks (Received)
    0
    Likes (Received)
    0
    Dislikes (Received)
    0
    Ok i get it, nobody likes me. lol
    What shrouds did you use Drunkie?
    I have the Gatling 2.0... i don't see how i can get the screws in if the projector is mounted.
    Can we move this thread to the "How to section"?
    Reply With Quote  
     

  16. #16 Re: How-To Retro-fit 04-08 Headlights 
    Brightening up your day. Koniig's Avatar
    Join Date
    Jun 2010
    Location
    Illinois.
    Posts
    1,345
    Thanks (Received)
    0
    Likes (Received)
    0
    Dislikes (Received)
    0
    Marvelous work my good sir.

    This shall come in handy in the near future as I am about 1/3 of the way done with my own. Having botched my first attempt, this is a wonderful reference.
    Reply With Quote  
     

  17. #17 Re: How-To Retro-fit 04-08 Headlights 
    Sunroof S/C'es air 2 face E IN v Y's Avatar
    Join Date
    Jun 2011
    Location
    I’m a space bound rocketship and your hearts the moon.
    Posts
    2,103
    Thanks (Received)
    0
    Likes (Received)
    0
    Dislikes (Received)
    0
    This thread has helped a lot!
    Im almost done with my retro.
    Thanks Dave!
    Reply With Quote  
     

  18. #18 Re: How-To Retro-fit 04-08 Headlights 
    GTP Level Member wa04compg's Avatar
    Join Date
    Oct 2011
    Location
    Puyallup WA
    Posts
    1,747
    Thanks (Received)
    0
    Likes (Received)
    0
    Dislikes (Received)
    0
    Question for you guys that have done this...did you guys buy just the projectors and then buy hid's seperate of did you guys do a full kit?
    04 Comp G - XP Bolt ons....boring Slow...SOLD
    08 G8 GT - exhaust Tune
    99 Silverado - 5.3 Exhaust Tune
    01 Suburban - 5.3 Intake Exhaust Tune
    Reply With Quote  
     

  19. #19 Re: How-To Retro-fit 04-08 Headlights 
    GTP Level Member wa04compg's Avatar
    Join Date
    Oct 2011
    Location
    Puyallup WA
    Posts
    1,747
    Thanks (Received)
    0
    Likes (Received)
    0
    Dislikes (Received)
    0
    My next question is if I just but the projectors and install a ddm h1 hid kit how do I get from the oem 9006 to h1...ddm has a adaptor but I think I need female not male
    04 Comp G - XP Bolt ons....boring Slow...SOLD
    08 G8 GT - exhaust Tune
    99 Silverado - 5.3 Exhaust Tune
    01 Suburban - 5.3 Intake Exhaust Tune
    Reply With Quote  
     

  20. #20 Re: How-To Retro-fit 04-08 Headlights 
    GrandPrix Junkie SeanGTP's Avatar
    Join Date
    Nov 2008
    Location
    Waterloo, Iowa
    Posts
    4,168
    Thanks (Received)
    0
    Likes (Received)
    0
    Dislikes (Received)
    0
    Ballasts. Most ballasts are either H1 and D2S. I had stock headlights with a 9007 HID kit, when I did my retro, all I had to do was plug the H1 bulb into the ballast. Same for you, just you have a 9006, but that doesn't matter.
    Reply With Quote  
     

Page 1 of 4 123 ... LastLast

Similar Threads

  1. Best aftermarket headlights for 04+ (not going to retro)
    By dengnath in forum Visual/Body Modifications
    Replies: 9
    Last Post: 11-06-2011, 09:31 PM
  2. anyone make 04+ retro?
    By tayl5645 in forum Visual/Body Modifications
    Replies: 7
    Last Post: 03-17-2011, 08:40 PM
  3. retro fit
    By BoostJunki3 in forum Visual/Body Modifications
    Replies: 102
    Last Post: 02-16-2011, 11:12 PM
  4. anyone ever try these for retro fit?
    By BoostJunki3 in forum Visual/Body Modifications
    Replies: 10
    Last Post: 02-03-2011, 10:32 PM
Tags for this Thread

View Tag Cloud

Bookmarks
Bookmarks
Posting Permissions
  • You may not post new threads
  • You may not post replies
  • You may not post attachments
  • You may not edit your posts
  •